A Scientist's Guide to Spectrometer Optics Cleaning: Solvent Selection, Methods, and Best Practices
This article provides a comprehensive guide for researchers and laboratory professionals on selecting and using proper solvents for cleaning spectrometer optics.
A Scientist's Guide to Spectrometer Optics Cleaning: Solvent Selection, Methods, and Best Practices
Abstract
This article provides a comprehensive guide for researchers and laboratory professionals on selecting and using proper solvents for cleaning spectrometer optics. It covers the foundational chemistry of common solvents like reagent-grade isopropyl alcohol, acetone, and methanol, detailing their mechanisms for dissolving organic and ionic contaminants. The content delivers step-by-step methodological protocols for various optic types, including lenses, mirrors, and delicate coatings, alongside advanced troubleshooting for persistent issues like streaks and stains. Finally, it offers validation techniques to verify cleaning efficacy and comparative analysis to guide solvent selection for specific optical materials and contaminants, ensuring optimal instrument performance and data integrity in biomedical and clinical research settings.
The Science of Clean: Understanding Solvent Chemistry and Contaminant Interactions
The choice of solvent in the maintenance and operation of spectroscopic instruments is a critical determinant in both the validity of analytical data and the long-term functionality of expensive equipment. Within the context of advanced research, particularly in drug development, the implications of solvent purity extend far beyond simple cleanliness. Impurities in solvents can directly degrade delicate optical surfaces, leading to permanent damage and reduced instrument performance [1]. Concurrently, these contaminants can introduce significant analytical errors in spectroscopic readings, compromising data integrity for sensitive measurements such as those in UV-Vis spectroscopy and HPLC [2] [3]. This application note delineates the dual risks posed by improper solvent selection and provides validated protocols to safeguard both spectral accuracy and optic longevity.
The Impact of Solvent Contaminants on Spectral Accuracy
In analytical spectroscopy, the presence of contaminants in solvents acts as a primary source of systematic error, adversely affecting the detection and quantification of analytes.
Mechanisms of Spectral Interference
The mechanisms through which solvent impurities interfere with spectral accuracy are multifaceted:
- Increased Baseline Noise and Reduced Sensitivity: Trace impurities, especially those that absorb UV light, elevate the baseline signal and noise levels [2]. This increased background noise can mask the peaks of low-concentration analytes, effectively raising the detection limits and making trace analysis unreliable [2] [3].
- Peak Distortion and Resolution Loss: Contaminants like metal ions or organic residues can interact with the analytes or the stationary phase in chromatographic systems [2]. This leads to asymmetrical peaks, tailing, or fronting, which complicates accurate integration and can cause peak co-elution, making analyte identification and quantification erroneous [2].
- Ion Suppression in LC-MS: In HPLC-MS, a powerful tool in pharmaceutical research, impurities in the mobile phase can cause ion suppression by competing with the analyte for charge during the ionization process [3]. This suppression is particularly pronounced in electrospray ionization (ESI) and can lead to falsely low or even negative results for the target compound.
Quantitative Deviations from the Beer-Lambert Law
The foundational principle of UV-Vis spectrophotometry, the Beer-Lambert Law, assumes a linear relationship between absorbance and concentration. Solvent-related issues can cause significant deviations from this law [4].
Table 1: Solvent-Related Causes for Beer-Lambert Law Deviations
| Cause | Description | Impact on Analysis |
|---|---|---|
| Stray Light | Caused by impurities scattering light or imperfections in optics. Any light outside the selected wavelength that reaches the detector will cause a non-linear response, especially at high absorbances [4]. | Reported absorbance is lower than the true value, flattening the calibration curve at high concentrations [4]. |
| Fluctuating Baselines | Impurities in solvents can cause the baseline to drift or shift during gradient elution in HPLC, complicating integration [2]. | Inaccurate peak area measurement, leading to errors in quantitative analysis [2]. |
| Non-Ideal Solvent Properties | The solvent itself must be transparent at the wavelength of analysis. Some HPLC-grade solvents are certified only for UV transparency and may contain non-UV active impurities that interfere with MS detection [3]. | High background signal, reduced signal-to-noise ratio, and potential for false positives/negatives [3]. |
The Impact of Improper Solvents on Optic Longevity
Precision optics, such as lenses, mirrors, and filters, are inherently delicate. The use of inappropriate solvents or cleaning techniques inevitably shortens their functional life and degrades performance.
Types of Damage from Solvent Contaminants
- Abrasive Scratching: Particulate matter in low-purity solvents or the use of dry, abrasive wipes (like regular paper tissues) can scratch optical coatings and the substrate itself [1] [5]. These scratches permanently increase light scatter, reducing throughput and introducing noise into the system [6].
- Chemical Attack and Etching: Solvents can chemically interact with optical coatings. For instance, strong acids or alkalis can attack and dissolve thin-film coatings [6]. Furthermore, fingerprints and skin oils, if not removed promptly with a suitable solvent, can etch into the optical surface over time, causing permanent damage [6] [5].
- Streaking and Residue Deposition: Low-purity solvents or improper application (e.g., using excess liquid) can leave behind residues as they evaporate [6] [7]. These residues form streaks or films on the optic, which scatter light and reduce contrast. The rapid evaporation of solvents like acetone makes them particularly prone to leaving residues if not applied correctly [7].
Economic and Operational Consequences
The degradation of optics has direct operational and financial consequences:
- Increased Maintenance Costs: Damaged optics require replacement, which is costly. Furthermore, contaminants from solvents can accumulate in instrument fluidic paths, clogging filters and damaging other components like pump seals, leading to more frequent servicing and part replacements [2].
- System Downtime: The process of diagnosing degraded performance, cleaning contaminated systems, and replacing optics results in significant instrument downtime, delaying critical research and development projects [2].
Experimental Protocols for Solvent Evaluation and Optic Cleaning
Protocol: Evaluating Solvent Purity for UV-Vis Spectroscopy
This protocol is designed to assess the suitability of a solvent for sensitive UV-Vis analyses.
1. Materials and Equipment:
- UV-Vis spectrophotometer with matched quartz cuvettes
- High-purity solvent candidate (e.g., HPLC or spectroscopic grade)
- Reference cuvette containing high-purity water or the solvent's specified blank
- Syringe with 0.45 μm or 0.22 μm PTFE filter
2. Procedure:
- Step 1: Allow the spectrophotometer to warm up and stabilize according to the manufacturer's instructions.
- Step 2: Filter the test solvent using the syringe filter to remove any particulates.
- Step 3: Carefully fill a clean cuvette with the filtered solvent, ensuring no air bubbles are trapped.
- Step 4: Place the cuvette in the sample holder and run a baseline correction with the reference cuvette in the reference holder.
- Step 5: Acquire an absorbance spectrum across the UV-Vis range you intend to use (e.g., 200 nm to 800 nm).
- Step 6: Analyze the resulting spectrum. A high-purity solvent will show low absorbance (preferably <1.0 AU) across the entire range, with no sharp, unexpected peaks.
3. Data Interpretation:
- Acceptable: A flat, low-absorbance baseline.
- Unacceptable: Elevated baseline noise or distinct absorption peaks, indicating the presence of UV-absorbing impurities. Such solvents should be rejected for sensitive work.
Protocol: Standardized Cleaning of Precision Optics
This protocol provides a generalized method for safely cleaning flat optics and lenses. Always consult the optic manufacturer's instructions first, as certain coatings or materials (e.g., calcite, pellicle beamsplitters) require specific, non-contact cleaning methods [5].
1. Materials and Preparation:
- Personal Protection: Wear appropriate gloves (nitrile or powder-free latex finger cots) to prevent fingerprint transfer [6] [5].
- Workspace: A clean, dust-free, and temperature-stable environment [1] [5].
- Tools: Blower bulb or filtered, moisture-free canned gas [6] [5].
- Cleaning Materials: Lint-free wipes (e.g., pure cotton Webril wipes, lens tissue), cotton-tipped applicators with wooden or polypropylene handles [6] [5].
- Solvents: Optical-grade solvents in clean, sealed containers. Common choices include acetone, methanol, and isopropyl alcohol (IPA) [6] [5]. A mild soap solution (1% neutral soap in distilled water) can be used for heavy contamination like fingerprints [6].
2. Step-by-Step Cleaning Procedure:
- Step 1: Inspection. Under a bright light, inspect the optic to identify the type and location of contaminants [5].
- Step 2: Dry Gas Blowing. Using a blower bulb or canned gas held at a grazing angle, use short blasts to remove loose particulate matter. This is a non-contact step and should always be performed first [5] [7]. Caution: Do not use your breath, as saliva may be deposited on the surface [5].
- Step 3: Solvent Application (For Smudges and Oils).
- For flat optics: The "Drop and Drag" method is preferred. Hold a sheet of unfolded lens tissue above the optic. Place a few drops of solvent (e.g., acetone) on the tissue and lower it onto the optic. Slowly and steadily drag the tissue across the surface, lifting contaminants away [6] [5].
- For curved or mounted optics: Fold a lens tissue and clamp it with hemostats, or wrap a tissue around a swab. Moisten with solvent—the tissue should be damp, not dripping [6] [5]. Wipe the surface gently using a continuous, circular, or figure-eight motion, rotating the swab/tissue to present a clean surface to the optic [1] [6]. Never wipe an optic with a dry cloth or tissue [5].
- Step 4: Final Rinse and Dry. For a final clean, repeat the solvent application with a fresh wipe/swab and fresh solvent. Allow the optic to air-dry vertically or use a dry blower to prevent streaking. Inspect the optic again to confirm cleanliness [6] [7].
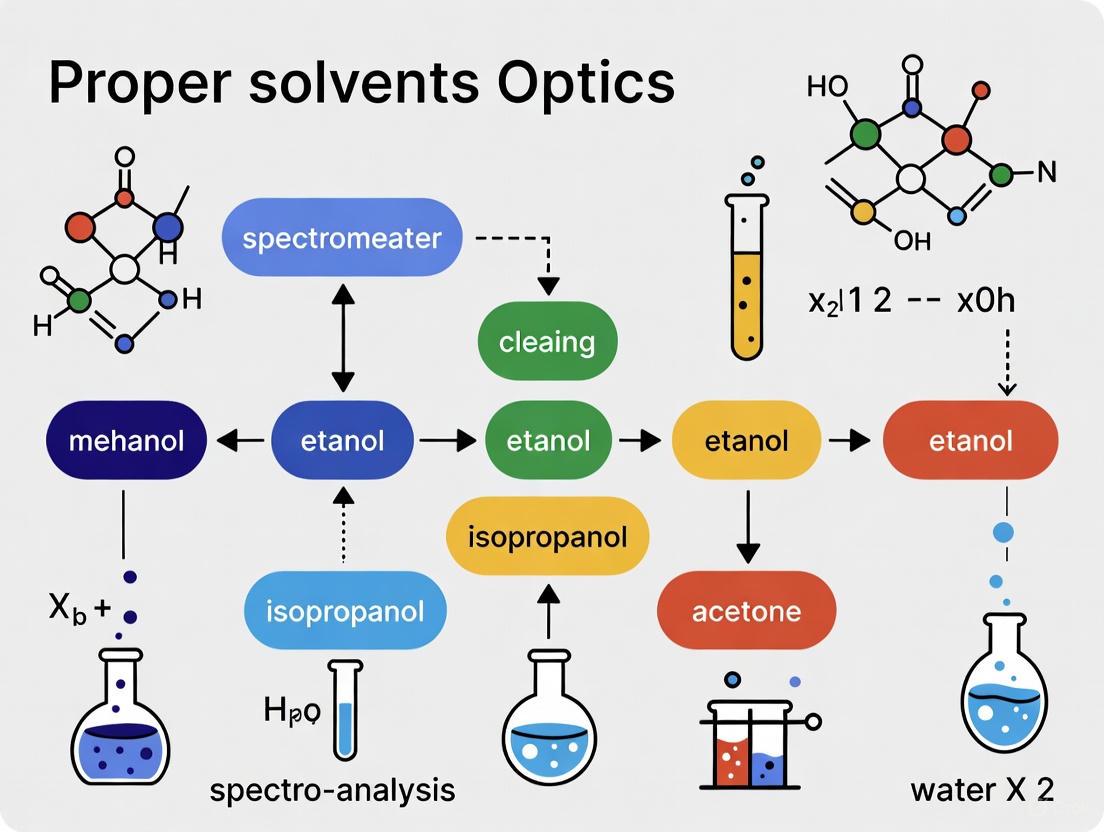
The logical workflow for selecting and executing the correct cleaning procedure to mitigate risks is outlined below.
The Scientist's Toolkit: Research Reagent Solutions
The following table details essential materials required for the proper maintenance of spectroscopic instrumentation and the execution of high-fidelity analyses.
Table 2: Essential Materials for Spectral Analysis and Optic Maintenance
| Item | Specification / Grade | Primary Function |
|---|---|---|
| Solvents | Spectroscopic Grade, HPLC Grade, ACS/USP Grade [2] | Ensure minimal UV-absorbing impurities for low-noise baselines and accurate detection in HPLC and UV-Vis. |
| Lint-Free Wipes | Lens Tissue, Pure Cotton Wipes (e.g., Webril) [6] [5] | Provide a soft, non-abrasive medium for applying solvents to optical surfaces without scratching or leaving fibers. |
| Swabs & Applicators | Cotton or Polyester Swabs with Wooden/Polypropylene Handles [6] | Enable precise application of solvents to small or hard-to-reach optical surfaces and mounted optics. |
| Compressed Gas | Filtered, Moisture-Free Canned Air or Nitrogen [6] [5] | Remove loose, particulate contamination via non-contact method, preventing abrasion during cleaning. |
| Optical Soap | Neutral pH, Non-Perfumed [6] | Lift heavy contaminants like fingerprints and oils from optics before a solvent rinse. |
| Protective Gear | Powder-Free Gloves, Finger Cots [6] [5] | Prevent transfer of skin oils and salts to optical surfaces during handling and cleaning. |
The selection of high-purity solvents and adherence to meticulous cleaning protocols are not merely best practices but fundamental requirements in a research environment where data integrity and asset preservation are paramount. The use of low-purity solvents introduces a hidden cost, manifesting as distorted spectral data, increased detection limits, and accelerated degradation of valuable optical components. By integrating the protocols and principles outlined in this document, researchers can make informed decisions that directly contribute to the reliability of their scientific results and the long-term operational efficiency of their laboratory instrumentation.
Within the context of research focused on cleaning spectrometer optics, the precise selection of solvents is not merely a procedural step but a fundamental aspect of maintaining data integrity and instrument performance. The efficacy of a cleaning procedure hinges on the principle of "like dissolves like," which dictates that a solvent will most effectively dissolve a contaminant with similar molecular polarity [8] [9]. This application note provides a detailed framework for researchers and scientists in drug development to systematically match solvent properties with common contaminant types, ensuring optimal optical clarity and the reliability of spectroscopic data.
Fundamental Concepts: Polarity and Solvent Classification
Defining Polarity
Polarity arises from the unequal distribution of electrons within a molecule, leading to the presence of partial positive and negative charges, known as a dipole moment [10]. This occurs when atoms with significantly different electronegativities (a difference greater than 0.4) form a covalent bond [10]. For instance, in a water molecule (H₂O), the oxygen atom, being more electronegative, pulls electron density towards itself, resulting in a partial negative charge (δ⁻) on the oxygen and partial positive charges (δ⁺) on the hydrogen atoms. In contrast, non-polar bonds exist between atoms with similar electronegativities (a difference less than 0.4), leading to an even sharing of electrons, as seen in the chlorine molecule (Cl₂) or carbon-hydrogen bonds in hydrocarbons [10].
Classifying Solvents for Optical Cleaning
Solvents are categorized based on their polarity and their ability to donate hydrogen bonds, which critically influences their dissolving power and application [8].
- Polar Protic Solvents: These solvents have O-H or N-H bonds and can act as hydrogen bond donors [8]. This ability makes them excellent at solvating ions and other polar species. Common examples include water, methanol, ethanol, and isopropyl alcohol [8].
- Polar Aprotic Solvents: These solvents possess a significant dipole moment due to polar functional groups (like C=O or S=O) but lack O-H or N-H bonds and cannot be hydrogen bond donors [8]. They are highly effective at dissolving polar solutes without strongly coordinating anions. Examples include acetone, dimethyl sulfoxide (DMSO), and N,N-Dimethylformamide (DMF) [8].
- Non-Polar Solvents: These solvents have little to no dipole moment, with low dielectric constants typically below 5 [8]. They are incapable of dissolving ionic or strongly polar materials but are ideal for hydrophobic contaminants. Examples include hexane, toluene, and pentane [8] [9].
Quantitative Solvent Properties
The following tables summarize key physical properties for common solvents used in laboratory cleaning, derived from empirical data [11]. These properties provide a quantitative basis for solvent selection.
Table 1: Physical Properties of Common Solvents
Compiled from source data [11]
| Solvent | Chemical Formula | Polarity Index | Dipole Moment (D) | Dielectric Constant (ε) | Boiling Point (°C) |
|---|---|---|---|---|---|
| n-Hexane | C₆H₁₄ | 0.1 | 0.08 | 1.88 | 68.7 |
| Toluene | C₆H₅CH₃ | 2.4 | 0.31 | 2.38 | 110.6 |
| Diethyl Ether | (C₂H₅)₂O | 2.8 | 1.15 | 4.33 | 34.5 |
| Dichloromethane | CH₂Cl₂ | 3.1 | 1.14 | 8.93 | 39.7 |
| Chloroform | CHCl₃ | 4.1 | 1.15 | 4.81 | 61.1 |
| Ethyl Acetate | CH₃COOC₂H₅ | 4.4 | 1.88 | 6.02 | 77.1 |
| Tetrahydrofuran | C₄H₈O | 4.0 | 1.75 | 7.58 | 66.0 |
| Acetone | CH₃COCH₃ | 5.1 | 2.69 | 20.7 | 56.3 |
| Ethanol | CH₃CH₂OH | N/A | 1.66 | 24.55 | 78.3 |
| Methanol | CH₃OH | 5.1 | 2.87 | 32.70 | 64.7 |
| Acetonitrile | CH₃CN | 5.8 | 3.44 | 37.5 | 81.6 |
| Dimethyl Sulfoxide | (CH₃)₂SO | 7.2 | 4.10 | 46.68 | 189.0 |
| Water | H₂O | 10.2 | 1.87 | 80.10 | 100.0 |
Table 2: Solvent Classification and Contaminant Targeting
Based on concepts from [8] and [9]
| Solvent Class | Example Solvents | Target Contaminant Types (Optics Context) |
|---|---|---|
| Non-Polar | Hexane, Pentane, Toluene | Hydrocarbon greases, vacuum pump oils, silicone lubricants, fingerprint oils (non-polar components), dust. |
| Polar Aprotic | Acetone, DMSO, DMF, Ethyl Acetate | Polar polymers, synthetic adhesives, certain polar salts, some polar organic residues. |
| Polar Protic | Methanol, Ethanol, Isopropanol, Water | Salts (e.g., from sweat), ionic residues, sugars, polar organics, water-soluble dust. |
Experimental Protocol: A Systematic Approach to Optical Cleaning
Safety and Material Preparation
Personal Protective Equipment (PPE): Always wear appropriate nitrile gloves, safety goggles, and a lab coat. Perform solvent handling in a well-ventilated area or a fume hood. Materials:
- Optics: The lens or mirror to be cleaned.
- Solvents: Prepared as per the selection guide (Section 5).
- Lint-Free Wipes: Specially formulated optical wipes or high-purity cellulose wipes.
- Swabs: Cotton or microfiber-tipped swabs with plastic or paper stems (avoid wooden stems which can shed fibers).
- Compressed Gas Duster: High-purity, oil-free nitrogen or dedicated camera/canned air.
Contaminant Identification and Solvent Selection Workflow
The following diagram outlines the logical decision process for selecting an appropriate cleaning solvent based on the nature of the contaminant.
Step-by-Step Cleaning Procedure
- Initial Inspection and Dry Cleaning: Under controlled, dust-free lighting, visually inspect the optical surface. Use an oil-free compressed gas duster (e.g., nitrogen) to gently remove loose particulate matter. Hold the nozzle at an angle and use short bursts to avoid driving contaminants across the surface.
- Solvent Application (Least Aggressive First):
- Moisten a fresh, lint-free wipe or swab with a small volume of the selected solvent. The material should be damp, not dripping wet, to prevent solvent from wicking into optic mounts and causing damage or leaving streaks.
- Using minimal pressure, wipe the optical surface in a straight line across one diameter. Do not use a circular motion.
- Discard the wipe/swab after a single pass.
- Sequential Solvent Washing (If Required): For complex or unknown contaminants, begin with the least aggressive, most compatible solvent (often a non-polar solvent like hexane to remove oils, followed by a polar protic like IPA to remove salts). Always allow the solvent to fully evaporate between steps.
- Final Drying: After the final solvent wash, use a fresh, dry lint-free wipe or swab to gently blot the surface if any streaking is observed, though this should be minimized with proper technique. Alternatively, use a final, gentle stream of nitrogen to ensure complete drying.
- Post-Cleaning Inspection: Re-inspect the optic under light. If contamination persists, reevaluate the contaminant type and repeat the procedure, potentially moving to a more aggressive solvent as needed.
The Scientist's Toolkit: Essential Research Reagent Solutions
Table 3: Key Reagents for Optical Cleaning
Based on common laboratory practices and solvent properties [8] [11]
| Reagent/Solvent | Function in Optical Cleaning | Key Consideration |
|---|---|---|
| Reagent-Grade Solvents (e.g., Acetone, IPA, Hexane) | High-purity solvents for final cleaning stages to prevent streaking or residue from impurities. | Essential for critical optical surfaces; avoid technical grades. |
| Spectrophotometric-Grade Solvents | The highest purity grade, guaranteed for low UV absorbance, crucial for UV-transmitting optics. | Required for fluorescence or UV-Vis spectrometer optics. |
| High-Purity Lint-Free Wipes | Mechanically remove and absorb contaminants and solvent without shedding fibers. | Cellulose-based or microfiber; ensure compatibility with solvent to avoid disintegration. |
| Cotton or Polyester Swabs | Allow for precise application of solvent to small or hard-to-reach optical surfaces. | Use a rolling motion from center to edge; never re-use a swab. |
| Oil-Free, Filtered Nitrogen Gas | Safely blow off loose abrasive particles without introducing new contaminants or moisture. | Prevents static buildup and avoids the hydrocarbons present in standard compressed air. |
The systematic matching of solvent properties to contaminant types is a critical, knowledge-driven component of spectrometer maintenance. By applying the fundamental principles of polarity, utilizing the quantitative data for informed selection, and adhering to the detailed protocols outlined in this document, researchers can effectively remove contaminants that compromise optical performance. This rigorous approach ensures the acquisition of high-fidelity spectroscopic data, which is foundational to successful research and drug development.
In the context of research and drug development, the precision of analytical instruments is paramount. The performance of spectrometer optics is particularly vulnerable to contamination from dust, oils, and residual materials, which can scatter incident light, absorb radiation, and create hotspots that permanently damage sensitive coatings and substrates [12] [5]. The use of high-purity, reagent-grade solvents for cleaning is not merely a best practice but a necessity to ensure data integrity, instrument longevity, and reproducible results. This document provides a detailed examination of three key solvents—acetone, methanol, and isopropyl alcohol—outlining their properties, appropriate applications, and standardized protocols for the safe and effective maintenance of optical components.
Solvent Properties and Grade Specifications
Chemical and Physical Properties
The efficacy of a cleaning solvent is determined by its intrinsic physical and chemical properties. The following table summarizes the key characteristics of the three reagent-grade solvents under review.
Table 1: Properties of Reagent-Grade Solvents for Optical Cleaning
| Property | Acetone | Methanol | Isopropyl Alcohol (IPA) |
|---|---|---|---|
| Chemical Formula | C₃H₆O [13] | CH₃OH [14] | C₃H₈O |
| Molecular Weight (g/mol) | 58.08 [13] | 32.04 [14] | 60.10 |
| Boiling Point (°C) | 56 [15] | 64.7 [14] | ~82 |
| Evaporation Rate | Very Fast | Fast | Moderate [12] |
| Flash Point (°C) | -20 [15] | 11 [14] | ~12 |
| Miscibility in Water | Miscible [15] | Miscible [14] | Miscible |
| Primary Optical Cleaning Use | Removing stubborn oils and greases [12] | Component of fast-drying mixtures [12] | General-purpose cleaning; safe for most coatings [16] |
Understanding "Reagent Grade" and Impurity Profiles
For laboratory cleaning, "Reagent Grade" (including ACS Grade) signifies a benchmark of purity where stringent limits are placed on impurities that could interfere with analytical procedures or leave residues on optical surfaces [15].
Table 2: Key Impurity Specifications for Reagent-Grade Solvents
| Impurity/Parameter | Acetone (ACS Grade) | Methanol (ACS Grade) | Isopropyl Alcohol |
|---|---|---|---|
| Minimum Assay (Purity) | ≥99.5% [15] | ≥99.95% [14] | ≥99.9% (recommended) [17] |
| Water Content | ≤0.5% [15] | ≤0.05% [14] | - |
| Residue After Evaporation | ≤0.001% [15] | ≤0.005% [14] | - |
| Key Impurity Limits | Aldehydes, Isopropyl Alcohol, Methanol [15] | Acetone, Aldehydes, Chloride (≤2 ppm) [14] | - |
Why Impurities Matter: Non-volatile residues can form films on optics, leading to light scattering and inaccurate spectroscopic readings [15]. Water can cause streaking and react with hygroscopic optical materials, while other organic impurities may solubilize and re-deposit onto the optical surface during cleaning [14].
Experimental Protocols for Optical Cleaning
General Handling and Pre-Cleaning Preparation
Essential Materials (The Scientist's Toolkit):
- Gloves: Powder-free, acetone-impermeable nitrile or latex gloves to prevent skin oils from contaminating optics [12] [18].
- Lens Tissue: Low-lint wipes designed for optics (e.g., Kimwipes) [18]. Never use dry lens tissue, as it can scratch surfaces [12].
- Compressed Gas: Canned, filtered air, dry nitrogen, or a blower bulb for dust removal [12] [5].
- Swabs and Tweezers: Cotton-tipped applicators or synthetic swabs for mounted or small optics; non-marring tweezers for handling [16] [5].
Workstation Setup: Perform all cleaning in a clean, temperature-controlled, low-dust environment. Work over a clean, non-abrasive surface, such as a fresh clean-room wiper [12] [19]. Inspect optics under a bright light, viewing at different angles to identify contaminants via scattering [12] [5].
Detailed Step-by-Step Cleaning Methodologies
Protocol 1: The "Drop and Drag" Method for Flat, Unmounted Optics This technique is ideal for mirrors and windows, minimizing physical contact with the optical surface [12] [5].
- Secure the Optic: Place the optic on a clean, non-abrasive surface.
- Remove Loose Contaminants: Use short blasts of compressed gas, holding the canister at a grazing angle roughly 6 inches (15 cm) away [5].
- Apply Tissue and Solvent: Hold a clean, unfolded sheet of lens tissue above the optic. Apply one or two drops of an approved solvent (e.g., acetone or IPA) to the tissue, allowing its weight to bring it into contact with the surface [12] [5].
- Drag and Lift: Slowly and steadily drag the soaked tissue across the optic's face in a single, continuous motion, lifting it off at the edge. This action lifts contaminants off the surface instead of dragging them across it [5].
- Inspect: Examine the optic. Repeat with a fresh tissue if necessary, but never re-use a lens tissue [12].
Protocol 2: The "Brush" or "Applicator" Method for Curved or Mounted Optics This method provides more control for cleaning lenses and mounted components [12] [5].
- Prepare the Applicator: Fold a lens tissue into a pad or wrap it around a cotton-tipped swab to create a soft, clean brushing surface. Do not touch the part that will contact the optic [12].
- Moisten with Solvent: Apply a few drops of solvent to the brush or swab. It should be damp but not dripping. Safely shake off any excess [12] [5].
- Wipe the Surface: Gently wipe the optical surface using a slow, continuous motion. For curved lenses, start from the center and spiral outward, continuously rotating the applicator to present a clean surface [16] [5].
- Final Rinse (Optional): For a streak-free finish, a final wipe with a swab dampened with IPA can be used, as its slower evaporation helps prevent drying marks [12] [19].
Protocol 3: Immersion Cleaning for Heavily Soiled, Robust Optics
- Note: This method is not suitable for cemented optics, micro-optics, or optics with unknown coating stability [12] [16].
- Procedure: Immerse the optic in a beaker of reagent-grade solvent (e.g., acetone). For stubborn contamination, gentle agitation in an ultrasonic bath may be used, but never for micro-optics or diffraction gratings [12] [16]. Rinse by immersing in fresh solvent. To dry, carefully blow the solvent off from one direction using a stream of dry nitrogen to avoid streaking [12].
Solvent Selection Workflow
The following diagram outlines the decision-making process for selecting the appropriate solvent and cleaning method, integrating the specific properties and risks associated with each.
Critical Material Compatibility and Warnings
The choice of solvent must account for the specific optical material to prevent irreversible damage.
- Plastic Optics: Never use acetone on plastic optics or housings, as it will dissolve and craze the material. Use only compressed air, reagent-grade alcohol, or de-ionized water [12] [16].
- Specialized Coatings:
- Bare Metallic Coatings & Gratings: These are extremely delicate. Physical contact is not recommended. The only safe cleaning method is often using a stream of clean, compressed gas [5] [19].
- Polka Dot Beamsplitters: Do not clean with water or solvents, as this can deteriorate the coating. Use only compressed air [12].
- Crystalline Optics (e.g., KBr, NaCl): These materials are water-soluble and hygroscopic. They require handling in low-humidity environments and should not be cleaned with aqueous solutions or alcohols without consulting the manufacturer [19].
- Micro-Optics (<3mm diameter): Require special handling with vacuum pick-up tools or delicate tweezers. Isopropyl alcohol is commonly used. Do not use ultrasonic cleaning [12] [16].
Maintaining the precision and throughput of spectrometer systems in research and drug development hinges on disciplined optical maintenance. The protocols outlined herein provide a foundation for preserving optical fidelity. Adherence to these guidelines—selecting the correct reagent-grade solvent, employing the appropriate technique for the optical component, and operating in a controlled environment—will minimize scattering losses, prevent laser-induced damage, and ensure the generation of reliable, high-quality spectroscopic data. Always consult the manufacturer's specifications for unique optical components, as improper cleaning can cause irreversible damage and costly instrument downtime.
Within pharmaceutical research and development, maintaining the integrity of analytical instruments is paramount. Spectrometer optics, crucial for data accuracy, are particularly susceptible to performance degradation from contaminants. While potent chemical solvents have their place, a class of specialty solvents—de-ionized water and mild detergents—plays a critical role as a safe, effective, and essential cleaning regimen. This application note details the proper use of these solutions for cleaning optics, providing researchers with validated protocols to preserve optical function and ensure analytical reliability within the broader context of solvent selection for spectrometer maintenance.
The Scientific Rationale for Aqueous Cleaning
The Safety Profile of De-Ionized Water and Mild Detergents
De-ionized (DI) water and mild detergents serve as the cornerstone for safe optical cleaning, especially when the compatibility of an optical substrate or coating is unknown. Their primary advantage lies in their non-reactive nature. Unlike harsh chemicals, a solution of DI water and mild dish soap presents a low risk of damaging delicate or specialized optical coatings [20]. This makes it the recommended choice for cleaning plastic optics or optics in plastic housings, which can be severely damaged by solvents like acetone [20] [12].
The cleaning mechanism involves the surfactant action of the mild detergent, which reduces the surface tension of water, allowing it to penetrate and lift oils and particulates. The de-ionized water, free of ionic contaminants, then rinses away the residues without leaving mineral spots, which is a risk with tap water [12]. This combination is exceptionally effective for removing skin oils and general laboratory contaminants without the streaking that some solvents can leave behind [20].
Comparative Solvent Properties
The table below summarizes key solvents used in optical cleaning, highlighting the specific role of the DI water and detergent mixture.
Table 1: Quantitative Comparison of Common Optical Cleaning Solvents
| Solvent Type | Primary Use Case | Evaporation Rate | Relative Safety on Coatings | Key Risk |
|---|---|---|---|---|
| De-ionized Water & Mild Detergent | Safe cleaning for unknown coatings/plastics; removal of oils and water-soluble soils [20] [12] | Slow | Very High | Can leave marks if not properly rinsed/dried [12] |
| Reagent-Grade Isopropyl Alcohol | General-purpose cleaning; fingerprint removal [20] | Medium | High | Slow evaporation can leave drying marks [12] |
| Acetone/Methanol Blend (60/40) | Effective dissolution of stubborn organic debris [12] | Very Fast (slowed by methanol) | Medium | Acetone damages plastics; dries too quickly for large surfaces alone [12] |
| Reagent-Grade Acetone | Quick-drying cleaning of glass optics [20] | Very Fast | Low | Highly aggressive; will damage plastic optics and many coatings [20] |
Experimental Protocols and Workflows
Decision Workflow for Solvent Selection
The following diagram outlines a systematic approach for selecting the appropriate cleaning method, positioning the DI water and detergent protocol as the initial, safest option for many scenarios.
Detailed Cleaning Protocol: DI Water and Mild Detergent
This protocol is adapted from established optical cleaning procedures provided by major manufacturers [20] [12] [5].
Research Reagent Solutions and Materials
Table 2: Essential Materials for Aqueous Optical Cleaning
| Material/Solution | Specification | Primary Function |
|---|---|---|
| De-Ionized Water | Reagent-Grade, Low Particulate | Final rinsing agent to remove detergent and dissolved contaminants without leaving residues. |
| Mild Detergent | Neutral pH, Non-Moisturizing Liquid Dish Soap | Acts as a surfactant to break down and lift oils and greasy contaminants from the optical surface. |
| Lens Tissue | Low-Lint, Optic-Grade | Provides a soft, clean medium for wiping the optical surface without scratching. |
| Cotton-Tipped Applicators | Synthetic, Low-Lint | Allows for precise application and wiping on small or mounted optics. |
| Compressed Air/Duster | Canned Inert Gas or Filtered Nitrogen | Removes loose particulate matter prior to wet cleaning to prevent scratching. |
| Powder-Free Gloves | Nitrile or Acetone-Impenetrable | Protects the optic from skin oils and the user from chemicals. |
Step-by-Step Procedure
Preparation and Inspection: Perform all work in a clean, temperature-controlled, low-dust environment. Wear appropriate powder-free gloves. Before cleaning, inspect the optic under a bright light to identify the type and location of contaminants [5].
Dry Dust Removal: Using a canister of inert dusting gas or a blower bulb, gently blow off all loose particulate matter from the optical surface. Hold the can upright about 6 inches (15 cm) from the optic and use short blasts at a grazing angle. Never blow directly from your mouth, as saliva can contaminate the surface [5].
Solution Preparation and Application: Prepare a dilute solution of mild dish soap in de-ionized water. The solution should be only slightly soapy. Moisten a piece of fresh lens tissue or a cotton applicator with the solution. The applicator should be damp, not dripping wet [20] [12].
Wiping the Optic:
- For flat, unmounted optics, use the "drop and drag" method: lay a piece of unfolded lens tissue over the optic, drop on the soapy solution, and slowly drag the tissue across the surface [12].
- For curved or mounted optics, use a moistened cotton applicator or a "brush" made from lens tissue held with non-marring tweezers. Wipe slowly in a continuous motion from one edge to the other, rotating the applicator to present a clean surface [12] [5].
- Critical Note: Always clean from the edges inward to prevent drawing dirt onto the clean optical face.
Rinsing: Using a fresh applicator or lens tissue moistened with pure de-ionized water, thoroughly rinse the optical surface to remove all soap residue. Multiple passes with clean water and fresh applicators may be necessary.
Drying: Carefully blow the rinsed optic dry with filtered, compressed air or nitrogen. Direct the stream from one side to the other to avoid leaving drying marks [12]. Allow any residual moisture to evaporate completely.
Post-Cleaning Inspection and Storage: Re-inspect the optic under a bright light. If contaminants remain, repeat the procedure. Once clean, mount the optic immediately or wrap it individually in clean lens tissue and store it in a dedicated container in a low-humidity environment. Never store unwrapped optics together [20] [12].
De-ionized water and mild detergents are not merely simple alternatives but are specialty solutions in their own right, offering an unmatched safety profile for cleaning critical spectrometer optics. Their use is a fundamental practice for researchers handling optics with unknown compatibility, delicate coatings, or plastic components. By integrating this gentle yet effective protocol into standard laboratory procedures—often as a first step in a tiered cleaning strategy—scientists and drug development professionals can significantly prolong optical lifetime, reduce instrument downtime, and safeguard the integrity of their spectroscopic data.
Within spectroscopic analysis, the precision of analytical results is intrinsically linked to the cleanliness of optical components. Contaminants such as dust, oils, and residues can cause significant light scattering, absorption, and even permanent damage to sensitive surfaces, especially under high-intensity laser sources [12] [21]. The cleaning process, however, introduces its own risks; the improper selection of solvents can degrade optical coatings, craze crystals, or dissolve plastic housings, leading to costly repairs and instrument downtime. This application note provides a critical framework for researchers and drug development professionals, detailing protocols for selecting solvents based on rigorous material compatibility principles. The information is structured to support a broader thesis on developing standardized, safe cleaning procedures for spectroscopic instrumentation, ensuring analytical integrity and extending equipment lifespan.
Solvent Properties and Material Compatibility
Selecting a solvent requires a balance between effective cleaning power and material safety. Key properties such as polarity, evaporation rate, and water content must be matched to the substrate material to prevent damage.
Table 1: Properties and Applications of Common Cleaning Solvents
| Solvent | Chemical Grade | Key Properties | Compatible Materials | Incompatible/Risky Materials |
|---|---|---|---|---|
| Acetone-Methanol Mix (60:40) | Reagent or Spectrophotometric Grade | Fast-evaporating, broad dissolution power. Methanol slows acetone's evaporation for better cleaning [12]. | Glass, most inorganic crystals, hardened coatings [12] [21]. | Plastic optics and housings (can cause crazing or dissolution) [12]. |
| Isopropyl Alcohol (IPA) | Reagent Grade | Less aggressive, safer for many materials. Slow evaporation can leave drying marks [12]. | Glass, some plastics, metal coatings [12] [22]. | Softer coatings where residue is a concern. |
| De-ionized Water | N/A | Non-aggressive, residue-free. Often used with mild dish soap [12]. | Plastic optics, plastic housings, unknown coatings [12]. | Not effective for removing non-polar contaminants like oils. |
| Spectroscopic-Grade Solvents (e.g., Uvasol, SPECTRONORM) | Spectroscopy Grade | Highest optical and chemical purity; low evaporation residue; guaranteed UV transmission [23] [24]. | All materials where contamination must be avoided; ideal for final rinsing of critical optics. | Generally safe; cost may be prohibitive for routine cleaning of non-critical parts. |
Table 2: Material-Specific Solvent Compatibility Guide
| Optical Material / Coating | Recommended Solvents & Methods | Solvents & Methods to Avoid | Special Handling Considerations |
|---|---|---|---|
| Plastic Optics & Housings | Compressed air, reagent-grade isopropyl alcohol, de-ionized water [12]. | Acetone and other aggressive organic solvents [12]. | Handle with care to avoid scratching soft surfaces. |
| Metallic Coatings | Use gentle methods like the "immersion" technique [21]. Isopropyl alcohol is often safe. | Avoid aggressive mechanical cleaning like the "wipe" technique, which can scratch surfaces [12] [21]. | Highly sensitive to physical contact; can be easily scratched [12]. |
| Polka Dot Beamsplitters | Compressed air only. These have a delicate halftone aluminum coating [12]. | Do not clean with any liquids or solvents, including water, as this causes coating deterioration [12]. | Use in non-condensing, dust-free environments [12]. |
| Nanotexture Windows/Lenses | Immersion technique with solvent or dust-off with compressed air [12]. | Do not use polymer film cleaners [12]. | - |
| Micro Optics (<3mm diameter) | Reagent grade IPA, acetone, or de-ionized water with tweezers or vacuum pickup; compressed air [12]. | Do not use ultrasonic cleaning, as it can scratch delicate surfaces [12]. | Requires special care; use small, delicate tools for handling. |
| Cemented Optics | Standard wipe techniques with appropriate solvents. | Never clean by immersion or in an ultrasonic bath, as this can break down the cement layer [12]. | - |
| Unknown Coating/Substrate | De-ionized water with a mild dish soap [12]. | Avoid harsh chemicals until compatibility is established. | Err on the side of caution to prevent irreversible damage. |
Experimental Protocols for Optic Cleaning
General Handling and Pre-Cleaning Inspection
Proper handling is the first critical step in preventing damage and contamination.
- Environment: Perform all handling and cleaning in a clean, low-dust, temperature-controlled area, such as a laminar flow bench [12] [21].
- Personal Protective Equipment (PPE): Wear powder-free, acetone-impenetrable gloves or finger cots. Never touch the optical surface, as human sweat is corrosive and can permanently damage coatings [12].
- Handling Tools: Use tweezers or suction pickup tools for small or delicate optics. Never use metal tools directly on optical surfaces. Always hold optics by their ground edges [12] [21].
- Inspection: Before cleaning, inspect the optic under a bright, visible-light source. View it from multiple angles to identify scattering from dust or stains, which helps determine the necessary cleaning level [12] [21].
Core Cleaning Techniques
A summary of the decision-making process for selecting and executing a cleaning technique is provided in the workflow below.
Initial Dry Cleaning: Compressed Air
Dusting is always the first active cleaning step. Wiping a dusty optic can grind particles into the surface, causing scratches [12] [21].
- Procedure: Use a canned air duster, filtered compressed air, or dry nitrogen gas.
- Technique: Hold the can or nozzle upright and use short, directed bursts. Do not shake the canned air, as this can release propellant.
- Re-inspection: After dusting, re-inspect the optic. If no stains are visible, do not proceed further. The rule is: "If it's not dirty, don't clean it" [12].
Solvent-Based Cleaning Techniques
If stains persist after dusting, employ one of the following solvent-based techniques using appropriate solvents from Table 1 and lint-free lens tissue or swabs.
A. The "Drop and Drag" Technique (for unmounted optics) This method is ideal for light cleaning of unmounted optics like mirrors and beam pick-offs [12] [21].
- Place the optic on a clean, non-abrasive surface like a fresh clean-room wiper.
- After blowing off dust, lay a single, unfolded piece of lens tissue over the optic.
- Drop a small amount of the chosen solvent onto the tissue so it soaks through to the optic.
- Slowly drag the soaked tissue across the optic's face in one smooth motion. Allow it to dry completely before inspection [12].
B. The "Brush" Technique (for small or mounted optics) This technique is suited for small optics, polarizers, wave plates, and mounted optics with hard-to-reach edges [12].
- Fold a lens tissue so the fold is as wide as the optic's surface. Do not touch the folded edge.
- Grip the folded tissue parallel to the fold using hemostats or tweezers.
- Wet the folded "brush" with solvent and shake off any excess.
- Place the brush on one edge of the optic and, with slight pressure, slowly wipe straight across to the opposite edge in a single, continuous motion [12]. For mounted optics, a low-lint swab can be used similarly, "painting" the surface in one continuous motion to prevent drying marks [12].
C. The "Wipe" Technique (for heavier, non-metallic coatings) This method is useful for heavier cleaning of stubborn stains but is not recommended for delicate metallic coatings [12] [21].
- Fold the lens tissue as in the brush technique.
- Grip the tissue between your fingers (instead of tweezers) to apply more uniform pressure.
- Applying moderate and even pressure, slowly wipe the folded edge across the optic's face [12].
D. The "Immersion" Technique (for sensitive coatings) Sensitive optics and those with Nanotexture surfaces can be cleaned via immersion [12].
- Remove any dust from the optic using compressed air.
- Immerse the optic in a beaker of a suitable, high-purity solvent like acetone.
- For heavily soiled optics, an ultrasonic bath may be used, except for micro optics or cemented optics [12].
- Remove the optic and rinse by immersing it in fresh, clean solvent.
- To dry, carefully blow solvent off from one direction using compressed air or nitrogen to avoid leaving drying marks [12].
Post-Cleaning Storage
After cleaning, optics must be handled and stored correctly to avoid recontamination.
- Immediate Use: Install the optic directly into its mount.
- Storage: If not used immediately, wrap the optic individually in fresh lens tissue and place it in a clean, sealed container (e.g., a pergamine bag or storage box). Never store unwrapped optics together, as contact can cause scratches [12] [21].
The Scientist's Toolkit: Research Reagent Solutions
Table 3: Essential Materials for Optic Cleaning and Inspection
| Item | Function / Application | Examples / Specifications |
|---|---|---|
| Lens Tissue | Low-lint wipes for applying solvent without scratching optical surfaces. Must be used with solvent, never dry. | Kimtech Science Precision Wipes, Texwipe MiracleWipe [21]. |
| Cleaning Swabs | For precision cleaning of small or mounted optics where tissues are impractical. | Texwipe TX 761, TX 714A; synthetic, low-lint [21]. |
| High-Purity Solvents | To dissolve contaminants without leaving residues that interfere with spectroscopy. | Reagent or Spectrophotometric grade Acetone, Methanol, IPA. Spectroscopy-grade solvents (e.g., Uvasol, SPECTRONORM) for critical applications [12] [23] [24]. |
| Compressed Gas Duster | For safe removal of loose abrasive particles prior to wet cleaning. | Canned air, filtered laboratory air, or dry nitrogen [12] [21]. |
| Powder-Free Gloves | To prevent contamination of optics from oils and salts on bare hands. | Acetone-impermeable gloves (e.g., nitrile) [12]. |
| Inspection Scope | To verify cleanliness of fiber connectors and small optics before and after cleaning. | 200X magnification scope with universal adapters for various connector types (e.g., Thorlabs FS201) [22]. |
| Polymer Film Cleaner | For atomic-level cleaning of rough surfaces or gratings; encapsulates particulates. | Not for use on Nanotexture surfaces [12]. |
Proven Cleaning Protocols: Step-by-Step Techniques for Flawless Optics
Within the rigorous context of spectrometer optics research, the pursuit of optimal performance and longevity hinges on meticulous cleaning protocols. The initial pre-cleaning step is not merely a preliminary action but a critical procedure that determines the success of all subsequent cleaning stages. This application note details the essential first step: the use of compressed gas to remove loose particulate contamination. When framed within a broader thesis on solvent cleaning, this pre-cleaning step is foundational; it prevents the smearing of contaminants during solvent application, which can cause permanent surface damage such as scratches and increase light scatter [5] [18]. For researchers and drug development professionals, standardizing this procedure is vital for ensuring reproducible results, maintaining data integrity, and protecting sensitive optical investments from avoidable damage.
The Critical Role of Gas Pre-Cleaning in Solvent Cleaning Research
The strategic purpose of employing compressed air or nitrogen prior to any solvent application is threefold, each objective critical to the scientific method in optical maintenance.
- Primary Objective: Removal of Loose Particulates: The foremost goal is the non-contact removal of abrasive particulates like dust and fibers. If a solvent is applied to a surface contaminated with these particles, the ensuing wipe will drag the hard particulates across the optic, grinding them into the soft coating or substrate and creating irreparable scratches [5]. These micro-scratches permanently degrade optical performance by increasing scatter and reducing throughput.
- Prevention of Contaminant Transfer: Research highlights a often-overlooked variable: solvents themselves can be a source of contamination. Studies using vibrational sum-frequency-generation spectroscopy have demonstrated that solvents like acetone, methanol, and isopropanol can leave a persistent residue on optics after even brief contact with certain plastics or rubbers [25]. By removing loose debris first, the amount of solvent and the intensity of wiping required are reduced, thereby minimizing the potential for introducing this solvent-borne residue.
- Enhancement of Solvent Efficacy: A surface free of macroscopic particles allows solvents to interact more directly and effectively with the targeted molecular contaminants, such as thin oil films or fingerprints. This improves the efficiency of the solvent's dissolution action and leads to a cleaner final result with less solvent usage and fewer repetitions.
Experimental Protocols for Gas Pre-Cleaning
The following protocols are designed to be integrated into a comprehensive research methodology for evaluating cleaning solvents.
Safety Precautions and Personal Protective Equipment (PPE)
- PPE: Always wear appropriate personal protective equipment, including safety glasses to protect eyes from dislodged particulates and powder-free nitrile gloves to prevent skin oils from contaminating the optic [18].
- Ventilation: Perform cleaning in a well-ventilated area. Be aware that compressed gases can aerosolize contaminants.
- Gas Handling: Never use flammable, combustible, or toxic gases for purging or cleaning [26]. Ensure compressed air or nitrogen sources are secured and regulated properly.
Materials and Reagent Solutions
The quality of materials used directly influences experimental outcomes. The table below catalogues essential reagents and tools for this procedure.
Table 1: Research Reagent Solutions and Key Materials for Gas Pre-Cleaning
| Item | Function/Description | Critical Specifications |
|---|---|---|
| Filtered Dry Nitrogen | Inert, oil-free gas for high-purity cleaning and purging of sensitive optics. | Purity: Oil-free; Dew point: -70 ℃ or below [26]. |
| Canned "Dust-Off" Gas | Portable source of inert gas for particle removal. | Hold can upright to avoid depositing propellant [5]. |
| Blower Bulb | Manual, solvent-free air source for delicate optics; exerts minimal force. | Rubber bulb, no internal lubricants or powders. |
| Particulate Filter | Installed in compressed air lines to remove oil, water, and particles. | Rating: 10-micrometer or finer [26]; Complies with ISO 8573-1 [27]. |
| Pressure Regulator | Controls and reduces line pressure to a safe, usable level for optics handling. | Adjustable output; suitable for low pressure (20-100 psig) [26]. |
| Lint-Free Gloves | Powder-free nitrile gloves to handle optics without introducing contamination. | Powder-free, cleanroom-compatible. |
Step-by-Step Pre-Cleaning Workflow
This workflow must be performed in a clean, temperature-controlled environment with a black background and bright light to aid visual inspection [5] [18].
- Inspection: Prior to any cleaning, visually inspect the optic under a bright light. Use magnification if necessary. Document the type and distribution of contaminants. This provides a baseline for evaluating the procedure's effectiveness [5].
- Gas Source Selection and Preparation:
- For general optics, use a blower bulb or filtered, oil-free compressed air/nitrogen [5].
- For extremely delicate optics (e.g., pellicle beamsplitters, gratings, calcite polarizers), a blower bulb is mandatory as the force from canned air or compressed gas can damage the surface [5].
- If using canned gas, hold the can upright and initiate the flow away from the optic to clear the nozzle. Do not shake the can [5].
- Application Technique:
- Hold the gas nozzle approximately 6 inches (15 cm) from the optical surface [5].
- Angle the nozzle at a shallow, grazing angle to the surface rather than perpendicularly. This allows the air stream to lift and carry particles away rather than driving them into the surface.
- Use short, controlled bursts of gas [5]. For large surfaces, trace a slow, methodical figure-eight pattern to ensure complete coverage [5].
- Continuously rotate the optic or move the gas stream to approach contaminants from different directions.
- Post-Cleaning Inspection: Re-inspect the optic under the same lighting and magnification conditions used in Step 1. Evaluate the efficacy of the particulate removal. If contaminants remain, the procedure may be repeated. If oily or adhered contaminants persist, the researcher may then proceed with a solvent-based cleaning method, as outlined in subsequent research protocols.
The following workflow diagram synthesizes this multi-step experimental procedure into a single, visual logic map.
Data Presentation: Specifications and Standards
Adherence to quantitative standards is a cornerstone of reproducible research. The following tables summarize key specifications for gases and contaminants.
Table 2: Compressed Air and Nitrogen Quality Specifications per ISO 8573-1
| Contaminant Class | Purity Level | Target Limit | Application Note |
|---|---|---|---|
| Solid Particles | ISO 8573-1 Class | As defined by purity level [27]. | Measured via laser particle counter [27]. |
| Water (Dew Point) | N/A | ≤ -70 ℃ (-94 ℉) [26]. | Critical to prevent moisture damage to hygroscopic optics. |
| Oil (Aerosol & Vapor) | ISO 8573-1 Class | 0 mg/m³ (oil-free) [26] [27]. | Mandatory to prevent hydrocarbon film deposition. |
Table 3: Optic-Specific Gas Cleaning Guidelines
| Optic Type | Recommended Tool | Critical Precaution | Rationale |
|---|---|---|---|
| Pellicle Beamsplitters | Blower Bulb Only | Force from canned/compressed air can break the thin membrane [5]. | Non-destructive cleaning. |
| Ruled Gratings | Blower Bulb Only | Grooved surface is extremely sensitive to physical contact [5] [19]. | Preserves delicate ruling. |
| Salt Crystals (KBr, NaCl) | Blower Bulb in Dry Environment | Requires <30% humidity during handling to prevent dissolution [19]. | Prevents hydrolytic damage. |
Integration with Broader Solvent Research
The gas pre-cleaning protocol is the indispensable first module in a comprehensive, multi-stage research project on optical cleaning. Its successful execution directly impacts the variables and outcomes of subsequent solvent studies.
- Solvent-Residue Studies: By ensuring the optical surface is free of particulates before solvent application, researchers can be more confident that any residues detected post-cleaning (e.g., via spectroscopy [25]) originate from the solvent or its interaction with storage materials, and not from confounding particulate matter.
- Scratch-Dig Analysis: A primary dependent variable in cleaning research is the introduction of surface defects. A rigorous pre-cleaning step establishes a controlled baseline, allowing researchers to more accurately attribute any new scratches to the wiping technique or solvent application, rather than pre-existing debris.
- Laser-Induced Damage Threshold (LIDT): For optics in high-energy laser systems, contaminants are nucleation points for catastrophic failure [28]. Effective pre-cleaning removes these initiators, thereby enabling a valid assessment of how solvent cleaning and residual films affect the LIDT, independent of particulate contamination.
In conclusion, the "blow-off" step is a scientifically grounded, non-negotiable practice. It is the foundation upon which reliable and valid solvent cleaning research is built, ensuring that subsequent experimental results truly reflect the properties of the solvents and methods under investigation, and not the artifacts of inadequate preparation.
Mastering the 'Drop and Drag' Technique for Unmounted and Flat Optics
Within the rigorous framework of pharmaceutical research and development, the integrity of analytical data is paramount. Spectrometers, essential for drug analysis, rely on the pristine condition of their optical components. Contaminants such as dust, oils, or chemical residues on unmounted and flat optics can significantly increase light scattering and absorption, leading to erroneous results in critical analyses of Active Pharmaceutical Ingredients (APIs) [29] [5]. The "Drop and Drag" cleaning technique represents a controlled, mechanical wiping method designed to remove contaminants from flat optical surfaces with minimal physical contact, thereby preserving the optical performance and longevity of these sensitive components [12] [30]. This protocol details the application of this technique within the context of research on solvents for cleaning spectrometer optics, ensuring that cleaning processes themselves do not introduce variables that compromise data fidelity.
The Scientist's Toolkit: Essential Materials and Reagents
The following reagents and materials are critical for executing the "Drop and Drag" technique effectively and safely. The selection is based on their compatibility with optical surfaces and their efficacy in dissolving common laboratory contaminants.
Table 1: Research Reagent Solutions for Optical Cleaning
| Item | Function & Specification | Rationale for Use |
|---|---|---|
| Reagent-Grade Solvents | Dissolve organic contaminants and oils without leaving residue. | Purity is critical; commercial glass cleaners can cause streaking and damage [31] [32]. |
| Lens Tissue | Low-lint, soft physical medium for contaminant removal. | Must be used moist with solvent; dry tissue can scratch surfaces. Never re-used [12] [30]. |
| Compressed Air/Duster | Removes loose particulate matter prior to wiping. | Prevents abrasive damage during the wiping process [30] [32]. |
| Powder-Free Gloves | Barrier against skin oils and salts. | Human sweat is corrosive and can permanently damage optical coatings [12] [31]. |
| Clean-Room Wipers | Provides a clean, non-abrasive surface to place the optic on during cleaning. | Protects the optic from contamination and scratches from the work surface [12] [30]. |
Experimental Protocol: The Drop and Drag Technique
Pre-Cleaning Procedures
1. Environmental Preparation: Conduct cleaning in a clean, low-dust, and temperature-controlled environment [12] [5]. Ensure the work area is clean, sanitized, and well-lit to prevent the introduction of new contaminants and to allow for proper inspection [32].
2. Personal Protective Equipment (PPE): Don powder-free, acetone-impenetrable gloves (e.g., nitrile or latex) [12] [30]. This protects the optic from skin oils and the user from chemical exposure.
3. Optical Inspection: Prior to any cleaning, inspect the optic by holding it under a bright light source and viewing it from multiple angles. This helps identify the type, severity, and location of contaminants through light scattering [12] [30] [5]. If the optic is only dusty, compressed air may be the only required step.
4. Initial Dust Removal: Using filtered, oil-free compressed air, canned air, or nitrogen, gently blow the entire surface of the optic [12] [30]. Hold the canister upright about 6 inches (15 cm) from the surface and use short blasts at a grazing angle to avoid depositing propellant [29] [5]. This step is crucial, as wiping a dusty optic can grind particles into the surface, causing scratches [30].
Core Cleaning Methodology
The following workflow outlines the sequential steps for the "Drop and Drag" technique, from initial inspection to final storage.
1. Optic Positioning: Place the unmounted, flat optic on a stable, clean, non-abrasive surface such as a clean-room wiper. Ensure the optic is secure and will not move when light lateral pressure is applied [12] [32].
2. Tissue Preparation: Take a single, unused sheet of lens tissue. Do not touch the central area of the tissue that will contact the optical surface. Hold the tissue flat and position it just above the optic, ensuring it is large enough to cover the surface to be cleaned [29].
3. Solvent Application: While continuing to hold the tissue above the optic, apply one or two drops of a pre-selected, reagent-grade solvent mixture onto the tissue directly over the contaminated area. The weight of the solvent will cause the tissue to make contact with the optical surface [29] [5]. A common and effective solvent mixture is 60% reagent-grade acetone and 40% reagent-grade methanol. The methanol slows the evaporation rate of the acetone, allowing more time for it to dissolve debris [12] [30].
4. The Drag Execution: Once the tissue is in contact with the optic, slowly and steadily drag the soaked tissue across the optic's face in a single, continuous motion. Continue dragging until the tissue is completely off the optical surface [29]. The motion should be slow enough to allow the solvent to evaporate uniformly without leaving streaks or drying marks [12] [30]. Critical Note: Always clean from the edges of the optic inward, or ensure your drag path lifts contaminants away from the center to prevent drawing dirt onto a clean surface [12] [30].
Post-Cleaning Validation and Storage
1. Inspection: Immediately after cleaning, perform a final inspection under a bright light as described in Section 3.1. Look for any remaining contaminants, streaks, or solvent marks. If contamination persists, repeat the "Drop and Drag" process with a new sheet of lens tissue. Never re-use a lens tissue [12] [29].
2. Storage: Once clean, the optic should be immediately placed into its intended mount or prepared for storage. For storage, wrap the optic individually in a clean lens tissue and place it in a dedicated optical storage box. Never store unwrapped optics together, as contact can cause scratches and permanent damage. Store the box in a low-humidity, temperature-controlled environment [12] [31] [5].
Data Presentation: Solvent Properties and Selection
Selecting the appropriate solvent is a critical variable in cleaning validation for spectrometer optics. The following table summarizes key properties of common reagents to guide this decision.
Table 2: Properties of Common Optical Cleaning Solvents
| Solvent | Evaporation Rate | Key Advantages | Key Limitations & Safety | Ideal Use Case |
|---|---|---|---|---|
| Acetone | Very Fast | Excellent for dissolving a wide range of organic compounds. | Dries too quickly for some applications; can damage plastics; highly flammable [12] [31]. | Quick cleaning of glass/ceramic optics without delicate coatings. |
| Methanol | Fast | Effective for contaminants acetone may not dissolve. | Toxic; flammable [5]. | Often used in a 40:60 mixture with acetone to slow evaporation [12]. |
| Isopropyl Alcohol (IPA) | Moderate | Less toxic than methanol; safe for most coatings. | Slow evaporation can leave drying marks; may be less effective on some oils [12] [30]. | General-purpose cleaning for coated and uncoated optics. |
| De-ionized Water | Slow | Safest option for unknown coatings or plastic optics; no flammability risk. | Ineffective at removing non-polar contaminants (oils, greases) [31]. | Initial rinse or used with mild dish soap for plastic components [31] [30]. |
Discussion and Best Practices
Integration with Broader Research Context
The "Drop and Drag" protocol aligns with the principles of cleaning validation in pharmaceutical QC laboratories, where the goal is to prevent cross-contamination of APIs [33]. Just as recovery studies are performed to validate the cleaning of laboratory glassware and equipment [33], the efficacy of this optical cleaning technique should be verified through rigorous inspection. The establishment of Residue Acceptable Limits (RALs), a cornerstone of cleaning validation [33], finds its parallel here in the visual and performance-based acceptance criteria for a "clean" optic—specifically, the absence of visible contaminants or streaks that could scatter light or affect spectroscopic readings.
Troubleshooting and Technique Adaptation
- Streaking: Caused by too much solvent, an uneven wiping motion, or the edge of the tissue lifting during the drag. Ensure a slow, steady, and continuous motion with a correctly dampened (not dripping) tissue [29] [5].
- Residual Contaminants: If contaminants remain after a single pass, the process must be repeated with a fresh tissue. Dragging the same contaminated tissue back across the surface will re-deposit the debris.
- Special Considerations: This technique is not recommended for optics with bare metallic coatings or other delicate surfaces that are easily scratched [12]. For these components, blowing with compressed air may be the only safe method [31] [5]. Furthermore, plastic optics or optics in plastic housings must never be cleaned with acetone, as it will cause dissolution or crazing of the plastic. For these materials, use only compressed air, reagent-grade isopropyl alcohol, or de-ionized water [12] [31] [30].
The "Drop and Drag" technique is a foundational skill for researchers and scientists who depend on the precision of optical systems like spectrometers. By providing a standardized, reliable methodology for decontaminating flat, unmounted optics, this protocol helps ensure the accuracy and reproducibility of analytical data in drug development. Adherence to the specified materials, a controlled procedural workflow, and a thorough understanding of solvent properties are all critical for maintaining optical performance and extending the functional lifetime of these vital research components.
Within research on proper solvents for cleaning spectrometer optics, the precision of a cleaning methodology is paramount. For small-diameter and mounted optics, which are integral to instruments like spectrometers and microscopes, standard cleaning procedures pose a high risk of damage or incomplete contamination removal. The 'Brush' technique offers a controlled alternative, enabling targeted cleaning of these sensitive components while minimizing physical contact [12] [30]. This protocol details the application of the Brush technique, framing it within the critical context of solvent selection and residue management to ensure optical performance and longevity. The following workflow outlines the complete cleaning and validation process.
Technical Foundation
The Critical Role of Solvent Selection
The efficacy of the Brush technique is fundamentally dependent on solvent selection. Different solvents possess varying capabilities for dissolving contaminants and have different evaporation rates, which can impact cleaning success and the potential for residue.
Table 1: Common Solvents for Optical Cleaning
| Solvent | Key Properties | Advantages | Limitations | Ideal Use Case |
|---|---|---|---|---|
| Acetone-Methanol Mix (60:40) [12] [30] | Fast-evaporating, broad solubility. | Methanol slows acetone evaporation for better cleaning; effective on oils and organics. [12] | Can damage plastics/coatings; requires acetone-impermeable gloves. [12] [34] | General glass and quartz optics without vulnerable coatings. |
| Reagent-Grade Isopropyl Alcohol [12] [34] | Slower evaporation, less aggressive. | Safe for most coatings; effective for light oils and fingerprints. | Slow evaporation can leave drying marks. [12] | Coated optics, final rinse, or when a milder solvent is required. |
| De-Ionized Water (with mild soap) [12] [34] | Aqueous, non-solvent. | Safest option for unknown coatings or plastic substrates. [34] | Ineffective on non-polar, greasy contaminants. | Initial cleaning attempt or for water-soluble dirt. |
A primary research consideration is solvent purity. A study demonstrated that even brief contact of high-purity solvents like acetone, methanol, or isopropanol with plastics or rubber can introduce a persistent residue [25]. Therefore, solvents must be stored in and dispensed from glass or chemically inert containers to maintain their integrity.
Rationale for the Brush Technique
Small-diameter and mounted optics present unique challenges:
- Limited Access: Mounts can obstruct edges, making standard wiping impossible [12].
- Fragility: Their small size makes them susceptible to drops or damage from improper handling [34].
- Precision: The technique allows controlled application of solvent and pressure exclusively to the optical surface, avoiding the mount [30].
The Brush technique addresses these by creating a soft, solvent-applicator tool that can be manipulated with precision, ensuring thorough cleaning without abrasive contact or risk of solvent wicking into the mount assembly [12].
Experimental Protocol
Research Reagent Solutions & Essential Materials
Table 2: Essential Materials for the Brush Technique
| Item | Specification / Grade | Function | Rationale |
|---|---|---|---|
| Lens Tissue | Low-lint, high-quality (e.g., Kimwipes) [35] | Primary cleaning medium. | Minimizes scratching and fiber residue on optical surfaces. |
| Solvents | Reagent-grade or spectrophotometric grade [12] [36] | Dissolves and removes organic contaminants. | High purity ensures no dissolved impurities are deposited on the optic. |
| Tweezers/Hemostat | Non-marring, plastic or bamboo preferred [34] [35] | Holds the tissue "brush". | Provides precise control while preventing scratches from metal tools. |
| Compressed Gas Duster | Filtered, oil-free, dry nitrogen or "canned air" [12] [30] | Removes loose particulate matter. | Prevents scratching during subsequent wiping; blowing is non-contact. |
| Gloves | Powder-free, acetone-impermeable [12] [30] | Personnel handling. | Prevents skin oils and chemicals from contacting the optic. |
| Magnification | Microscope or magnifying lamp (e.g., 20x) [37] | Pre- and post-cleaning inspection. | Allows identification of tiny contaminants and verification of cleanliness. |
Step-by-Step Methodology
Step 1: Preparation and Inspection
- Establish a clean, low-dust, and temperature-stabilized work environment [21].
- Don powder-free, acetone-impermeable gloves to prevent contamination from skin oils [12] [30].
- Visually inspect the optic under a bright light, viewing from multiple angles to identify dust, stains, or fingerprints [12] [30].
Step 2: Dry Dust Removal Using a filtered, oil-free air duster or nitrogen gas, gently blow the surface of the optic to dislodge and remove loose dust and particles [12] [34]. Never blow with your mouth, as saliva can contaminate the surface [34]. If no stains are visible after dusting, consider the cleaning complete, as unnecessary cleaning increases the risk of damage [12] [30].
Step 3: Fabrication of the Tissue "Brush"
- Take a single sheet of lint-free lens tissue and fold it so that the final fold's width matches or slightly exceeds the diameter of the optic to be cleaned [12] [30].
- Using a hemostat or non-marring tweezers, grip the folded tissue parallel to and near the fold. Crucially, do not touch any part of the tissue that will contact the optic [12].
Step 4: Application of Solvent and Technique Execution
- Lightly wet the folded edge of the "brush" with the selected reagent-grade solvent. Shake gently to remove any excess liquid [12].
- Hold the small or mounted optic securely by its edges. For mounted optics, take care to clean the edges of the exposed optic first, tracing the inside edge of the mount in a slow circle to prevent dirt from being drawn onto the face [30].
- Place the wet brush on one edge of the optical surface. Applying slight, uniform pressure, slowly and deliberately drag the brush in a straight line across the optic's face from one edge to the other [12].
- Do not double back over your path. Use a single, continuous, and slow stroke to allow the solvent to evaporate without streaking [12] [30].
Step 5: Final Processing
- After the solvent has fully evaporated, perform a final visual inspection under magnification to verify cleanliness [37].
- If contamination persists, repeat the process using a fresh section of the tissue brush or an entirely new one.
- Once clean, install the optic directly into its mount or wrap it individually in clean lens tissue for storage. Never store unwrapped optics together, as contact can cause scratches [12] [34].
The Brush technique, when executed with a scientific understanding of solvent properties and material compatibility, provides a reliable and effective method for maintaining the critical performance of small-diameter and mounted optics. Adherence to this detailed protocol, emphasizing solvent purity and meticulous handling, will ensure accurate spectroscopic measurements and extend the operational lifespan of valuable optical components in research and drug development.
Within research on proper solvents for cleaning spectrometer optics, achieving atomic-level cleanliness is a critical requirement for ensuring data accuracy and instrument longevity. Contaminants on optical surfaces can cause light scattering, absorption, and unpredictable performance, particularly in sensitive applications such as drug development and analytical spectroscopy. This application note details two advanced cleaning protocols—solvent immersion and polymer film application—that surpass conventional wiping techniques. These methods are designed for researchers and scientists who require the highest level of surface purity for critical optical components in spectrometric systems.
Advanced Cleaning Methodologies
Immersion Cleaning
Immersion cleaning is a highly effective technique for removing stubborn contaminants from optical surfaces. This method involves submerging the optic in a solvent bath, which allows for complete and uniform contact between the cleaning agent and the contaminated surface [12].
Key Applications: Ideal for softer coatings and optics with complex surface geometries, such as Nanotexture windows and lenses, where physical contact from wiping could cause damage [12]. This method is also particularly effective for removing heavy contamination that has adhered strongly to the optical surface.
Critical Limitations: Cemented optics should never be cleaned by immersion, as the solvent can penetrate and weaken the cement layer, causing delamination or optical misalignment [12]. Additionally, micro-optics (typically smaller than 3mm in diameter) should not undergo ultrasonic immersion cleaning, as the intense cavitation can scratch delicate surfaces [12] [38].
Polymer Film Cleaning for Atomic-Level Cleanliness
Polymer film cleaning represents a revolutionary approach for achieving atomic-level cleanliness without mechanical contact with the optical surface. This technique involves applying a specially formulated liquid polymer solution to the optic. As the polymer dries to a solid film, it dissolves organic compounds and encapsulates particulate matter. The film is then peeled away, lifting the encapsulated contaminants from the surface and revealing a pristine optic that can be cleaner than when new [12].
Key Applications: This method is exceptionally valuable for cleaning rough surfaces and diffraction gratings, which are difficult or impossible to clean effectively using standard techniques [12]. It is the preferred method when the absolute lowest particulate count is required, such as in high-power laser applications or sensitive spectroscopic measurements.
Critical Limitations: Nanotexture windows and lenses should never be cleaned using polymer film, as the process may damage their specialized surfaces. For these optics, only the immersion technique or dust-off procedures are recommended [12].
Experimental Protocols
Protocol for Immersion Cleaning
The following step-by-step protocol ensures safe and effective immersion cleaning of compatible optics.
Step 1: Preliminary Inspection and Dust Removal
- Inspect the optic under a bright light source, viewing from different angles to identify contaminants [5].
- Using a canister of inert dusting gas or a blower bulb, remove all loose particulate matter from the surface [12] [5]. Hold the gas can upright approximately 6 inches (15 cm) from the optic and use short blasts at a grazing angle to the surface.
- Safety Note: Do not use breath to blow on the optic, as saliva droplets can contaminate the surface [5].
Step 2: Solvent Bath Preparation
- Prepare an appropriate solvent bath in a chemically resistant container. A mixture of 60% reagent-grade acetone and 40% reagent-grade methanol is often effective, as the methanol slows the evaporation rate of the acetone, allowing for better dissolution of contaminants [12].
- Safety Precautions: Wear acetone-impenetrable gloves and work in a well-ventilated area, as these solvents are poisonous and flammable [12] [5].
Step 3: Immersion and Agitation
- Immerse the optic completely in the solvent bath using optical tweezers or a vacuum pick-up tool.
- For heavily soiled optics, gentle agitation in an ultrasonic bath may be used, provided the optic is not a micro-optic, cemented, or otherwise unsuitable for ultrasonic cleaning [12].
- The optic should not remain immersed longer than necessary to remove contaminants [5].
Step 4: Rinsing and Drying
- Remove the optic from the primary solvent bath and rinse it by immersing it in a fresh, clean solvent bath [12].
- To dry, carefully blow solvent off from one direction using filtered, compressed air or nitrogen to avoid leaving drying marks or streaks [12].
- Avoid pooling of any cleaning solutions as they dry because that tends to leave streaks on the optical surface [5].
Protocol for Polymer Film Cleaning
This protocol achieves atomic-level cleanliness through a non-contact mechanism.
Step 1: Surface Preparation
- Begin by thoroughly removing all dust and loose particles from the optic using compressed air or an air blower, as described in Step 1 of the immersion protocol [12]. The surface must be free of large particulates before polymer application.
Step 2: Polymer Application
- Apply the designer polymer solution according to the manufacturer's instructions. This can typically be done by pouring, brushing, or spraying a uniform layer onto the optical surface [12].
- Ensure the entire surface is covered with a consistent film thickness.
Step 3: Curing and Encapsulation
- Allow the polymer to dry completely to a solid film at room temperature. As the polymer dries, it dissolves organic compounds and encapsulates particulates [12].
- The curing time will vary based on the specific product, environmental conditions, and film thickness.
Step 4: Film Removal
- Once fully cured, carefully peel the polymer film off the optic, starting from one edge. The encapsulated contaminants are removed with the film [12].
- The resulting surface is pristine and achieves atomic-level cleanliness.
Research Reagent Solutions
The following reagents and materials are essential for implementing these advanced cleaning protocols.
Table 1: Essential Reagents and Materials for Advanced Optics Cleaning
| Item | Specification/Grade | Primary Function | Application Notes |
|---|---|---|---|
| Acetone [12] [38] | Reagent-grade or Spectrophotometric-grade | Dissolves organic contaminants | Never use on plastic optics; use in well-ventilated area |
| Methanol [12] | Reagent-grade or Spectrophotometric-grade | Slows acetone evaporation; dissolves different debris | Use in well-ventilated area |
| Isopropyl Alcohol [12] [38] | Reagent-grade | Safe, effective solvent for general cleaning | Slow evaporation can leave drying marks |
| Polymer Cleaning Solution [12] | Optic-grade, specific product formulations | Dissolves organics and encapsulates particulates | Do not use on Nanotexture surfaces |
| Compressed Air/Duster [12] [5] | Filtered, moisture-free | Removes loose dust and particulates | Hold can upright; use short blasts |
| Lens Tissue [12] | Low-lint, manufactured for optics | Wiping application for solvents | Never use dry; never re-use |
| Gloves [12] [38] | Powder-free, acetone-impenetrable | Precontamination from skin oils | Essential when handling all optics |
Solvent Compatibility and Selection
Selecting the appropriate solvent is critical to both cleaning efficacy and preserving the optical component. Solvent compatibility depends on the optical substrate, coating type, and the nature of the contaminant.
Table 2: Solvent Compatibility and Performance Characteristics
| Solvent | Evaporation Rate | Optical Material Compatibility | Contaminant Best Suited For |
|---|---|---|---|
| Acetone-Methanol Mix (60/40) [12] | Fast (optimized) | Glass, hardened coatings; not for plastics or cemented optics | Oils, fingerprints, general organics |
| Reagent-Grade Isopropyl Alcohol [12] [38] | Slow | Broad compatibility, including some plastics | Light oils, salts, some residues |
| Acetonitrile [33] | Medium | Quartz, glass; verify coating compatibility | Difficult API residues (e.g., Oxcarbazepine) |
| De-ionized Water with Mild Soap [12] [38] | Slow | Safest for unknown coatings/plastics | Water-soluble contaminants, general cleaning |
Special Considerations for Spectrometer Optics
- Quartz Cuvettes: While quartz is resistant to many solvents, hydrofluoric acid (even in low concentrations) and strong alkalis will cause severe damage. For aqueous solutions, temperatures below 90°C are generally safe, but aggressive organics at elevated temperatures can accelerate surface degradation [39].
- Coated Optics: Unprotected metallic coatings, holographic gratings, and ruled gratings are extremely sensitive. Physical contact should be avoided; blowing off the surface is often the only safe cleaning method [5].
- Plastic Optics: Never use acetone on plastic optics or optics in plastic housings, as it will cause damage. Use only compressed air, reagent-grade alcohol, or de-ionized water [12] [38].
Workflow and Decision Pathways
The following diagram illustrates the decision-making process for selecting and applying the appropriate advanced cleaning method.
For researchers and drug development professionals, maintaining optically clean surfaces is fundamental to obtaining reliable spectroscopic data. The immersion cleaning and polymer film methods outlined in this application note provide robust, reproducible pathways to achieve atomic-level cleanliness. The immersion technique offers a powerful solution for heavily contaminated but durable optics, while polymer film cleaning enables non-contact, atomic-level decontamination of even the most delicate and complex surfaces. By integrating these protocols with a rigorous solvent selection process and appropriate safety measures, laboratories can significantly enhance the performance and longevity of their critical optical instrumentation.
Within spectroscopic instrumentation, the performance of optical components is paramount to data integrity. Contaminants such as dust, fingerprints, and organic residues can cause significant light scattering, absorption, and even permanent laser-induced damage, compromising experimental results [12] [40]. This application note details specialized handling and cleaning protocols for three categories of particularly sensitive optics—gratings, micro-optics, and pellicle beamsplitters—framed within essential research on solvent compatibility. The guidelines are designed to help researchers and drug development professionals maintain optical performance and extend the service life of these critical, often costly, components.
General Handling and Storage Principles
Before addressing specific components, adherence to foundational handling practices is critical.
- Personal Protective Equipment (PPE) and Tools: Always wear powder-free gloves (nitrile or latex) or finger cots to prevent the transfer of skin oils, which are corrosive to optical coatings [12] [41]. Handle optics exclusively by their ground edges or non-optical surfaces [41]. For micro-optics or difficult-to-grip components, use non-marring tweezers (plastic, bamboo, or soft-jawed) or vacuum pick-up tools [12] [41]. Never use metal tools directly on optical surfaces [12].
- Environment: Perform all handling and cleaning in a clean, low-dust, and temperature-stabilized environment, such as a laminar flow hood, if available [12] [21]. Allow components packaged in a cooler environment to reach thermal equilibrium before unwrapping to prevent thermal shock and condensation [29] [21].
- Inspection: Use a bright visible-light source and, if necessary, a magnifier or microscope to inspect for contaminants and defects before and after cleaning [40] [29]. This step determines the required cleaning level and verifies its success.
- Storage: After cleaning, wrap optics individually in clean, lint-free lens tissue and store them in dedicated optical storage boxes with foam or molded plastic inserts [12] [41] [29]. Never store unwrapped optics together, as contact can cause scratches [12].
Handling and Cleaning Protocols for Specific Optics
Diffraction Gratings
Diffraction gratings, with their finely ruled or holographically generated surfaces, are exceptionally delicate. Their structured surfaces easily trap contaminants and are highly susceptible to physical damage [40] [29].
Primary Cleaning Protocol: Dry Gas Blowing This is the only recommended method for cleaning most diffraction gratings and wire grid polarizers, as it involves no physical contact [41] [29].
- Tools: Use a canister of inert dusting gas, filtered compressed air, or nitrogen [12] [40].
- Procedure: Hold the can upright approximately 6 inches from the optical surface. Before directing it at the optic, start the gas flow pointing away to clear any propellant. Wave the spray over the grating at a grazing angle in a steady, sweeping motion [29].
- Precautions: Never shake the gas canister, as this can release liquid propellant. Never use your mouth to blow air, as saliva will contaminate the surface [29].
Contraindicated Methods: Do not attempt to wipe gratings with lens tissue or swabs, and do not use any liquid solvents [41] [42]. These actions will almost certainly damage the sensitive surface structure.
Micro-Optics
Micro optics, typically defined as lenses smaller than 3 mm in diameter, require specialized tools and techniques due to their size and the high risk of loss or damage during handling [12] [41].
- Handling: Use delicate vacuum pick-up tools or soft, non-marring tweezers (plastic or bamboo) to hold the optic by its edge [12] [41].
- Cleaning Protocol: Solvent and Swab
- Initial Cleaning: Use compressed air or a gas duster to remove loose surface debris [41].
- Solvent Application: For persistent contaminants like fingerprints, use a high-purity solvent. Reagent-grade isopropyl alcohol is generally preferred due to its good cleaning efficacy and lower risk compared to faster-evaporating solvents [12] [41]. Acetone or de-ionized water can also be used [12].
- Wiping: Moisten the tip of a synthetic, low-lint swab or a small brush made from lens tissue with the solvent. Gently wipe the optical surface in a single, slow, straight stroke from one edge to the other [12].
- Precautions: Do not use ultrasonic cleaning for micro optics, as the intense vibrations can cause physical damage to such small components [12].
Pellicle Beamsplitters
Pellicle beamsplitters feature an extremely thin, stretched membrane that makes them extraordinarily fragile. Any physical contact, including a jet of air, can potentially cause damage [12] [42].
- Handling Sensitivity: These components are "so sensitive that any physical contact from hands or optical handling instruments can cause damage" [12]. Their first surface is unprotected, and the thin membrane is easily deformed or ruptured.
- Recommended Cleaning Protocol: Extreme caution is advised. In most cases, the best practice is prevention. If cleaning is absolutely necessary, the only potentially safe method is to use an extremely gentle stream of dry, oil-free air [42]. However, even this carries risk.
- Contraindicated Methods: Do not wipe with any material. Do not apply solvents, as they could dissolve the membrane or leave stains. The consensus across multiple sources is that these optics are often not cleanable once contaminated, and replacement is the safest option if performance is degraded [12] [42].
Research Reagent Solutions
The table below catalogs essential materials and their functions for handling and cleaning delicate optics.
Table 1: Essential Research Reagent Solutions and Materials for Optical Cleaning
| Item | Function & Application | Key Considerations |
|---|---|---|
| Powder-Free Gloves (Nitrile/Latex) | Creates barrier against skin oils and corrosive sweat during handling [12] [41]. | Acetone-impermeable gloves (e.g., nitrile) are required when using acetone [12]. |
| Reagent-Grade Solvents | Dissolves organic contaminants like oils and fingerprints. | Use spectrophotometric or reagent grade to prevent residue [12] [40]. |
| - Isopropyl Alcohol (IPA) | General-purpose solvent; safe for most glass optics and plastic housings [41]. | Slower evaporation can leave drying marks if used excessively [12]. |
| - Acetone | Powerful solvent for stubborn grease [12] [42]. | Dries very quickly; can damage plastics and some coatings [12] [40]. |
| - Methanol | Often mixed with acetone (60/40) to slow evaporation and improve cleaning [12] [21]. | Toxic; requires careful handling and proper ventilation. |
| - De-ionized Water | Safe solvent for unknown coatings or with mild dish soap for aqueous cleaning [12] [41]. | Often used with a drop of mild detergent for aqueous cleaning [41]. |
| Lens Tissue | Low-lint, disposable wipes for applying solvent and dragging contaminants off the surface [12] [40]. | Never use dry, as it can scratch. Never re-use a tissue [12]. |
| Compressed/Dusting Gas | Removes loose particulate contamination without physical contact (first cleaning step) [12] [40]. | Use canned air, filtered compressed air, or nitrogen. Avoid propellant droplets [29]. |
| Non-Marring Tweezers | For secure handling of micro-optics and small components without scratching [41] [29]. | Tips made of plastic, bamboo, or ceramic are preferred over metal. |
| Cotton-Tipped Applicators | Allow precise solvent application for small or mounted optics where tissues are impractical [41] [29]. | Use low-lint, optical-grade swabs to minimize fiber residue. |
Decision Workflow and Comparative Analysis
Optical Cleaning Decision Workflow
The following diagram outlines the logical decision process for assessing and cleaning delicate optics, integrating the critical "if it's not dirty, don't clean it" principle to minimize handling risk.
Comparative Cleaning Methods for Delicate Optics
The table below provides a consolidated summary of the appropriate and contraindicated cleaning methods for each optical type discussed, serving as a quick-reference guide.
Table 2: Summary of Cleaning Methods for Delicate Optics
| Optical Component | Primary Cleaning Method | Acceptable Solvents | Contraindicated Methods | Key Risk |
|---|---|---|---|---|
| Diffraction Gratings | Dry gas blowing only [41] [29] | None | Wiping, any solvent use, ultrasonic cleaning [41] | Permanent physical damage to ruled surface |
| Micro-Optics | 1. Gas blowing, then 2. Solvent wiping with swab [12] [41] | Reagent IPA, Acetone, De-ionized Water [12] [41] | Ultrasonic cleaning, handling with metal tools [12] | Physical damage/loss due to small size |
| Pellicle Beamsplitters | Prevention; or gentle air stream (with high risk) [42] | None | Any physical contact, wiping, solvent application [12] [42] | Tearing, stretching, or rupturing the membrane |
Maintaining the cleanliness and integrity of specialized optical components is a critical aspect of ensuring spectroscopic data quality. The protocols outlined herein emphasize that a conservative approach is safest: the best cleaning is often avoidance. Always prioritize handling practices that prevent contamination. For essential cleaning, the methods must be meticulously matched to the component's specific sensitivity, with gratings and pellicle beamsplitters requiring the most restrictive, non-contact approaches. Adherence to these guidelines, combined with the use of high-purity reagents and proper storage, will protect these valuable assets, support reproducible research outcomes, and reduce costly replacements in drug development and scientific research.
Troubleshooting Common Cleaning Challenges: From Streaks to Damage Prevention
Within the context of advanced spectrometer maintenance, achieving a pristine optical surface post-cleaning is not merely a matter of aesthetics but is fundamental to data integrity and experimental reproducibility. For researchers in drug development and scientific research, contaminants such as streaks, drying marks, and residual films can significantly compromise spectroscopic measurements by introducing spurious signals, altering transmission characteristics, and reducing overall signal-to-noise ratio. This document outlines evidence-based protocols and application notes to systematically eliminate these post-cleaning issues, ensuring optical components meet the stringent cleanliness standards required for precise analytical science. The following guidelines are synthesized from established optical handling procedures and are contextualized for the specific demands of spectrometer maintenance.
Troubleshooting Common Post-Cleaning Defects
The first step in remediating cleaning issues is a correct diagnosis of their root cause. The table below summarizes the common defects, their primary causes, and recommended corrective actions.
Table 1: Troubleshooting Common Post-Cleaning Defects on Spectrometer Optics
| Observed Defect | Primary Cause | Corrective Action |
|---|---|---|
| Streaking | Incorrect solvent application; dirty wipes; improper wiping technique leading to re-deposition of contaminants. [5] [12] | Use a larger, clean applicator; ensure the wipe is damp, not dripping; employ a continuous, non-overlapping wipe path with a slow, steady motion. [5] |
| Drying Marks / Residue | Use of impure solvents; too much solvent leading to pooling and non-uniform evaporation; use of incompatible cleaning agents. [12] | Use high-purity, reagent-grade solvents (e.g., acetone, methanol, isopropanol). Apply minimal solvent and accelerate uniform drying with a directed stream of clean, dry air or nitrogen. [5] [12] |
| Lint or Fibers | Use of low-lint or non-optical grade wipes; dry wiping; static charge attracting particles. [5] [43] | Use approved, low-lint wipes (e.g., pure cotton, lens tissue) always moistened with solvent. Use an air blower first to remove loose particles. Consider anti-static cleaning tools. [44] |
| Persistent Oily Residue | Ineffective solvent for the contaminant (e.g., water on fingerprint oils); incomplete removal. [5] | Use an appropriate, effective solvent blend. A common and effective mixture is 60% reagent-grade acetone and 40% methanol, which combines strong solvation power with a controlled evaporation rate. [12] |
| Scratches | Wiping a dusty surface (grinding particles into the coating); using dry tissue or abrasive materials. [43] [12] | Always use a clean air duster (canned air, nitrogen) to remove loose abrasive particles before any mechanical wiping with a solvent and tissue. [43] [12] |
The following decision tree provides a logical workflow for diagnosing and addressing these issues, from initial inspection to final verification.
Diagram 1: Post-Cleaning Defect Diagnosis Workflow
Standardized Cleaning Protocols for Streak- and Residue-Free Results
Adherence to the following standardized protocols is critical for achieving consistent, high-quality cleaning outcomes without introducing defects.
Pre-Cleaning Inspection and Handling
- Inspection: Prior to any cleaning, inspect the optic under a bright light, viewing it at different angles to identify the type, location, and severity of contaminants. [5] [43] Use magnification if necessary.
- Handling: Always wear powder-free, solvent-impenetrable gloves or finger cots. Never touch the optical surface with bare hands, as skin oils are corrosive and difficult to remove. [5] [12] Hold optics only by their ground edges.
- Environment: Perform cleaning in a clean, low-dust, and well-ventilated area. A laminar flow hood is ideal for critical applications. [43]
Essential Cleaning Procedure: The Lens Tissue and Solvent Method
This is the most common and recommended method for general optical cleaning. [5] [12]
- Dry Gas Blow-Off: This step is non-negotiable. Always use a can of inert dusting gas, filtered compressed air, or nitrogen to remove loose, abrasive particles before wiping. Hold the can upright and use short blasts at a grazing angle from a distance of roughly 6 inches (15 cm). [5] [12] Never wipe a dusty optic. [43]
- Prepare the Wipe: Fold a fresh sheet of low-lint lens tissue into a pad or, for more precision, clamp it in self-clamping tweezers (e.g., a hemostat) so that no metal touches the optic. [43] [12] Ensure the contact surface is clean and has not been touched.
- Apply Solvent: Lightly moisten the tissue with a small amount of high-purity solvent. The tissue should be damp, not dripping. Excess solvent is a primary cause of streaking and drying marks. [5] [12]
- Wipe the Surface: Using very light to moderate pressure, wipe the optical surface in a continuous, straight, or circular motion from the center outward. [43] [12] Wipe slowly and steadily to allow for controlled solvent evaporation and to prevent re-deposition of contaminants. Continuously rotate the tissue to present a clean surface to the optic. [5]
- Final Drying: If any solvent remains, use a brief, directed stream of clean, dry air to blow it off from one direction to prevent pooling and drying marks. [12]
- Post-Cleaning Inspection: Immediately re-inspect the optic under bright light. If contaminants remain, repeat the process with a fresh tissue and solvent. Never re-use a lens tissue. [12]
Specialized Techniques
- Drop and Drag Method (For Unmounted Flat Optics): Place the optic on a clean surface. Lay a piece of unfolded lens tissue over it, drop solvent onto the tissue, and slowly drag the soaked tissue across the optic's face in a single, continuous motion. This minimizes physical contact and pressure on the optical surface. [5] [12]
- Immersion Technique (For Soft or Delicate Coatings): Immerse the entire optic in a bath of high-purity solvent (e.g., acetone). For stubborn contamination, an ultrasonic bath may be used, but this is not recommended for micro-optics or cemented components. After immersion, rinse with fresh solvent and dry with a directed stream of air. [12] Note: Confirm coating compatibility with immersion before proceeding.
The Scientist's Toolkit: Research Reagent Solutions
The selection of appropriate reagents and materials is as critical as the technique itself. Using non-optical grade materials is a common source of post-cleaning defects.
Table 2: Essential Materials for Residue-Free Optical Cleaning
| Material / Tool | Function & Specification | Critical Notes for Preventing Defects |
|---|---|---|
| Solvents | To dissolve and remove organic contaminants (oils, fingerprints) without leaving a residue. | Use reagent-grade or spectrophotometric-grade purity. [12] Common choices: Acetone, Methanol, Isopropyl Alcohol (IPA). A 60% Acetone / 40% Methanol blend is often optimal, as methanol slows acetone's rapid evaporation, improving cleaning and reducing streaks. [12] |
| Lens Tissue | A low-lint, soft paper for applying solvent and wiping surfaces. | Never use dry, as it can scratch. Use each tissue only once. [12] Fold to create a fresh, clean surface for each wipe. [5] |
| Pure Cotton Wipes (e.g., Webril) | A softer alternative to lens tissue that holds solvent well and is less likely to fall apart. | Recommended for most optics to minimize micro-scratches. [5] Ensure they are 100% pure cotton without additives. |
| Clean Air Source | To remove loose, abrasive particles prior to wiping. | Use canned "dust-off" gas (held upright), a blower bulb, or filtered, oil-free nitrogen/compressed air. [5] [43] Do not use breath from your mouth. [5] |
| Powder-Free Gloves | To prevent contamination from skin oils and salts. | Nitrile or similar solvent-impermeable gloves are required. Do not handle optics with bare hands. [43] [12] |
| Anti-Static Tools | To neutralize static charge that attracts lint and dust. | Specialized cleaning pens (LensPen) have been shown to generate minimal electrostatic charge compared to other materials, reducing particle attraction post-cleaning. [44] |
Eliminating streaks, drying marks, and residue from spectrometer optics is an achievable goal that hinges on a disciplined approach combining the correct materials, precise techniques, and systematic troubleshooting. The protocols outlined herein—emphasizing the use of high-purity solvents, proper pre-cleaning with inert gas, and controlled application methods—provide a reliable framework for researchers. Consistent application of these practices is essential for maintaining the optical performance required for sensitive spectroscopic measurements, thereby safeguarding the integrity of scientific data in drug development and fundamental research.
In the context of spectrometer optics research, the removal of stubborn contaminants such as fingerprints, oils, and grime is not merely a matter of optical clarity but is crucial for ensuring measurement accuracy, instrument longevity, and experimental reproducibility. These contaminants can significantly degrade performance by increasing light scatter, absorbing incident radiation, creating hot spots that permanently damage coatings, and introducing spectral artifacts [12] [5]. This document provides detailed application notes and protocols for researchers and drug development professionals, framing cleaning methodologies within the rigorous demands of analytical spectroscopy. The strategies outlined are founded on the principle that effective cleaning must be precisely tailored to the specific contaminant, optical substrate, and required level of cleanliness, moving beyond generic approaches to achieve scientifically validated results.
Understanding Contaminants and Material Compatibility
A fundamental prerequisite for effective cleaning is accurate identification of the contaminant and understanding its interaction with the optical substrate. Different contaminants require specific chemical or mechanical removal strategies.
Fingerprints represent a complex mixture of skin oils, salts, water, and organic acids, which can be particularly corrosive to optical coatings [12] [5]. Oils and greases, often from lubricants or manufacturing processes, are typically non-polar and require surfactants or solvents for emulsification and removal [45] [46]. Grime may consist of adhered particulate matter, carbon deposits, or polishing compounds, often demanding a combination of chemical and mechanical action [45].
Equally critical is substrate compatibility. The table below summarizes the chemical resistance of common optical materials to guide safe solvent selection [45] [46].
Table 1: Optical Material Chemical Compatibility and Cleaning Considerations
| Optical Material | Resistance to Alkaline Medium | Resistance to Acidic Medium | Key Cleaning Considerations |
|---|---|---|---|
| Borosilicate Glass | Resistant | Resistant | Generally robust; standard solvent mixtures are safe. |
| Precision Optics Glass | Sensitive | Sensitive | Avoid alkaline and acidic products; use neutral pH solutions. |
| Sapphire | Resistant | Resistant | Highly resistant to most chemical compounds. |
| CR39, PA (Plastics) | Low Sensitivity | Low Sensitivity | Avoid aggressive solvents; use mild detergents or alcohols. |
| Polycarbonates | Sensitive | Varies | Highly sensitive to alkaline products and specific solvents. |
| Stainless Steel (Mounts) | Resistant (except with chlorides) | Resistant (except to hydrochloric acid & chlorides) | Chlorides can break down the passive layer, causing corrosion. |
Research Reagent Solutions for Optics Cleaning
The following table details essential reagents, their properties, and specific functions in formulating cleaning solutions for spectroscopic applications.
Table 2: Key Research Reagent Solutions for Optics Cleaning
| Reagent | Technical Grade | Primary Function | Application Notes & Warnings |
|---|---|---|---|
| Acetone | Reagent- or Spectrophotometric-grade | Powerful solvent for oils, greases, and adhesives. | Evaporates very quickly. Use with acetone-impenetrable gloves [12]. |
| Methanol | Reagent- or Spectrophotometric-grade | Solvent for polar and ionic residues; slows acetone evaporation. | Poisonous and flammable. Improves cleaning efficacy when mixed with acetone [12]. |
| Isopropyl Alcohol (IPA) | Reagent-grade | Safe, general-purpose solvent for light oils and fingerprints. | Slow evaporation can leave drying marks. Ideal for plastics and delicate coatings [12] [47]. |
| De-ionized Water | N/A | Rinsing agent; base for aqueous cleaning solutions. | Removes water-soluble salts and residues without streaks. |
| Optical Soap/Mild Detergent | N/A | Surfactant for emulsifying oils and reducing water surface tension. | Used with distilled water for washing; requires thorough rinsing [5]. |
| Lens Tissue | Low-lint, high-purity | Soft, non-abrasive physical wiper. | Never use dry. Always moisten with an appropriate solvent to prevent scratching [12] [5]. |
| Webril Wipes (Pure Cotton) | N/A | Soft wiper for larger or less delicate optics. | Holds solvent well and does not dry out as fast as lens tissue [5]. |
| Environmentally Friendly Cleaning Agent B | As specified by manufacturer (e.g., Sea Energe) | Surfactant-based aqueous cleaner for polymers and sensitive substrates. | VOC-free alternative to traditional solvents. Proven effective for polyimide substrates in MEMS/sensor fabrication [47]. |
Experimental Protocols for Contaminant Removal
The following protocols provide detailed, step-by-step methodologies for cleaning spectrometer optics, emphasizing the non-negotiable rule: "If it's not dirty, don't clean it" [12]. Unnecessary handling and cleaning pose the greatest risk of damage.
Protocol 1: Standard Cleaning for Fingerprints and Oils on Unmounted Flat Optics
Principle: This protocol uses a solvent-lens tissue system to dissolve and lift contaminants without abrasive action.
Materials: Powder-free gloves, lens tissue, reagent-grade solvents (e.g., 60% acetone / 40% methanol mixture, or IPA), canned, filtered compressed air or nitrogen duster.
Procedure:
- Inspection: Under a bright light, inspect the optic from various angles to locate contaminants [12] [5].
- Environment & Handling: Perform all steps in a clean, temperature-controlled area. Handle the optic only by its ground edges using gloved hands [12] [5].
- Dry Gas Cleaning (Critical First Step): Using a can of inert dusting gas or nitrogen, hold the nozzle at a grazing angle roughly 6 inches (15 cm) from the optic. Use short blasts in a figure-eight pattern to remove loose dust. Never wipe a dusty optic. [5]
- The "Drop and Drag" Technique:
- Place the optic on a clean, non-abrasive surface like a clean-room wiper.
- Hold a fresh, unfolded sheet of lens tissue above the optic.
- Place one or two drops of solvent onto the tissue. The weight will cause it to contact the optic.
- Slowly and steadily drag the soaked tissue across the optical surface in a single, continuous motion, lifting it away once it clears the edge [12] [5].
- Inspection: Examine the optic again. If contaminants remain, repeat step 4 with a fresh piece of lens tissue. Never re-use lens tissue. [12]
Protocol 2: Cleaning of Mounted or Curved Optics
Principle: This method uses a controlled, rotating wipe to clean optics that cannot be cleaned using the "Drop and Drag" method.
Materials: Powder-free gloves, lens tissue, hemostat or soft, non-metallic tweezers, reagent-grade solvents (IPA recommended for its slower drying time on complex shapes).
Procedure:
- Follow Steps 1-3 from Protocol 1.
- The "Brush" Technique:
- Fold a piece of lens tissue so the fold is as wide as the optic to be cleaned.
- Grip the folded tissue parallel to and near the fold with a hemostat. Do not touch the part of the tissue that will contact the optic.
- Wet the "brush" with solvent and shake off excess.
- Place the brush on the optic and, with slight pressure, slowly wipe straight across from one edge to the other [12].
- The "Lens Tissue with Forceps" Method (for curved surfaces):
- Fold the tissue and clamp it with forceps. Apply solvent until damp, not dripping.
- Wipe the optical surface in a smooth, continuous motion while slowly rotating the forceps. This continuous rotation presents a clean portion of the tissue to the optic, preventing re-deposition of contaminants [5].
- Final Rinse and Dry (Optional for stubborn streaks): For a pristine finish, a final, swift drag with a solvent-moistened tissue can prevent drying marks. Carefully blow dry with filtered gas.
Protocol 3: Ultrasonic Cleaning for Robust Optics and Components
Principle: Ultrasonic cleaning employs high-frequency sound waves to create cavitation bubbles in a liquid, which implode and generate intense, localized scrubbing action effective for intricate parts [45] [48].
WARNING: This method is NOT suitable for thin glass, soft crystals, coated optics where the coating may be delaminated, micro-optics, or cemented components, as it can cause severe damage [45] [12] [46].
Materials: Ultrasonic cleaner, appropriate aqueous cleaning solution (with surfactants and corrosion inhibitors), stainless steel basket, de-ionized water for rinsing, oven or dry nitrogen for drying.
Procedure:
- Solution Preparation: Fill the ultrasonic tank with an aqueous cleaning solution suitable for the contaminant and substrate. For organic residues, a detergent with surfactants is essential to lower water's surface tension and emulsify oils [46].
- Part Positioning: Place the optics in a stainless steel basket to ensure all surfaces are exposed to the solution and to protect them from mechanical damage [46] [48].
- Cleaning Cycle:
- Frequency Selection: Use 40 kHz for general cleaning. For delicate but robust optics, use a higher frequency (e.g., 80-120 kHz) for gentler, more penetrating cavitation [46].
- Heating: Heating the solution (typically to 50-60°C) can significantly improve cleaning efficacy by reducing solution viscosity and increasing chemical reaction rates [48].
- Time: Cycle time can vary from 3 to 10 minutes. Avoid excessive time to prevent potential cavitation erosion [45].
- Rinsing and Drying:
Verification and Advanced Techniques
Cleaning Verification
In a research and pharmaceutical context, verification is critical. Post-cleaning, optics should be inspected using a bright light source, viewing at different angles to detect scattering from residual contaminants or streaks [12] [5]. For the highest standards, techniques like Near Infra-Red Chemical Imaging (NIR-CI) are emerging, capable of detecting and quantifying residual API surface contamination in the range of 1-500 µg/25cm², offering a non-destructive, real-time alternative to swabbing and HPLC analysis [49].
Advanced Cleaning: Polymer Film Technology
For ultra-high-value optics or those with nanostructured or grating surfaces, polymer film cleaners offer a non-contact method. A designer polymer is poured or sprayed onto the optic. As it dries, it dissolves organic compounds and encapsulates particulates. Peeling off the film reveals a pristine surface. Note: This method is not suitable for all optics, such as Nanotexture surfaces [12].
Workflow and Decision Framework
The following workflow diagram provides a logical sequence for selecting the appropriate cleaning method based on the optic's sensitivity and the nature of the contamination.
Diagram 1: Optics Cleaning Decision Workflow. This chart outlines the systematic process for selecting a cleaning method based on initial inspection findings and the sensitivity of the optical component.
In spectrometer research, the integrity of optical components is paramount. The performance of a spectrometer is directly dependent on the pristine condition of its optics, including lenses, mirrors, filters, and specialized components like quartz cuvettes. Scratches, coating degradation, or solvent incompatibility can introduce significant errors in spectroscopic measurements, compromising data reliability in critical applications such as drug development and quantitative analysis.
Proper cleaning is not merely about aesthetics; it is a fundamental methodological concern. Contaminants like dust, oils, and residues can scatter light, absorb specific wavelengths, and introduce fluorescence background, leading to inaccurate absorbance readings and flawed experimental conclusions [50]. This document establishes detailed protocols to help researchers maintain optical performance and prevent accidental damage during cleaning procedures.
Understanding Optical Materials and Solvent Compatibility
The first step in preventing damage is understanding the material composition of optical components and how they interact with cleaning solvents. Using an incompatible solvent can permanently damage optics by dissolving coatings, clouding surfaces, or attacking the substrate material itself.
Solvent Compatibility Guide
Table 1: Optical material compatibility with common cleaning solvents.
| Optical Material | Reagent-Grade Acetone | Reagent-Grade Isopropyl Alcohol | De-Ionized Water | Methanol | Mild Soap Solution |
|---|---|---|---|---|---|
| Fused Silica/Quartz | Compatible [51] | Compatible [51] | Compatible [51] | Compatible [12] | Compatible [51] |
| Optical Glass | Compatible [51] | Compatible [51] | Compatible [51] | Compatible [12] | Compatible [51] |
| Anti-Reflection Coatings | Use with caution; check manufacturer data | Generally compatible [51] | Generally compatible [51] | Use with caution | Safest option [51] |
| Bare Metallic Coatings | Not Recommended [51] | Not Recommended [51] | Not Recommended [51] | Not Recommended | Safest option [51] |
| Plastic Optics/Housings | Incompatible (will damage plastic) [51] [12] | Compatible [51] [12] | Compatible [51] [12] | Not Recommended | Compatible [51] |
Material-Specific Risks
- Quartz Cuvettes: While quartz (fused silica) offers excellent chemical resistance and is essential for UV transparency, it is incompatible with hydrofluoric acid (HF) and can be etched by prolonged contact with hot, concentrated strong bases [50].
- Plastic Optics and Cuvettes: These are particularly vulnerable. Acetone will readily dissolve or craze plastics such as polystyrene (PS) and polymethyl methacrylate (PMMA) [51] [12]. Always use compressed air, reagent-grade alcohol, or de-ionized water for plastic components [51].
- Specialized Coatings: Bare metallic coatings (e.g., on some mirrors) are delicate and can be easily scratched or stained. Physical contact should be minimized, and cleaning should only be attempted with great caution, if at all [51].
The Researcher's Toolkit: Essential Cleaning Materials
Using the correct tools is as critical as using the correct solvents. Substandard materials can scratch surfaces even with proper technique.
Table 2: Essential materials for safe optical cleaning.
| Category | Item | Purpose & Rationale |
|---|---|---|
| Solvents | Reagent-Grade or Spectrophotometric-Grade Solvents | High-purity solvents leave minimal residue. A 60% acetone, 40% methanol mix is effective; methanol slows evaporation, improving cleaning [12]. |
| Wiping Substrates | Low-Lint Lens Tissue | Specifically designed for optics. Never use dry tissue or re-use a tissue, as this can grind in debris [12]. |
| Cotton-Tipped Swabs | For applying solvent to small or hard-to-reach areas without direct finger contact [51]. | |
| Particle Removal | Compressed Air/Dust Blower | Always the first step to remove abrasive dust without contact [51] [12]. |
| Handling & Safety | Powder-Free, Acetone-Impenetrable Gloves | Protects optics from corrosive skin oils and protects the researcher from solvents [12]. |
| Non-Marring Tweezers (Plastic, Bamboo) | For handling micro-optics or small components without scratching ground edges [51]. | |
| Specialized Solutions | Polymer Film Cleaner | A designer polymer poured/sprayed on, then peeled off, encapsulating contaminants. Ideal for delicate or complex surfaces like gratings [12]. |
Detailed Cleaning Protocols and Methodologies
Adherence to a systematic protocol is the most effective strategy for preventing accidental damage. The following workflows provide a step-by-step methodology for cleaning various optical components.
General Cleaning Workflow for Lenses and Filters
This workflow outlines the core logical process for safely cleaning most transmissive optics, emphasizing the critical sequence of non-contact to contact methods.
Protocol Steps:
Inspection and Initial Handling:
- Work in a clean, low-dust, temperature-controlled environment [12].
- Wearing appropriate gloves, hold the optic under a bright light and view it from multiple angles to identify the type and extent of contamination [12].
- Always handle optics by their ground edges, never touching the optical surface [51].
Non-Contact Particle Removal (Compressed Air):
- Using a can of compressed air, a dust blower, or filtered nitrogen, gently blow the surface to dislodge loose dust and particles [51] [12].
- Rationale: This step is critical. Wiping a dusty optic is analogous to cleaning with sandpaper, as larger particles trapped under a cloth or tissue will scratch the surface [51] [12].
Solvent Cleaning for Smudges and Oils:
- If smudges (e.g., fingerprints) or oils remain after dusting, proceed with solvent cleaning.
- Hold the optic in one hand and apply a few drops of an appropriate solvent (e.g., reagent-grade isopropyl alcohol) to a fresh sheet of lens tissue. Never apply solvent directly to the optic, as it may seep into mounts and dissolve adhesives [51] [12].
- Using the moistened tissue, wipe the optic slowly from the center outward, turning the tissue as you go to present a clean surface. This motion pulls dirt off the optic instead of redistributing it [51].
- For stubborn oils, a mild soap solution (de-ionized water with a drop of mild dish soap) can be used first, followed by a reagent-grade alcohol wipe to eliminate streaks and soap residue [51].
Specialized Cleaning Techniques
Different optical components require tailored techniques to mitigate specific risks of scratches or coating degradation.
Table 3: Specialized cleaning methods for specific optical components.
| Optical Component | Recommended Technique | Key Steps | Risk Mitigation |
|---|---|---|---|
| Mirrors (General) | Drag Method [51] | 1. Blow off dust with air.2. Saturate lens tissue with solvent.3. Slowly drag tissue across surface in one motion. | Prevents streaking by allowing uniform solvent evaporation. |
| Bare Metallic Mirrors | Prevention & Extreme Caution [51] | 1. Prioritize prevention of contamination.2. If cleaning is unavoidable, consult manufacturer and use minimal contact. | Dirt and fingerprints can cause permanent damage. Physical contact is high-risk. |
| Diffraction Gratings & Wire Grid Polarizers | Air Only [51] | 1. Use only compressed air or a dust blower.2. Avoid all direct contact. | Contact can damage the fine ruling. Ultrasonic cleaning may separate the grating from its substrate. |
| Micro Optics (<3mm diameter) | Brush Technique [12] | 1. Use delicate tweezers or a vacuum pick-up.2. Create a tiny "brush" with lens tissue.3. Wet brush with solvent, wipe slowly across optic. | Provides control for tiny, fragile components. Do not use ultrasonic cleaning [12]. |
| Pellicle Beamsplitters & Sensitive Coatings | Polymer Film Cleaner [12] | 1. Pour, brush, or spray polymer onto surface.2. Allow to dry into a film.3. Peel off film, encapsulating contaminants. | Provides a no-wipe, no-scratch clean for ultra-delicate surfaces. |
Best Practices for Handling and Storage
Proper handling and storage between experiments are essential for preventing the need for frequent cleaning and for protecting against physical damage.
- Wear Appropriate Gloves: Always wear powder-free, acetone-impenetrable gloves or finger cots. Human sweat is corrosive and can permanently stain optical coatings [51] [12].
- Handle by the Edges: Never touch the optical surface, even while wearing gloves. Handle components by their ground edges or non-optical surfaces [51].
- Use Non-Marring Tools: When handling optics, especially small ones, use vacuum pick-up tools or tweezers made of plastic, bamboo, or other non-marring materials. Never use metal tools directly on an optic [51].
- Clean Before Storage: Always ensure optics are clean and dry before storage to prevent stains from setting.
- Store Individually: Wrap each optic individually in clean, lint-free lens tissue and place it in a clean container. Never store unwrapped optics together, as contact will cause scratches and damage [51] [12].
- Avoid Blowing: Never blow on an optic to remove dust, as saliva particles can stain the surface. Similarly, avoid talking or chewing gum over uncovered optics [51].
In spectroscopic research, the quality of data is intrinsically linked to the care taken in maintaining optical components. Adherence to the principles outlined in these application notes—understanding solvent compatibility, employing the correct materials, following systematic protocols, and implementing careful handling—will significantly reduce the risk of accidental scratches, coating degradation, and solvent-related damage. By integrating these practices into standard laboratory procedure, researchers and drug development professionals can ensure the longevity of valuable optical components and the integrity of their scientific data.
In research involving spectrometer optics, the clarity of your data is directly dependent on the cleanliness of your optical components. Contaminants as small as a speck of dust or a single fingerprint can scatter light, absorb radiation, and introduce significant errors in spectroscopic measurements [52]. This application note details the critical protocols for optimizing your cleaning environment, selecting appropriate personal protective equipment, and employing proper wiping materials, all within the specific context of preparing and maintaining spectrometer optics for a research thesis on solvent efficacy.
The Critical Role of the Controlled Environment
Cleanroom Standards and Basic Setup
A controlled environment is the first line of defense against contamination. Cleanrooms are classified by the maximum number of particles per cubic meter of air, with common standards for optics work ranging from ISO Class 5 to ISO Class 8 [52]. The upcoming 2025 revision to the ISO 14644-5 standard for cleanroom operations formally integrates criteria for evaluating consumables like wipers and gloves, emphasizing their role in contamination control [53].
For many research settings, a full-scale cleanroom may not be feasible. However, a basic clean area can be established at the bench level using a laminar flow hood equipped with a HEPA (High-Efficiency Particulate Air) filter, which is ≥99.97% effective for particles 0.3 microns and larger [52]. This creates a localized, particle-free environment for handling and cleaning sensitive optics.
Essential Cleanroom Practices
Personnel are the largest source of contamination. Adherence to the following protocols is non-negotiable:
- Gowning: Wear dedicated lab coats, hairnets, and shoe covers [52].
- Gloving: Always wear appropriate gloves (see Section 3) [54].
- Behavior: Avoid quick movements, talking directly over components, and never blow on an optic to remove dust, as saliva can cause permanent staining [54] [52].
Selection and Use of Proper Gloves
The choice of gloves is critical to prevent transferring oils, salts, and particulates from hands to optical surfaces.
Powder-Free vs. Powdered Gloves
For cleaning spectrometer optics, powder-free gloves are mandatory. Powdered gloves, which are coated with cornstarch to ease donning, pose a significant contamination risk. The powder can become airborne, settle on optical surfaces, and act as an abrasive or a carrier for other contaminants [55] [56] [57]. Notably, the U.S. FDA has banned powdered gloves for medical use due to associated health risks, underscoring their incompatibility with critical, sensitive work [56] [57].
Table 1: Comparison of Powdered vs. Powder-Free Gloves
| Feature | Powdered Gloves | Powder-Free Gloves |
|---|---|---|
| Donning Ease | Easier due to powder lubricant [57] | May require more effort; aided by chlorination or polymer coatings [56] [57] |
| Contamination Risk | High; powder can carry contaminants [56] [57] | Low; no powder to become a contaminant [56] |
| Allergy Risk | Higher; powder can carry latex proteins [57] | Lower; eliminates powder-related risks [56] |
| Regulatory Status | Banned in medical use [56] [57] | Standard for medical and sensitive applications [56] |
| Suitability for Optics | Not Recommended | Essential |
Recommended Glove Materials
- Nitrile: The preferred choice for most optical cleaning procedures. Nitrile gloves offer excellent chemical resistance against common solvents like isopropyl alcohol and acetone, are durable, and are latex-free, minimizing allergy concerns [56].
- Latex: Offer good dexterity and tactile sensitivity but carry a risk of allergic reactions. If used, must be powder-free and changed frequently as they can degrade with exposure to certain solvents.
- Vinyl: A more economical option suitable for low-risk, brief handling tasks but generally offer less chemical resistance and durability [57].
Protocol: Safe Glove Handling
- Donning: Wash and dry hands thoroughly before donning gloves.
- Inspection: Inspect gloves for tears or holes.
- Handling: Handle optics only by the edges even while gloved [54].
- Changing: Change gloves immediately if they become contaminated, torn, or after handling non-cleanroom items.
Lint-Free Wipes: Materials and Applications
Using the correct wiper is essential to avoid scratching surfaces or leaving behind fibers and chemical residues.
Wiper Material Types and Properties
- Microfiber Polyester: Ultra-soft, non-abrasive, and lint-free. Ideal for critical cleaning of delicate surfaces like lenses, mirrors, and coated optics. Excellent for use with solvents and effective for final wiping to achieve a streak-free finish [58].
- Polyester-Cellulose Nonwoven (55/45 Blend): An economical and highly absorbent blend. Suitable for general surface cleaning, spill control, and removing excess materials like solder paste. Offers a good balance of absorbency and low particle release [59] [58].
- Knitted Polyester: Typically laundered and compatible with a wide range of chemicals. Known for durability and low linting, making them suitable for repeated use in cleanrooms [58].
Table 2: Selection Guide for Lint-Free Wipes
| Wiper Type | Key Features | Ideal Applications in Optics Cleaning |
|---|---|---|
| Microfiber Polyester | Non-abrasive, ultra-low lint, high absorbency, chemically compatible [58] | Critical cleaning of coated lenses, laser optics, mirrors, and sensors [58] |
| Polyester-Cellulose Blend | Economical, high absorbency, good dry/wet strength [59] [58] | Initial wiping to remove bulk contaminants, cleaning workstations, handling mechanical parts [59] |
| Knitted Polyester | Durable, low-lint, laundered for high purity [58] | General cleanroom use, repeated wiping tasks where durability is needed [58] |
All cleanroom wipes should be manufactured and packaged in a cleanroom (ideally ISO Class 4-5) and sealed in poly bags to maintain purity until use [58].
Integrated Cleaning Protocol for Spectrometer Optics
This step-by-step protocol integrates the use of a controlled environment, proper gloves, and lint-free wipes for cleaning spectrometer optics as part of a solvent study.
Workflow: Spectrometer Optics Cleaning
Pre-Cleaning Setup
- Environment Preparation: Turn on the laminar flow hood and allow it to purge for at least 15 minutes. Wipe down the work surface with 70% isopropyl alcohol and a cleanroom wiper.
- Personal Preparation: Don hairnet, lab coat, and powder-free nitrile gloves.
- Material Preparation: Unpack cleanroom wipes (microfiber recommended for critical optics) and solvents (e.g., reagent-grade IPA, acetone) and place them within the clean workspace.
Step-by-Step Cleaning Procedure
- Inspection: Examine the optical component under a bright light or a microscope (50-100x magnification) to identify the type and location of contaminants [52].
- Dry Cleaning (Particulate Removal): Use a stream of dry, filtered, oil-free air or nitrogen to dislodge and remove loose particulate matter. Hold the canister upright and use brief bursts. Alternatively, use a soft, clean brush made of camel hair or synthetic fibers for delicate dislodging [54] [52].
- Wet Cleaning (Residue Removal):
- The Drag Method: For flat or gently curved optics, place a few drops of the appropriate reagent-grade solvent on a folded cleanroom wipe. Gently drag the wet wipe across the optical surface in one continuous, straight line, applying light pressure. Use a fresh, dry area of the wipe for each pass. Repeat if necessary, always using a fresh wipe to avoid redepositing contamination [54].
- Swab Method: For small or hard-to-reach areas, saturate a cleanroom swab with solvent. Gently wipe the surface using a circular motion from the center outward, turning the swab to always present a clean surface.
- Drying: Immediately after solvent application, blot the surface dry with a fresh, dry corner of a cleanroom wiper or use a stream of dry nitrogen to prevent streak-forming residue [54] [52].
- Final Inspection: Re-inspect the optic under the microscope. If contaminants remain, repeat the dry and/or wet cleaning process. If the surface is clean, proceed to storage.
Post-Cleaning Storage
Store the cleaned optic in an individual, clean container with a desiccant to control humidity. Place the container in a dark, temperature-stable environment to prevent contamination and degradation [52].
The Scientist's Toolkit: Essential Research Reagents and Materials
Table 3: Essential Materials for Cleaning Spectrometer Optics
| Item | Function & Rationale |
|---|---|
| Powder-Free Nitrile Gloves | Provides a barrier against skin oils and salts without introducing powdered contaminants [56] [52]. |
| Microfiber Cleanroom Wipes | Lint-free and non-abrasive for physically removing contaminants without scratching sensitive optical surfaces and coatings [58]. |
| Reagent-Grade Isopropyl Alcohol (IPA) | Effectively dissolves many organic residues like fingerprints and oils; relatively safe for most optical materials [54]. |
| Reagent-Grade Acetone | Powerful solvent for removing stubborn oils, greases, and adhesive residues. Caution: Can damage plastics and some coatings [54]. |
| Deionized Water | Used to rinse away water-soluble contaminants and solvent residues; high purity prevents mineral deposits [54] [52]. |
| Filtered Compressed Air/Nitrogen | Removes loose abrasive particles without physical contact, preventing scratches. Also used for drying [54]. |
| Cleanroom Swabs | Allows for precise application of solvents to small or complex optical surfaces not easily accessed with wipes [54]. |
| HEPA-Filtered Laminar Flow Hood | Creates a localized ISO-class clean environment by providing a continuous stream of particulate-free air over the work zone [52]. |
Within spectroscopic research, the integrity of optical components is paramount. The pursuit of pristine optics must be balanced against the reality that improper or excessive cleaning can cause irreversible damage, compromising data quality and leading to costly replacements. This application note, framed within a broader thesis on solvent efficacy for spectrometer optics, provides a critical framework for researchers and drug development professionals. It details how to recognize the physical and chemical limits of cleaning procedures to prevent damage to sensitive, often irreplaceable, optical components. The guidelines herein synthesize established handling protocols with material science to define the point at which cleaning should stop and professional servicing or replacement should be considered.
The Optics Cleaning Dilemma: Purity vs. Preservation
The primary goal of cleaning is to remove contaminants such as dust, skin oils, and residues that increase scattered light, cause absorption, and create thermal hot spots that can permanently damage optical surfaces [5]. However, the cleaning process itself introduces risks. Abrasion from wipes, chemical etching from solvents, and physical stress can degrade delicate coatings and polished surfaces. For certain optics, including holographic gratings, ruled gratings, first-surface metallic mirrors, and pellicle beamsplitters, any physical contact is strongly discouraged, with blowing being the only approved cleaning method [5]. The decision to clean must therefore be an informed risk assessment, weighing the contamination against the potential for damage.
Critical Damage Mechanisms and Their Identification
Understanding how damage occurs is the first step in preventing it. The following mechanisms are the most common culprits.
Physical Damage from Abrasion and Handling
- Scratches: Caused by dragging hard, particulate contaminants across the surface with a wipe or using excessive pressure. Scratches permanently scatter light and reduce throughput.
- Digs (Pits): Small, localized fractures in the substrate or coating, often resulting from improper handling or impact with hard particles.
- Assessment: Inspect optics under a bright light, holding them to reflect light off the surface. Scratches and digs will appear as distinct, sharp features. Their size can be categorized using a scratch-dig paddle; if defects exceed the manufacturer's specification, the optic may need replacement [5].
Chemical Damage from Solvent Incompatibility
- Etching and Hazing: Results from using a solvent that chemically attacks the optical substrate or coating. This manifests as a permanent, cloudy appearance that severely scatters light.
- Coating Delamination: Certain solvents can degrade the adhesive layers of coatings, causing them to peel or blister.
- Assessment: After cleaning, inspect the optic for a milky film or cloudiness that does not wipe away. This indicates chemical degradation is irreversible.
Structural Damage to Sensitive Components
- Pellicle Membrane Rupture: The 2 μm thick nitrocellulose membrane in pellicle beamsplitters is extremely fragile and can be broken by the force of compressed air or any physical contact [5].
- Thermal Shock: Crystals such as calcite polarizers or lithium niobate wafers can crack if exposed to sudden temperature changes [5].
Decision Framework: Recognizing the Point of No Return
The following workflow provides a logical sequence for inspecting, cleaning, and, crucially, deciding when to stop. Adherence to this protocol minimizes the risk of causing catastrophic damage.
Pre-Cleaning Assessment Protocol
Objective: To determine the necessity and appropriate method for cleaning, thereby avoiding all unnecessary procedures.
Contamination Typing:
- Loose Particulates (Dust): Use bright, oblique-angle lighting to visualize particles. These are the easiest to remove and pose the lowest risk.
- Adhered Contaminants (Oil, Fingerprints): Appear as smudges or films. Require solvent and mechanical action, presenting a higher risk.
- Water Spots: Can leave mineral residues upon drying.
Optic Sensitivity Classification:
- High-Sensitivity: Holographic/ruled gratings, first-surface metallic mirrors, pellicle beamsplitters, calcite polarizers. These optics should only be cleaned using non-contact methods (blowing). Any other cleaning must be performed by a specialist [5].
- Medium-Sensitivity: Standard lenses, mirrors, and windows with robust coatings. Can tolerate careful solvent cleaning with appropriate wipes.
- Low-Sensitivity: Uncoated, durable substrates like some NIR windows. Tolerate more aggressive cleaning but are still susceptible to scratching.
The Cleaning Escalation Ladder and Stopping Points
Cleaning should always proceed from the least invasive to more invasive methods. The points below indicate when to stop the process.
- Stopping Point 1: After Non-Contact Cleaning. If blowing with inert gas or a blower bulb fails to remove the contamination, and the optic is classified as High-Sensitivity, STOP. Do not proceed to solvent or wiping methods [5].
- Stopping Point 2: After Two Careful Solvent Cleaning Attempts. For optics that can tolerate wiping, if two consecutive, careful cleaning attempts (e.g., using the "Drop and Drag" or "Applicator" method) fail to remove the contaminant, STOP. Further attempts are likely to grind in the contaminant or create scratches.
- Stopping Point 3: Upon Observation of New Defects. If, during post-cleaning inspection, you observe any new scratches, haze, clouding, or coating damage that was not present before, STOP IMMEDIATELY. The cleaning process is causing damage, and continuation will worsen it.
Essential Research Reagents and Materials
The following table details key materials used in the careful cleaning of optical components, as referenced in the protocols above.
Table 1: Research Reagent Solutions and Materials for Optics Cleaning
| Item | Function & Application Notes |
|---|---|
| Inert Dusting Gas / Blower Bulb | Removes loose particulate matter without contact. Essential first step for all optics. Prevents grinding particles during wiping [5] [21]. |
| Optical Grade Solvents (Acetone, Methanol, Isopropanol) | Dissolves organic contaminants like oils and adhesives. Use reagent grade or better to prevent residue. Always test solvent compatibility on a non-critical area first [5]. |
| Lens Tissue (e.g., Kimtech) | Low-lint, soft paper for delicate wiping. For "Drop and Drag" method. Use each sheet only once to avoid cross-contamination [5] [21]. |
| Pure Cotton Wipes (e.g., Webril) | Softer, more absorbent alternative to lens tissue. Holds solvent well and is less likely to fall apart during cleaning [5]. |
| Cotton-Tipped Applicators / Cleaning Swabs (e.g., Texwipe) | Allow precise application of solvent to small or mounted optics. The swab tip should be dragged or rolled across the surface without excessive pressure [5] [21]. |
| Powder-Free Nitrile Gloves | Mandatory for handling all optics. Prevents transfer of skin oils and salts to optical surfaces [5] [21]. |
| Anti-Static Tweezers | For safely manipulating small optics without touching optical surfaces, reducing the need for cleaning [5]. |
Quantitative Data: Solvent and Material Compatibility
Selecting the correct solvent is a critical part of the thesis on solvent efficacy. Using an incompatible chemical can instantly and irreversibly damage an optic. The following table provides a safety matrix for common optical materials against standard cleaning solvents.
Table 2: Chemical Compatibility Guide for Optical Materials. (+: Stable, –: Not Recommended)
| Optical Material | Acetone | Methanol | Isopropanol | 10% HCl | 10% NaOH | Key Risk & Stopping Cue |
|---|---|---|---|---|---|---|
| Fused Silica (Quartz) | + [60] | + [60] | + [60] | + [60] | + (Short-term) [60] | STOP if exposed to HF. Etched by hot, concentrated bases [60]. |
| Borosilicate (Optical Glass) | + | + | + | + | – | STOP if exposed to strong bases; surface becomes white and rough [60]. |
| Calcite Polarizers | – | – | – | – | – | Extreme Sensitivity. Avoid all solvents and contact. Clean only with gentle blowing [5]. |
| First-Surface Al Mirror | + (Careful) | + (Careful) | + (Careful) | – | – | Soft Coating. Solvent use is risky; mechanical wiping can scratch. STOP if coating appears smeared. |
| Anti-Reflection Coating (MgF₂) | + | + | + | – | – | STOP immediately if haziness or peeling appears after solvent contact. |
The most skilled researcher knows not just how to clean, but when not to. Adhering to the "least invasive method first" principle and rigorously following the stopping points outlined in this document will preserve the lifespan and performance of critical spectroscopic optics. The ultimate best practice is proactive prevention: implementing proper handling with gloves and tweezers, storing optics in a clean, controlled environment in protective packaging, and inspecting them regularly to address contamination before it becomes severe [5] [21]. By integrating these protocols, the scientific community can maintain the highest data integrity while safeguarding valuable optical assets.
Ensuring Success: Validating Cleaning Efficacy and Comparing Solvent Performance
Within the broader research on solvents for cleaning spectrometer optics, the verification of cleaning efficacy is as critical as the cleaning process itself. Post-cleaning inspection protocols ensure that optical surfaces are free from contaminants and defects that can compromise data integrity. For researchers and drug development professionals, this is paramount; even minor residual contaminants can cause light scatter or absorption, leading to inaccurate spectrophotometric readings that jeopardize experimental validity and regulatory compliance [5] [61]. This document details standardized application notes and protocols for verifying the cleanliness of spectrometer optics using bright light and magnification, providing a essential quality control framework for scientific research.
The Critical Role of Inspection in Spectrophotometer Maintenance
Regular calibration and validation are foundational for ensuring spectrophotometer accuracy, traceability, and compliance with quality systems like ISO standards [61]. However, the instrument's performance is contingent upon the pristine condition of its optical components. Contaminants such as dust, skin oils, and residual solvents increase scatter off optical surfaces and absorb incident radiation. This can create localized hot spots, resulting in permanent damage to delicate coatings and the optical substrate itself [5]. A rigorous post-cleaning inspection protocol is therefore a necessary prerequisite to analytical instrument qualification (AIQ) and system validation, forming the first line of defense against measurement errors and instrumental drift [62] [61].
Core Principles of Optical Inspection
Visual inspection, when enhanced with appropriate tools and techniques, is a powerful non-destructive method for assessing surface cleanliness. The core principle involves manipulating light and perspective to make minute contaminants and defects visible.
Optical Phenomena in Inspection
The inspection process leverages how light interacts with a surface. Under direct, perpendicular illumination, a flawless surface reflects light uniformly back to the observer, creating a bright, uniform background. When light encounters defects like scratches, particles, or residues, it scatters, absorbs, or is redirected. These flaws appear as dark spots or areas of contrast variation against the bright background, making them detectable [63].
Inspection Angles for Different Surface Types
The inspection angle is critical and depends on whether the surface is reflective or transmissive.
- For Reflective Surfaces (e.g., mirrors, reflective coatings): The optic should be held nearly parallel to the line of sight. By looking across the surface rather than directly at it, the observer sees contamination and not reflections of the surrounding environment [5].
- For Transmissive Surfaces (e.g., lenses, windows): Polished surfaces should be held perpendicular to the line of sight so that one can look through the optic. Contaminants will appear as dark specks or smears in the field of view [5].
Equipment and Research Reagent Solutions
A successful inspection protocol requires a basic toolkit of clean, dedicated materials. The following table details essential items and their functions.
Table 1: Key Research Reagents and Equipment for Post-Cleaning Inspection
| Item | Function & Rationale |
|---|---|
| Bright Light Source | Provides high-intensity, cool (LED preferred) illumination. Essential for creating sufficient contrast to reveal subtle contaminants and micro-scratches [5] [63]. |
| Magnification Device | A microscope or magnifying loupe (typically 5x to 100x) is necessary to resolve contaminants and defects smaller than the human eye can see [5]. |
| Lint-Free Gloves | Powder-free nitrile or cotton gloves prevent the transfer of skin oils and particulates to the optical surface during handling and inspection [5] [61]. |
| Compressed Gas Duster | A canister of inert dusting gas or a blower bulb removes loose dust prior to close inspection without contacting the surface [5]. |
| Scratch-Dig Paddle | A calibrated reference tool categorizes the size of any identified surface defects by comparing them to standardized scratches and digs (pitches) [5]. |
Detailed Post-Cleaning Inspection Protocol
Pre-Inspection Handling and Preparation
- Environment: Unpack and inspect optics in a clean, temperature-controlled, and low-humidity environment to prevent new contamination [5].
- Handling: Always wear lint-free gloves. Handle optics only by their ground edges. Never touch the optical surface with hands or instruments, as certain coatings (e.g., unprotected metallic mirrors, pellicle beamsplitters) are permanently damaged by physical contact [5].
- Initial Blow-off: Use a canister of inert gas or a blower bulb to remove loose particulate matter. Hold the can upright and use short blasts from approximately 6 inches (15 cm) away at a grazing angle to the surface. Do not use breath from your mouth, as saliva may be deposited [5].
Inspection Procedure Workflow
The following diagram illustrates the sequential workflow for the post-cleaning inspection protocol.
Quantitative Defect Characterization
If a surface defect is located, a scratch-dig paddle is used to categorize its size. This allows for objective assessment against the manufacturer's scratch-dig specification, determining if the optic needs replacement to achieve desired performance [5].
Table 2: Defect Categorization and Acceptance Criteria
| Defect Type | Description | Measurement Method | Typical Acceptance Threshold (Example) |
|---|---|---|---|
| Scratch | A linear surface flaw. | Width is compared to calibrated scratch widths on a scratch-dig paddle under magnification. | Scratch # < 80 (e.g., a #60 scratch is 60 millionths of an inch, or ~1.5 µm, wide) [5]. |
| Dig | A small, pit-like flaw. | Diameter is compared to calibrated dig diameters on a scratch-dig paddle. | Dig # < 50 (e.g., a #50 dig is 500 millionths of an inch, or ~12.5 µm, in diameter) [5]. |
| Contamination | Residual films or particles. | Assessed visually and via light scatter. No visible residue or particles under bright light and magnification. | Surface must be free of visible contaminants after cleaning [5]. |
Integration with Broader Spectrometer Solvent Research
The post-cleaning inspection protocol is not a standalone activity but a critical feedback mechanism within a larger research framework. It provides the quantitative and qualitative data needed to validate the efficacy of different solvent systems, from traditional organic solvents like acetone and isopropyl alcohol to emerging environmentally friendly cleaning agents [47].
The Experimental Validation Workflow
The diagram below illustrates how post-cleaning inspection integrates into a broader experimental workflow for evaluating cleaning solvents.
This integrated approach allows researchers to move beyond simple cleanliness observations to correlating specific solvent cleaning outcomes with hard performance metrics, such as photometric accuracy and stray light levels in the spectrophotometer [47] [61]. This闭环 (closed-loop) process is essential for developing robust, evidence-based cleaning procedures that ensure data integrity in drug development and scientific research.
This application note establishes a rigorous protocol for validating the cleanliness of spectrometer optics by quantitatively correlating cleaning efficacy with instrumental baseline stability. Contaminated optics can introduce significant measurement error, compromising data integrity in critical applications such as pharmaceutical development. Within the broader context of research on optimized cleaning solvents, this document provides detailed methodologies for applying controlled contamination, performing cleaning procedures, and measuring subsequent spectrometer performance. The protocols leverage baseline stability and signal-to-noise ratio as key performance indicators (KPIs), enabling scientists to objectively validate cleaning methods and ensure analytical accuracy.
In ultraviolet-visible (UV-Vis) spectrophotometry, the baseline stability is a critical performance metric indicating the instrument's photometric and wavelength reliability over time. Contamination of optical components—such as lenses, mirrors, and gratings—by dust, moisture, or organic residues is a primary factor degrading baseline performance. These contaminants scatter and absorb incident light, leading to increased noise, drift, and stray light, which subsequently distort sample absorbance measurements [64] [65]. In regulated environments like drug development, where method validation is paramount, establishing a quantitative link between optic cleanliness and baseline stability is essential for ensuring data quality and compliance [66].
This work frames the cleaning validation within a systematic study of cleaning solvents and techniques. The objective is to provide a standardized experimental protocol that can determine the effectiveness of a chosen solvent or cleaning method by measuring its direct impact on restoring the spectrometer's baseline to its optimal, pristine state.
Theoretical Background: Baseline Stability as a Performance Indicator
Baseline stability reflects the instrument's ability to maintain a flat and stable baseline signal when no sample is present. According to instrument validation guidelines, key performance parameters include [64] [65]:
- Noise Level: The maximum deviation of the absorbance measured over a specific time (e.g., one minute) at a defined wavelength. A high noise level indicates poor signal reproducibility, often linked to a deteriorating light source or contaminated optics.
- Baseline Flatness: The deviation of the baseline from a straight line across a specified wavelength range.
- Stray Light: Light outside the specified wavelength band that reaches the detector, causing significant measurement errors, especially at high absorbance values. Stray light can be exacerbated by light scattering from particulate contamination on optical surfaces.
A clean optical system is fundamental to achieving the low noise and high stability required for sensitive quantitative analyses.
Experimental Protocols
The following sections detail the protocols for instrument qualification, controlled contamination, cleaning procedures, and post-cleaning validation.
Pre-Experimental Instrument Qualification
Before initiating cleaning validation, confirm the spectrometer's baseline performance meets manufacturer specifications using the following steps [64] [66]:
- Warm-up: Power on the instrument and allow it to stabilize for at least 60 minutes.
- Baseline Recording: With an empty sample compartment, scan the baseline across the required wavelength range (e.g., 200-800 nm). Use the instrument's built-in baseline correction memory to store this reference.
- Performance Verification:
- Noise Level: Measure the absorbance at a specific wavelength (e.g., 500 nm) near 0 Abs for 1 minute. Record the maximum peak-to-trough deviation.
- Stray Light: Use a certified cutoff filter (e.g., a sodium iodide solution for 220 nm) and measure the apparent transmittance. The stray light value is defined as the difference between this reading and the reading from a completely shuttered beam [64].
- Photometric Accuracy: Measure a standard solution with known absorbance (e.g., 0.050 g/L K₂Cr₂O₇ in 0.01 N H₂SO₄ at 257 nm) and compare the reading to the certified value [66].
Table 1: Acceptance Criteria for Spectrometer Baseline Performance Qualification
| Performance Parameter | Recommended Acceptance Criteria | Test Method |
|---|---|---|
| Wavelength Accuracy | ≤ ±0.5 nm | Measure emission lines of a deuterium lamp (e.g., 656.1 nm) [64] |
| Photometric Accuracy | ≤ ±0.010 Abs | Measure a potassium dichromate standard solution [66] |
| Noise Level | ≤ 0.001 Abs (at 500 nm) | Measure max peak-to-trough deviation over 1 min at ~0 Abs [64] |
| Stray Light | < 0.1% T | Measure with a certified cutoff filter (e.g., NaI at 220 nm) [64] |
| Baseline Flatness | ≤ ±0.001 Abs (200-800 nm) | Scan baseline across the entire wavelength range |
Protocol for Simulating Organic Contamination
To standardize testing, a controlled contamination layer is applied to a representative optical element (e.g., a removable mirror or a calibration cuvette window).
Materials:
- Test solvent (e.g., analytical grade hexane, isopropanol)
- Contaminant solution (e.g., 1% v/v squalene in hexane to simulate fingerprint oils, or a vacuum pump oil fraction to simulate system contamination)
- Clean, lint-free swabs (e.g., cellulose or microfiber)
- Nitrogen gun (dry, oil-free)
Procedure:
- Clean the test optic with a sequence of pure solvents (e.g., hexane followed by isopropanol) and dry with a nitrogen gun. Verify a pristine surface by confirming the absence of residues via visual inspection under bright light.
- Qualify the spectrometer's baseline stability with the clean optic installed (
Pristine_Baseline). - Apply 10 µL of the contaminant solution uniformly across the optical surface using a micropipette.
- Allow the solvent to evaporate completely, leaving a thin, uniform film of non-volatile residue.
Protocol for Cleaning and In-Situ Validation
This protocol evaluates the effectiveness of a test cleaning solvent or method.
Materials:
- Low-lint, cleanroom wipes (e.g., Whatman Lens Cleaning Tissue)
- Candidate cleaning solvents (for evaluation; e.g., HPLC-grade water, isopropanol, specialized optical coatings-safe solvent)
- Nitrogen gun
Procedure:
- Initial Contaminated Measurement: Install the contaminated optic and record the baseline (
Contaminated_Baseline). Note the increase in noise and drift. - Cleaning Procedure: a. Apply the test cleaning solvent generously to a cleanroom wipe. Do not spray solvent directly onto the optic. b. Wipe the optical surface gently using a circular motion, starting from the center and moving outwards. c. Use a dry part of a fresh wipe to remove excess solvent, again using a gentle circular motion. d. Use an oil-free nitrogen gun to blow off any remaining lint or droplets.
- Post-Cleaning Validation: Reinstall the optic and immediately record the post-cleaning baseline (
Cleaned_Baseline). - Data Analysis: Calculate the recovery of baseline stability by comparing the noise level and baseline flatness of the
Cleaned_Baselineto thePristine_BaselineandContaminated_Baseline.
Advanced In-Situ Cleaning Validation Method
For critical applications or integrated systems, a mid-IR fiber optic probe with grazing-angle reflectance can be employed for direct, in-situ monitoring of surface contamination without disassembly, providing a solvent-free validation method [67].
Data Analysis and Correlation
The core of this validation is the quantitative correlation between cleaning and the restoration of baseline performance.
Key Performance Indicators (KPIs)
- Noise Level (ΔA): Calculated as described in Section 3.1.
- Baseline Drift (ΔA/min): The change in absorbance at a fixed wavelength over time.
- Signal-to-Noise Ratio (S/N): Often calculated as
(2 × Height of Signal) / Peak-to-Peak Noisein a specified region.
Quantitative Data Presentation
Data from a simulated experiment, inspired by low-pressure plasma cleaning studies [68], is summarized below to illustrate the correlation.
Table 2: Quantitative Correlation of Optic Cleanliness with Spectrometer Baseline Performance
| Optical Surface Condition | Noise Level (Abs, at 500 nm) | Baseline Drift (Abs/min, at 250 nm) | Stray Light (% T, at 220 nm) | Calculated S/N Ratio |
|---|---|---|---|---|
| Pristine (Pre-Contamination) | 0.0005 | 0.0008 | 0.03 | 4000 : 1 |
| Contaminated (Oil Film) | 0.0042 | 0.0120 | 0.25 | 476 : 1 |
| Post-Solvent A Cleaning | 0.0010 | 0.0020 | 0.06 | 2000 : 1 |
| Post-Solvent B Cleaning | 0.0006 | 0.0010 | 0.04 | 3333 : 1 |
Analysis: The data demonstrates that effective cleaning (Solvent B) can nearly restore the baseline performance to its pristine state, directly validating its cleaning efficacy. Ineffective cleaning (Solvent A) leaves residual contamination, resulting in higher noise and drift.
The Scientist's Toolkit
Table 3: Essential Research Reagents and Materials for Cleaning Validation
| Item | Function / Rationale |
|---|---|
| Certified Wavelength Standards (e.g., Holmium Oxide filter, Deuterium Lamp) | To verify wavelength accuracy before and after cleaning; ensures spectral data integrity [64]. |
| Certified Photometric Standards (e.g., Potassium Dichromate solution) | To validate the accuracy of absorbance measurements post-cleaning [66]. |
| Stray Light Reference Filters (e.g., Sodium Iodide or Potassium Chloride solutions) | To quantify levels of stray light, which is highly sensitive to scattered light from contaminated surfaces [64]. |
| High-Purity, Low-Residue Solvents (e.g., HPLC-grade Isopropanol, Acetone) | To dissolve organic contaminants without leaving interfering residues on optical surfaces. |
| Low-Lint, Cleanroom Wipes (e.g., Lens Cleaning Tissue) | To physically remove contaminants without scratching delicate optical coatings or leaving fibers. |
| Compressed Gas Duster (Oil-Free, Moisture-Free Nitrogen) | To remove loose particulate matter and dry solvent-wetted surfaces without contact. |
Experimental Workflow and Data Correlation
The following diagram illustrates the logical workflow of the cleaning validation protocol and the relationship between its key stages.
This application note provides a standardized, quantitative framework for validating spectrometer optic cleanliness by directly correlating it with the critical performance metric of baseline stability. The outlined protocols for qualification, contamination, cleaning, and analysis enable researchers to objectively compare and select optimal cleaning solvents and methods. Integrating this validation process into routine instrument maintenance ensures data integrity, supports regulatory compliance, and is a foundational practice within a comprehensive research program on spectroscopic solvent science.
In the realm of spectroscopic analysis, the cleanliness of optical components is paramount to data integrity and instrument performance. Solvents are critical reagents for maintaining and restoring optical clarity, yet their selection requires a precise balance of efficacy, material compatibility, and safety. Residues on lenses, mirrors, and windows can cause significant scattering, absorption, and anomalous results, directly impacting research outcomes in drug development and analytical science. This guide provides a systematic framework for selecting solvents based on their physicochemical properties, tailored specifically for the delicate task of cleaning spectrometer optics. The protocols and data presented herein are designed to empower researchers with the knowledge to make informed decisions that protect both their equipment and their well-being, framed within the context of modern green chemistry principles and updated safety regulations [69] [70].
Solvent Fundamentals: Properties and Selection Criteria
Key Physicochemical Properties
Understanding the properties that dictate a solvent's cleaning performance and safety is the first step in the selection process.
- Polarity: Governs the ability to dissolve polar contaminants (e.g., salts, polar organics). The principle of "like dissolves like" is fundamental; polar solvents are best for polar substances, while non-polar solvents are ideal for oils and greases [70] [71].
- Volatility: Indicated by boiling point, volatility affects evaporation rate. Fast-evaporating solvents minimize dripping and drying time but can cause cooling condensation on optics if used excessively [70].
- Purity: HPLC or spectroscopic grade solvents are mandatory to prevent the deposition of trace impurities that can form films on optical surfaces. Impurities can cause ghost peaks, increased background noise, and reduced sensitivity in spectroscopic measurements [70] [71].
- UV Cut-Off: The wavelength below which the solvent itself absorbs UV light significantly. For optics in UV spectrometers, solvents with a high UV cut-off (e.g., >250 nm) are unsuitable for final rinsing as they can leave a film that interferes with analysis [71].
Safety and Environmental Considerations
The 2025 updates to the Globally Harmonized System (GHS) and OSHA's Hazard Communication Standard (HCS) have heightened requirements for hazard classification, labeling, and Safety Data Sheets (SDSs) [72] [73]. Key updates include:
- Stricter SDS Timelines: SDSs must be revised within 90 days of new hazard information [72].
- Enhanced Labeling: Labels, including those on small containers (≤100 ml), must now include pictograms, signal words, and manufacturer information [73].
- Toxicity and Exposure Limits: Permissible Exposure Limits (PELs) and toxicity profiles (e.g., carcinogenicity) must be reviewed prior to use [74]. A shift towards green solvents—characterized by low toxicity, biodegradability, and sustainable manufacture—is encouraged to reduce environmental impact and meet stringent occupational safety regulations [69].
Comprehensive Solvent Comparison Table
The following table summarizes critical properties, uses, and safety information for solvents commonly employed in optics cleaning. This data serves as a primary reference for initial solvent screening.
Table: Detailed Properties and Safety Profiles of Common Optics Cleaning Solvents
| Solvent | Boiling Point (°C) | Polarity | UV Cut-Off (nm) | Common Grade | Key Uses & Strengths | Flammability (Class) | OSHA PEL (ppm) | Primary Health & Safety Risks |
|---|---|---|---|---|---|---|---|---|
| Acetone | 56 [74] | Moderate | 330 [71] | HPLC | Rapid dissolution of resins, plastics; fast evaporation [75] | High (IB) [74] | 1000 [74] | Flammable, skin irritant, can damage plastic optics [75] |
| Isopropanol (IPA) | 82 [74] | Moderate | 205 [71] | Spectroscopic | General purpose grease removal; safe for most coatings [70] | High (IB) [74] | 400 [74] | Flammable, moderately toxic [76] |
| Methanol | 65 [74] | Polar | 205 [71] | HPLC | Cleaning stubborn polar contaminants [70] | High (IB) [74] | 200 [74] | Flammable, toxic (nerve damage, blindness) [76] |
| Ethanol | 78 [74] | Polar | 210 [71] | Spectroscopic | General cleaning; less toxic alternative to methanol [76] | High (IB) [74] | 1000 [74] | Flammable [75] |
| n-Hexane | 69 [74] | Non-Polar | 200 [71] | HPLC | Removing non-polar oils, waxes, adhesives [75] [70] | High (IB) [74] | 500 [74] | Flammable, neurotoxic [76] |
| Ethyl Acetate | 77 [74] | Moderate | 255 [71] | HPLC | Dissolving many organic compounds [70] | High (IB) [74] | 400 [74] | Flammable, irritant [75] |
| D-Limonene | ~175-176 [69] | Non-Polar | N/A | Technical | Bio-based, green degreaser [69] [75] | Combustible [75] | N/A | Low acute toxicity, can cause skin irritation [75] |
Experimental Protocols for Optics Cleaning and Solvent Evaluation
Standard Operating Procedure: Precision Cleaning of Spectrometer Optics
Principle: This protocol outlines a safe, effective, and reproducible method for manually cleaning optical surfaces to prevent damage and avoid the introduction of artifacts.
Materials and Reagents:
- Solvents: Selected from the comparison table (e.g., HPLC Grade Acetone, Isopropanol).
- Wipers: Lint-free wipers or swabs (e.g., cellulose, microfiber).
- Personal Protective Equipment (PPE): Nitrile gloves, safety goggles, lab coat.
- Other: Dry, filtered air or nitrogen gas pistol.
Procedure:
- Preparation: Don appropriate PPE. Work in a clean, well-ventilated area, preferably a fume hood. Prepare all materials before starting [75] [74].
- Initial Inspection & Dry Cleaning: Inspect the optical surface under a bright light. Use dry, filtered air or nitrogen to remove loose particulate matter. Do not touch the optical surface with bare hands.
- Solvent Application:
- Apply a minimal amount of the primary solvent to a fresh, lint-free wiper. Do not pour solvent directly onto the optic.
- Using very light pressure, wipe the surface in a straight line. Turn the wiper to a clean area and make another pass, overlapping slightly. Continue with a "cross-hatch" pattern to ensure full coverage.
- Final Rinse (if required):
- For a streak-free finish, use a second, high-purity solvent (e.g., IPA) as a final rinse. Apply with a fresh wiper using the same technique.
- This step helps to remove any residual film left by the first solvent.
- Drying: Allow the solvent to evaporate completely. Avoid blowing breath on the optic. The surface can be gently flushed with dry, filtered air to accelerate drying.
Notes:
- Always test a cleaning procedure on a non-critical area or a representative sample first.
- Use a new wiper/swab for each cleaning session to prevent contamination from previously removed debris.
- Consult the optic manufacturer's guidelines for specific material compatibility warnings.
Protocol: Solvent Compatibility and Residue Testing
Principle: This test evaluates a solvent's suitability for a specific optical coating or substrate and checks for non-volatile residue that could form a film.
Workflow: The following diagram illustrates the logical workflow for evaluating a solvent for optics cleaning.
The Scientist's Toolkit: Essential Research Reagent Solutions
Table: Essential Materials for Optics Cleaning and Solvent Handling
| Item | Function & Explanation |
|---|---|
| HPLC/Spectroscopic Grade Solvents | High-purity solvents minimize the risk of introducing trace impurities that can form films on optical surfaces during evaporation [70] [71]. |
| Lint-Free Wipers/Swabs | Made from cellulose or microfiber, they provide a non-abrasive, low-lint physical medium for applying solvent and removing contamination without scratching delicate surfaces. |
| Safety Data Sheet (SDS) | A mandatory, standardized document providing detailed hazard, handling, first-aid, and disposal information. Must be readily accessible and reviewed in light of 2025 GHS updates [72] [77]. |
| Personal Protective Equipment (PPE) | Nitrile gloves, safety goggles, and a lab coat are essential for protecting against splashes and inhalation risks during solvent handling [75]. |
| Fume Hood | A ventilated enclosure is critical for preventing the buildup of flammable or toxic vapors, protecting the user and ensuring a clean, vapor-free environment for the optic [75]. |
| Chemical Waste Container | A dedicated, properly labeled container with a secure lid for collecting used solvent and wipers, ensuring compliant hazardous waste disposal [75]. |
Regulatory and Safety Compliance
Adherence to updated regulatory frameworks is not optional. Employers must provide training on revised SDSs and labels, and maintain accurate chemical inventories [72] [73]. For any solvent, the corresponding SDS is the primary source for hazard information, and it must be reviewed before work commences. Key regulatory milestones include:
- January 19, 2026: Deadline for manufacturers to update SDSs and labels for chemical substances [73].
- July 19, 2026: Deadline for employers to update workplace labels and training for substances [73].
Integrating green solvents like bio-based D-limonene or ethanol into laboratory protocols can reduce toxicity, waste disposal costs, and environmental footprint, aligning with the principles of green chemistry and modern regulatory trends [69] [75].
Within the context of spectrometer maintenance and the broader research on solvents for cleaning optics, selecting an inappropriate cleaning solvent can lead to irreversible damage, degraded performance, and costly replacements. The performance and longevity of optical components in spectrometers are critically dependent on their material composition and the corresponding cleaning protocols. Contaminants such as dust, oils, and chemical residues can cause significant light scattering, absorption, and inaccurate spectroscopic readings, compromising data integrity in research and drug development. This application note provides a detailed guide on the material properties of common optical substrates and the corresponding, validated cleaning methodologies to ensure optimal performance and longevity.
Material Properties and Solvent Compatibility
The chemical and physical resistance of an optical material dictates the range of solvents and cleaning techniques that can be safely employed. Using an incompatible solvent can etch surfaces, degrade coatings, or leave behind residues.
Quartz and Fused Silica
Quartz glass and fused silica are amorphous forms of silicon dioxide (SiO₂) known for high purity and excellent transmission from the deep ultraviolet (DUV) to the infrared (IR) regions [78] [79]. They exhibit exceptional chemical strength, with high resistance to water and nearly all acids, with the critical exception of hydrofluoric acid (HF) and phosphoric acid, which will attack the silica network [78] [79]. These materials can routinely withstand high temperatures, making them suitable for demanding applications [78].
- Compatible Solvents: Acetone, methanol, isopropanol [21] [5]; Nitric acid (HNO₃) for deep cleaning [80]; Hydrogen peroxide (H₂O₂) for organic residues [80]; Deionized water for rinsing [80].
- Incompatible/High-Risk Substances: Hydrofluoric acid (HF) and phosphoric acid cause severe etching [79] [80]; Strong alkalis (e.g., sodium hydroxide) can also etch the surface [80].
Optical Glass (Borosilicate and others)
While "optical glass" encompasses many types, borosilicate glass (e.g., BOROFLOAT) is a common representative for many lenses and windows [79]. It generally offers good chemical durability but is less resistant than fused silica, particularly to alkaline solutions.
- Compatible Solvents: Mild detergents with distilled water [5]; Isopropyl alcohol [5]; Acetone is often used with caution, though compatibility should be verified for specific glass types.
- Incompatible/High-Risk Substances: Strong acids and alkalis can cause surface damage or leaching.
Coated Optics
Coated optics include substrates (which could be glass or quartz) with thin-film layers, such as ITO (Indium Tin Oxide), or delicate metallic coatings. The cleaning process must consider both the substrate and the coating.
- ITO-Coated Quartz Glass: Can be cleaned with isopropyl alcohol [81]. It is crucial to avoid acidic substances and alkali solutions (e.g., sodium hydroxide), as these will damage the ITO coating [81].
- Unprotected Metallic Mirrors, Holographic Gratings, Pellicles: These are extremely sensitive. For many, the only approved cleaning method is blowing off loose particles with inert gas [5]. Physical contact with wipes or solvents is likely to cause permanent damage [5].
Table 1: Solvent Compatibility Guide for Common Optical Materials
| Optical Material | Compatible Solvents & Procedures | Incompatible/High-Risk Substances | Key Mechanical Considerations |
|---|---|---|---|
| Quartz / Fused Silica | Acetone, Methanol, Isopropanol [21] [5]; Nitric Acid (for deep cleaning) [80]; Deionized Water [80] | Hydrofluoric Acid (HF), Phosphoric Acid [79]; Strong Alkalis (e.g., NaOH) [80] | High scratch resistance and hardness [78]. Standard wiping techniques are generally safe. |
| Optical Glass (e.g., Borosilicate) | Mild detergent & distilled water [5]; Isopropyl Alcohol [5] | Strong Acids; Strong Alkalis | Softer than quartz; use care to avoid scratching. |
| ITO-Coated Optics | Isopropyl Alcohol (use lint-free wipes) [81] | Acidic substances; Alkali solutions (e.g., NaOH) [81] | The conductive coating is fragile and can be scratched. |
| Delicate Coatings (Unprotected Metal, Gratings) | Inert gas or blower bulb only [5] | Most solvents; Any physical contact | Extremely sensitive. Never wipe the surface [5]. |
Experimental Protocols for Cleaning and Validation
A systematic, multi-step approach is essential to effectively remove contaminants without damaging the optical surface. The following protocols are adapted from industry best practices [21] [5] [80].
Preliminary Inspection and Dry Cleaning
Purpose: To assess contamination levels and remove loose, dry particulates without contacting the surface. Methodology:
- Inspect the optic under a high-intensity lamp, holding it to maximize reflections and reveal contaminants [21] [5].
- Blow Off Dust: Using a canister of inert dusting gas or a blower bulb, direct short blasts across the optical surface at a grazing angle from a distance of roughly 15 cm. Trace a figure-eight pattern for large optics [5].
- Do not use your mouth to blow, as saliva may contaminate the surface [5].
Solvent Cleaning Techniques
Purpose: To dissolve and remove organic residues and adhered contaminants. Methodology: Select a technique based on the optic's geometry and mounting.
Drop and Drag (for flat, unmounted optics) [21] [5]:
- Place the optic on a clean, stable surface.
- Hold a fresh sheet of lens tissue above the surface.
- Apply one or two drops of an approved solvent (e.g., acetone) to the tissue.
- Slowly and steadily drag the damp tissue across the optic, lifting contaminants away.
- Use a fresh tissue for each drag.
Lens Tissue with Forceps or Swab (for mounted or curved optics) [21] [5]:
- Fold a lens tissue and clamp it with forceps, or use a pre-made cleaning swab.
- Apply a few drops of solvent to the tip—it should be damp, not dripping.
- Wipe the optical surface in a smooth, continuous motion while slowly rotating the swab to present a clean surface.
- For curved surfaces, a spiral or snaking wipe path is effective.
Immersion and Ultrasonic Cleaning [21] [80]:
- For heavy contamination or multiple components, immerse the optic in a bath of compatible solvent (e.g., nitric acid or hydrogen peroxide for quartz, following strict safety protocols) [80].
- An ultrasonic bath can be used for particulate removal, with the choice of frequency (40–80 kHz) and power tailored to the component [80].
Quality Assurance and Contamination Testing
Purpose: To validate the cleaning process and ensure the surface meets required specifications. Methodology:
- Surface Inspection: Re-inspect the optic visually under bright light and, if available, UV light to check for residues or streaks [80].
- Trace Contamination Testing: For critical applications, use analytical techniques such as Total Organic Carbon (TOC) analysis or Fourier Transform Infrared Spectroscopy (FTIR) to detect residual contaminants at the molecular level [80].
- Documentation: Maintain detailed cleaning logs with records of solvents used, techniques applied, and inspection results for full traceability [80].
Workflow and Decision Pathways
The following diagram illustrates the logical decision process for selecting the appropriate cleaning method based on the optical material and the type of contamination.
Cleaning Method Decision Workflow
The Scientist's Toolkit: Essential Research Reagents and Materials
A properly equipped lab is fundamental to executing the protocols outlined in this document. The following table details key materials and their functions in the cleaning and validation process.
Table 2: Essential Materials for Optical Cleaning
| Item | Function & Application Notes |
|---|---|
| Lint-Free Wipes (Pure Cotton, Lens Tissue) | Soft, non-abrasive physical medium for applying solvents and lifting contaminants [21] [5]. |
| Cotton-Tipped Applicators | For precision cleaning of small or hard-to-reach areas on optics [21]. |
| Optical Grade Solvents (Acetone, Methanol, Isopropanol) | High-purity solvents for dissolving organic contaminants without leaving residues [21] [5]. |
| Inert Dusting Gas / Blower Bulb | For non-contact removal of loose particulates; critical for delicate coatings [5]. |
| Deionized Water | Final rinse to remove any traces of cleaning solvents and prevent streaking [80]. |
| Nitric Acid (HNO₃) | Strong oxidizing agent for deep cleaning and removing inorganic residues from quartz [80]. |
| Personal Protective Equipment (PPE) | Nitrile gloves, safety goggles, and lab coat are mandatory for handling chemicals [80]. |
| Fume Hood | Provides necessary ventilation for safe handling of volatile and hazardous solvents and acids [80]. |
Within research and drug development, the integrity of analytical data is paramount. Spectrometer performance, critical for accurate results, can be significantly compromised by contaminated optics, leading to signal scatter, absorption, and unreliable data [5]. The choice of cleaning solvents is a fundamental, yet often underestimated, aspect of laboratory protocol. This application note provides a structured, data-driven framework for evaluating the cost-benefit relationship of using high-purity Reagent Grade solvents for cleaning spectrometer optics against lower-grade, less expensive alternatives. By quantifying the risks of contamination and establishing rigorous cleaning and validation protocols, this document supports the broader thesis that investing in reagent-grade purity is not merely an expense but a essential measure for ensuring data fidelity, instrument longevity, and operational efficiency.
The Quantitative Case for Purity: Impurity Profiles and Consequences
The primary distinction between solvent grades lies not in their primary chemical content but in their impurity profiles. These trace contaminants are the fundamental drivers of cost and performance differences.
Table 1: Comparative Impurity Profiles and Associated Risks of Common Solvent Grades
| Parameter / Impurity | Technical Grade | ACS Reagent Grade | Semiconductor Grade | Primary Risk to Spectrometer Optics |
|---|---|---|---|---|
| Metallic Ions (e.g., Fe, Ni) | Unspecified / High | ≤ 10 ppm | ≤ 0.5 ppm | Photon absorption, catalytic damage, permanent coating defects [82] |
| Heavy Metals (as Pb) | Unspecified | ≤ 20 ppm | ≤ 0.5 ppm | Coating degradation and increased scatter [82] |
| Chloride (Cl⁻) | Unspecified | ≤ 200 ppm | ≤ 5 ppm | Pitting corrosion on delicate surfaces and coatings [82] |
| Non-Volatile Residue | Unspecified / High | Low | Ultra-Low | Streaking, residue deposition, and permanent staining [83] [12] |
| UV Cutoff | Not Guaranteed | Low & Guaranteed | Very Low & Guaranteed | Elevated background noise in UV/VIS spectrometry [84] |
| Certificate of Analysis (CofA) | Typically No | Lot-Specific | Ultra-Detailed Lot-Specific | Lack of process control and traceability [82] |
The consequences of these impurities are not theoretical. Metallic ions such as iron (Fe) are highly absorptive, creating microscopic hot spots on optics under laser illumination that can lower the Laser-Induced Damage Threshold (LIDT) and lead to permanent, catastrophic failure [82]. Organic residues and non-volatile impurities left on surfaces act as a release layer, compromising the adhesion of anti-reflective coatings and leading to delamination under thermal stress [82]. Furthermore, these contaminants scatter incident light, elevating background noise and directly reducing the signal-to-noise ratio of the spectrometer, which diminishes sensitivity and detection limits [5].
Experimental Protocols for Cleaning and Validation
Implementing a standardized methodology is crucial for consistent, damage-free results. The following protocols are adapted from established optical handling procedures [83] [12] [5].
Protocol: Basic Cleaning of Spectrometer Lenses and Windows
Objective: To safely remove fingerprints, oils, and particulate matter from standard lenses and optical windows without damaging surfaces or coatings.
Materials & Reagents:
- Nitrogen Gas Duster: Oil-free, moisture-free compressed air or nitrogen [12] [5].
- Lens Tissue: Low-lint, optically clean tissue [83].
- Reagent-Grade Solvents: ACS Reagent Grade or better Isopropyl Alcohol and/or Acetone [83]. Note: Acetone damages plastic optics and housings [83] [12].
- Cotton-Tipped Applicators: Synthetic, low-lint swabs for small areas [5].
- Personal Protective Equipment (PPE): Powder-free, acetone-impenetrable gloves [12].
Procedure:
- Inspection: Hold the optic under a bright light and view it from multiple angles to identify the type and location of contaminants [5].
- Blowing Off Dust: Using the nitrogen duster, hold the nozzle at a grazing angle approximately 6 inches (15 cm) from the surface. Use short blasts in a figure-eight pattern to remove loose abrasive particles. Never wipe a dusty optic [12] [5].
- Solvent Application (Drag Method):
- For flat, unmounted optics, place the component on a clean, lint-free wipe.
- Drape a single sheet of lens tissue over the optic.
- Apply a few drops of solvent to the tissue so it makes contact with the optical surface.
- Slowly and steadily drag the soaked tissue across the optic's face, lifting contaminants away [12].
- Solvent Application (Swab Method):
- For mounted or curved optics, fold a lens tissue around the tip of a swab to create a soft brush.
- Moisten the brush with solvent; shake off excess.
- In a single, continuous motion, wipe from one edge of the optic to the other, slowly rotating the swab to present a clean surface [12]. Avoid pooling solvent.
- Final Inspection: Re-inspect the optic. Repeat the process with fresh tissue/swab and solvent if necessary. Never re-use cleaning materials.
Protocol: Validation of Cleaning Efficacy via Surface Inspection
Objective: To verify the optical surface is free of residues and defects that could impact performance.
Materials:
- High-intensity white light source.
- Magnification device (e.g., magnifying loupe or microscope).
- Scratch-Dig paddle (per MIL-PRF-13830B) [5].
Procedure:
- Reflective Surfaces: Hold the optic nearly parallel to your line of sight. Look across the surface to see contaminants via light scatter, rather than looking at your reflection [5].
- Transmissive Surfaces: Hold the optic perpendicular to your line of sight and look through it toward the light source [5].
- Defect Categorization: Compare any observed scratches or digs to the calibrated defects on the scratch-dig paddle. Document the size and location of any defects that exceed the manufacturer's specifications [5].
Decision Framework: Wegging Costs Against Performance
The decision to use Reagent Grade solvents should be based on a systematic risk assessment of the application. The following workflow provides a logical path for selecting the appropriate solvent grade, balancing performance needs against operational costs.
The financial analysis extends beyond the unit cost of the chemical. A comprehensive Total Cost of Ownership (TCO) model must account for:
- Direct Chemical Cost: Higher for Reagent Grade.
- Prevention Costs: Reduced instrument downtime, fewer ruined experiments, and lower risk of catastrophic optic failure.
- Failure Costs: Complete cost of replacing a damaged optic (component cost + labor + instrument downtime). A single multi-thousand-dollar optic failure can eclipse years of savings from using technical grade solvents [82].
The Scientist's Toolkit: Essential Research Reagent Solutions
Table 2: Essential Materials for Precision Optical Cleaning
| Item | Function & Rationale |
|---|---|
| ACS Reagent Grade Isopropyl Alcohol | General-purpose solvent for removing organic films; evaporates without residue, safe for most coatings [83]. |
| ACS Reagent Grade Acetone | Powerful solvent for removing stubborn contaminants. Caution: Dries very quickly and will damage plastics [83] [12]. |
| High-Purity Deionized (DI) Water (>18 MΩ·cm) | Final rinse to remove solvent traces; used with mild optical soap for initial wash [83] [5]. |
| Low-Lint Lens Tissue | Provides a soft, clean medium for wiping; must be used wet with solvent to prevent scratching [12] [5]. |
| Nitrogen or Canned Air Duster | Non-contact first step for removing abrasive particulates. Prevents scratching during subsequent wiping [83] [5]. |
| Powder-Free Nitrile Gloves | Prevents transfer of skin oils and salts to optical surfaces, which are corrosive and can permanently stain coatings [12] [5]. |
| Cotton-Tipped Applicators | Allow precise application of solvent to small or mounted optics without direct finger contact [83] [5]. |
| Optical Soap | Mild, surfactant-based cleaner for initial removal of heavy fingerprints and grime via immersion or washing [5]. |
The choice between reagent-grade purity and practical lab performance is a false dichotomy. In the context of maintaining spectrometer optics, Reagent Grade purity is the foundation of practical performance. The data clearly demonstrates that the uncontrolled, unspecified impurities in technical-grade solvents present a significant and quantifiable risk to optical integrity, analytical sensitivity, and operational budget. While the initial purchase price is higher, the investment in ACS Reagent Grade or superior solvents is a necessary insurance policy against far greater costs associated with instrument downtime, compromised research data, and component replacement. For any research or drug development application where data integrity is non-negotiable, establishing a protocol mandating high-purity solvents is not just a best practice—it is a critical requirement for scientific rigor.
Conclusion
The integrity of spectroscopic data in biomedical and clinical research is fundamentally linked to the cleanliness of spectrometer optics. A meticulous approach to solvent selection and cleaning methodology, grounded in an understanding of solvent chemistry and contaminant interactions, is not merely a maintenance task but a critical analytical procedure. By adopting the systematic protocols for application, troubleshooting, and validation outlined in this guide, researchers can significantly reduce signal noise, prevent permanent optic damage, and ensure the reproducibility of sensitive assays. Future directions will likely involve the development of even more specialized solvent blends and automated cleaning systems to support next-generation, high-throughput spectroscopic applications in drug development and diagnostic technologies.
References
- 1. Tips for cleaning precision optics [https://iosoptics.com/tips-for-cleaning-precision-optics/]
- 2. 5 Ways Solvent Purity Impacts HPLC Results [https://allanchem.com/5-ways-solvent-purity-impacts-hplc-results/]
- 3. Trace analysis by HPLC-MS: contamination problems and ... [https://www.sciencedirect.com/science/article/abs/pii/S0165993602005034]
- 4. Ultraviolet–visible spectroscopy [https://en.wikipedia.org/wiki/Ultraviolet%E2%80%93visible_spectroscopy]
- 5. Optics Handling and Care Tutorial [https://www.thorlabs.com/newgrouppage9.cfm?objectgroup_id=9025]
- 6. Care and Cleaning of Optics [https://forealspectrum.com/technolog/care-and-cleaning-of-optics/]
- 7. How to Clean Optical Filters [https://www.iridian.ca/learning_center/how-to-clean-optical-filters-dup/?srsltid=AfmBOoqmonv56VtRakcsha4ZRMyH4RgjE-hx6dotqZi1C01LIWqKiyGv]
- 8. Polar Protic? Polar Aprotic? Nonpolar? All About Solvents [https://www.masterorganicchemistry.com/2012/04/27/polar-protic-polar-aprotic-nonpolar-all-about-solvents/]
- 9. What are polar and nonpolar solvents? [https://www.vedantu.com/question-answer/are-polar-and-nonpolar-solvents-class-11-chemistry-cbse-60235db0f865ac1e018d525b]
- 10. Polar vs. Non-Polar Bonds & Molecules [https://chemistrytalk.org/polar-vs-non-polar-bonds/]
- 11. Solvent Physical Properties [https://people.chem.umass.edu/xray/solvent.html]
- 12. Technical Note: How to Clean Optics [https://www.newport.com/n/how-to-clean-optics]
- 13. Acetone-Spectrophotometric-Grade-ACS | CAS 67-64-1 [https://www.spectrumchemical.com/acetone-spectrophotometric-grade-acs-sp101?srsltid=AfmBOoq4ULtWTy5WP1EjPaM_3wGQyyxkoqUYSZ_8D81AVqecC5Os5APM]
- 14. Methanol ACS Reagent Grade - 16 Sizes Available [https://alliancechemical.com/products/methanol-acs-reagent-grade?srsltid=AfmBOoqs7_zeryTGaepU_w3FwgSPs5uJUJnMLqZ-AFiCDbDCA2BpAKp7]
- 15. Why Purity Reigns: The Ultimate Guide to ACS Grade ... [https://alliancechemical.com/blogs/articles/why-purity-reigns-the-ultimate-guide-to-acs-grade-acetone-amp-its-critical-applications?srsltid=AfmBOoqKed2697bdoQp0SPPjOXkvucLXBUERC-r9D6l-aOoHFj2vwJYA]
- 16. Cleaning Optics [https://www.edmundoptics.com/knowledge-center/application-notes/optics/cleaning-optics/?srsltid=AfmBOoqd1j_T78TDGooCpSfFGB9CYVAOuO6_NlpzlI0RMN9kVJS65BqH]
- 17. Is it OK to clean lenses with isopropanol? [https://www.photomacrography.net/forum/viewtopic.php?t=15571]
- 18. Cleaning and Handling Filters [https://www.chroma.com/support/knowledge-center/cleaning-filters]
- 19. Handling and Cleaning of Optics [http://www.tydexoptics.com/technical_support/cleaning/]
- 20. Cleaning Optics [https://www.edmundoptics.com/knowledge-center/application-notes/optics/cleaning-optics/?srsltid=AfmBOoqP2KAuUbs5h0GA-V1KDEVaRMoCtcwxLVNLO7ifD3pfe3zWlSFn]
- 21. Cleaning optics properly [https://www.asphericon.com/en/blog/190218-cleaning-optics-properly/]
- 22. Fiber Optic Cleaning Products [https://www.thorlabs.com/newgrouppage9.cfm?objectgroup_id=3317]
- 23. Chemicals For NMR And UV/V Is Spectroscopy [https://gbjpl.com.au/chemicals-for-nmr-and-uv-v-is-spectroscopy-ensuring-quality-reliability-and-value/]
- 24. Solvents for Spectroscopy Uvasol® | Analytics and Sample ... [https://www.merckmillipore.com/INTL/en/products/analytics-sample-prep/spectroscopy/solvents-for-spectroscopy-uvasol/Skyb.qB.BD0AAAE_ahV3.Lxj,nav]
- 25. How clean is the solvent you use to clean your optics? A ... [https://opg.optica.org/ao/upcoming_pdf.cfm?id=288059]
- 26. Safety precautions [https://knowledge1.thermofisher.com/Molecular_Spectroscopy/Fourier_Transform_FT_Infrared_IR_and_Near_Infrared_NIR/Nicolet_Spectrometers/Nicolet_Apex_FTIR_Spectrometer/269-361701_Rev_C_Nicolet_Apex_Site_and_Safety_Guide/Safety_precautions]
- 27. Compressed Air Testing – How to Test and Why It Matters [https://nigen.com/what-is-compressed-air-testing-procedure-specification/]
- 28. Meet ODIS, the USA's new HEL Optic Defect Inspection ... [https://americom.org/2025/09/25/meet-odis-americoms-new-hel-optic-defect-inspection-system/]
- 29. Application Note: Handling & Cleaning Optical Components [https://wavelength-oe.com/handling-and-cleaning-procedures-for-optical-components/]
- 30. Cleaning Procedure for Optics [https://sunex.com/2020/01/31/cleaning-procedure-for-optics/]
- 31. Cleaning Optics [https://www.edmundoptics.com/knowledge-center/application-notes/optics/cleaning-optics/?srsltid=AfmBOordrrmT4nHUXotoo3GAFRhlpvufu9KkzalQSGNvdqCqDY6rmPmk]
- 32. How to Clean & Care for Your Sapphire Windows [https://blueridgeoptics.com/sapphire-window-care-guide/]
- 33. Cleaning validation in pharmaceutical quality control ... [https://pmc.ncbi.nlm.nih.gov/articles/PMC12229404/]
- 34. Cleaning Optics [https://www.edmundoptics.com/knowledge-center/application-notes/optics/cleaning-optics/?srsltid=AfmBOorTy7QoUipziYgjZxVKkp5u2o1_tVm-vKtakYJ4hqyfmCoev8ku]
- 35. ZEISS Microscopy Online Campus | Microscope Maintenance [https://zeiss-campus.magnet.fsu.edu/articles/basics/care.html]
- 36. Solvents for Spectrophotometry - Chemicals [https://www.spectrumchemical.com/chemical/solvents-for-spectrophotometry?srsltid=AfmBOopH_Fcs96ZBC5sJieIoUG4LL0h0CjIfKKgSjs4ltVRgqBFmpNQN]
- 37. How to Clean Fiber Laser Cutting Head Optics: A Step-by- ... [https://pendstar.com/blogs/how-to/clean-fiber-laser-cutting-head-optics?srsltid=AfmBOoraMoKQsMBGxoO6yU61RmsfDZC7R0kO7AzjTn0iTYAjtvWUpN9G]
- 38. Cleaning Optics [https://www.edmundoptics.com/knowledge-center/application-notes/optics/cleaning-optics/?srsltid=AfmBOoqPTz9f-wcUPvNchxcnyHopkW0FPWxZ5UAmpQt-u88zDkoSDzVf]
- 39. How to Implement Solvent Compatibility Protocols for Quartz ... [https://toquartz.com/quartz-cuvette-solvent-protocols-2025/]
- 40. Cleaning of Optics [https://www.rp-photonics.com/cleaning_of_optics.html]
- 41. Cleaning Optics [https://www.edmundoptics.com/knowledge-center/application-notes/optics/cleaning-optics/?srsltid=AfmBOopbonEqPHRlW6AvfUYWGv2YVKDxpL7WnTfUiJMnHqd8jGGGcQac]
- 42. Methods for Cleaning Optics in the Lab and Industry [https://mariotonin.me/2024/07/methods-for-cleaning-optics-in-the-lab-and-industry/]
- 43. How to Clean Laser Optics [https://www.lasercomponents.com/us/photonics-portal/knowledge-center/expert-tips/optics-how-to-clean-laser-optics/]
- 44. Laboratory-Tested Camera Lens Cleaning Kit Efficacy [https://lenspen.com/pages/laboratory-test]
- 45. Ultrasonic Cleaning 101 [https://www.upcorp.com/blog/ultrasonic-cleaning-101/]
- 46. Ultrasonic Cleaning - Complete Guide [https://www.kemet.co.uk/blog/cleaning/ultrasonic-cleaning-the-complete-guide]
- 47. Comparison of Environmentally Friendly Cleaning Agents ... [https://www.mdpi.com/2072-666X/16/11/1219]
- 48. Demystifying Ultrasonic Cleaning: Ultrasonic Cleaner Brief [https://crest-ultrasonics.com/demystifying-ultrasonic-cleaning/]
- 49. Effective and reliable optical system for cleaning validation in ... [https://cordis.europa.eu/project/id/285836/reporting]
- 50. Quartz Cuvette: Complete & Essential Guide for ... [https://qvarz.com/quartz-cuvette/?srsltid=AfmBOor0wLQDZJlaVa8rkhH2DUCCsJwK3rZ3Eg4XP_D_GKk3721WRPK5]
- 51. Cleaning Optics [https://www.edmundoptics.com/knowledge-center/application-notes/optics/cleaning-optics/?srsltid=AfmBOoo4IDm3PE64XY3XhzBDlWcuhThDQve2GRylhHdLiE4yKZgC3lWo]
- 52. Cleaning and Handling Procedures for Sensitive Optical ... [https://toweroptical.com/cleaning-and-handling-procedures-for-sensitive-optical-components/]
- 53. ISO 14644-5's First Update in Over Two Decades [https://www.14644.dk/iso-14644-5-s-first-update-in-over-two-decades-what-the-2025-revision-means-for-cleanroom-operations]
- 54. Cleaning Optics [https://www.edmundoptics.com/knowledge-center/application-notes/optics/cleaning-optics/?srsltid=AfmBOoq54-UV4RRoRoXd1m5q0hCCuOxGWIWVavd_4AUenfGlCSLu1E74]
- 55. Powdered vs Powder-Free Gloves [https://www.safetygloves.co.uk/blog/powdered-vs-powder-free-gloves-the-facts.html]
- 56. Powder-Free vs. Powdered Nitrile Gloves [https://www.esafetysupplies.com/blogs/news/powder-free-vs-powdered-nitrile-gloves-a-comprehensive-comparison?srsltid=AfmBOoot2o-dyIoFHsb0HjC56aL9uh1U7Nd1h-0se-m7ECMHvQkceguf]
- 57. What are Powdered Gloves? A Look at Their History and ... [https://harmonycr.com/resources/what-are-powdered-gloves-a-look-at-their-history-and-the-rise-of-powderfree-alternatives/]
- 58. Cleanroom Wipes [https://www.aawipes.com/collections/cleanroom-wipes?srsltid=AfmBOorpP0g4dsk4UgFNndgFRFuEfsHb9yMU4UCqah_MNAmS0efXAdPY]
- 59. AAwipes Cleanroom Wipes Lint Free Wipes 4" x 4 ... [https://www.amazon.com/AAwipes-Cleanroom-Wipes-Cellulose-Polyester/dp/B07YF88GJH]
- 60. Quartz Cuvette: Complete & Essential Guide for ... [https://qvarz.com/quartz-cuvette/?srsltid=AfmBOoo5KjhjeJua9is-LfOOp7b5vFvwEsW2bmGGpAnnfRVeiaqVTCI8]
- 61. Spectrophotometer Calibration and Validation Guide [https://aelabgroup.com/spectrophotometer-calibration-and-validation-guide/]
- 62. Do We Qualify or Validate a Spectrometer? [https://www.spectroscopyonline.com/view/do-we-qualify-or-validate-a-spectrometer-]
- 63. Bright Field Inspection Explained & Applications [2025] [https://averroes.ai/blog/bright-field-inspection]
- 64. Instrument Validation and Inspection Methods [https://www.ssi.shimadzu.com/service-support/technical-support/analysis-basics/fundamentals-uv/validation.html]
- 65. Spectrophotometer Calibration and Validation: Ensuring ... [https://www.drawellanalytical.com/spectrophotometer-calibration-and-validation-ensuring-accuracy-in-spectrophotometric-measurements/]
- 66. Validation of a Stability-Indicating Spectrometric Method for ... [https://pmc.ncbi.nlm.nih.gov/articles/PMC5508414/]
- 67. Development of an In Situ Spectroscopic Method for ... [https://www.spectroscopyonline.com/view/development-situ-spectroscopic-method-cleaning-validation-using-mid-ir-fiber-optics-pdf]
- 68. Low-pressure plasma cleaning of organic contamination from ... [https://pmc.ncbi.nlm.nih.gov/articles/PMC12624504/]
- 69. Green solvents and their role in modern sample ... [https://link.springer.com/article/10.1007/s44371-025-00325-6]
- 70. Solvents in Sample Preparation for Chromatography and ... [https://www.organomation.com/solvents-in-sample-preparation-for-chromatography-and-mass-spectrometry]
- 71. HPLC Solvent Selection [https://www.elementlabsolutions.com/uk/chromatography-blog/post/hplc-solvent-selection]
- 72. How The New GHS Updates Are Shaping SDS ... [https://sdsmanager.com/us/sds-management-articles/how-the-new-ghs-updates-are-shaping-sds-requirements-in-the-us-in-2025/]
- 73. HAZCOM Update 2025: What Employers Must Know About ... [https://www.friedlandergroup.com/blog/hazcom-update-2025-what-employers-must-know-about-oshas-new-rules-and-sds]
- 74. Solvents - James Tarpo Jr. and Margaret Tarpo Department of ... [https://www.chem.purdue.edu/chemsafety/chem/solvents.html]
- 75. The Ultimate Guide to Industrial Solvents: Applications, ... [https://alliancechemical.com/blogs/articles/the-ultimate-guide-to-industrial-solvents-applications-selection-and-safety?srsltid=AfmBOoo3-4uqvIIdaRYToHVZ3QaJCePrNigwYwaE81R98alXn9Tklk-y]
- 76. Guide to Choosing the Correct HPLC Solvent [https://www.phenomenex.com/knowledge-center/hplc-knowledge-center/hplc-solvent-selection-guide?srsltid=AfmBOoqwRcObbQcRDTDO0VSuv9Nyy7Lj8sR6VZ7FMV2HIC3UDC1oj911]
- 77. MSDS Certificate: A Comprehensive Guide for 2025 [https://wareiq.com/resources/blogs/material-safety-data-sheet-msds-certificate/]
- 78. Quartz Glass for Optics [https://www.tydexoptics.com/materials1/for_mirrors/fused_silica/]
- 79. Quartz Glass for Optical Applications: Fused Silica [https://www.pgo-online.com/intl/quartz-glass.html]
- 80. How Do You Properly Clean Quartz Glass Without Damage? [https://toquartz.com/how-to-clean-quartz-glass-professional-methods/]
- 81. ITO Coated Quartz Glass Manufacturer and Supplier [https://www.techinstro.com/ito-coated-quartz-glass/?srsltid=AfmBOorjJQdSStwrW6Zkyozg2Wy39DgY3Wgvxs1AhBrjqWes7YkURfqz]
- 82. The Chemist's Guide to Sodium Hydroxide for Precision ... [https://alliancechemical.com/blogs/articles/sodium-hydroxide-optical-cleaning-etching-guide?srsltid=AfmBOoq9NSfxtph1DWxQ5BFAE4tapZGBGH6ui8D3A_DMZF09eKasD7Bx]
- 83. Cleaning Optics [https://www.edmundoptics.com/knowledge-center/application-notes/optics/cleaning-optics/?srsltid=AfmBOorMlNuP-8hu1VaxaymscX1xXa1KgzuBXFNB75mkoHNwcH26HFxK]
- 84. LC-MS Solvents [https://www.merckmillipore.com/AZ/en/products/analytical-chemistry/analytical-chromatography/solvents/lc-ms-solvents]