Mastering Sample Preparation for UV-Vis Spectroscopy in Pharmaceutical QC: A Guide to Accuracy, Compliance, and Efficiency
This article provides a comprehensive guide for researchers, scientists, and drug development professionals on optimizing sample preparation for UV-Vis spectroscopy in pharmaceutical quality control.
Mastering Sample Preparation for UV-Vis Spectroscopy in Pharmaceutical QC: A Guide to Accuracy, Compliance, and Efficiency
Abstract
This article provides a comprehensive guide for researchers, scientists, and drug development professionals on optimizing sample preparation for UV-Vis spectroscopy in pharmaceutical quality control. It covers foundational principles, from the critical role of sample integrity in ensuring accurate and reproducible results to specific methodologies for handling diverse sample types like APIs and finished dosage forms. The content delves into practical troubleshooting for common challenges such as matrix effects and solvent selection, and crucially, outlines the pathway to method validation and compliance with major pharmacopeial standards like USP and EP. By synthesizing these core intents, the article serves as an essential resource for enhancing data reliability and regulatory success in pharmaceutical analysis.
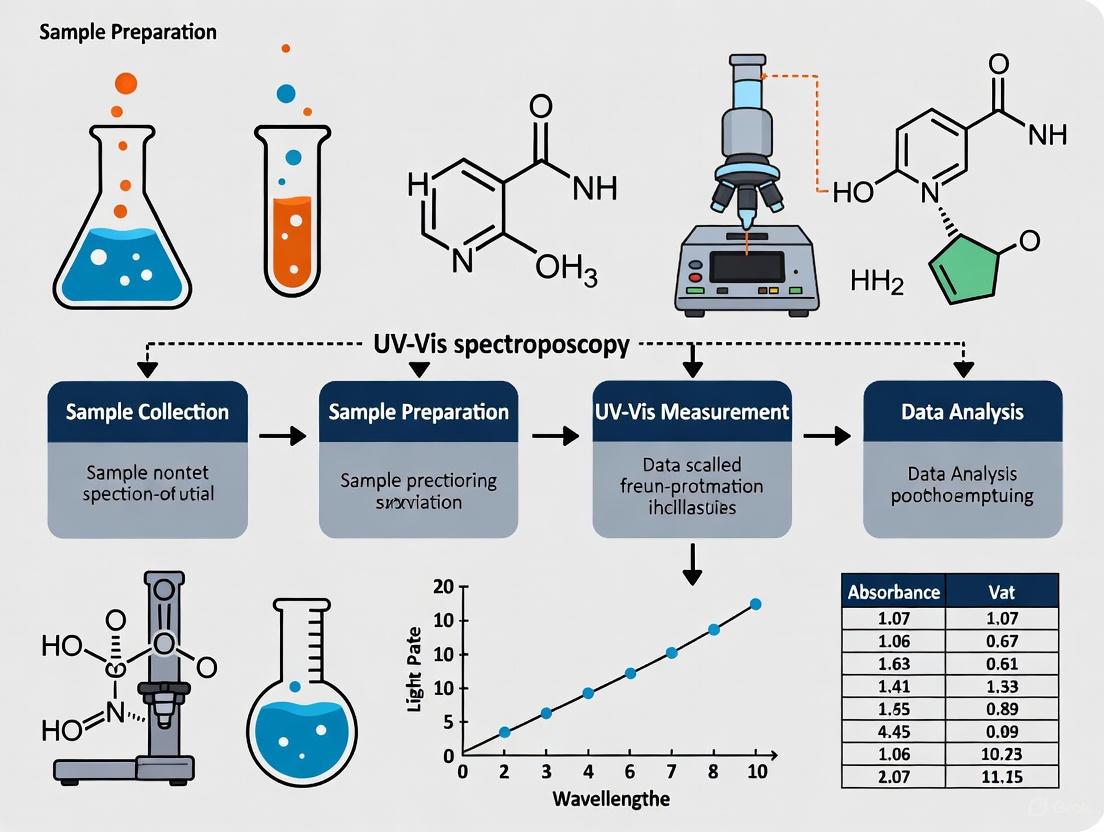
The Pillars of Success: Why Sample Preparation is Fundamental to Reliable UV-Vis Results in Pharma
The Critical Link Between Sample Integrity and Analytical Accuracy
This application note details the critical role of sample preparation in ensuring analytical accuracy for UV-Vis spectroscopy within pharmaceutical quality control (QC) research. Inadequate sample preparation is a primary source of analytical error, accounting for as much as 60% of all spectroscopic analytical errors [1]. This document provides validated protocols and data-driven guidelines to help researchers maintain sample integrity from collection to analysis, thereby ensuring the reliability of data critical to drug development and compliance.
Quantitative Data Specifications for UV-Vis Analysis
Proper sample preparation places samples within the optimal operating parameters of UV-Vis instrumentation. The tables below summarize key quantitative benchmarks for absorbance accuracy and precision, derived from controlled studies on spectrometer performance [2].
Table 1: Absorbance Accuracy Acceptance Criteria
| Decision Rule Number | Criteria Description | Acceptance Limits |
|---|---|---|
| #1 | Mean Absorbance | ± 0.005 A from the certified standard value |
| #2 | Standard Deviation (SD) | Not greater than 0.5% |
| #3 | Range of Individual Absorbances | ± 0.010 A |
| #4 | Range of Deviations from Observed Mean | ± 0.010 A |
Table 2: Absorbance Accuracy Tolerances Across the Analytical Range
| Target Absorbance (A) | 0.5% Tolerance (A) |
|---|---|
| 0.2000 | 0.0010 |
| 0.3000 | 0.0015 |
| 0.4000 | 0.0020 |
| 0.5000 | 0.0025 |
| 0.6000 | 0.0030 |
| 0.7000 | 0.0035 |
| 0.8000 | 0.0040 |
Experimental Protocols for Sample Preparation
Protocol: Liquid Sample Preparation for API Quantification
This protocol ensures accurate and reproducible preparation of liquid samples for the analysis of Active Pharmaceutical Ingredients (APIs) using UV-Vis spectroscopy.
- Objective: To dissolve and dilute a solid API standard to a concentration within the optimal UV-Vis absorbance range (0.1-1.0 A), while ensuring clarity and homogeneity.
- Materials:
- API standard
- High-purity solvent (e.g., HPLC-grade water, methanol, buffer)
- Volumetric flasks (e.g., 10 mL, 50 mL, 100 mL)
- Analytical balance (calibrated)
- Precision pipettes and tips
- Syringe filters (0.45 µm or 0.2 µm, low extractables)
- Ultrasonic bath
- Procedure:
- Weighing: Using a calibrated analytical balance, accurately weigh a calculated amount of the API standard to achieve the target concentration after dilution. Record the weight to four decimal places. Balances must offer traceable workflows to support investigations and comply with regulations like 21 CFR part 11 [3].
- Dissolution: Quantitatively transfer the API standard into an appropriate volumetric flask. Add the chosen solvent to about two-thirds of the flask's volume.
- Agitation: Cap the flask and agitate vigorously or place in an ultrasonic bath for 5-10 minutes until complete dissolution is visually confirmed.
- Dilution to Mark: Carefully add solvent to the calibration mark of the volumetric flask. Use a dropper for the final few milliliters to avoid overshooting. Mix thoroughly by inverting the flask at least 10 times.
- Filtration: Using a syringe, draw a portion of the solution and pass it through a 0.45 µm or 0.2 µm syringe filter into a clean vial. This step removes any potential particulates that could cause light scattering. Syringe filters should be selected to ensure clean particle removal without contributing extractables and leachables (E&L) [3].
- Secondary Dilution: If necessary, perform a serial dilution using precision pipettes to bring the sample into the instrument's linear range. Electronic pipettes with customizable protocols ensure the accurate and ergonomic transfer of even the smallest volumes without compromising sample integrity [3].
Protocol: Sample Purity and Contamination Assessment
This procedure outlines steps to identify and mitigate contamination during sample preparation.
- Objective: To ensure sample purity by controlling for contaminants like extractables, leachables, and cross-contamination.
- Materials:
- High-purity laboratory water systems
- Certified low-extractable consumables (filters, vials)
- Blanks (method blank, solvent blank)
- Procedure:
- Blank Analysis: Prepare a method blank that undergoes the entire preparation procedure without the analyte. This controls for contamination from reagents, glassware, and the environment.
- Control of Water Purity: Use ultrapure water from a certified lab water system as a solvent and for preparing blanks. Consistent low Total Organic Carbon (TOC) and conductivity levels are essential to avoid ghost peaks and ensure an optimal baseline in analytical methods [3].
- Consumables Qualification: Use syringe filters and vials that are rigorously controlled and certified to be low in extractables and leachables. This facilitates root-cause investigations should analytical deviations arise [3].
Workflow and Relationship Visualizations
Sample Integrity Workflow
Contamination Control Pathways
The Scientist's Toolkit: Essential Research Reagent Solutions
Table 3: Key Materials and Equipment for Sample Preparation
| Item | Function & Importance in Pharma QC |
|---|---|
| Lab Water Systems | Provides Type 1 ultrapure water for preparing solutions, reagents, and blanks. Critical for avoiding ghost peaks and ensuring an optimal baseline in HPLC and UV-Vis by meeting ASTM, NCCLS, ISO, and USP standards [3]. |
| Analytical Balances | Enables precise preparation of calibration standards and sample solutions. Ultra-high-resolution models support regulatory compliance (21 CFR part 11) and ensure accurate weighing over the entire range, resulting in low minimum sample weight [3]. |
| Syringe Filters | Clarifies and sterilizes samples by removing particulates and microorganisms, protecting analytical columns and ensuring sample clarity. Filters with regenerated cellulose or PTFE membranes prevent contributing extractables and leachables (E&L) [3]. |
| Electronic Pipettes | Ensures accurate and ergonomic transfer of liquid samples, including serial dilutions. Electronic models with guided workflows minimize user fatigue and error during repetitive tasks, ensuring volume precision [3]. |
| High-Purity Solvents | Solvents with appropriate UV-cutoff wavelengths are used to dissolve samples without introducing interfering absorbance in the analytical region, which is fundamental for both UV-Vis and FT-IR [1]. |
The Beer-Lambert Law (also known as Beer's Law) is a fundamental principle that describes the quantitative relationship between the absorption of light and the properties of a material through which the light is traveling. This law states that the absorbance of a solution is directly proportional to both the concentration of the absorbing species and the path length the light takes through the solution [4] [5]. In its most common form, the law is expressed mathematically as:
A = εlc
Where:
- A is the measured absorbance (a dimensionless quantity)
- ε is the molar absorptivity or molar extinction coefficient (typically in L·mol⁻¹·cm⁻¹)
- l is the path length of the light through the sample (typically in cm)
- c is the concentration of the absorbing species (typically in mol/L) [4] [6]
This linear relationship enables researchers to determine unknown concentrations of analytes by measuring their absorbance, making it indispensable for quantitative analysis in pharmaceutical quality control (QC) [6]. The law applies to monochromatic light (light of a single wavelength) and assumes uniform distribution of absorbers throughout the sample [5].
Practical Implications for Sample Preparation
The theoretical foundation of the Beer-Lambert Law has direct, critical implications for sample preparation in pharmaceutical QC. Proper sample preparation ensures the validity of this relationship and guarantees accurate, reproducible results.
The Critical Role of Concentration and Path Length
The linear relationship A = εlc dictates that both concentration and path length must be carefully controlled and optimized.
- Concentration Optimization: Sample concentration must be adjusted to fall within the linear range of the spectrophotometer's calibration curve [7] [6]. If the sample is too concentrated, minimal light will be transmitted, making accurate measurement impossible. Conversely, if it is too dilute, the absorbance signal may be too weak to distinguish from noise [7].
- Path Length Selection: Standard cuvettes have a 1 cm path length, but cuvettes with different path lengths are available. Using a cuvette with a shorter path length can be an effective strategy for analyzing highly concentrated samples without requiring dilution, which could alter sample properties. This approach also reduces the volume of precious or expensive samples required for analysis [7].
The Absorbance-Transmittance Relationship
Absorbance (A) and Transmittance (T) are inversely related. Absorbance is defined as the logarithm of the reciprocal of transmittance [4] [6]. The following table summarizes this key relationship, which is vital for interpreting spectrometer readouts.
Table 1: Relationship Between Absorbance and Percent Transmittance
| Absorbance | Percent Transmittance (%) |
|---|---|
| 0.0 | 100% |
| 0.1 | 79% |
| 0.5 | 32% |
| 1.0 | 10% |
| 2.0 | 1.0% |
| 3.0 | 0.1% |
| 4.0 | 0.01% |
Data adapted from [6].
For reliable quantification, absorbance values should ideally fall within a range where the relationship with concentration is linear, typically between 0.1 and 1.0 Absorbance Units (AU) [7]. An absorbance of 1.0 means 90% of the light has been absorbed, leaving only 10% to be detected [4].
Sample Preparation Methodologies
The choice between preparing a sample in solution or as a thin film depends on the analytical goal, the physical state of the sample, and the final application of the material.
Preparing Solution Samples
Measuring samples in solution is a straightforward and common method, ideal for confining a material within a controlled environment of known path length [7].
Protocol 1: Preparation of Liquid Samples for Absorbance Quantification
Cuvette Selection and Cleaning
- Select a quartz cuvette for UV-Vis analysis (380-700 nm and below). Quartz is essential for UV light transmission [7].
- Clean the cuvette thoroughly before use. Rinse it with a rinsing agent like acetone or isopropanol (IPA), followed by deionized water. If possible, use a standard glass washing procedure [7].
Solvent and Reference Measurement
Sample Loading and Measurement
- Rinse the cuvette with the sample solvent to remove residual solvent and prevent contamination [7].
- Load the sample solution into the cuvette, ensuring no air bubbles are trapped.
- Wipe the transparent sides of the cuvette with a lint-free tissue to remove fingerprints or smudges.
- Place the cuvette in the spectrometer holder, ensuring it sits consistently and faces the light source directly to minimize scattering effects [7].
Preparing Thin Film Samples
For solid formulations or materials used in devices (e.g., coatings, films), direct measurement of thin films is more relevant than solution analysis [7].
Protocol 2: Preparation of Solid Thin Film Samples
Substrate Selection
- Use a quartz glass substrate for transmission measurements. Quartz provides high transmission across both UV and visible wavelengths, unlike other types of glass [7].
Film Deposition and Thickness Control
- Ensure the film is smooth, uniform, and free of defects like pinholes, which can scatter light and distort measurements [7].
- Control film thickness precisely. If spin-coating, thickness can be varied by adjusting the spin speed or the precursor concentration. The thickness must be optimized so the sample is not too thick (which would block all light) or too thin (which would yield a weak signal) [7].
Sample Positioning
The following workflow diagram illustrates the decision process and key steps for preparing both solution and thin film samples for UV-Vis analysis.
Experimental Protocol: Quantification of an Active Pharmaceutical Ingredient (API)
This protocol details the use of the Beer-Lambert Law to determine the concentration of an unknown sample of Rhodamine B, simulating the quantification of an Active Pharmaceutical Ingredient (API) [6].
Objective: To generate a calibration curve using standard solutions of known concentration and use it to determine the concentration of an unknown sample.
Materials and Equipment:
- UV-Vis Spectrophotometer (e.g., PerkinElmer LAMBDA 365+)
- Quartz cuvettes (1 cm path length)
- Analytical balance
- Volumetric flasks
- Rhodamine B standard
- Unknown Rhodamine B sample
- Deionized water
Procedure:
Preparation of Standard Solutions
- Accurately prepare a series of Rhodamine B standard solutions in deionized water with concentrations of, for example, 1 µM, 2 µM, 5 µM, 10 µM, and 15 µM.
Spectroscopic Measurement
- Using a quartz cuvette, collect a reference spectrum of deionized water.
- Measure the absorbance spectrum of each standard solution across the relevant wavelength range (e.g., 400-600 nm).
- Record the absorbance value at the wavelength of maximum absorption (λmax, approximately 550 nm for Rhodamine B) for each standard [6].
Calibration Curve Generation
- Plot the absorbance at λmax versus the known concentration for each standard solution.
- Perform linear regression analysis to obtain the equation of the best-fit line (y = mx + b), where the slope (m) is εl [6].
Analysis of Unknown Sample
- Measure the absorbance of the unknown Rhodamine B sample at the same λmax.
- Use the equation of the calibration curve to calculate the concentration of the unknown: c = A / (εl)
Table 2: Example Data for Rhodamine B Calibration Curve
| Standard Solution | Concentration (µM) | Absorbance at λmax |
|---|---|---|
| Blank | 0.0 | 0.000 |
| Std 1 | 1.0 | 0.105 |
| Std 2 | 2.0 | 0.198 |
| Std 3 | 5.0 | 0.512 |
| Std 4 | 10.0 | 0.995 |
| Std 5 | 15.0 | 1.510 |
| Unknown | ? | 0.750 |
Note: The data in this table is illustrative. The slope (εl) of the calibration curve generated from this example data is ~0.100 µM⁻¹. The concentration of the unknown is calculated as 0.750 / 0.100 = 7.5 µM.
The Scientist's Toolkit: Essential Materials and Reagents
Table 3: Key Reagents and Materials for UV-Vis Sample Preparation
| Item | Function and Importance |
|---|---|
| Quartz Cuvettes | Container for liquid samples with high transmission of UV and visible light. Standard path length is 1 cm [7]. |
| Quartz Substrates | Used as a support for solid thin film samples, allowing light to pass through for transmission measurements [7]. |
| High-Purity Solvents | To dissolve samples without introducing absorbing impurities that could contaminate the measurement [7]. |
| Volumetric Flasks | For accurate preparation and dilution of standard and sample solutions to ensure precise concentrations. |
| Micro-pipettes | For precise handling and transfer of small liquid volumes, critical for preparing dilute solutions. |
| Syringe Filters (0.45 µm or 0.2 µm) | For filtering solutions before analysis to remove particulate contaminants that could cause light scattering [7]. |
| UV-Vis Spectrophotometer | Instrument to measure the absorption of light by a sample. Systems like the LAMBDA 365+ are designed for pharmacopeia compliance [8]. |
Regulatory and Quality Control Considerations
In pharmaceutical QC, adherence to regulatory standards is paramount. UV-Vis methods must comply with global pharmacopeia standards such as the United States Pharmacopeia (USP) <857>, the European Pharmacopoeia, and others [8]. These standards define instrument qualification, performance verification, and validated methodologies to ensure data integrity and result reliability.
Color analysis via UV-Vis is a critical QC check, as color variation can indicate impurities or degradation [9]. The technique provides an objective, quantitative measure that eliminates the person-to-person variations inherent in visual inspections, ensuring consistent quality control and maintaining consumer trust [9]. For regulated environments, software with enhanced security features is often required to ensure compliance with regulations like 21 CFR Part 11, which governs electronic records and signatures [8].
In pharmaceutical quality control (QC) research, the accuracy of UV-Vis spectroscopy is foundational to decisions regarding drug purity, potency, and safety. While instrument qualification is critical, the reliability of the results is equally dependent on the proper selection of core consumables: solvents, cuvettes, and filters. Errors in material selection can introduce spectral interferences, increase noise, and lead to erroneous data, potentially compromising product quality assessments [10]. This application note provides detailed protocols and selection criteria for these essential materials, framed within the stringent requirements of a modern pharmaceutical QC environment. Adherence to these guidelines ensures data integrity, supports regulatory compliance, and upholds the highest standards of analytical excellence.
The Scientist's Toolkit: Research Reagent Solutions
The following table details essential materials used in UV-Vis spectroscopy for pharmaceutical QC, along with their critical functions.
| Material Category | Specific Item | Primary Function & Rationale |
|---|---|---|
| Cuvettes | Standard Rectangular Quartz (10 mm path length) | Function: Holds liquid sample for absorbance measurement. Rationale: Quartz provides essential UV transparency (down to 190 nm) for DNA/protein quantification at 260/280 nm and offers high chemical resistance [11] [12]. |
| Cuvettes | Fluorescence Quartz Cuvette (4-window) | Function: Holds sample for fluorescence measurements. Rationale: All four polished optical windows allow for light entry and detection at a 90-degree angle, which is required for fluorescence assays [12]. |
| Cuvettes | Microvolume "Drop-In" Cell | Function: Enables analysis of very small sample volumes (1-2 µL). Rationale: Preserves precious or limited samples while maintaining a standard path length for accurate concentration measurements [11]. |
| Solvents | UV-Grade Solvents (e.g., Acetonitrile, Methanol) | Function: Dissolves analytes for analysis. Rationale: Specially purified to exhibit high transparency and very low absorbance in the UV range, minimizing background signal and baseline noise. |
| Filters | Syringe Filters (e.g., Nylon, PTFE, 0.45 µm or 0.2 µm pore size) | Function: Clarifies samples by removing particulate matter. Rationale: Prevents light scattering from particles, which reduces noise and avoids potential scratching of delicate cuvette windows [11]. |
Selection Criteria and Comparative Data
Cuvette Material Selection
The cuvette material dictates the usable wavelength range, chemical compatibility, and background noise level, making it one of the most critical choices. The following table provides a comparative analysis.
| Feature | Quartz (Fused Silica) | Optical Glass | Plastic (PS/PMMA) |
|---|---|---|---|
| UV Transmission Range | Excellent (190–2500 nm) [12] | Limited (>320 nm) [12] | Not supported (typically >400 nm) [12] |
| Visible Transmission | Excellent | Excellent | Good |
| Autofluorescence | Low [12] | Moderate [12] | High [12] |
| Chemical Resistance | High (except to HF) [11] [12] | Moderate [12] | Low [12] |
| Max Temperature | 150–1200 °C [12] | ≤90 °C [12] | ≤60 °C [12] |
| Lifespan & Cost | Years (with care); Higher upfront cost [12] | Months–Years; Mid-range cost [12] | Disposable; Low cost [12] |
| Best Use in Pharma QC | UV-Vis, fluorescence, solvent-based assays [13] | Visible-only colorimetric assays | High-throughput, disposable applications |
Path Length Considerations: The optical path length of the cuvette directly influences sensitivity according to the Beer-Lambert law (A = εbc). Selecting the appropriate path length is crucial for optimizing the dynamic range of an assay [11].
| Path Length | Sensitivity Gain* | Ideal Pharmaceutical Applications |
|---|---|---|
| 1–2 mm | Baseline | High-concentration analytes, turbid dissolution samples |
| 10 mm (standard) | ≈10× vs 1 mm | Most quantitative UV-Vis analyses, drug content uniformity |
| 20–50 mm | 20–50× vs 1 mm | Trace analyte analysis, impurity profiling, cleaning validation swab analysis |
*Approximate theoretical gain; practical signal-to-noise depends on instrument stability [11].
Solvent Selection and Compatibility
Solvents must be selected for their UV transparency and compatibility with both the sample and the cuvette material.
- UV Cutoff and Purity: Always use UV-grade or HPLC-grade solvents, which are certified for low UV absorbance. The solvent's UV cutoff wavelength (the point where absorbance reaches 1 AU) must be lower than the wavelength of interest for your analyte. For example, measuring an analyte at 230 nm requires a solvent with a cutoff below 220 nm.
- Chemical Compatibility with Cuvettes: While quartz cuvettes are resistant to most acids, bases, and organic solvents, they are not compatible with hydrofluoric acid (HF), which will rapidly etch and destroy the silica matrix. Prolonged exposure to hot, concentrated strong bases can also damage quartz over time [12].
Filter Selection for Sample Clarification
Sample clarification is essential for obtaining noise-free spectra. Particulate matter causes light scattering, leading to erroneously high absorbance readings and a noisy baseline.
- Pore Size: A 0.45 µm pore size is standard for removing fine particulates. For protein solutions or sterile filtration, a 0.2 µm pore size is recommended.
- Membrane Material:
- Nylon: Excellent for aqueous samples and a wide range of solvents, offering good protein recovery.
- PTFE (Hydrophobic): Ideal for aggressive organic solvents. Note that it requires wetting with a small amount of solvent before filtering aqueous solutions.
- PVDF: Low protein binding, making it suitable for sensitive biological assays.
Experimental Protocol: A Standard Workflow for Sample Preparation and Measurement
This protocol outlines a standardized workflow for preparing and analyzing a liquid pharmaceutical sample using UV-Vis spectroscopy in a QC setting.
Workflow Visualization
The following diagram illustrates the logical sequence of steps from sample to data analysis, highlighting key decision points.
Step-by-Step Procedure
Materials:
- Analytical balance
- Volumetric flasks and pipettes
- Selected UV-grade solvent
- Appropriate syringe filters (e.g., Nylon, 0.45 µm)
- Selected quartz cuvettes (e.g., 10 mm path length, 2-window for absorbance)
- Lint-free wipes (e.g., microfiber)
- Nitrile gloves
Method:
- Sample Preparation:
- Weigh the sample accurately using an analytical balance.
- Transfer it to a volumetric flask and dilute to volume with the selected UV-grade solvent. Ensure the solution is homogenous by inverting the flask several times.
- For solid-containing samples, filter the solution using an appropriate syringe filter into a clean vial. Discard the first few drops of filtrate.
Cuvette Preparation and Loading:
- Put on nitrile gloves to avoid fingerprint contamination.
- Rinse a clean quartz cuvette several times with the UV-grade solvent used for dilution.
- Using a clean pipette, fill the cuvette with the filtered sample solution. Avoid overfilling; the meniscus should be above the light path.
- Carefully wipe the external optical windows with a lint-free tissue in a single direction to remove any droplets or smudges. Do not touch the windows with bare hands.
Measurement:
- Place the cuvette in the spectrophotometer holder, ensuring the clear optical windows are aligned with the light path.
- Close the instrument lid and run the analysis according to the validated method.
- Measure a solvent blank (cuvette filled only with the dilution solvent) and ensure it is used for background correction.
Post-Measurement Cuvette Care:
- Immediately after measurement, empty the cuvette and rinse it thoroughly with the solvent used, followed by a final rinse with pure water if compatible.
- If the sample contained sticky or insoluble residues, clean the cuvette with a mild detergent solution, followed by multiple rinses with water and solvent. Use a lint-free swab if necessary, but avoid scratching the windows.
- Allow the cuvette to air-dry in a dust-free environment or use a gentle stream of clean, inert gas. Store in a protective case.
Regulatory and Quality Considerations
In a pharmaceutical QC laboratory, all procedures and materials must align with regulatory expectations for data integrity and instrument qualification [10].
- Instrument Qualification: Ensure the UV-Vis spectrometer is qualified according to a lifecycle approach encompassing Installation Qualification (IQ), Operational Qualification (OQ), and Performance Qualification (PQ) in line with USP general chapters <857> and other pharmacopeia standards [8] [10].
- Documentation and Compliance: Use instruments with software designed for regulatory compliance, such as those supporting 21 CFR Part 11 for electronic records and signatures [8]. All sample preparation steps, including the types of solvents, cuvettes, and filters used, must be documented in standard operating procedures (SOPs) and batch records to ensure full traceability and facilitate audit trails. Proper handling and cleaning are not just best practices but are integral to maintaining this compliance and ensuring the longevity of optical components [11].
The Impact of Improper Preparation on Spectral Data and Product Quality
In pharmaceutical quality control (QC), the integrity of analytical data is foundational to ensuring the safety, efficacy, and quality of drug products. Ultraviolet-Visible (UV-Vis) spectroscopy is a cornerstone technique in this framework, prized for its speed, simplicity, and cost-effectiveness for tasks ranging from raw material identification to dissolution testing and assay of active pharmaceutical ingredients (APIs) [14]. However, the reliability of the data it produces is entirely contingent on the quality of the sample preparation process. Inadequate sample preparation is not merely a procedural oversight; it is a significant source of error that can compromise product quality and regulatory compliance. Studies suggest that inadequate sample preparation is the cause of as much as 60% of all spectroscopic analytical errors [1]. This Application Note delineates the consequences of improper sample preparation on spectral data and subsequent product quality decisions, and provides detailed, actionable protocols to mitigate these risks within a pharmaceutical QC environment.
The Fundamental Principles of UV-Vis Spectroscopy and the Beer-Lambert Law
UV-Vis spectroscopy measures the amount of discrete wavelengths of ultraviolet or visible light that are absorbed by or transmitted through a sample compared to a reference or blank sample [15]. The quantitative aspect of the technique is governed by the Beer-Lambert Law, which states that the absorbance (A) of a solution is directly proportional to the concentration (c) of the absorbing species, the path length (L) of the sample holder, and the molar absorptivity (ε) of the species [15].
The mathematical expression is:
A = ε * c * L
For this relationship to hold true and provide accurate concentration measurements, several conditions must be met, all of which are directly influenced by sample preparation:
- The sample must be homogeneous and free of light-scattering particulates.
- The analyte must dissolve completely in the solvent.
- Stray light and instrumental artifacts must be minimized through proper blanking and calibration [15] [16] [17].
Deviations from proper preparation protocols directly violate these assumptions, leading to a breakdown of the Beer-Lambert relationship and generating erroneous data.
Common Sample Preparation Errors and Their Impacts on Spectral Data
Improper sample preparation introduces a range of artifacts that distort the UV-Vis spectrum, leading to incorrect interpretations and potentially severe consequences for product quality. The table below summarizes the primary errors, their spectral impacts, and the resultant risks to product quality.
Table 1: Impact of Common Sample Preparation Errors on Spectral Data and Product Quality
| Preparation Error | Impact on Spectral Data | Consequence for Product Quality |
|---|---|---|
| Particulate Matter / Turbidity | Increased, non-absorbance-based scattering leads to artificially elevated baseline and absorbance values across wavelengths [16] [18]. | Overestimation of API concentration, potential release of a sub-potent product, or false failure of a conforming batch. |
| Inappropriate Solvent Selection | Solvent absorption bands can obscure analyte peaks, especially in the UV range below ~210 nm for solvents like ethanol [16]. | Incorrect identity testing, failure to detect critical impurities or degradation products, compromising product safety and purity. |
| Incorrect Absorbance Range | Absorbance readings outside the optimal linear range (typically 0.1-1.0 AU) lead to photometric inaccuracy and non-linearity [15] [16] [14]. | Inaccurate potency determination, leading to incorrect dosage form strength and potential patient harm. |
| Improper Dilution / Concentration | Deviations from Beer-Lambert linearity at high concentrations due to molecular interactions or stray light effects [16] [17]. | Faulty quantification during content uniformity testing, risking batch inconsistency and variable dosing. |
| Contamination | Introduction of extraneous absorbance peaks from contaminants in water, acids, labware, or the environment [19]. | False positive for impurity, incorrect assay results, and misidentification of raw materials, leading to supply chain issues. |
The following workflow diagram illustrates how these preparation errors propagate through the analytical process, ultimately affecting the final quality decision.
Detailed Experimental Protocols for Robust Sample Preparation
Protocol 1: Preparation of a Clear Liquid Sample for API Quantification
Objective: To accurately determine the concentration of an API in a solution using UV-Vis spectroscopy, ensuring adherence to the Beer-Lambert Law.
Materials:
- See "The Scientist's Toolkit" for essential reagents and materials.
- API standard of known purity.
- Appropriate volumetric flasks (e.g., Class A).
- pH meter and buffers (if required).
Procedure:
- Standard Solution Preparation:
- Accurately weigh the required quantity of API standard using an analytical balance.
- Quantitatively transfer the standard to a volumetric flask and dilute to volume with the chosen solvent. This is the stock standard solution.
- Serially dilute the stock solution to prepare a calibration curve with at least five concentration levels, ensuring the calculated absorbance of the highest standard falls between 0.5 and 1.0 AU.
Sample Solution Preparation:
- Prepare the test sample according to the approved analytical procedure (e.g., extract from a tablet powder).
- If the sample solution is turbid, filter it through a 0.45 μm or 0.2 μm membrane syringe filter (e.g., PVDF or Nylon) to remove particulates [1].
- Perform a preliminary scan. If the absorbance at the target wavelength is >1.0 AU, quantitatively dilute the sample to bring it within the linear range of the calibration curve (0.1-1.0 AU is ideal) [15] [14].
Blank Preparation:
- Prepare the blank using the same solvent and any other reagents used in the sample preparation, but without the analyte.
Measurement:
- Allow the instrument to warm up and stabilize.
- Perform a baseline correction with the blank.
- Measure the absorbance of calibration standards and the sample solution at the specified wavelength.
- Plot the calibration curve and calculate the sample concentration.
Protocol 2: Baseline Correction for Light-Scattering Samples
Objective: To correct UV-Vis spectra for baseline artifacts caused by light scattering from particulates or large molecules like protein aggregates [18].
Materials:
- UV-Vis spectrophotometer with scanning capability.
- Appropriate software for baseline fitting and subtraction.
Procedure:
- Sample Scanning:
- Obtain a full UV-Vis spectrum of the sample (e.g., from 400 nm to 240 nm for a protein sample), rather than a single wavelength reading.
Baseline Identification:
- Visually inspect the spectrum. A scattering artifact is indicated by a steep, sloping baseline that increases with decreasing wavelength.
- Identify regions on the spectrum where the analyte is known not to absorb (e.g., for proteins, a region above 330 nm).
Baseline Fitting and Subtraction:
- Using the instrument's software, select the points of zero analyte absorbance to define a baseline.
- Apply a linear or polynomial fit to these points. Advanced methods may use fundamental Rayleigh and Mie scattering equations for a more physically accurate correction [18].
- Subtract the fitted baseline from the original sample spectrum.
Quantification:
- Use the baseline-corrected spectrum to measure the absorbance at the target wavelength (e.g., 280 nm for proteins) for concentration calculation.
Table 2: Troubleshooting Common Preparation Issues in UV-Vis Analysis
| Observed Problem | Potential Preparation Cause | Corrective Action |
|---|---|---|
| Noisy / Unstable Signal | Bubbles in cuvette; contaminated cuvette. | Centrifuge sample briefly; use clean, matched quartz cuvettes [15] [14]. |
| Negative Absorbance | Blank has higher absorbance than sample; contaminated blank. | Re-prepare blank with high-purity reagents and water; ensure blank is optically clear [16]. |
| Non-Linear Calibration | Sample precipitation at high concentration; chemical association. | Dilute samples to remain in linear range (A < 1.2); verify sample stability [16] [17]. |
| Unexpected Peaks | Contamination from labware (e.g., leaching from plastic); impure solvents. | Use high-purity solvents; use inert labware (FEP, quartz); rinse glassware thoroughly [19] [1]. |
The Scientist's Toolkit: Essential Materials for UV-Vis Sample Preparation
The following table details key reagents and materials critical for minimizing error in UV-Vis sample preparation for pharmaceutical QC.
Table 3: Research Reagent Solutions for UV-Vis Spectroscopy in Pharma QC
| Item | Function & Importance | Quality & Usage Notes |
|---|---|---|
| High-Purity Water | Primary solvent; used for blanks and dilutions. Introduces minimal background absorbance. | Must meet Type I (ASTM) standards (18.2 MΩ·cm, <5 ppb TOC). Check certificate of analysis [19]. |
| Spectroscopic-Grade Solvents | Dissolve analytes without introducing interfering absorbance. | Use solvents with a low "UV cutoff" wavelength (e.g., Acetonitrile, ~190 nm). Verify grade is suitable for sensitivity required [14] [1]. |
| Quartz Cuvettes | Hold samples in the light path. Quartz is transparent across UV and visible ranges. | Use for UV work. Ensure they are clean, matched, and free of scratches. Pathlength (typically 1 cm) must be known and consistent [15]. |
| Syringe Filters | Remove particulate matter from liquid samples to prevent light scattering. | Use 0.45 μm or 0.2 μm pore size. Select membrane material (e.g., Nylon, PVDF) that does not adsorb the analyte [1]. |
| Volumetric Glassware | For precise dilution and preparation of standards and samples. | Use Class A tolerance. Ensure proper cleaning and rinsing to avoid contamination and ensure accurate volume delivery [19]. |
| Certified Reference Materials (CRMs) | For instrument calibration and verification of method accuracy. | Must be traceable to national standards (e.g., NIST). Use within expiration date and handle to prevent contamination [16] [19]. |
In the highly regulated environment of pharmaceutical quality control, the margin for error is negligible. The data generated by UV-Vis spectroscopy directly informs critical decisions about the identity, strength, purity, and quality of drug products. As demonstrated, improper sample preparation is a predominant source of analytical error that can systematically distort spectral data, leading to incorrect conclusions about product quality. By understanding the tangible impacts of preparation artifacts and implementing the detailed, robust protocols outlined in this document—including proper filtration, dilution, solvent selection, and the use of high-purity materials—laboratories can significantly enhance data integrity. This rigorous approach to sample preparation is not merely a technical requirement; it is a fundamental component of a quality culture that ensures patient safety and upholds the stringent standards of global pharmacopoeias [16] [8] [14].
From Theory to Practice: Proven Sample Preparation Methods for Pharmaceutical Matrices
In pharmaceutical quality control (QC) research, the accuracy of Ultraviolet-Visible (UV-Vis) spectroscopy is fundamentally dependent on proper sample preparation. Inadequate preparation can introduce errors, leading to deceptive results and potentially compromising drug quality and safety [7]. This application note provides detailed protocols and workflows for preparing common pharmaceutical matrices—Active Pharmaceutical Ingredients (APIs), solid tablets, and liquid formulations—to ensure reliable, reproducible, and compliant analytical outcomes.
The foundational principle of UV-Vis spectroscopy involves measuring the absorption of ultraviolet or visible light by a sample. The amount of light absorbed is quantitatively related to the concentration of the analyte via the Beer-Lambert Law [15]. The sample preparation process must ensure that the analyte is in a form that provides a clear and interpretable signal, free from interferences like light scattering or absorption from other components.
Essential Concepts and Scientist's Toolkit
Key Principles for Sample Preparation
Two critical factors govern sample preparation for UV-Vis spectroscopy:
Sample Concentration and Path Length: The absorbance of a sample must fall within the dynamic range of the instrument, typically between 0.1 and 1.0 Absorbance Units (AU). A concentration that is too high (absorbance >1) will not allow sufficient light to reach the detector, while a concentration that is too low will yield a weak, imprecise signal [15]. The relationship is defined by Beer-Lambert's Law (A = εcl), where A is absorbance, ε is the molar absorptivity, c is concentration, and l is the path length. Adjusting either the concentration or the path length (e.g., using a cuvette with a shorter path length) is a primary method for bringing the absorbance into the optimal range [7] [20].
Solvent and Environment Compatibility: The solvent used for dilution must not absorb significantly at the wavelengths used for analysis. Additionally, factors such as sample temperature and pH can impact the measured optical properties and must be controlled [7].
The Scientist's Toolkit: Essential Materials and Reagents
The following table details key reagents and materials required for the sample preparation workflows described in this note.
Table 1: Essential Research Reagent Solutions and Materials for UV-Vis Sample Preparation
| Item Name | Function/Application | Key Considerations |
|---|---|---|
| Quartz Cuvettes | Holder for liquid samples during measurement. | Quartz is transparent to UV light, essential for analysis below ~350 nm; plastic/glass are not suitable for UV [15]. |
| Appropriate Solvents | Dissolving and diluting the analyte (e.g., methanol, water, buffer). | Must be transparent in the spectral region of interest; should not chemically react with the analyte [7]. |
| Syringe Filters | Removal of undissolved particles and contaminants from solutions. | Prevents light scattering; ensures a clear path for the light beam; typical pore size: 0.45 µm or 0.2 µm [7]. |
| Volumetric Flasks | Precise preparation and dilution of standard and sample solutions. | Critical for achieving accurate and known concentrations for quantitative analysis. |
| Microwave Spectrometer | Unambiguous determination of structure and configuration in the gas phase. | Emerging technique for analyzing small molecules; applicable in pharmaceutical industries [21]. |
Sample Preparation Workflows
Workflow for Active Pharmaceutical Ingredients (APIs) and Powders
The analysis of pure APIs or powder blends requires dissolution and homogenization to create a representative solution. A significant risk in powder handling is adhesion (sticking) to vessel walls, which can reduce the actual API concentration in the sampled mixture and lead to poor content uniformity in the final product [22].
The workflow below outlines the process for preparing API and powder samples, incorporating a check for adhesion issues.
Diagram 1: API and powder sample prep workflow.
Detailed Protocol:
- Weighing: Accurately weigh a representative sample of the API or powder blend using an analytical balance. The mass should be calculated to yield a final concentration within the linear range of the Beer-Lambert law for the specific compound.
- Dissolution: Quantitatively transfer the powder to an appropriate volumetric flask. Add a portion of the chosen solvent and agitate (e.g., via swirling, magnetic stirring, or sonication) until the solid is fully dissolved.
- Adhesion Check: A critical in-process control. Visually inspect the original weighing vessel and the flask walls for any adhered powder. Studies have shown that powder sticking, particularly with binary blends, can lead to elevated API concentrations on the vessel wall, creating a heterogeneity risk [22]. If sticking is observed, carefully dislodge the material and re-homogenize the mixture.
- Dilution: Once fully dissolved and homogeneous, make the solution up to the final volume with the solvent. Mix thoroughly.
- Filtration: Filter the solution using a syringe filter (e.g., 0.45 µm pore size) to remove any remaining particulate matter that could cause light scattering [7].
Table 2: Key Parameters for API and Powder Sample Preparation
| Parameter | Typical Specification | Rationale |
|---|---|---|
| Final Concentration | Adjusted to yield A < 1.0 (ideally 0.1-1.0) | Ensures measurement within instrument's linear dynamic range [15]. |
| Solvent Purity | Spectroscopic grade | Minimizes background absorbance from solvent impurities. |
| Filtration | 0.2 - 0.45 µm syringe filter | Removes particulates to prevent light scattering [7]. |
| Adhesion Mitigation | Visual inspection and vessel scraping | Counters risk of poor content uniformity from powder sticking [22]. |
Workflow for Solid Dosage Forms (Tablets)
The preparation of tablets involves breaking down the solid dosage form to extract and dissolve the API while dealing with excipients that may need to be removed to avoid interference.
Diagram 2: Solid dosage form sample prep workflow.
Detailed Protocol:
- Grinding: Place a representative number of tablets (e.g., 10) in a mortar and grind to a fine, homogeneous powder [23].
- Weighing: Accurately weigh a portion of the powder equivalent to the mass of one tablet (or the required amount for analysis).
- Extraction: Transfer the powder to a container (e.g., a centrifuge tube or volumetric flask). Add a known volume of solvent and stir vigorously for a defined period (e.g., 40 minutes) to dissolve the API. Sonication can be used to enhance extraction efficiency.
- Clarification: Centrifuge the mixture at high speed (e.g., 10,000 rpm for 5 minutes) to pellet insoluble excipients like starch or magnesium stearate [23].
- Dilution: Carefully withdraw the clear supernatant and transfer it to a volumetric flask. Make up to the final volume with solvent. Further filtration may be performed if the solution is not perfectly clear.
Workflow for Liquid Formulations
Liquid formulations (solutions, syrups, injections) often require the least preparation but may still need dilution or buffer exchange to make them suitable for measurement. For complex mixtures like biologics, the focus is on direct quantification without interference.
Protocol for Protein/Nucleic Acid Quantification: Advanced UV-Vis systems are designed for high-throughput analysis of biologics with minimal volume. The general principle for sample handling is as follows:
- Sample Input: Use only 2 µL of the liquid formulation [20].
- Containment: The sample is introduced into a fixed pathlength microcuvette, which is part of a microfluidic circuit. This design prevents evaporation and cross-contamination, which are critical for accuracy with such small volumes [20].
- Measurement: The instrument automatically measures the absorbance at 280 nm for proteins (primarily due to tryptophan and tyrosine residues) and 260 nm for DNA/RNA. The fixed pathlength and known extinction coefficient are used to calculate concentration directly via Beer-Lambert's law with high accuracy (within 2% of NIST standards) [20].
Table 3: Key Parameters for Liquid Formulation Analysis
| Parameter | Biologics (Proteins/DNA) | Simple Solutions (Syrups, Injections) |
|---|---|---|
| Sample Volume | 2 µL [20] | 1-3 mL (standard cuvette) |
| Primary Wavelength | 280 nm (Protein), 260 nm (DNA/RNA) [20] | λ-max of the specific API |
| Path Length | 0.1 mm or 0.7 mm (fixed) [20] | 1 cm (standard) or adjustable |
| Dilution Factor | Often undiluted (wide dynamic range) | Adjusted to bring A < 1.0 |
| Key Consideration | Use of microfluidics to prevent evaporation [20] | Ensure solvent matches formulation base |
Advanced Applications and In-line Monitoring
UV-Vis spectroscopy is also a powerful tool for Process Analytical Technology (PAT), enabling real-time monitoring of Critical Quality Attributes (CQAs) during manufacturing.
A demonstrated application is the in-line quantification of an API (e.g., piroxicam) during Hot Melt Extrusion (HME). A UV-Vis spectrophotometer with fiber-optic probes is installed in the extruder die in a transmission configuration. The system collects transmittance spectra, which can be converted into CIELAB color space parameters (L, a, b*) and correlated to API concentration using multivariate calibration models. This method, developed under Analytical Quality by Design (AQbD) principles, has been validated to monitor API content with accuracy profile tolerance limits within ±5%, serving as a robust PAT tool for real-time release testing [24].
For the analysis of complex mixtures without prior separation, such as multi-drug formulations, multivariate calibration techniques are employed. Methods like Partial Least Squares (PLS-1) and Principal Component Regression (PCR) can resolve spectral overlaps from multiple active ingredients (e.g., theophylline, montelukast, and loratadine) [23]. The calibration set is designed using a central composite design, and the models are refined and validated to allow for simultaneous determination of all components in pharmaceutical tablets and biological fluids like human plasma with excellent recoveries [23].
In pharmaceutical quality control (QC) research, the accuracy of Ultraviolet-Visible (UV-Vis) spectroscopic analysis is fundamentally dependent on proper sample preparation. Solvent selection directly influences solubility, stability, and spectral characteristics of active pharmaceutical ingredients (APIs), making it a critical methodological step [25]. The pursuit of clear, stable solutions is not merely procedural but central to generating reliable, reproducible analytical data that complies with regulatory standards [26]. Within a framework of Quality by Design (QbD), understanding and controlling solubility parameters is essential for defining a robust analytical method [26].
This application note provides structured protocols and strategies for selecting optimal solvents to prepare API solutions for UV-Vis analysis, ensuring data integrity while embracing emerging green chemistry principles [25] [27].
Theoretical Foundations: Solubility and Spectral Effects
The Solubility Paradigm
Solubility is governed by the principle "like dissolves like," where the intermolecular forces between solute and solvent molecules determine dissolution efficacy. The Hansen Solubility Parameters (HSP) provide a quantitative framework for predicting solubility by dividing the total cohesive energy density (δ) into three components:
- δD: Energy from dispersion forces between molecules.
- δP: Energy from permanent dipole-permanent dipole interactions.
- δH: Energy from hydrogen bonding and other specific interactions [27].
A solvent will effectively dissolve a solute if its HSP values are close to those of the solute. The Hansen Distance (Ra) between a solute and a solvent can be calculated, with a smaller Ra indicating higher probability of dissolution [27].
Solvent-Induced Spectral Shifts
The solvent environment can significantly alter the UV-Vis spectrum of a compound through solvatochromism:
- Bathochromic (Red) Shift: A shift of the absorption maximum (λmax) to a longer wavelength, often caused by increased solvent polarity or conjugation [28].
- Hypsochromic (Blue) Shift: A shift of λmax to a shorter wavelength, typically indicating reduced conjugation or environmental changes [28].
- Hyperchromic Effect: An increase in absorption intensity.
- Hypochromic Effect: A decrease in absorption intensity [28].
These effects originate from the stabilization or destabilization of a molecule's electronic states relative to its ground state by the solvent. For example, polar solvents more effectively stabilize the excited state of a polar molecule, lowering the energy required for the electronic transition and resulting in a bathochromic shift [29].
Strategic Solvent Evaluation and Selection
Primary Selection Criteria
Table 1: Key Criteria for Analytical Solvent Selection
| Criterion | Description | Impact on Analysis |
|---|---|---|
| Spectroscopic Transparency | Solvent must not absorb significantly in the spectral region of the analyte. | Prevents signal masking; UV-cutoff values are critical [7]. |
| Solute Solubility | Ability to completely dissolve the API to form a clear solution. | Prevents light scattering; ensures representative sampling and Beer-Lambert law adherence [7]. |
| Chemical Inertness | No chemical reaction with the analyte. | Preserves analyte integrity and prevents degradation [7]. |
| Safety, Health, & Environment (SHE) | Low toxicity, flammability, and environmental impact. | Protects analyst health and aligns with green chemistry principles [25] [27]. |
Quantitative Solvent Assessment and Green Alternatives
Modern solvent selection employs software tools (e.g., SUSSOL, HSPiP) to identify substitutes based on physical properties and HSP [27]. The CHEM21 assessment toolkit provides a metric for evaluating solvents based on Safety, Health, and Environment (SHE) criteria [27].
Table 2: Common Solvents for UV-Vis Spectroscopy and Greener Alternatives
| Solvent | UV Cutoff (nm) [7] | Common Uses | Key Hazards | Potential Greener Alternative |
|---|---|---|---|---|
| Acetonitrile | ~190 nm | HPLC, UV-Vis of polar compounds | Toxic, environmental hazard | Propylene Glycol (G=7.8) [25] |
| Methanol | ~205 nm | General purpose solvent | Toxic, flammable | Ethanol (Renewable, less toxic) |
| n-Hexane | ~195 nm | Non-polar extracts | Neurotoxic, highly flammable | Heptane (Less toxic) |
| Chloroform | ~245 nm | FT-IR, extraction | Carcinogen, toxic | Deuterated Chloroform (CDCl₃) (for IR) [1] |
| Xylene | Varies | Varnishes, historical solvent [27] | Irritant, hazardous | isoamyl acetate, anisole [27] |
Advanced Strategies for Challenging Compounds
For APIs with poor aqueous solubility, several strategies can be employed:
- Hydrotropy: Using high concentrations of additives like sodium acetate or urea to increase the aqueous solubility of a solute. Trial concentrations of 1-4 M may be required [25].
- Mixed Solvent Systems: Using a co-solvent like ethanol in a 3:1 ratio with an aqueous NaOH solution has been successfully demonstrated for drugs like paracetamol and ibuprofen [30].
- Solvent-less Methods: For solid analysis, techniques like grinding and pelletizing with KBr or pressing into fused beads can be used for FT-IR or XRF, though these are less common for UV-Vis [1].
Experimental Protocols
Workflow for Systematic Solvent Screening
The following diagram illustrates a logical workflow for selecting and validating an optimal solvent for UV-Vis sample preparation.
Protocol 1: Standard Solution Preparation for UV-Vis Analysis
Purpose: To prepare a clear, stable standard solution of an API for quantitative UV-Vis spectroscopic analysis.
Materials:
- The Scientist's Toolkit (See Section 6)
- API (e.g., Theophylline monohydrate, Amlodipine besylate) [26] [25]
Procedure:
- Solvent Selection: Based on preliminary screening (Section 4.1), select a suitable solvent (e.g., Propylene glycol for AMLB/TEL [25], Ethanol-NaOH mixture for paracetamol/ibuprofen [30]).
- Stock Solution Preparation:
- Accurately weigh 2-10 mg of the certified pure API using an analytical balance [25].
- Transfer the API quantitatively into a 10 mL volumetric flask.
- Add approximately 5 mL of the selected solvent. Shake and sonicate for 20 minutes or until complete dissolution is visually confirmed [25].
- Dilute to the mark with the same solvent to obtain a stock solution of known concentration (e.g., 200 µg/mL for AMLB/TEL [25]).
- Store prepared solutions under refrigeration if necessary to maintain potency and integrity [25].
- Working Solution Preparation:
- Pipette an accurate aliquot from the stock solution into a second 10 mL volumetric flask.
- Dilute to volume with a solvent that is spectroscopically transparent (often the same solvent or water) to reach a concentration within the Beer-Lambert law's linear range (absorbance typically 0.1-1.0) [28].
- Reference (Blank) Preparation: Prepare a reference solution containing all components except the API, using the same solvent and volumetric procedures [7] [15].
Protocol 2: Handling Spectral Overlap in Multi-Component Formulations
Purpose: To simultaneously quantify two APIs with overlapping UV-Vis spectra using chemometric methods.
Application Example: Analysis of Amlodipine besylate (AMLB) and Telmisartan (TEL) combination tablets [25].
Materials:
- The Scientist's Toolkit (See Section 6)
- Combined dosage form tablets (e.g., AMLB/TEL 5/40 mg) [25]
Procedure:
- Sample Preparation:
- Crush and powder a representative number of tablets.
- Accurately weigh powder equivalent to 2 mg of each API into a 10 mL volumetric flask.
- Add 5 mL of propylene glycol, sonicate for 20 min, and dilute to volume to obtain stock solution [25].
- Further dilute with water as needed to working concentration.
- Spectral Acquisition:
- Using a dual-beam spectrophotometer, record the zero-order absorption spectrum of the mixture from 200-400 nm [25].
- Use propylene glycol diluted with water as the blank.
- Chemometric Analysis (Select one method):
- First Derivative Spectroscopy: Obtain the first derivative of the absorption spectra (dA/dλ). The concentrations of AMLB and TEL can be determined at wavelengths where the derivative value for one drug is zero, and the other shows a measurable signal [25].
- Ratio Difference Method: Divide the absorption spectrum of the mixture by the spectrum of a standard solution of one analyte (the "divisor") to obtain a ratio spectrum. The difference in amplitudes at two selected wavelengths in the ratio spectrum is proportional to the concentration of the other analyte [25].
- Validation: Validate the chosen method for specificity, linearity, accuracy, and precision according to ICH Q2 guidelines [25].
Data Analysis and Interpretation
Validating Solution Quality and Spectral Data
A high-quality solution for UV-Vis analysis must be clear and stable, with no visible particles or Tyndall effect, indicating complete dissolution and absence of light-scattering colloids [7]. The resulting spectrum should be evaluated for:
- Well-Defined Peaks: The λmax should be consistent with literature values for the API, considering potential solvent-induced shifts [28].
- Appropriate Absorbance: The maximum absorbance for the working solution should ideally fall between 0.1 and 1.0 to ensure linearity with concentration and minimize instrumental error [15] [28].
- Low Noise and Stable Baseline: A smooth spectrum and stable baseline indicate a clean sample, proper instrument calibration, and suitable solvent transparency [28].
Troubleshooting Common Issues
Table 3: Troubleshooting Solubility and Spectral Problems
| Problem | Potential Cause | Corrective Action |
|---|---|---|
| Cloudy or Hazy Solution | Incomplete dissolution; particle precipitation. | Further sonication; warm gently; select a stronger solvent or use hydrotropy [25]. |
| Spectral Peaks Saturated (A > 2) | Concentration too high. | Dilute sample further; use a cuvette with a shorter path length (e.g., 1 mm instead of 10 mm) [15]. |
| High/Noisy Baseline | Solvent absorbs in measurement range; dirty cuvette; particulate matter. | Use a higher purity solvent with lower UV cutoff; filter sample; clean cuvette thoroughly [7] [28]. |
| Spectral Shifts from Expected | Solvatochromism; chemical degradation; pH effects. | Compare with literature in the same solvent; check solution pH and stability; use buffered solutions if needed [29] [28]. |
| Non-Linear Calibration Curve | Chemical association/dissociation at high concentration; instrumental stray light. | Ensure concentration is within linear dynamic range; verify instrument performance [28]. |
The Scientist's Toolkit: Essential Research Reagents and Materials
Table 4: Key Reagents and Equipment for Sample Preparation
| Item | Function/Application | Key Considerations |
|---|---|---|
| Quartz Cuvettes | Holding liquid samples for UV-Vis measurement. | Quartz is transparent down to ~200 nm; ensure pathlength (e.g., 1 cm) is appropriate and cuvettes are clean, matched, and unscratched [15]. |
| Propylene Glycol | A greener solvent for dissolving poorly water-soluble APIs. | Has a high greenness score (G=7.8); useful for drugs like amlodipine and telmisartan [25]. |
| Ethanol | A common, relatively safe solvent for a wide range of compounds. | Renewable source; less toxic than methanol; often used in mixed solvent systems [30]. |
| Volumetric Flasks (Class A) | Precise preparation of standard and sample solutions. | Critical for achieving accurate and reproducible concentrations for quantitative work. |
| Syringe Filters (0.45 µm or 0.2 µm) | Removing undissolved particles or contaminants from solutions before analysis. | Prevents light scattering and cuvette contamination; use PTFE membranes for low analyte adsorption [1]. |
| Ultrasonic Bath | Aiding dissolution by breaking up aggregates and enhancing mixing. | Standard tool for facilitating the preparation of stock solutions [25]. |
| Analytical Balance | Accurate weighing of small quantities of API. | Essential for preparing solutions of known concentration. |
Methodical solvent selection is a cornerstone of robust UV-Vis spectroscopic methods in pharmaceutical QC. By applying a systematic approach that integrates solubility science, spectral knowledge, and modern green chemistry principles, scientists can reliably develop methods that yield clear, stable solutions. This ensures the generation of high-quality, defensible analytical data crucial for drug development and quality assurance. The protocols and strategies outlined herein provide a actionable framework for optimizing this critical sample preparation step.
In the pharmaceutical quality control (QC) laboratory, the accuracy of Ultraviolet-Visible (UV-Vis) spectroscopic analysis is fundamentally dependent on the quality of sample preparation. Techniques such as filtration, dilution, and degassing are critical pre-analytical steps that address challenges posed by complex sample matrices. These techniques ensure that samples are free of interferents, are within the instrument's optimal analytical range, and do not contain gas bubbles that can compromise spectroscopic measurements. Proper execution of these methods directly supports the principles of Analytical Quality by Design (AQbD) by controlling critical method variables, thereby ensuring that results for identity, purity, and potency of Active Pharmaceutical Ingredients (APIs) are reliable, reproducible, and compliant with regulatory standards [14] [31].
This application note provides detailed protocols for these essential sample preparation techniques, framed within the context of a broader thesis on enhancing analytical reproducibility in pharmaceutical development.
Theoretical Foundations
UV-Vis spectroscopy measures the absorption of light by a sample, which is quantitatively described by the Beer-Lambert Law: ( A = \epsilon l c ), where:
- ( A ) is the measured absorbance
- ( \epsilon ) is the molar absorptivity (a compound-specific constant)
- ( l ) is the path length of the light through the sample (typically in cm)
- ( c ) is the concentration of the analyte [15] [32]
The practical application of this law in a QC setting requires careful sample preparation. The goal is to present a sample to the instrument that is a true solution, free from particulate matter (which causes light scattering), at an appropriate concentration (with an absorbance typically between 0.1 and 1.0 AU to remain within the linear dynamic range of the detector), and without microbubbles (which can scatter light and create anomalous absorbance readings) [15] [14]. Failure to adhere to these principles risks generating data that is inaccurate, non-reproducible, and non-compliant.
Essential Sample Preparation Techniques
Filtration
Filtration is employed to clarify samples by removing undissolved solids or turbidity that cause light scattering, resulting in erroneously high absorbance readings and an unstable baseline [14].
Detailed Protocol for Clarification Filtration
Principle: To remove particulate matter without adsorbing the analyte of interest.
Materials:
- Syringe (1 mL to 50 mL, depending on sample volume)
- Syringe filter unit (0.45 µm or 0.2 µm pore size)
- Collection vial (e.g., a clean 2 mL HPLC vial or a quartz cuvette)
Procedure:
- Filter Selection: Choose a filter membrane compatible with your sample solvent and analyte. Aqueous samples can use nylon or cellulose acetate membranes. For organic solvents, use polytetrafluoroethylene (PTFE) membranes. For proteinaceous samples, use low protein-binding polyvinylidene fluoride (PVDF) or PTFE membranes to prevent API loss.
- Sample Pre-treatment: For samples in viscous solvents or with high particulate load, a brief centrifugation (e.g., 5,000 rpm for 5 minutes) prior to filtration can prevent premature filter clogging.
- Filtration Assembly: Attach the syringe filter unit securely to the syringe.
- Wetting and Priming: Draw the sample into the syringe. For quantitative work, pre-rinse the syringe and filter with approximately 1 mL of the sample, and discard this rinse. This step saturates binding sites on the filter and prevents analyte dilution.
- Filtration: Pass the sample through the filter into the collection vial. Apply steady, moderate pressure to the syringe plunger. Avoid excessive force.
- Analysis: Cap the vial or proceed to transfer the filtrate to a quartz cuvette for immediate analysis. Note: Plastic cuvettes are inappropriate for UV analysis as plastic absorbs UV light; quartz is required [15].
Dilution
Dilution adjusts the sample concentration to bring its absorbance within the instrument's linear dynamic range (typically 0.1–1.0 AU), ensuring accurate quantitation [15] [14].
Detailed Protocol for Serial Dilution
Principle: To achieve a high dilution factor accurately while minimizing volumetric errors.
Materials:
- Precision pipettes and tips
- Volumetric flasks or tubes
- Appropriate diluent (e.g., the same solvent used to prepare the sample, such as a buffered aqueous solution)
Procedure:
- Initial Measurement: Perform a preliminary scan of the undiluted sample to estimate its approximate absorbance. If the maximum absorbance exceeds 1.0 AU, dilution is required [15].
- Dilution Factor Calculation: Use the Beer-Lambert law to estimate the required dilution factor. For example, if the measured absorbance (Ameas) is 1.8 and the target absorbance (Atarget) is 0.5, the required dilution factor (DF) is: ( DF = A{meas} / A{target} = 1.8 / 0.5 = 3.6 ). A 1:4 or 1:5 dilution is appropriate.
- Serial Dilution Steps:
- Step 1: Pipette a precise volume (V1) of the concentrated stock solution into a new flask or tube. For example, 1.0 mL.
- Step 2: Add diluent to a final volume (V2). For a 1:10 dilution, add 9.0 mL of diluent to make 10.0 mL total.
- Step 3: Mix thoroughly by inverting the container 10-15 times. Do not vortex if the solution is prone to bubble formation.
- Step 4: If further dilution is needed, repeat the process using the diluted solution from the previous step as the new "stock."
- Verification: Measure the absorbance of the final diluted sample. The maximum absorbance should now fall between 0.1 and 1.0 AU. If not, repeat the dilution process with an adjusted factor.
Table 1: Troubleshooting Common Dilution and Filtration Issues
| Problem | Probable Cause | Solution |
|---|---|---|
| Absorbance >1.0 AU after dilution | Incorrect dilution factor; analyte concentration too high. | Increase dilution factor; use serial dilution for greater accuracy. |
| Non-linear calibration curve | Particulate scattering; chemical reactions; incorrect pathlength. | Filter sample; ensure chemical stability; verify cuvette pathlength. |
| Precipitate formation after dilution | Solubility limit exceeded; solvent mismatch. | Dilute with the original solvent; ensure diluent compatibility. |
| Low analyte recovery after filtration | Analyte adsorption to filter membrane. | Pre-saturate filter with sample; switch to a low-binding membrane material (e.g., PTFE). |
| High background signal | Impure diluent; contaminated cuvette. | Use high-purity solvents; clean cuvette properly. |
Degassing
Degassing removes dissolved oxygen or other gases from a solvent or sample solution. Microbubbles can form and scatter light when the solution is in the sample beam path, leading to significant noise and spikes in the absorbance spectrum.
Detailed Protocol for Solvent Degassing
Principle: To remove dissolved gases that can form interfering microbubbles.
Materials:
- Solvent or sample solution
- Ultrasonic bath
- Vacuum filtration apparatus (optional)
- Stir plate and stir bar
Procedure:
- Ultrasonication (Most Common Method):
- Transfer the solvent or sample to a sealed container, leaving minimal headspace.
- Place the container in an ultrasonic water bath for 10-20 minutes. The ultrasonic energy nucleates small bubbles, causing them to coalesce and rise out of the solution.
- Sparging with Inert Gas:
- Place a volume of solvent in a flask with a magnetic stir bar.
- Begin stirring to create a deep vortex.
- Bubble a stream of inert, high-purity gas (such as helium or argon) through the solvent via a gas dispersion tube for 20-30 minutes. Sparging is highly effective but can lead to solvent evaporation and concentration changes for volatile solvents.
- Combination Method (Most Effective):
- Apply a mild vacuum to the solvent while it is being stirred or sonicated. This lowers the partial pressure of dissolved gases, enhancing their removal.
- Verification: After degassing, the solution should appear clear without any visible bubbles rising. Analyze the solution promptly to minimize reabsorption of gases from the atmosphere.
The Scientist's Toolkit: Research Reagent Solutions
The following table details essential materials and their specific functions in the preparation of complex samples for UV-Vis analysis in a pharmaceutical context.
Table 2: Essential Materials for Sample Preparation in UV-Vis Spectroscopy
| Item | Function & Rationale |
|---|---|
| Quartz Cuvettes | Sample holders that are transparent across the UV and visible light spectrum (unlike plastic or glass, which absorb UV light) [15]. |
| Syringe Filters (0.2/0.45 µm) | Remove sub-micron particulate matter to prevent light scattering. Membrane choice (Nylon, PTFE, PVDF) is critical for solvent compatibility and minimizing analyte binding [14]. |
| High-Purity Solvents | Used for dilution and as a blank. Impurities can absorb light and contribute to a high background signal, reducing the signal-to-noise ratio [14]. |
| Precision Pipettes & Volumetric Flasks | Ensure highly accurate and reproducible liquid handling, which is fundamental for obtaining valid quantitative results, especially during serial dilution [14]. |
| Ultrasonic Bath | A standard tool for degassing solvents and for dissolving stubborn or poorly soluble APIs by using sonic energy to agitate molecules [15]. |
Integrated Workflow for a Complex Pharmaceutical Sample
The following diagram illustrates a logical, integrated workflow that combines filtration, dilution, and degassing for the analysis of a solid pharmaceutical formulation, such as a tablet, where the sample matrix is complex.
Workflow for Preparing a Complex Solid Sample
This workflow ensures that the final sample solution presented to the spectrophotometer is clear, concentrated within the ideal range, and free from gas-induced artifacts, thereby guaranteeing data of the highest integrity for critical pharmaceutical QC decisions.
In pharmaceutical quality control (QC) and research, the accuracy of Ultraviolet-Visible (UV-Vis) spectroscopic analysis is paramount for ensuring the identity, purity, potency, and stability of drug substances and products [14]. However, the integrity of these analyses is frequently challenged by non-ideal sample matrices. Turbid, colored, or low-concentration samples can significantly compromise data quality, leading to inaccurate quantification and potential regulatory compliance issues [33] [34].
Turbidity, caused by suspended particles, introduces error through light scattering and absorption that is unrelated to the target analyte [35] [34]. Colored samples or complex matrices can lead to spectral interferences where multiple compounds absorb light at overlapping wavelengths [33] [36]. Finally, samples with very low analyte concentrations push against the inherent sensitivity limits of the instrument [33]. This application note, framed within a broader thesis on sample preparation for UV-Vis spectroscopy in pharma QC, details targeted strategies to overcome these challenges, ensuring reliable and accurate analytical results.
Problem Definition and Key Challenges
Understanding the specific mechanisms by which different matrices interfere with UV-Vis spectroscopy is the first step in developing effective mitigation strategies. The following table summarizes the core problems and their impact on the analytical signal.
Table 1: Key Challenges Posed by Difficult Sample Matrices in UV-Vis Spectroscopy
| Challenge | Root Cause | Impact on Analysis | Common in Pharma/QC Context |
|---|---|---|---|
| Turbidity | Suspended particles (e.g., undissolved API, excipients, contaminants) scatter and absorb light [34]. | Increased apparent absorbance, leading to overestimation of analyte concentration [37] [34]. | Analysis of suspensions, poorly soluble compounds, or samples from non-homogeneous mixtures. |
| Spectral Interference (Colored Samples) | Multiple chromophores in the sample matrix absorb light at or near the wavelength of the target analyte [33] [36]. | Inability to isolate the signal of interest, resulting in inaccurate quantification and identification [33]. | Herbal preparations, degradation products, and formulations with colored excipients or co-absorbing preservatives. |
| Matrix Effects | Components of the sample matrix (e.g., proteins, salts, solvents) alter the absorbance properties of the analyte [33]. | Shift in baseline, alteration of molar absorptivity, and reduction of method accuracy and sensitivity [33]. | Analysis of biological fluids, syrups, and complex finished products. |
| Low Concentration | Analyte concentration falls below the instrument's optimal linear detection range [33]. | Signal-to-noise ratio is too low for reliable detection and quantification [33]. | Analysis of low-dose APIs, impurities, and degradation products. |
Strategic Approaches and Methodologies
Strategies for Turbid Samples
Turbidity presents a significant challenge as it causes light scattering, which artificially inflates absorbance measurements [37] [34]. The following workflow outlines a decision pathway for handling turbid samples.
Figure 1: Decision Workflow for Analyzing Turbid Samples
Based on the pathway in Figure 1, the main strategies are:
Physical Removal of Particles:
- Filtration: Pass the sample through a membrane filter (e.g., 0.2 µm or 0.45 µm) to remove suspended particles. This is highly effective but must be validated to ensure the target analyte is not adsorbed onto the filter membrane [34].
- Centrifugation: Spin the sample at high speed to pellet suspended matter, then carefully pipette the clarified supernatant for analysis [33].
Computational Correction: For samples where particle removal is not feasible, a mathematical correction can be applied. This method, validated for turbid systems like dispersion paints, involves modeling the scattering contribution [37].
- Protocol: Measure the absorbance spectrum of the turbid sample. In a wavelength region where the analyte does not absorb (e.g., 550-690 nm), fit the scattering contribution to a power law:
Absscattering = A × λ^(-B), where λ is the wavelength and A & B are fitted parameters [37]. - Calculation: Subtract the calculated
Absscatteringvalue from the total absorbance at the analytical wavelength to obtain the corrected absorbance due solely to the analyte [37].
- Protocol: Measure the absorbance spectrum of the turbid sample. In a wavelength region where the analyte does not absorb (e.g., 550-690 nm), fit the scattering contribution to a power law:
Instrument-Based Solutions: Integrating Spheres: An integrating sphere is a accessory that collects not only transmitted light but also scattered light, a measurement known as "transflexion" [37]. This effectively neutralizes the scattering effect of turbidity, as both transmitted and scattered light are measured by the detector.
Strategies for Colored Samples and Spectral Interferences
Samples with inherent color or complex matrices require strategies to isolate the analyte's signal.
Figure 2: Workflow for Managing Colored Samples and Spectral Interferences
Chemical Separation and Derivatization:
- Selective Extraction: Use liquid-liquid extraction or solid-phase extraction (SPE) to isolate the analyte from the interfering colored matrix components [33].
- Derivatization: Chemically modify the analyte to produce a derivative that absorbs at a wavelength free from interference or has a higher molar absorptivity [33].
Multi-Wavelength and Chemometric Techniques: Advanced data processing techniques can mathematically resolve overlapping spectral signals.
- Multi-Wavelength Analysis: Using absorbance values at multiple wavelengths can help correct for baseline drift or broad background interference [33].
- Parallel Factor Analysis (PARAFAC): This is a powerful three-way analysis method. For instance, it has been used to quantify the colorant Allura Red in energy drinks by decomposing a three-way data array (absorbance × sample × pH) into the spectral, concentration, and pH profiles of the individual components, successfully isolating the analyte signal from the matrix [36].
- Other Chemometric Tools: Principal Component Analysis (PCA) and Partial Least Squares (PLS) regression are also widely used to extract meaningful information from complex spectra and build robust quantitative models [38] [39].
Strategies for Low-Concentration Samples
Analyzing samples with very low analyte concentrations requires enhancing the signal to a detectable level.
Table 2: Methods for Enhancing Sensitivity in Low-Concentration Analysis
| Method | Protocol | Considerations |
|---|---|---|
| Path Length Increase | Use a cuvette with a longer path length (e.g., 50 mm or 100 mm instead of 10 mm). According to Beer-Lambert law, absorbance is proportional to path length [39]. | Increases absorbance signal linearly. Requires larger sample volume unless using a specialized micro-volume cell. |
| Solvent Optimization | Ensure the solvent does not absorb significantly at the analytical wavelength. Use high-purity solvents to minimize background noise. | Reduces background signal, thereby improving the signal-to-noise ratio [7]. |
| Pre-Concentration | Gently evaporate the sample under a stream of nitrogen or via lyophilization, then re-dissolve in a smaller volume of solvent. | Effectively increases the analyte concentration. Risk of losing volatile analytes or causing thermal degradation. |
| Signal Averaging | Configure the spectrophotometer to take multiple rapid scans of the same sample and average them. | Reduces random noise, revealing a cleaner signal. Increases analysis time slightly. |
The Scientist's Toolkit: Essential Research Reagents and Materials
The successful implementation of the above strategies relies on a set of key laboratory materials.
Table 3: Essential Reagents and Materials for Handling Challenging Matrices
| Item | Function/Application | Key Specifications |
|---|---|---|
| Syringe Filters | Physical clarification of turbid samples via filtration [34]. | Pore size: 0.2 µm or 0.45 µm; Membrane material: Nylon, PVDF, or PTFE (check for analyte compatibility). |
| Solid-Phase Extraction (SPE) Cartridges | Selective extraction and purification of the analyte from a complex colored matrix [33]. | Sorbent phase: C18, Silica, Ion-Exchange, depending on analyte chemistry. |
| Long-Path Length Cuvettes | Enhancing the absorbance signal for low-concentration samples [39]. | Path length: 50 mm or 100 mm; Material: Quartz (for UV range). |
| Micro-Cuvettes | Analysis when sample volume is limited. | Path length: 10 mm; Volume: < 1 mL. |
| High-Purity Solvents | Minimizing background absorbance and noise, crucial for low-concentration work [7]. | UV-Vis Grade or HPLC Grade. |
| Derivatization Reagents | Chemically modifying the analyte to enhance its absorptivity or shift its λ_max [33]. | Specific to the functional group of the target analyte (e.g., acetylacetone for formaldehyde [37]). |
| Certified Reference Materials (CRMs) | For matrix-matching in calibration to correct for matrix effects [33]. | Analyte of interest in a matrix similar to the sample. |
Robust UV-Vis spectroscopic analysis of challenging matrices is achievable through a systematic approach to sample preparation and data processing. The choice of strategy—whether physical clarification, computational correction, chemical separation, or signal enhancement—depends on the specific nature of the interference. By integrating these protocols into pharmaceutical QC workflows, researchers and scientists can significantly improve the accuracy, reliability, and regulatory compliance of their analytical methods, ensuring the quality and safety of drug products.
Solving Common Challenges: A Troubleshooting Guide for UV-Vis Sample Preparation
In pharmaceutical quality control (QC) research, the accuracy of UV-Vis spectroscopy is foundational for determining critical attributes like active pharmaceutical ingredient (API) concentration and product purity. However, the integrity of these measurements is highly dependent on sample quality. This application note details the identification and correction of three prevalent sample-related errors—particulates, bubbles, and degradation—within the context of sample preparation for UV-Vis spectroscopy. We provide detailed protocols and data to help researchers ensure measurement validity and regulatory compliance.
Particulates and Subvisible Particles
In biopharmaceutical products, protein aggregates and foreign particulates can scatter light, leading to falsely elevated absorbance readings. This is particularly challenging in high-concentration protein formulations where the active ingredient itself can form particulate matter as a degradation product [40]. Current compendial standards, such as USP <788> for parenterals, set limits for visible particulates (e.g., not exceeding 6,000 per container at ≥10 µm and 600 per container at ≥25 µm). However, regulatory guidance now emphasizes the need to characterize subvisible particles below 10 µm, which can be optically heterogeneous and difficult to quantify [40].
Table 1: Analytical Techniques for Particulate Characterization
| Method | Manufacturer Examples | Size Range (µm) | Key Limitations |
|---|---|---|---|
| Light Obscuration | HIAC-Royco | 2 – 100 | Challenges with high-concentration, viscous protein solutions [40] |
| Micro-Flow Imaging (MFI) | Brightwell | 0.75 – 100 | High magnification can resolve morphologies; useful for protein aggregates [40] |
| Dynamic Light Scattering (DLS) | Wyatt Technology | 0.002 – 1.0 | Ideal for submicron particles; sensitive to dust and contaminants [40] |
Bubbles and Gas Entrainment
Air bubbles introduced during sample handling, such as pipetting, mixing, or vial transfer, act as microscopic lenses within the cuvette. They scatter light and can cause significant, erratic fluctuations in absorbance readings. This interference is a common pitfall that can compromise the precision of concentration determinations [41].
Sample Degradation
Chemical degradation of the analyte is a critical error that alters the molecular composition of the sample. This can manifest as the appearance of new chromophores, leading to increased absorbance, or the breakdown of the primary chromophore, resulting in decreased absorbance. Such degradation can be induced by factors like exposure to light, heat, or extreme pH during sample preparation and storage. Monitoring for unexpected absorbance peaks or changes in the spectral profile is essential for detecting degradation [14].
Experimental Protocols for Error Identification and Correction
Protocol for Assessing and Mitigating Particulate Interference
Principle: This protocol uses micro-flow imaging and sample degassing to identify and minimize errors from subvisible particles and micro-bubbles.
Materials:
- Micro-flow imaging instrument (e.g., Brightwell MFI)
- High-concentration protein formulation (e.g., 150 mg/mL IgG1 antibody)
- Vacuum degassing apparatus
- Laminar flow hood
- Appropriate buffer for dilutions
Procedure:
- Sample Preparation: Gently swirl the protein sample to mitigate particle settling. Avoid vortexing, which can introduce bubbles and shear stress.
- Particulate Analysis: Analyze the undiluted sample using MFI to establish a baseline count and size distribution of subvisible particles (1-100 µm).
- Degassing: Transfer a 20 mL aliquot of the sample into a test tube. Place the sample in a vacuum chamber for 5-50 minutes to remove entrained air. Conduct all transfer steps in a laminar flow hood to minimize contamination [40].
- Post-Treatment Analysis: Re-analyze the degassed sample using MFI. Compare particle counts and size distributions before and after degassing to assess the contribution of removed micro-bubbles.
- Data Interpretation: A significant reduction in particle counts after degassing indicates that a substantial portion of the measured "particulates" were air bubbles.
Protocol for Minimizing Bubbles During Cuvette Preparation
Principle: This procedure outlines best practices for handling liquid samples to prevent the introduction of bubbles that interfere with light passage.
Materials:
- UV-transparent quartz cuvettes
- Syringe with a narrow-gauge needle or fine-tip pipette
- Degassed sample solution
- Lint-free laboratory wipes
Procedure:
- Cuvette Inspection: Visually inspect the clean, dry cuvette for any dust or fibers.
- Sample Loading: Using a syringe equipped with a needle or a fine-tip pipette, gently dispense the sample solution along the inner wall of the cuvette, allowing the liquid to flow smoothly into the reservoir. This technique minimizes turbulence and bubble formation.
- Bubble Check: Hold the sealed cuvette up to the light and inspect for any adherent bubbles, particularly on the optical windows.
- Bubble Removal: If bubbles are present, gently tap the side of the cuvette to dislodge them. For persistent bubbles, use a fresh pipette tip to carefully aspirate them from the surface.
- Cuvette Handling: Wipe the exterior of the cuvette with a lint-free wipe before placing it in the spectrophotometer, ensuring fingers do not contact the optical path [41].
Protocol for Monitoring Sample Degradation via Spectral Analysis
Principle: This method uses repeated spectral scans over time to detect chemical changes in the sample that manifest as alterations in the UV-Vis spectrum.
Materials:
- UV-Vis spectrophotometer with scanning capability
- Matched quartz cuvettes
- Standard solution of the analyte (e.g., 10 µg/mL in appropriate solvent)
- Data analysis software
Procedure:
- Baseline Correction: Perform a baseline scan with the blank solvent in both the sample and reference cuvettes.
- Initial Scan: Obtain a full UV-Vis spectrum (e.g., 200-800 nm) of the fresh standard solution.
- Stress Application: Subject an identical sample to a stress condition (e.g., exposure to 40°C in a water bath for 2 hours).
- Stressed Sample Scan: Cool the stressed sample to room temperature and obtain a full spectral scan using the same parameters.
- Data Comparison: Overlay the spectra from the fresh and stressed samples. Look for the appearance of new absorbance peaks, shifts in the λ_max, or changes in the absorbance ratio at different wavelengths (e.g., A260/A280 for proteins) [14]. These changes are indicative of degradation.
The Scientist's Toolkit: Research Reagent Solutions
Table 2: Essential Materials for Sample Preparation and Analysis
| Item | Function in Protocol |
|---|---|
| Micro-Flow Imager (MFI) | Provides high-resolution imaging, counting, and sizing of subvisible particles (0.75-100 µm) in protein solutions [40]. |
| Quartz Cuvettes | Provide optimal transmission of UV and visible light; essential for accurate absorbance measurements across the full spectral range [14]. |
| Polystyrene (PS) Latex Bead Standards | Spherical particles of known size used as instrument performance standards to calibrate and validate particle sizing/counting methods [40]. |
| Syringe & Narrow-Gauge Needle | Allows for gentle, controlled dispensing of sample into cuvettes, minimizing turbulence and bubble formation during loading. |
| Deuterated Solvents (for NMR) | Used in orthogonal NMR analysis for structural elucidation and confirmation of degradation products or impurities [14]. |
| Vacuum Degassing Apparatus | Removes dissolved and entrained gasses from liquid samples prior to analysis, reducing interference from micro-bubbles in particle analysis and absorbance readings [40]. |
Workflow for Systematic Error Management
The following workflow diagram outlines a logical sequence for identifying, diagnosing, and correcting the sample-related errors discussed in this note.
Overcoming Matrix Effects and Solvent Absorption Interference
In the context of pharmaceutical quality control (QC) research, Ultraviolet-Visible (UV-Vis) spectroscopy is a cornerstone technique for quantifying active pharmaceutical ingredients (APIs), ensuring content uniformity, and monitoring dissolution profiles due to its simplicity, cost-effectiveness, and rapid analysis time [14]. However, the accuracy and reproducibility of UV-Vis methods can be significantly compromised by two major analytical challenges: matrix effects and solvent absorption interference.
The sample matrix—comprising all components in a sample other than the analyte, such as excipients, impurities, salts, and proteins—can alter the expected spectroscopic signal of the target analyte [42] [43]. Simultaneously, the solvent itself can cause interference, particularly at lower wavelengths in the UV region, by absorbing light and leading to inaccurate absorbance readings [7]. Within a broader thesis on sample preparation for UV-Vis spectroscopy in pharma QC, this document provides detailed application notes and protocols to identify, assess, and overcome these challenges, ensuring data integrity and regulatory compliance.
Understanding the Challenges
Matrix Effects in Spectroscopic Analysis
In analytical chemistry, a matrix effect is formally defined as the "combined effect of all components of the sample other than the analyte on the measurement of the quantity" [42]. In UV-Vis spectroscopy, these effects manifest primarily through:
- Chemical Interactions: Matrix components can chemically interact with the analyte, leading to changes in its absorptivity via phenomena such as solvatochromism, where the absorbance spectrum of a compound shifts due to the polarity of its surrounding solvent environment [43].
- Physical Interactions: Components can cause light scattering, particularly in turbid samples, or variations in effective path length, distorting the baseline and leading to inaccurate quantification [42].
- Signal Overlap: Other compounds in the sample matrix may absorb at or near the same wavelength as the target analyte, causing spectral overlap and falsely elevated absorbance values [14].
Solvent Absorption Interference
The choice of solvent is critical, as all solvents have a UV cutoff wavelength below which they absorb significantly and reduce the available light path [7]. Using a solvent with a cutoff too close to the analyte's λmax can result in a noisy baseline, reduced linear dynamic range, and poor detection limits. Key considerations include:
- Ensuring the solvent is transparent at the measurement wavelength.
- Accounting for solvent-related artifacts such as bubbles or particulate matter that can cause light scattering [7].
Assessment and Evaluation Strategies
Before developing mitigation strategies, it is crucial to detect and quantify the extent of these interferences. The following protocols provide a systematic approach for assessment.
Protocol: Standard Addition Method for Matrix Effect Assessment
Principle: This method helps identify and compensate for matrix-induced signal suppression or enhancement by adding known quantities of the analyte directly to the sample matrix [43].
Procedure:
- Prepare Sample Aliquots: Accurately divide the prepared sample solution into at least four equal aliquots.
- Spike the Aliquots: To all but one aliquot, add known and increasing volumes of a standard analyte solution. Add an equivalent volume of pure solvent to the first aliquot (the "zero spike").
- Dilute to Volume: Dilute all aliquots to the same final volume with the appropriate solvent.
- Measure Absorbance: Record the absorbance of each solution at the analytical wavelength.
- Plot and Interpret: Plot the measured absorbance against the concentration of the analyte added (see Diagram 1). The x-intercept of the line represents the original analyte concentration in the sample. A difference in slope between this method and a pure solvent-based calibration curve indicates a matrix effect [43].
Diagram 1: Standard Addition Method Workflow. This diagram outlines the key steps for performing the standard addition method to assess and compensate for matrix effects. The x-intercept of the resulting plot provides the original analyte concentration.
Protocol: Solvent Suitability and Blank Correction
Principle: This test evaluates whether the solvent system introduces significant background absorption that could interfere with the analyte signal [7].
Procedure:
- Select Solvent: Choose a solvent with a UV cutoff wavelength well below the analyte's λmax. For example, methanol is often preferred over solvents like chloroform or acetone for measurements near 250 nm [44].
- Prepare Blank: In a clean quartz cuvette, place the pure solvent that will be used to dissolve the sample.
- Record Baseline: Place the solvent-filled cuvette in the spectrometer and run a baseline or background correction.
- Measure Blank Absorbance: Against air as a reference, measure the absorbance of the pure solvent across the spectral range of interest (e.g., 200-400 nm).
- Evaluate: The solvent is suitable if its absorbance is less than 0.1 AU at the analyte's λmax. A significant absorption peak indicates interference, necessitating a solvent change [7].
Strategies for Overcoming Interference
A multi-faceted approach is required to ensure analytical accuracy. The following strategies can be employed during method development.
Sample Preparation and Clean-up
Effective sample preparation is the first line of defense against matrix effects [45].
- Dilution: Simple dilution of the sample can reduce the concentration of interfering matrix components to a level where they no longer significantly affect the analyte signal. However, this may also dilute the analyte below its limit of quantification [7].
- Filtration: Using a 0.45 μm or 0.2 μm syringe filter to remove particulate matter can minimize light scattering caused by turbidity [7].
- Selective Extraction: Techniques like liquid-liquid extraction or solid-phase extraction can selectively isolate the analyte from the complex matrix, thereby removing potential interferents [45].
Chemometric Modeling and Advanced Data Processing
For complex mixtures with severe spectral overlap, advanced computational models can resolve analyte signals without physical separation [46].
Principle: Chemometric techniques like Multivariate Curve Resolution-Alternating Least Squares (MCR-ALS) use mathematical modeling to separate the spectral contributions of individual components in a mixture [42]. Augmented Classical Least Squares models, such as Spectral Residual Augmented Classical Least Squares (SRACLS), have been shown to effectively handle spectral overlaps in pharmaceutical mixtures, yielding low prediction errors (e.g., RRMSEP <2%) [46].
The Scientist's Toolkit: Key Research Reagents and Materials
| Item | Function in Protocol | Key Considerations |
|---|---|---|
| Quartz Cuvettes | Holds liquid sample for measurement. | Must be optically clear; pathlength (e.g., 1 cm) affects signal intensity [7]. |
| HPLC-Grade Solvents | Dissolves analyte and matrix. | Low UV cutoff; high purity to minimize background absorption [44]. |
| Syringe Filters | Removes particulate matter. | Pore size (0.45/0.2 μm); compatibility with solvent to prevent dissolution [7]. |
| Reference Standards | Used for calibration and standard addition. | High purity; required for accurate quantification and recovery studies [44]. |
Wavelength Selection and Derivative Spectroscopy
Shifting the measurement wavelength or using derivative techniques can enhance specificity.
- Wavelength Selection: If an interferent absorbs at the λmax of the analyte, selecting an alternative, secondary wavelength where the analyte still absorbs significantly but the interferent does not can eliminate the interference.
- Derivative Spectrophotometry: This technique transforms the zero-order absorption spectrum into its first or second derivative. This process suppresses broad background signals from interferents and resolves overlapping peaks, allowing for accurate quantification of the target analyte [44]. A study on Tafamidis meglumine successfully used first-order derivative techniques to resolve overlapping peaks, demonstrating excellent linearity (R² > 0.998) and accuracy (recovery rates of 99-100.57%) [44].
Integrated Experimental Protocols
Comprehensive Protocol: Development of a Robust UV-Vis Method for Tablet Formulation
Objective: To accurately quantify an API in a tablet formulation while compensating for matrix effects from excipients.
Materials: Tablet formulation, API reference standard, suitable solvent (e.g., methanol), volumetric flasks, ultrasonic bath, syringe filters (0.45 μm), quartz cuvettes, UV-Vis spectrophotometer.
Procedure:
- Sample Preparation:
- Crush and homogenize several tablets.
- Accurately weigh a portion equivalent to one dose into a volumetric flask.
- Add solvent, sonicate for 15 minutes to dissolve the API, and dilute to volume.
- Filter a portion of the solution through a 0.45 μm syringe filter to obtain a clear sample stock solution [44] [7].
- Preliminary Matrix Effect Assessment (Post-Extraction Spike):
- Prepare a blank matrix solution from placebo tablets (tablets without API) using the same method as in Step 1.
- Prepare two solutions:
- Solution A: A standard solution of the API in pure solvent.
- Solution B: The blank matrix solution, spiked with the same concentration of API.
- Measure the absorbance of both solutions. A significant difference in response indicates a matrix effect [45].
- Calibration with Matrix Matching:
- Prepare a series of calibration standards by spiking the blank matrix solution (from placebo tablets) with known concentrations of the API reference standard. This ensures the calibration curve and the unknown sample experience identical matrix effects [42].
- Analysis and Validation:
- Measure the absorbance of the prepared sample solution (from Step 1).
- Calculate the API concentration using the matrix-matched calibration curve.
- Validate the method by assessing linearity, precision (repeatability with %RSD < 2%), and accuracy through recovery studies (target: 98-102%) as per ICH Q2(R1) guidelines [44].
Summary of Matrix Effect Assessment Methods
| Method | Type of Information | Key Advantage | Key Limitation |
|---|---|---|---|
| Standard Addition [43] | Quantitative | Compensates for effects directly in the sample matrix. | Labor-intensive; requires multiple sample preparations. |
| Post-Extraction Spike [45] | Quantitative | Directly compares signal in matrix vs. pure solvent. | Requires availability of a blank matrix. |
| Slope Ratio Analysis [45] | Semi-quantitative | Evaluates matrix effect over a range of concentrations. | Does not provide a single definitive value for the effect. |
Protocol: Chemometric-Assisted Simultaneous Determination of Multiple APIs
Objective: To quantify three antiviral drugs (sofosbuvir, simeprevir, ledipasvir) in a mixture despite significant spectral overlap [46].
Procedure:
- Experimental Design: Generate a calibration set of 25-30 mixtures with varying concentrations of all three APIs using a factorial design to adequately cover the "concentration space" [46].
- Spectral Acquisition: Record the full UV spectrum (e.g., 200-400 nm) for each mixture in the calibration set.
- Model Building: Use chemometric software (e.g., MATLAB) to build an SRACLS model. The model is trained to correlate the spectral data with the known concentrations of all components.
- Model Validation: Use an independent set of validation samples to assess the model's predictive performance. Calculate the Relative Root Mean Square Error of Prediction (RRMSEP); a value below 2% indicates excellent predictive accuracy [46].
- Analysis of Unknowns: Measure the spectrum of the unknown pharmaceutical sample and use the trained chemometric model to predict the concentration of each API directly.
Diagram 2: Chemometric Analysis Workflow. This diagram illustrates the key stages of developing and applying a chemometric model for the simultaneous quantification of multiple analytes in a mixture with spectral overlap.
Matrix effects and solvent interference are significant yet manageable challenges in UV-Vis spectroscopic analysis for pharmaceutical QC. This document has outlined a systematic framework for overcoming these obstacles, encompassing rigorous assessment protocols, practical sample preparation techniques, and advanced chemometric modeling. By integrating these strategies into method development and validation—adhering to standards such as ICH Q2(R1)—researchers can ensure their UV-Vis methods are robust, accurate, and fit-for-purpose, thereby reinforcing the role of spectroscopy as a reliable pillar in pharmaceutical quality control.
Optimizing Concentration and Pathlength to Stay within the Linear Dynamic Range
In pharmaceutical quality control (QC) and research, Ultraviolet-Visible (UV-Vis) spectroscopy is a foundational analytical technique for ensuring the identity, purity, and potency of drug substances and products. Its quantitative application hinges on the Beer-Lambert law (A = ε * c * l), which states that the absorbance (A) of a solution is directly proportional to the concentration (c) of the analyte and the pathlength (l) of the light through the solution [15]. The proportionality constant, ε, is the molar absorptivity, an intrinsic molecular property.
The linear dynamic range refers to the concentration (or absorbance) range over which this direct proportionality holds true. Operating outside this range, particularly at high absorbances where the relationship becomes non-linear, leads to inaccurate concentration measurements, jeopardizing product quality and compliance. The instrument's ability to reliably quantify an analyte diminishes when absorbance values become too high, typically above 1-2 AU, because the detector receives insufficient light [15]. Therefore, a core tenet of sample preparation is strategically optimizing both analyte concentration and instrument pathlength to ensure measurements fall within this critical linear window, ensuring data integrity for regulatory submissions and batch release.
Core Principles and Optimization Strategies
The fundamental relationship defined by the Beer-Lambert law provides two primary, interchangeable levers for controlling absorbance: concentration (c) and pathlength (l). This offers flexibility in method development to accommodate diverse sample types and analytical requirements.
The Interplay of Concentration and Pathlength
If the absorbance of a sample is too high, it can be brought back into the linear range by either diluting the sample (decreasing c) or by using a cuvette with a shorter pathlength (decreasing l). Conversely, for very low-concentration analytes, sensitivity can be improved by using a cuvette with a longer pathlength, which increases the absorbance signal without altering the sample composition [32] [15]. This principle is critical for expanding the utility of UV-Vis spectroscopy across various applications, from analyzing concentrated protein solutions to detecting trace impurities.
Table 1: Strategies for Adjusting Absorbance into the Linear Range
| Situation | Problem | Solution 1 (Concentration) | Solution 2 (Pathlength) |
|---|---|---|---|
| Absorbance too high (>1-2 AU) | Signal saturation; non-linearity | Dilute the sample with an appropriate solvent. | Switch to a cuvette with a shorter pathlength (e.g., from 10 mm to 1 mm). |
| Absorbance too low (near baseline) | Poor signal-to-noise ratio; inaccurate quantification | Concentrate the sample (if feasible). | Switch to a cuvette with a longer pathlength (e.g., from 10 mm to 50 mm). |
Advanced Variable Pathlength Technologies
Emerging technologies now allow for dynamic pathlength adjustment within a single measurement, eliminating the need for manual sample preparation steps like dilution. Variable Pathlength Technology (VPT), used in advanced in-line spectrophotometers, dynamically adjusts the optical pathlength during analysis to maintain absorbance within the instrument's linear range [47].
This technology employs Slope Spectroscopy, where absorbance is measured at multiple pathlengths. The concentration is then derived from the slope of the plot of absorbance versus pathlength (where slope = ε * c), rather than from a single absorbance reading [47]. This method provides an internal data validation check; a high coefficient of determination (R²) confirms that the data complies with the Beer-Lambert law, guaranteeing measurement reliability [48] [47]. This approach is particularly valuable for Process Analytical Technology (PAT) in continuous manufacturing and for analyzing precious or variable-concentration samples, such as adeno-associated virus (AAV) vectors in gene therapy [47].
Experimental Protocols for Method Optimization
Protocol 1: Establishing Linear Range via Dilution Series
This foundational protocol is used to validate the linear dynamic range for a new analyte or method.
1. Materials and Reagents:
- Stock solution of the analyte (e.g., active pharmaceutical ingredient - API)
- Appropriate solvent (e.g., buffer, water)
- Volumetric flasks or microcentrifuge tubes
- Pipettes and calibrated volumetric glassware
- UV-Vis spectrophotometer with 10 mm pathlength quartz cuvettes
2. Procedure: 1. Prepare a concentrated stock solution of the analyte with a known, high concentration. 2. Serially dilute the stock solution to create a series of standard solutions (e.g., 5-8 concentrations) covering a broad expected absorbance range. 3. Using the solvent as a blank, measure the absorbance of each standard solution at the target wavelength (e.g., λmax of the analyte). 4. Plot the measured absorbance (y-axis) against the corresponding concentration (x-axis).
3. Data Interpretation: Perform a linear regression analysis on the data. The linear dynamic range is the concentration span over which the coefficient of determination (R²) is >0.995 (or per internal SOP) and the residuals are randomly distributed. Concentrations yielding an absorbance >~1.5 AU should be excluded from the calibration curve if they show significant deviation from linearity.
Protocol 2: Pathlength Optimization for High-Concentration Samples
This protocol is applied when a sample's initial absorbance is too high, and dilution is undesirable or impractical.
1. Materials and Reagents:
- Undiluted sample solution
- UV-Vis spectrophotometer
- Set of quartz cuvettes with different pathlengths (e.g., 10 mm, 2 mm, 1 mm, 0.1 mm)
2. Procedure: 1. Measure the absorbance of the sample using a standard 10 mm pathlength cuvette. 2. If the absorbance exceeds 1.5 AU, switch to a cuvette with a shorter pathlength (e.g., 1 mm). 3. Remeasure the absorbance with the shorter pathlength cuvette. 4. Continue this process with even shorter pathlength cuvettes if necessary until the measured absorbance falls comfortably within the 0.1-1.0 AU range.
3. Data Interpretation: The valid measurement is the one taken with the pathlength that produces an absorbance within the linear range. The concentration can be calculated directly using the Beer-Lambert law with the known pathlength, eliminating the need for dilution and potential introduction of error.
Protocol 3: In-Line Concentration Monitoring with Variable Pathlength
This protocol describes the use of advanced VPT for real-time monitoring in process streams, such as during purification or continuous manufacturing [47].
1. Materials and Reagents:
- Process stream (e.g., from a tangential-flow filtration system)
- FlowVPX spectrophotometer or equivalent with variable pathlength flow cell
- KrosFlo KR2i Real-Time Process Management system or equivalent bioreactor/process control system
2. Procedure: 1. Integrate the VPT-enabled flow cell directly into the process flow path. 2. Set the instrument to Quick Slope mode for dynamic processes where concentration changes rapidly. This mode automatically scans multiple pathlengths to find the linear region for each measurement [47]. 3. The instrument collects absorbance data across a range of pathlengths and performs linear regression in real-time. 4. The slope (m) of the absorbance vs. pathlength plot is used to calculate concentration (c = m / ε). 5. Monitor the R² value output by the instrument. An R² value >0.999 indicates the measurement is reliable and within the linear dynamic range [47].
3. Data Interpretation: The concentration is calculated automatically by the software using Slope Spectroscopy. The R² value serves as a continuous internal validation check, ensuring data quality and compliance with the Beer-Lambert law throughout the process.
Data Presentation and Analysis
Pathlength Selection Guide
Table 2: Guide to Pathlength Selection for Different Sample Types
| Sample Type / Concentration | Recommended Pathlength | Key Consideration |
|---|---|---|
| Standard API solutions (for QC assay) | 10 mm | The default for most pharmacopeial methods; balances sensitivity and convenience. |
| High-concentration proteins / nucleic acids | 1 mm or less (e.g., 0.1 mm) | Prevents saturation, avoids multiple dilutions, and saves sample [15]. |
| Low-concentration impurities / cleaning agents | 50 mm or more (e.g., long-pathlength flow cell) | Increases absorbance signal, improving the limit of detection (LOD) and quantitation (LOQ) [32]. |
| In-line process monitoring (variable concentrations) | Variable Pathlength Technology (VPT) | Dynamically adjusts from 0.001 mm to 5 mm to maintain linearity without manual intervention [47]. |
Case Study Data: UV-Vis for Tablet Content Uniformity
A study validating in-line UV-Vis spectroscopy for monitoring theophylline content in tablets demonstrates successful method validation per ICH Q2. The method proved specific, linear, precise, and accurate for API content between 7-13 wt% [26].
Table 3: Validation Data for In-line UV-Vis Content Uniformity Monitoring [26]
| Validation Parameter | Result (Throughput: 7200 tablets/h) | Result (Throughput: 20000 tablets/h) | Acceptance Criterion |
|---|---|---|---|
| Linearity (R²) | 0.9891 | 0.9936 | R² > 0.980 (example) |
| Repeatability (Coefficient of Variation) | Max. 6.46% | Not Specified | Typically < 5-10% |
| Intermediate Precision (Coefficient of Variation) | Max. 6.34% | Not Specified | Typically < 5-10% |
| Accuracy (Mean % Recovery) | Sufficient | Higher accuracy than 7200/h | 90-110% (example) |
Workflow and Decision Pathways
The following decision tree outlines a systematic workflow for optimizing concentration and pathlength to ensure measurements remain within the linear dynamic range.
Figure 1: Decision pathway for optimizing concentration and pathlength.
The Scientist's Toolkit: Essential Research Reagent Solutions
Table 4: Key Materials and Reagents for UV-Vis Sample Preparation and Analysis
| Item | Function / Application | Critical Considerations |
|---|---|---|
| Quartz Cuvettes (multiple pathlengths) | Sample holder for UV-Vis analysis. | Quartz is transparent down to ~190 nm; plastic cuvettes are unsuitable for UV [15]. A set of pathlengths (e.g., 0.1, 1, 10 mm) is essential for optimization. |
| High-Purity Solvents (HPLC grade) | Dissolving and diluting analytes; used as blank. | Must be transparent at the analytical wavelength. Free from UV-absorbing impurities to prevent high background noise. |
| Volumetric Glassware (Class A) | Precise preparation of standard solutions and dilutions. | Calibration and tolerance are critical for accurate concentration data, a prerequisite for valid Beer-Lambert application. |
| Formulated Cleaning Agents (with chromophores) | Model soils for cleaning validation studies [32]. | Often contain a UV chromophore for trace detection at specific wavelengths like 220 nm, enabling in-line monitoring of residue removal. |
| Variable Pathlength Spectrophotometer (e.g., FlowVPX) | Real-time, in-line concentration monitoring for PAT [47]. | Dynamically adjusts pathlength (0.001-5 mm) to maintain linearity, eliminating manual dilution and providing internal data validation via R². |
| Process Analytical Technology (PAT) Software | Manages in-line UV data and automated process control. | Enables closed-loop feedback control for unit operations like TFF, ensuring endpoint is based on real-time concentration [47]. |
Best Practices for Contamination Control and Ensuring Sample Homogeneity
In the context of pharmaceutical quality control (QC) research, sample preparation is a critical step that directly influences the reliability of analytical results, particularly for UV-Vis spectroscopy. Proper sample preparation ensures the accurate quantification of active pharmaceutical ingredients (APIs) and the detection of impurities, which are fundamental to ensuring drug safety and efficacy [14]. This document outlines structured protocols and best practices for controlling contamination and ensuring sample homogeneity, two pivotal factors that underpin the integrity of spectroscopic data in regulated pharmaceutical environments.
Contamination Control in the Analytical Laboratory
Contamination introduces errors and compromises data integrity. Effective control requires a systematic approach addressing multiple potential sources.
Modern analytical instruments are exceptionally sensitive, making even trace-level contaminants a significant concern [19]. Common sources include:
- Reagents and Water: The purity of solvents and water is paramount. For parts-per-billion (ppb) or parts-per-trillion (ppt) analysis, high-purity water (e.g., ASTM Type I) and acids with verified certificates of analysis are essential. An aliquot of 5 mL of acid containing 100 ppb of a contaminant can introduce 5 ppb of that contaminant into a 100 mL sample [19].
- Labware: Glassware can leach elements like boron, silicon, and sodium. Plasticware and tubing can also be significant sources of specific elemental contaminants [19].
- Laboratory Environment: Airborne particulates from dust, HVAC systems, and building materials can contaminate samples. Studies show that distilled nitric acid has significantly lower contamination when prepared in a HEPA-filtered clean room compared to a regular laboratory [19].
- Personnel: Cosmetics, lotions, perfumes, jewelry, and even sweat can introduce contaminants such as aluminum, zinc, and sodium [19].
Establishing a Contamination Control Framework
A robust framework combines laboratory design, procedural controls, and consistent cleaning practices.
2.2.1 Laboratory Design and Workflow Separation Physically separate pre- and post-amplification areas or, in a general analytical context, sample preparation from analysis areas [49]. This prevents cross-contamination, especially from high-concentration samples or standards to low-concentration ones. Maintain a one-way workflow and use dedicated equipment, protective clothing, and consumables for each area [49] [50].
2.2.2 Procedural Controls and Aseptic Technique
- Personal Protective Equipment (PPE): analysts should wear powder-free gloves (as powder can contain zinc) and avoid wearing jewelry, cosmetics, or lotions in the lab [19].
- Liquid Handling: Use aerosol-resistant pipette tips and maintain good pipetting technique to minimize splashing. Carefully open tubes and keep samples covered as much as possible [49].
- Sample Handling: Open standards and prepare samples under a fume hood or in a clean room environment. Rinse the outside of reference material containers with deionized water before opening and recap them quickly to reduce environmental contamination [19].
2.2.3 Cleaning and Decontamination Protocols Regularly decontaminate work surfaces and equipment with 70% ethanol. For thorough decontamination after spills, a 10-15% fresh bleach solution (sodium hypochlorite) is recommended; it should be left on the surface for 10-15 minutes before being wiped off with de-ionized water [49]. Automated cleaning, such as a pipette washer, has been shown to reduce residual contamination significantly compared to manual cleaning [19].
Table 1: Common Contamination Sources and Mitigation Strategies
| Source Category | Specific Examples | Mitigation Strategy |
|---|---|---|
| Reagents & Water | Low-purity water, acids with high impurity levels | Use ASTM Type I water; check acid CoA; use high-purity solvents [19] |
| Labware | Borosilicate glass (leaches B, Si, Na), reusable pipettes, silicone tubing | Use FEP or quartz; employ automated labware washers; use metal-free or dedicated plasticware [19] |
| Laboratory Environment | Airborne particulates, dust, HVAC systems | Use HEPA-filtered clean rooms or hoods for sample prep [19] [50] |
| Personnel | Cosmetics, jewelry, powdered gloves, lotions | Enforce use of powder-free gloves; prohibit jewelry/cosmetics in lab [19] |
Ensuring Sample Homogeneity
Sample homogeneity is critical for obtaining a representative aliquot, which is essential for accurate quantification in assays and content uniformity testing.
Sample Preparation for Drug Substances (API)
The "dilute and shoot" approach for drug substances requires meticulous technique to ensure the sample is fully representative and dissolved [51].
Protocol 3.1: Weighing and Solubilization of Drug Substance
Principle: To accurately weigh and completely dissolve a drug substance into a solution that is representative of the entire batch and compatible with UV-Vis analysis.
Materials:
- Analytical balance (five-place, ±0.1 mg accuracy)
- Folded weighing paper or small weighing boat
- Appropriate Class A volumetric flask
- Diluent (e.g., suitable solvent or buffer)
- Ultrasonic bath or wrist-action shaker
Procedure:
- Weighing:
- For hygoscopic APIs, allow the sample to warm to room temperature before opening to prevent moisture condensation. Handle speedily to avoid moisture uptake [51].
- Tare a folded weighing paper on the balance. Accurately weigh the required amount of drug substance (typically 25-50 mg). The folded paper minimizes spillage and facilitates transfer.
- Quantitatively transfer all powder into a volumetric flask using a funnel. Rinse the weighing paper and funnel thoroughly with the diluent into the flask. Alternatively, use differential weighing [51].
- Solubilization:
- Fill the volumetric flask approximately halfway with the diluent.
- Solubilization Method A (Sonication): Place the flask in an ultrasonic bath filled with 0.5-1 inch of water (without a perforated plate). Sonicate for the time optimized during method development. Scrutinize the solution to ensure all particles are dissolved. Note: prolonged sonication can generate heat and cause degradation [51].
- Solubilization Method B (Shaking): Secure the flask on a wrist-action or orbital shaker and agitate for the prescribed time. This method offers better defined and replicated dissolution conditions [51].
- After solubilization, dilute to the final volume with the diluent and mix thoroughly.
Sample Preparation for Solid Oral Drug Products (Tablets/Capsules)
For drug products, a "grind, extract, and filter" approach is typically needed to liberate the API from the excipient matrix [51].
Protocol 3.2: Grinding, Extraction, and Filtration of Tablets
Principle: To achieve particle size reduction for complete extraction of the API from a solid dosage form, resulting in a homogeneous solution for analysis.
Materials:
- Porcelain mortar and pestle or a micro-mill
- Volumetric flask
- Extraction diluent
- Sonicator or shaker
- Disposable syringe and 0.45 µm membrane filter (e.g., Nylon or PTFE)
Procedure:
- Particle Size Reduction:
- For potency testing, composite 10-20 tablets by crushing them in a mortar and pestle until a fine, homogeneous powder is achieved [51].
- For content uniformity testing, a single tablet can be wrapped in weighing paper and crushed with a pestle [51].
- For hard tablets, a ball or rotor mill may be used for more efficient grinding.
Quantitative Transfer:
- Quantitatively transfer the entire amount of crushed powder (or a weight equivalent to the Average Tablet Weight) into a volumetric flask using a funnel. Rinse all surfaces (mortar, pestle, funnel) thoroughly with the diluent into the flask.
Extraction:
- Dilute the powder in the flask approximately halfway with the extraction diluent.
- Extract the API by sonication or shaking for the time and under the conditions validated in the method. For immediate-release formulations with disintegrants, intact tablets may sometimes be dropped directly into the flask [51].
Filtration:
- Filter an aliquot of the solution through a 0.45 µm disposable syringe filter. Discard the first 0.5 mL of the filtrate to saturate the filter membrane and avoid dilution effects. Collect the subsequent clear filtrate directly into an HPLC vial for analysis [51]. If the solution remains cloudy, use a 0.2 µm filter or centrifugation.
Special Considerations for UV-Vis Spectroscopy
The following practices are crucial for preparing samples suitable for UV-Vis spectroscopy:
- Solution Clarity: Samples must be optically clear and free of particulate matter to avoid light scattering effects that lead to inaccurate absorbance readings [14]. Filtration is often necessary.
- Optimal Absorbance: The concentration and path length should be chosen such that the absorbance of the sample falls within the linear range of the detector, typically between 0.1 and 1.0 Absorbance Units (AU) [7] [14]. This may require dilution of the stock solution or the use of a cuvette with a shorter path length.
- Cuvette Care: Cuvettes must be meticulously clean. Before use, rinse them with a solvent compatible with the sample, ideally the same solvent used for the measurement [7].
- Aggregation Control: For solution measurements, use dilute solutions to minimize molecular aggregation, which can alter spectral properties. Comparing solution and thin-film spectra can be useful for studying aggregation behavior [7].
Workflow and Material Summaries
Experimental Workflow Diagram
The following diagram summarizes the core protocols for preparing drug substances and products, highlighting critical control points for contamination and homogeneity.
The Scientist's Toolkit: Essential Research Reagent Solutions
The following table lists key materials and their functions for effective contamination control and sample preparation.
Table 2: Essential Materials for Contamination Control and Homogeneous Sample Preparation
| Item | Function & Importance |
|---|---|
| High-Purity Water (ASTM Type I) | Serves as the primary diluent; low elemental contamination is critical for accurate baseline and ppb/ppt-level analysis [19]. |
| High-Purity Acids & Solvents | Used for sample dissolution, dilution, and preservation. Certificates of Analysis are essential to verify low levels of elemental impurities [19]. |
| Quartz or FEP Labware | Preferred over borosilicate glass for trace metal analysis to avoid contamination from boron, silicon, and sodium [19]. |
| Aerosol-Resistant Filtered Pipette Tips | Prevents cross-contamination of samples and stock reagents by blocking aerosols from entering the pipette shaft [49]. |
| Class A Volumetric Glassware | Provides high accuracy and precision in volume measurement, which is fundamental for quantitative preparation of standards and samples [51]. |
| Syringe Filters (0.45 µm, 0.2 µm) | Clarifies sample solutions by removing undissolved particulates that cause light scattering in UV-Vis spectroscopy [51]. |
| Powder-Free Gloves | Prevents the introduction of zinc and other contaminants present in the powder of some gloves [19]. |
| HEPA-Filtered Enclosure (Clean Hood/BSC) | Provides a controlled, low-particulate environment for handling samples, standards, and reagents, minimizing airborne contamination [19] [50]. |
Ensuring Compliance: Validating Your Sample Preparation Method for USP and EP Standards
The analytical method lifecycle is a structured framework ensuring that analytical procedures remain fit-for-purpose from initial development through routine use in a regulated laboratory. This approach aligns with recent regulatory updates, including the ICH Q14 guideline on analytical procedure development and the revised ICH Q2(R2) on validation [52]. For pharmaceutical quality control (QC), adopting a lifecycle model is critical for maintaining data integrity, regulatory compliance, and consistent product quality.
A fundamental shift in the United States Pharmacopoeia (USP) <1058> chapter reflects this lifecycle approach. The draft update renames it "Analytical Instrument and System Qualification (AISQ)" and introduces a three-phase integrated lifecycle for qualification and validation [53]:
- Phase 1: Specification and Selection - Defining intended use through a User Requirements Specification (URS)
- Phase 2: Installation, Qualification, and Validation - Installation, commissioning, and operational verification
- Phase 3: Ongoing Performance Verification (OPV) - Continuous monitoring to ensure sustained fitness for purpose [53]
Table 1: The Three Phases of the Analytical Method Lifecycle
| Lifecycle Phase | Core Activities | Key Deliverables |
|---|---|---|
| Stage 1: Procedure Design | Method development based on Analytical Target Profile (ATP); Risk assessment; Parameter selection | Defined method operating within a controlled design space [52] |
| Stage 2: Procedure Performance Qualification | Experimental validation to demonstrate fitness for purpose | Fully validated method meeting all ATP criteria [52] |
| Stage 3: Ongoing Procedure Performance Verification | Routine monitoring, change control, and periodic assessment | Continual assurance of method robustness [52] |
Fit-for-Purpose Validation in Pharmaceutical UV-Vis Spectroscopy
Fit-for-purpose validation establishes that an analytical method meets the requirements of its intended applications, with validation depth proportional to the method's criticality [54]. In pharmaceutical QC, UV-Vis spectroscopy is widely employed for identity testing, assay, purity testing, and dissolution monitoring due to its simplicity, speed, and cost-effectiveness [14].
The core principle of "fitness for purpose" for an analytical instrument requires documented evidence that it is metrologically capable over specified ranges, its calibration is traceable to national standards, and its contribution to measurement uncertainty is sufficiently small—preferably no more than one-third of the target measurement uncertainty [53].
UV-Vis methods must be validated according to ICH Q2(R1) guidelines, which define validation parameters including accuracy, precision, specificity, detection limit, quantitation limit, linearity, range, and robustness [55]. The European Compliance Academy (ECA) Guide for An Integrated Approach to Analytical Instrument Qualification and System Validation provides additional practical implementation guidance [53].
Application Note: UV-Vis Method Validation Protocol for API Quantification
Experimental Workflow
The following diagram illustrates the complete experimental workflow for validating a UV-Vis method for Active Pharmaceutical Ingredient (API) quantification, incorporating both lifecycle stages and key experimental procedures.
Detailed Methodology
Sample Preparation for UV-Vis Analysis in Pharma QC
Proper sample preparation is crucial for accurate UV-Vis results in pharmaceutical analysis. Samples must be optically clear and free from particulate matter to avoid scattering effects [14]. Key considerations include:
- Solvent Selection: Choose solvents transparent in the selected wavelength range and compatible with the analyte
- Concentration Adjustment: Ensure absorbance readings fall within the optimal linear range (typically 0.1–1.0 AU) through appropriate dilution
- Cuvette Selection: Use matched quartz cuvettes with appropriate pathlength
- Blank Preparation: Prepare reagent blanks using identical solvents and reagents without analyte
For tablet formulations, a typical sample preparation protocol involves:
- Weigh and finely powder not less than 20 tablets
- Transfer an accurately weighed portion of powder equivalent to about 100 mg of API to a 100 mL volumetric flask
- Add about 70 mL of suitable solvent (e.g., methanol, water, or buffer), shake for 10 minutes, and sonicate for 15 minutes
- Dilute to volume with the same solvent and mix well
- Filter through a 0.45 μm membrane filter, discarding the first few mL of filtrate
- Further dilute filtrate quantitatively to obtain a final concentration within the validated range
Validation Parameters and Acceptance Criteria
Table 2: UV-Vis Method Validation Parameters and Typical Acceptance Criteria for API Quantification
| Validation Parameter | Experimental Procedure | Acceptance Criteria | Reference Guidelines |
|---|---|---|---|
| Specificity | Compare blank, placebo, and standard solutions; assess interference at analytical wavelength | No interference from placebo, blank, or known impurities at retention time of analyte | ICH Q2(R1) [55] |
| Linearity | Prepare and analyze at least 5 concentrations (e.g., 50-150% of target concentration) | Correlation coefficient (r) ≥ 0.999; y-intercept not significantly different from zero | ICH Q2(R1) [55] |
| Range | Established from linearity studies; confirmed to provide acceptable accuracy, precision, and linearity | Typically 80-120% of test concentration for assay | ICH Q2(R1) [55] |
| Accuracy | Spike placebo with known API amounts at 80%, 100%, 120% of target; analyze in triplicate | Recovery 98.0-102.0%; RSD ≤ 2.0% | ICH Q2(R1) [55] |
| Precision | Repeatability: Analyze 6 preparations at 100% test concentrationIntermediate Precision: Different days, analysts, equipment | RSD ≤ 2.0% for assay methods | ICH Q2(R1) [55] |
| LOD/LOQ | Based on signal-to-noise ratio (3:1 for LOD; 10:1 for LOQ) or residual standard deviation of regression line | LOD: Typically 0.5-1.0% of target concentrationLOQ: Typically 1.0-3.0% of target concentration | ICH Q2(R1) [55] |
| Robustness | Deliberate variations in wavelength (±2 nm), pH of dilution solvent (±0.2 units), different cuvettes | No significant impact on results (RSD < 2.0%) | ICH Q2(R1) [55] |
Case Study: Validation of UV-Vis Method for Fosravuconazole
A recent study demonstrated the application of green chemistry principles in validating a UV spectrophotometric method for fosravuconazole, a newer oral antifungal medication [55]. The research compared UV spectroscopy with HPLC methods, with both methods validated according to ICH Q2(R1) guidelines.
Key findings:
- The UV method demonstrated excellent linearity in the concentration range of 2-10 μg/mL
- Method showed appropriate accuracy with percent recovery of 99.2-100.8%
- Precision was demonstrated with %RSD less than 2% for both repeatability and intermediate precision
- The method earned a Blue Applicability Grade Index (BAGI) score of 82.5, indicating high practical feasibility for industrial applications
- The UV method demonstrated a superior green profile compared to the RP-HPLC method based on AGREE (Analytical Greenness Metric Approach) assessment [55]
This case study illustrates how fit-for-purpose validation can balance analytical reliability with practical considerations like environmental impact and industrial applicability.
The Scientist's Toolkit: Essential Research Reagents and Materials
Table 3: Essential Research Reagents and Materials for Pharmaceutical UV-Vis Analysis
| Item | Function/Application | Technical Considerations |
|---|---|---|
| High-Purity Solvents (HPLC grade methanol, acetonitrile, water) | Sample dissolution and dilution; mobile phase preparation | Low UV absorbance; transparency at selected wavelength; compatibility with analyte [14] |
| Buffer Salts (potassium phosphate, ammonium acetate) | pH control in aqueous solutions; maintaining analyte stability | Buffer transparency at analytical wavelength; appropriate buffer capacity [55] |
| Reference Standards (USP, EP certified reference materials) | Method calibration and qualification; system suitability testing | Certified purity and quality; proper storage and handling [14] |
| Quartz Cuvettes (matched pairs) | Sample containment for spectral measurement | Appropriate pathlength (typically 1 cm); UV transparency; proper cleaning protocols [14] |
| Membrane Filters (0.45 μm or 0.2 μm) | Sample clarification; removal of particulate matter | Material compatibility (nylon, PVDF, PTFE); low extractables [14] |
| pH Standards | pH meter calibration for buffer preparation | Certified reference materials; appropriate buffer ranges [55] |
Regulatory and Compliance Framework
Pharmaceutical UV-Vis methods must comply with global regulatory requirements, including:
- ICH Q2(R1) and Q14 guidelines for method validation and lifecycle management [52]
- USP <857> "Ultraviolet-Visible Spectroscopy" and related chapters [8]
- 21 CFR Part 211 for current good manufacturing practices [14]
- EU GMP guidelines, particularly Annex 15 on qualification and validation [32]
Instrument qualification follows the 4Q model (DQ, IQ, OQ, PQ) or the newer integrated lifecycle approach described in USP <1058> [53]. For UV-Vis systems, operational qualification should include wavelength accuracy, photometric accuracy, stray light, resolution, and baseline flatness testing [8].
Adherence to data integrity principles (ALCOA+) is essential throughout the method lifecycle, with proper documentation of all validation activities, electronic data storage, and audit trails, particularly for systems operating under 21 CFR Part 11 compliance [8] [14].
The analytical method lifecycle approach provides a comprehensive framework for developing, validating, and maintaining fit-for-purpose UV-Vis methods in pharmaceutical quality control. By integrating robust method validation with ongoing performance verification, laboratories can ensure reliable results throughout the method's lifetime. The case examples and protocols provided in this application note demonstrate practical implementation of these principles, emphasizing the critical role of proper sample preparation and method validation in generating data that supports product quality and patient safety.
In the context of sample preparation for UV-Vis spectroscopy within pharmaceutical quality control (QC) research, analytical method validation provides documented evidence that a method is suitable for its intended use [56]. This process establishes the reliability of analytical results, which is foundational for regulatory compliance, including global pharmacopoeia standards and 21 CFR Part 11 [8]. This application note details the experimental protocols for four key validation parameters—Specificity, Accuracy, Precision, and Linearity—providing a structured framework for researchers and drug development professionals to ensure data integrity and method robustness.
Specificity
Specificity is the ability of an analytical method to assess the analyte unequivocally in the presence of other components that may be expected to be present, such as impurities, degradants, or matrix components [57]. A specific method should yield results for the target analyte only, free from interference [57].
Experimental Protocol for Specificity
- Sample Preparation:
- Standard Solution: Prepare a solution of the analyte at the target concentration in the appropriate solvent.
- Sample Solution (Placebo): Prepare a synthetic mixture containing all expected excipients and potential impurities at their anticipated levels, but without the analyte.
- Spiked Sample Solution: Prepare a synthetic mixture containing all excipients and the analyte, spiked with known impurities or degradants.
- Analysis: Inject the Standard, Placebo, and Spiked Sample solutions into the HPLC-UV-Vis or UHPLC-DAD system. For UV-Vis spectroscopy, scan all solutions across the relevant wavelength range.
- Data Analysis:
- Chromatographic Methods: Ensure the resolution (Rs) between the analyte peak and the closest eluting potential interferent peak is ≥ 2.0 [56]. The peak purity, as determined by photodiode-array (PDA) or mass spectrometry (MS) detection, should be within acceptable limits, confirming a single, homogeneous peak for the analyte [56].
- Spectroscopic Methods: The analyte spectrum in the sample solution should be identical to the standard solution and show no significant shifts or additional peaks when compared to the placebo solution, confirming no spectral interference.
Accuracy
Accuracy expresses the closeness of agreement between the value found and a value accepted as a conventional true value or an accepted reference value [56] [57]. It is typically reported as the percentage recovery of the known, added amount of analyte.
Experimental Protocol for Accuracy (Recovery Study)
- Sample Preparation: Prepare a minimum of nine determinations over at least three concentration levels (e.g., 50%, 100%, 150% of the target concentration), with three replicates at each level [56].
- For a drug substance, compare results to a standard reference material.
- For a drug product, prepare synthetic mixtures of the sample placebo spiked with known quantities of the analyte.
- Analysis: Analyze each prepared sample using the validated method.
- Data Analysis: Calculate the percent recovery for each sample and the mean recovery at each concentration level.
- Calculation:
% Recovery = (Measured Concentration / Known Concentration) × 100 - Acceptance Criteria: The mean recovery should be within the predefined range for each concentration level, typically 98.0% - 102.0% for the target (100%) concentration.
- Calculation:
Table 1: Example Accuracy (Recovery) Study Results and Acceptance Criteria
| Concentration Level | Number of Replicates | Acceptance Criteria (Mean % Recovery) | Example Result (% Recovery) |
|---|---|---|---|
| 50% of target | 3 | 97.0 - 103.0% | 98.5% |
| 100% of target | 3 | 98.0 - 102.0% | 100.2% |
| 150% of target | 3 | 97.0 - 103.0% | 99.8% |
Precision
Precision expresses the closeness of agreement between a series of measurements obtained from multiple sampling of the same homogeneous sample under prescribed conditions [56]. It is usually investigated at three levels: repeatability, intermediate precision, and reproducibility.
Experimental Protocols for Precision
3.1 Repeatability (Intra-assay Precision)
- Sample Preparation: Prepare a minimum of six determinations at 100% of the test concentration, or nine determinations covering the specified range (e.g., three concentrations with three replicates each) [56].
- Analysis: Analyze all samples in a single sequence by one analyst, using one instrument on the same day.
- Data Analysis: Calculate the mean, standard deviation (SD), and relative standard deviation (%RSD) of the results.
- Acceptance Criterion: The %RSD for the assay of the drug substance or product is typically ≤ 2.0% for the target concentration from six replicates.
3.2 Intermediate Precision
- Sample Preparation: Prepare replicates (e.g., six at 100%) of the same homogeneous sample.
- Analysis: Analyze the samples under different conditions, such as different days, different analysts, or different instruments, following the same method.
- Data Analysis: Calculate the mean and %RSD for the results from each set of conditions (e.g., Analyst 1 and Analyst 2). The results should be subjected to statistical comparison (e.g., Student's t-test).
- Acceptance Criterion: The %RSD from the combined data sets is typically ≤ 3.0%, and no significant statistical difference should be found between the means obtained by different analysts or instruments.
Table 2: Precision Parameters and Experimental Design
| Precision Level | Experimental Design | Key Variable(s) | Acceptance Criteria |
|---|---|---|---|
| Repeatability | One analyst, one instrument, one day | None (identical conditions) | %RSD ≤ 2.0% (for six replicates at 100%) |
| Intermediate Precision | Two analysts, different instruments/days | Analyst, Equipment, Day | Combined %RSD ≤ 3.0%; No significant difference between means |
| Reproducibility | Collaborative studies between different laboratories | Laboratory | Protocol-dependent, based on inter-laboratory study design |
Linearity and Range
Linearity is the ability of the method to obtain test results that are directly proportional to the concentration of the analyte in a given range [57]. The range is the interval between the upper and lower concentrations for which suitable levels of precision, accuracy, and linearity have been demonstrated [56] [57].
Experimental Protocol for Linearity and Range
- Sample Preparation: Prepare a minimum of five standard solutions at different concentration levels covering the intended range of the method (e.g., 50%, 75%, 100%, 125%, 150% of the target concentration) [56]. Analyze each solution in triplicate.
- Analysis: Analyze the standard solutions in random order.
- Data Analysis: Plot the mean measured response (e.g., peak area) against the known concentration of the standard. Perform a linear regression analysis on the data to obtain the correlation coefficient (r), coefficient of determination (r²), slope, and y-intercept.
- Acceptance Criteria: A correlation coefficient (r) of ≥ 0.998 or a coefficient of determination (r²) of ≥ 0.996 is typically expected for chromatographic assays.
Table 3: Example Linearity Study Data and Acceptance Criteria
| Parameter | Description | Acceptance Criteria |
|---|---|---|
| Range | The interval between the upper and lower concentration levels tested. | Demonstrated to have suitable precision, accuracy, and linearity. |
| Number of Levels | Minimum number of concentration points. | At least 5 [56]. |
| Correlation Coefficient (r) | Measure of the strength of the linear relationship. | ≥ 0.998 |
| Coefficient of Determination (r²) | Proportion of variance in the response explained by concentration. | ≥ 0.996 |
| Y-Intercept | The value of the response when concentration is zero. | Statistically not significantly different from zero. |
The Scientist's Toolkit: Research Reagent Solutions
Table 4: Essential Materials for Sample Preparation and Method Validation in Pharmaceutical UV-Vis Analysis
| Item | Function/Description |
|---|---|
| High-Purity Reference Standard | Certified material with a known and high purity, used to prepare the standard solutions for accuracy, linearity, and specificity studies. Essential for defining the true value. |
| Placebo Matrix | A mixture containing all the formulation components (excipients) except the active analyte. Used in specificity and accuracy studies to confirm the absence of interference. |
| Certified Impurities/Degradants | Known impurity or forced-degradation products used to spike samples for specificity testing, ensuring the method can distinguish the analyte from related substances. |
| HPLC-Grade Solvents | High-purity solvents (e.g., methanol, acetonitrile, water) used for preparing mobile phases and sample solutions to minimize baseline noise and interference. |
| UV/VIS Cuvettes | High-quality, matched quartz or disposable cuvettes for holding samples during spectroscopic analysis, ensuring consistent pathlength and minimal light scattering. |
| Volumetric Glassware/Pipettes | Class A volumetric flasks and calibrated pipettes for accurate and precise preparation of standard and sample solutions, directly impacting accuracy and precision. |
| pH Buffers | Standardized buffer solutions used to adjust and control the pH of mobile phases or sample solutions, which is critical for robustness and reproducibility of the method. |
| Syringe Filters | Low-binding, compatible membrane filters (e.g., 0.45 µm or 0.22 µm) for removing particulate matter from samples prior to injection, protecting the instrument and column. |
In the pharmaceutical quality control (QC) laboratory, ensuring the reliability of analytical methods is paramount for guaranteeing product safety, identity, strength, quality, and purity. Two distinct but complementary processes—compendial verification and full validation—serve as the foundation for demonstrating that analytical procedures are fit for their intended use. Compendial verification confirms that a previously validated method from a recognized source, such as the United States Pharmacopeia (USP) or European Pharmacopoeia (EP), performs as expected in a specific laboratory. In contrast, full validation is a comprehensive process required for novel methods or those significantly modified from their compendial source, providing original evidence of their performance [58] [59] [60]. Adherence to these processes is not optional; USP standards are enforceable by the FDA under U.S. federal law, and EP standards are legally binding in the European Union [59].
Framed within the broader context of sample preparation for UV-Vis spectroscopy in pharmaceutical QC, this document outlines structured strategies for selecting and implementing the appropriate compliance pathway. Proper sample preparation—ensuring correct solvent selection, cuvette cleanliness, and optimal concentration—is a critical variable that can influence the success of both verification and validation activities [7] [14]. By integrating a risk-based approach and a clear understanding of regulatory expectations, laboratories can effectively navigate the complexities of USP and EP compliance, thereby streamlining method implementation and securing regulatory confidence.
Regulatory Framework and Analytical Lifecycle
The analytical procedure lifecycle, as advocated by the USP, provides a structured framework for managing methods from development through retirement. This lifecycle encompasses three core stages: method design and development, procedure qualification (validation), and ongoing procedure performance verification [61] [60]. The concept of "fitness for purpose" is the overarching goal throughout this lifecycle, ensuring that the analytical procedure delivers results that support confident decision-making regarding batch release and compliance [61].
Recent regulatory evolution is marked by the proposed revision of USP <1225>, which aims to better align the chapter with the principles of ICH Q2(R2) and integrate it more clearly into the analytical procedure lifecycle described in USP <1220> [61]. The revised chapter emphasizes the "Reportable Result (RR)" as the definitive output supporting compliance decisions and introduces statistical intervals for evaluating precision and accuracy in relation to decision risk [61]. Furthermore, the USP has introduced a new chapter, <1221> Ongoing Procedure Performance Verification, underscoring the importance of monitoring method performance throughout its operational life [61]. These updates reflect a shift towards a more holistic, risk-based understanding of analytical procedures, where validation and verification are not one-time events but integral parts of a continuous assurance system.
Decision Framework: Compendial Verification vs. Full Validation
The choice between compendial verification and full validation is a strategic one, dictated by the method's origin, the stage of product development, and regulatory requirements. The following diagram illustrates the key decision-making workflow.
Key Decision Factors
- Method Origin: Compendial methods from the USP, EP, or other recognized bodies are candidates for verification. New, in-house developed methods or those transferred without a prior validation history require full validation [58] [59].
- Product Stage: The "fit-for-purpose" concept acknowledges that validation requirements can increase as a product moves from early development to commercialization. Early-stage products may use simplified validation, while a full validation according to ICH Q2(R1) is required for the Biologics License Application (BLA) at the commercialization stage [60].
- Modifications: Any significant modification to a compendial method, such as a change to accommodate a unique sample matrix, invalidates its verified status and typically necessitates a full validation study to demonstrate the modified method's performance [59] [60].
- Platform Assays: For non-product-specific methods (e.g., platform assays for monoclonal antibodies), a generic validation can be performed using representative material. Subsequent application to a new product may only require a simple assessment or verification, not a full validation [60].
Experimental Protocols
Protocol for Compendial Verification of a UV-Vis Assay
This protocol outlines the process for verifying a USP monograph method for the assay of an active pharmaceutical ingredient (API) using UV-Vis spectroscopy.
1. Scope: To verify that the compendial UV-Vis assay method for [API Name] is suitable for use under the specific conditions of [Laboratory Name].
2. Pre-verification Activities
- Documentation Review: Obtain the current version of the relevant USP monograph [Citation: USP Monograph Number]. Review all methodological details, including sample preparation, solvent specification, and system suitability criteria [59].
- Sample Preparation Design:
- Solvent Preparation: Use the specified solvent (e.g., 0.1M HCl). Ensure solvent purity is appropriate for the intended analysis and that its UV cutoff wavelength is below the analytical wavelength [7] [14].
- Standard Solution: Prepare the standard solution as per monograph instructions. Typically, this involves accurately weighing and dissolving the API reference standard to a specific concentration.
- Sample Solution: Prepare the test sample (e.g., ground tablet powder or API) in the same manner as the standard.
- Cuvette Handling: Use matched quartz cuvettes. Clean thoroughly before use, rinsing with the solvent to be used in the analysis. Ensure the pathlength is correct and the external surfaces are clean and dry [7].
3. Verification Experiments
- System Suitability: First, perform the system suitability test as described in the monograph. This may involve replicate injections/measurements of a standard solution to confirm that parameters like %RSD of absorbance meet the required criteria [59].
- Accuracy (Recovery): Spike a placebo matrix (if applicable) with known quantities of the API reference standard at three concentration levels (e.g., 80%, 100%, 120% of the target concentration). Prepare and analyze these samples in triplicate. Calculate the percentage recovery for each level [58] [60].
- Precision (Repeatability): Analyze six independent sample preparations from a homogeneous API or product sample at 100% of the test concentration. Calculate the %RSD of the reported assay values [58].
- Specificity: Demonstrate that the absorbance measured is due to the analyte alone. For a simple API assay, this can be shown by comparing the spectra of the standard, sample, and placebo (if used) to ensure no interference at the analytical wavelength [14].
- Linearity: Prepare and analyze standard solutions at a minimum of five concentration levels across a range (e.g., 50-150% of the test concentration). Plot absorbance versus concentration and calculate the correlation coefficient, y-intercept, and slope of the regression line [14].
4. Acceptance Criteria
- Accuracy: Mean recovery should be within 98.0-102.0% for each level.
- Precision: %RSD for repeatability should be NMT 2.0%.
- Specificity: The placebo spectrum should show no significant interference at the analytical wavelength.
- Linearity: Correlation coefficient (r) should be NLT 0.999.
5. Documentation: Compile all raw data, calculations, and spectra into a verification report. The report should conclude on the fitness for purpose of the compendial method within the laboratory.
Protocol for Full Validation of a UV-Vis Method
This protocol provides a general framework for the full validation of a new, non-compendial UV-Vis method, based on ICH Q2(R1) guidelines.
1. Scope: To validate a UV-Vis spectroscopic method for the quantification of [Analyte Name] in [Matrix Type].
2. Validation Parameters and Experiments The following workflow details the sequential parameters to be tested and their logical dependencies.
- Specificity: Prove that the method can unequivocally assess the analyte in the presence of potential interferents (e.g., impurities, degradants, matrix components). Method: Compare spectra of the pure analyte, sample matrix, and samples spiked with interferents. For forced degradation studies, analyze samples subjected to stress conditions (heat, light, acid, base, oxidation) [14].
- Linearity and Range: Demonstrate a proportional response of absorbance to analyte concentration. Method: Prepare a minimum of 5 concentrations over the claimed range. Analyze each in triplicate. Plot mean absorbance vs. concentration and perform linear regression analysis [58] [14].
- Accuracy: Establish the closeness of agreement between the measured value and the true value. Method: Perform a recovery study using the sample matrix spiked with known amounts of analyte, typically at 80%, 100%, and 120% of the target concentration, with a minimum of three replicates per level. Report mean recovery and %RSD [58] [60].
- Precision:
- Repeatability: Assess precision under the same operating conditions over a short interval. Method: Analyze six independent sample preparations at 100% test concentration. Calculate the %RSD of the results [58].
- Intermediate Precision: Evaluate the impact of random variations within the laboratory (e.g., different analysts, different days, different instruments). Method: A second analyst repeats the repeatability study on a different day. Results from both analysts are combined to calculate the overall %RSD [58] [60].
- Detection Limit (LOD) & Quantitation Limit (LOQ):
- LOD: The lowest concentration at which the analyte can be detected. Method: Based on signal-to-noise ratio (typically 3:1) or standard deviation of the response of a blank.
- LOQ: The lowest concentration at which the analyte can be quantified with acceptable accuracy and precision. Method: Based on signal-to-noise ratio (typically 10:1) or standard deviation of the response and the slope. The accuracy and precision at the LOQ should be demonstrated [58] [14].
- Robustness: Measure the method's capacity to remain unaffected by small, deliberate variations in method parameters. Method: Evaluate the impact of small changes (e.g., solvent supplier, pH ±0.1 units, analytical wavelength ±2 nm, sonication time) on the system suitability criteria and assay results [14].
3. Documentation: A comprehensive validation report must be generated, including all experimental data, statistical analysis, spectra, and a definitive conclusion on the method's validation status.
Application to UV-Vis Spectroscopy in Pharma QC
UV-Vis spectroscopy is a cornerstone technique in pharmaceutical QC due to its simplicity, speed, and cost-effectiveness [14]. Its primary applications include identity testing, assay/content uniformity, and dissolution testing, all of which require rigorous method control.
Critical Sample Preparation Considerations for UV-Vis
The reliability of any UV-Vis method, whether verified or validated, is heavily dependent on proper sample preparation [7].
- Solvent Selection: The solvent must fully dissolve the analyte and be optically transparent in the wavelength region of interest. Common solvents include water, methanol, and acetonitrile, each with a specific UV cutoff wavelength below which they absorb strongly [7] [14].
- Concentration and Pathlength: The analyte concentration must be adjusted, or an appropriate pathlength cuvette selected, to ensure absorbance readings fall within the optimal linear range of the instrument (typically 0.1 to 1.0 Absorbance Units). This may require dilution of the sample [7] [14].
- Cuvette Handling: Matched quartz cuvettes are standard for UV work. They must be meticulously cleaned and rinsed with the analysis solvent to prevent contamination. The external faces must be clean and free of fingerprints [7].
- Clarity of Solution: Samples must be free of particulate matter that can cause light scattering. Filtration or centrifugation is often necessary before analysis [14].
Table: Key UV-Vis QC Applications and Corresponding Compliance Strategies
| Application | Typical Use | Recommended Compliance Strategy | Key Sample Preparation Notes |
|---|---|---|---|
| Identity Testing | Confirming raw material identity by spectral comparison. | Compendial Verification is typically sufficient. | Sample concentration is less critical than for quantification; focus is on spectral overlay [14]. |
| Assay/Content Uniformity | Quantifying API concentration in drug substance or product. | Full Validation for new methods. Verification for compendial methods. | Precise dilution and weighing are critical. Solution must be optically clear and within linear range [14]. |
| Dissolution Testing | Measuring amount of API released from dosage form over time. | Full Validation is required, as methods are often product-specific. | Samples are often taken directly from dissolution vessels; may require dilution to fall within the analytical range [14]. |
| Impurity Monitoring | Detecting and quantifying trace impurities or degradants. | Full Validation with emphasis on LOD/LOQ, specificity, and accuracy. | May require concentration or sample pre-treatment to detect low-level impurities [14]. |
The Scientist's Toolkit: Essential Materials for UV-Vis Analysis
Table: Key Research Reagent Solutions and Materials for UV-Vis Spectroscopy
| Item | Function/Application | Critical Considerations for Pharma QC |
|---|---|---|
| High-Purity Solvents (HPLC or Spectroscopic Grade) | To dissolve samples and act as a blank/reference. | Must have low UV absorbance (high transparency) at the analytical wavelength. Purity is critical to avoid introducing interfering signals [7] [14]. |
| Reference Standards | To calibrate the instrument and prepare standard solutions for accuracy and linearity studies. | Must be of known purity and identity, typically from a certified supplier (e.g., USP Reference Standard). Essential for generating reliable quantitative data [59]. |
| Quartz Cuvettes | To hold liquid samples in the light path. | Must be matched if used in double-beam instruments. Quartz is required for UV range analysis. Cleanliness and pathlength accuracy are vital [7]. |
| Volumetric Glassware (Flasks, Pipettes) | For accurate preparation and dilution of standard and sample solutions. | Must be Class A or equivalent to ensure measurement accuracy. Proper calibration and handling are necessary for GMP compliance [14]. |
| Syringe Filters (0.45 µm or 0.2 µm) | To remove particulate matter from samples before analysis. | Membrane material (e.g., Nylon, PTFE) must be compatible with the solvent and not adsorb the analyte [7]. |
| pH Buffers | To control the ionization state of the analyte, which can affect its UV spectrum. | Required if the method is pH-sensitive. Buffer purity and accurate preparation are important for robustness [14]. |
In the context of sample preparation for UV-Vis spectroscopy in pharmaceutical quality control (QC) research, the creation of robust and transferable Standard Operating Procedures (SOPs) is a critical determinant of success. These documents serve as the foundational framework that ensures analytical methods are performed consistently, yield reproducible results, and comply with stringent global regulatory standards. SOPs transform complex scientific protocols into clear, actionable instructions, guaranteeing that every sample—from raw material identification to dissolution testing of finished products—is prepared with unwavering accuracy and precision. This application note provides detailed guidance and protocols for developing, validating, and documenting sample preparation SOPs that are inherently reliable and readily transferable across different personnel, shifts, and laboratory environments within a pharmaceutical setting.
The Critical Framework for Effective SOPs
Core Components of a Sample Preparation SOP
A well-constructed SOP for sample preparation is more than a simple recipe; it is a technical document designed for clarity, compliance, and flawless execution. Its essential components create a comprehensive framework for quality [62] [63].
Table 1: Essential Components of a Sample Preparation SOP
| Component | Description | Application in UV-Vis Sample Prep |
|---|---|---|
| Title and Purpose | Clearly defines the document's objective and the specific process it covers. | "SOP for the Preparation of Stock and Working Standard Solutions for UV-Vis Analysis of APIs." |
| Scope | Outlines the boundaries of the procedure, including the instruments, products, and departments to which it applies. | "This procedure applies to all QC chemists performing sample prep for content uniformity testing on [Instrument Model]." |
| Responsibilities | Identifies the roles and personnel accountable for executing, reviewing, and approving the procedure. | Analyst, QC Manager, QA Officer. |
| Procedure | Provides a detailed, sequential list of steps required to complete the sample preparation. | Weighing, dissolution, dilution, filtration, and cuvette filling instructions. |
| Safety & Compliance | Highlights critical safety warnings, quality control points, and compliance requirements. | Personal protective equipment (PPE) requirements, handling of hazardous solvents, and data integrity (ALCOA+) principles. |
| References & Appendices | Links to relevant documents, such as pharmacopeia chapters, instrument SOPs, and data forms. | References to USP <857>, ICH Q2(R1), and calibration certificates for balances and volumetric glassware. |
| Review & Revision History | Tracks changes to the document, including version numbers, dates, and reasons for revision. | Essential for audit trails and continuous improvement. |
Adhering to the "4 P's" Framework
A practical model for SOP creation is the "4 P's" framework, which ensures the document is holistic and actionable [62]:
- Purpose: Why is this specific sample preparation procedure needed? (e.g., to ensure the sample is within the linear range of the UV-Vis spectrophotometer for accurate API quantification).
- Process: What are the exact, step-by-step instructions?
- People: Who is responsible for each task?
- Proof: How is compliance demonstrated and recorded? (e.g., printouts of weighing records, electronic audit trails, and entries in laboratory notebooks).
Experimental Protocol: A Case Study in UV-Vis Method Validation
The following protocol details the development and validation of a sample preparation and UV-Vis method for an Active Pharmaceutical Ingredient (API), based on a published approach for terbinafine hydrochloride [64]. This serves as a template for creating a robust, transferable SOP.
Objective
To develop and validate a simple, accurate, and precise UV-spectrophotometric method for the quantification of [API Name] in bulk and pharmaceutical dosage forms, in accordance with ICH Q2(R1) guidelines.
Materials and Reagents
- API Standard: High-purity [API Name] reference standard.
- Sample: Pharmaceutical dosage form (e.g., tablet, capsule, eye drops).
- Solvent: A suitable solvent in which the API is freely soluble and stable (e.g., distilled water, methanol, or buffer as determined by solubility studies). The solvent must be spectroscopically pure and not absorb significantly at the wavelength of analysis.
- Volumetric Flasks: Class A, various sizes (e.g., 10 mL, 100 mL).
- Micropipettes: Calibrated, with appropriate volume ranges.
- UV-Vis Spectrophotometer: Qualified and calibrated (Installation Qualification, Operational Qualification, Performance Qualification).
Sample Preparation Workflow
The sample preparation is visualized as a sequential workflow to minimize errors and ensure consistency.
Critical Experimental Steps and Methodologies
Standard Stock Solution Preparation: Accurately weigh 10 mg of the API reference standard and transfer it quantitatively to a 100 mL volumetric flask. Add approximately 20 mL of the chosen solvent and shake manually or sonicate until complete dissolution is achieved. Make up to the final volume with the same solvent to yield a stock solution of 100 µg/mL [64].
Selection of Wavelength of Maximum Absorbance (λmax): Pipette a small aliquot (e.g., 0.5 mL) of the standard stock solution into a 10 mL volumetric flask and dilute to volume with solvent. Scan this diluted solution over the UV range (e.g., 200-400 nm) using the spectrophotometer. The wavelength at which maximum absorbance occurs is identified as the λmax for the analysis [64]. Example: Terbinafine hydrochloride showed λmax at 283 nm.
Construction of Calibration Curve: Prepare a series of standard solutions by pipetting different aliquots (e.g., 0.5, 1.0, 1.5, 2.0, 2.5, 3.0 mL) of the stock solution into a series of 10 mL volumetric flasks. Dilute each to the mark with solvent to create a concentration series (e.g., 5, 10, 15, 20, 25, 30 µg/mL). Measure the absorbance of each solution at the predetermined λmax. Plot a graph of absorbance versus concentration, which should be linear. Perform linear regression analysis to obtain the equation of the line (y = mx + c) and the correlation coefficient (r²) [64].
Sample Preparation from Dosage Form: For a tablet, accurately weigh and powder not less than 20 tablets. Transfer an amount of powder equivalent to the weight of one tablet containing the API into a volumetric flask. Add solvent, sonicate to ensure complete extraction of the API, dilute to volume, and filter if necessary. Further dilute this solution appropriately to fall within the linear range of the calibration curve [64].
Method Validation Protocol
The sample preparation and analytical method must be validated as per ICH Q2(R1) guidelines. The following table summarizes the key validation parameters and the experimental protocol for each.
Table 2: Method Validation Parameters and Experimental Protocols
| Validation Parameter | Protocol | Acceptance Criteria |
|---|---|---|
| Linearity & Range | Prepare and analyze at least 5 concentrations across the specified range (e.g., 5-30 µg/mL). Plot absorbance vs. concentration. | Correlation coefficient (r²) ≥ 0.999 [64]. |
| Accuracy (Recovery) | Analyze the sample (e.g., pre-analyzed formulation) and then add known quantities of standard API at 80%, 100%, and 120% of the test concentration. Re-analyze and calculate % recovery. | % Recovery between 98-102% [64]. |
| Precision | Repeatability: Analyze 3 different concentrations (low, mid, high) in triplicate on the same day. Intermediate Precision: Perform the same analysis on a different day, with a different analyst, or on a different instrument. | % Relative Standard Deviation (% RSD) < 2.0% [64]. |
| Specificity | Demonstrate that the sample preparation does not introduce interfering substances from excipients. Compare the absorbance spectrum of the prepared sample solution to that of the standard. | The spectrum of the sample should be identical to the standard, with no additional peaks from excipients at the λmax. |
| Limit of Detection (LOD) & Quantification (LOQ) | Calculate based on the standard deviation of the response (σ) and the slope of the calibration curve (S). LOD = 3.3σ/S; LOQ = 10σ/S [64]. | LOD and LOQ should be sufficiently low to detect and quantify impurities or degradation products as required. |
The Scientist's Toolkit: Key Research Reagent Solutions
Table 3: Essential Materials for UV-Vis Sample Preparation in Pharma QC
| Item | Function in Sample Preparation |
|---|---|
| Reference Standard | High-purity API used to prepare calibration standards; ensures accuracy and traceability of the quantitative method. |
| Spectroscopic Grade Solvent | A pure solvent that does not absorb significantly in the UV-Vis range; prevents interference and ensures accurate baseline measurements. |
| Class A Volumetric Glassware | Provides high accuracy and precision in measuring volumes; critical for preparing standard and sample solutions of known concentration. |
| Syringe Filters (0.45 µm or 0.2 µm) | Removes undissolved particles or turbidity from sample solutions before analysis, preventing light scattering and erroneous absorbance readings [14]. |
| Quartz Cuvettes | Used for holding samples in the spectrophotometer; quartz is transparent in the UV range, unlike glass, which absorbs UV light. |
| Analytical Balance | Accurately weighs small quantities of standard and sample; the foundation of all subsequent concentration calculations. |
Regulatory Integration and Compliance
Adherence to regulatory guidelines is non-negotiable in pharmaceutical QC. SOPs must be developed with these frameworks in mind [62] [14]:
- ICH Q2(R1): Provides the validation of analytical procedures, including the parameters listed in Table 2.
- 21 CFR Part 11: Mandates controls for electronic records and electronic signatures, requiring SOPs for data security, audit trails, and user access control in computerized systems like modern UV-Vis instruments [8] [14].
- Pharmacopeial Standards (USP, Ph. Eur., JP): Provide general chapters (e.g., USP <857> on UV-Vis spectroscopy) that dictate instrument qualification and performance verification, which should be referenced in the SOP [8] [65].
- Data Integrity (ALCOA+): All data generated during sample preparation and analysis must be Attributable, Legible, Contemporaneous, Original, and Accurate (ALCOA), with additional emphasis on being Complete, Consistent, Enduring, and Available.
The relationship between the SOP, regulatory requirements, and the analyst is a closed-loop system ensuring continuous quality.
Conclusion
Effective sample preparation is not merely a preliminary step but the cornerstone of reliable UV-Vis spectroscopy in pharmaceutical quality control. A methodical approach, grounded in foundational principles and tailored to specific sample matrices, directly enables accurate concentration measurements and impurity detection. Mastering troubleshooting techniques mitigates common pitfalls, ensuring data integrity. Ultimately, aligning these practices with a rigorous, fit-for-purpose validation strategy is paramount for meeting USP and EP compliance, safeguarding patient safety, and bringing high-quality drugs to market. As the industry advances, the integration of more automated preparation workflows and advanced data analytics promises to further enhance the efficiency and robustness of pharmaceutical QC.
References
- 1. Spectroscopic Sample Preparation: Techniques for ... [https://www.metkon.com/spectroscopic-sample-preparation/]
- 2. Specifying accuracy and precision criteria for ultraviolet ... [https://www.spectroscopyeurope.com/quality/specifying-accuracy-and-precision-criteria-ultraviolet-spectrometers]
- 3. Sample Preparation Essentials for QC [https://www.sartorius.com/en/applications/quality-control-testing/sample-preparation-qc]
- 4. The Beer-Lambert Law [https://chem.libretexts.org/Bookshelves/Physical_and_Theoretical_Chemistry_Textbook_Maps/Supplemental_Modules_(Physical_and_Theoretical_Chemistry)/Spectroscopy/Electronic_Spectroscopy/Electronic_Spectroscopy_Basics/The_Beer-Lambert_Law]
- 5. Beer–Lambert law [https://en.wikipedia.org/wiki/Beer%E2%80%93Lambert_law]
- 6. Beer-Lambert Law | Transmittance & Absorbance [https://www.edinst.com/resource/the-beer-lambert-law/]
- 7. Sample Preparation for UV-Vis Spectroscopy [https://www.ossila.com/pages/preparing-samples-uv-vis-spectroscopy]
- 8. Pharma-Compliant Analysis with Flexible UV-Vis [https://www.spectroscopyonline.com/view/pharma-compliant-analysis-with-flexible-uv-vis]
- 9. Color Analysis for Pharmaceutical Products using UV- ... [https://www.thermofisher.com/blog/behindthebench/color-analysis-for-pharmaceutical-products-using-uv-visible-absorption-techniques/]
- 10. Qualification of UV Vis, FTIR and Spectroscopic Instruments ... [https://www.pharmavalidations.com/qualification-of-uv-vis-ftir-and-spectroscopic-instruments-for-qc-labs/]
- 11. Choosing the Right Cuvettes for UV-VIS Experiments [https://whitebearphotonics.com/blogs/measurement-techniques/uv-vis-cuvette-guide?srsltid=AfmBOoplZb2kAa_nJ6fCQSCX6OX6y_x2Sd1oxVMixkSsnFwJIKEQ2vTS]
- 12. Quartz Cuvette: Complete & Essential Guide for ... [https://qvarz.com/quartz-cuvette/?srsltid=AfmBOop982lxcQNjA3WUIffzUfeoQTRKW95k_b9Ll1yS_i31Z511wUwY]
- 13. Top 5 Uses of Uv Vis Spectrophotometer Cuvettes in 2025 [https://www.linkedin.com/pulse/uv-vis-spectrophotometer-cuvette-real-world-5-uses-youll-ih5he/]
- 14. Spectroscopic Methods in Pharma QA/QC: UV-Vis, IR, and ... [https://www.labmanager.com/spectroscopic-methods-in-pharma-qa-qc-uv-vis-ir-and-nmr-applications-34005]
- 15. UV-Vis Spectroscopy: Principle, Strengths and Limitations ... [https://www.technologynetworks.com/analysis/articles/uv-vis-spectroscopy-principle-strengths-and-limitations-and-applications-349865]
- 16. UV-VIS Spectroscopy Not Working? Common Limitations ... [https://www.pgeneral.com/service-maintenance-and-repair/uv-vis-spectroscopy-not-working-common-limitations-and-how-to-overcome-them/]
- 17. Errors in Spectrophotometry and Calibration Procedures to ... [https://pmc.ncbi.nlm.nih.gov/articles/PMC5293527/]
- 18. Correcting Ultraviolet-Visible Spectra for Baseline Artifacts [https://www.sciencedirect.com/science/article/pii/S0022354923003350]
- 19. A Common Sense Laboratory Guide to Reducing Errors ... [https://www.spectroscopyonline.com/view/common-sense-laboratory-guide-reducing-errors-and-contamination-icp-and-icp-ms-analysis]
- 20. UV/Vis Spectroscopy for DNA & Protein Analysis [https://www.unchainedlabs.com/uv-vis-spectroscopy/]
- 21. 2025 Review of Spectroscopic Instrumentation [https://www.spectroscopyonline.com/view/2025-review-of-spectroscopic-instrumentation]
- 22. UV–VIS imaging-based investigation of API concentration ... [https://www.sciencedirect.com/science/article/pii/S0378517324002448]
- 23. UV-Vis Spectrophotometry and Multivariate Calibration ... [https://pmc.ncbi.nlm.nih.gov/articles/PMC5149025/]
- 24. Development and Validation of an in-line API ... [https://pmc.ncbi.nlm.nih.gov/articles/PMC7076712/]
- 25. Spectrophotometric approach for deconvolving overlapped ... [https://pmc.ncbi.nlm.nih.gov/articles/PMC12257698/]
- 26. UV/Vis spectroscopy as an in-line monitoring tool for tablet ... [https://www.sciencedirect.com/science/article/abs/pii/S0731708523004909]
- 27. An innovative methodology for testing and selecting ... [https://www.nature.com/articles/s40494-025-01638-6]
- 28. How to Interpret UV-Vis Spectroscopy Results [https://www.azooptics.com/Article.aspx?ArticleID=2768]
- 29. Exploring solvatochromism: A comprehensive analysis of ... [https://www.sciencedirect.com/science/article/abs/pii/S0026265X24002789]
- 30. Simultaneous UV Spectrophotometric Analysis of Paracetamol ... [https://ijrpas.com/AbstractView.aspx?PID=2025-4-4-13]
- 31. Quality by design approach with design of experiment for ... [https://www.sciencedirect.com/science/article/pii/S2772582023000293]
- 32. In-line UV Spectrometry Monitoring in Cleaning Validation [https://www.pharmtech.com/view/in-line-uv-spectrometry-monitoring-in-cleaning-validation]
- 33. What are the Key Challenges in Spectrophotometric ... [https://www.drawellanalytical.com/what-are-key-challenges-in-spectrophotometric-analysis/]
- 34. Turbidity and its impact on photometric water analysis [https://www.news-medical.net/whitepaper/20250828/Turbidity-and-its-impact-on-photometric-water-analysis-with-advanced-auto-detection.aspx]
- 35. A review of methods and instruments to monitor turbidity ... [https://www.sciencedirect.com/science/article/pii/S2214714424008560]
- 36. Three-way analysis-based pH-UV-Vis spectroscopy for ... [https://pmc.ncbi.nlm.nih.gov/articles/PMC9261852/]
- 37. Quantitative UV/VIS-spectroscopy on turbid samples [https://analytik.news/en/papers/2023/2.html]
- 38. Advances on Water Quality Detection by UV-Vis ... [https://www.mdpi.com/2076-3417/10/19/6874]
- 39. How Chemometrics Revives the UV-Vis Spectroscopy ... [https://www.mdpi.com/2227-9040/11/1/8]
- 40. Issues and Challenges of Subvisible and Submicron ... [https://pmc.ncbi.nlm.nih.gov/articles/PMC3326173/]
- 41. Common Mistakes to Avoid When Using a UV-Vis ... [https://www.labtechco.com/blog/common-mistakes-uv-vis-spectrophotometer]
- 42. Matrix Effect Assessment via Matrix Matching Strategy ... [https://www.sciencedirect.com/science/article/abs/pii/S0003267025010864]
- 43. Matrix Effects on Quantitation in Liquid Chromatography: Sources and Solutions | LCGC International [https://www.chromatographyonline.com/view/matrix-effects-on-quantitation-in-liquid-chromatography-sources-and-solutions]
- 44. Optimization of UV spectrophotometric techniques for ... [https://www.sciencedirect.com/science/article/abs/pii/S0003450925001294]
- 45. Compensate for or Minimize Matrix Effects? Strategies for Overcoming Matrix Effects in Liquid Chromatography-Mass Spectrometry Technique: A Tutorial Review - PMC [https://pmc.ncbi.nlm.nih.gov/articles/PMC7412464/]
- 46. An eco-friendly chemometrics assisted UV spectrophotometric ... [https://pmc.ncbi.nlm.nih.gov/articles/PMC12128377/]
- 47. Revolutionizing Tangential-Flow Filtration for AAV Vectors [https://www.bioprocessintl.com/sponsored-content/revolutionizing-tangential-flow-filtration-for-aav-vectors-a-path-to-automation-and-precision]
- 48. Variable pathlength cell for internal data validation in ... [https://pubs.rsc.org/en/content/articlehtml/2025/dd/d5dd00245a]
- 49. Avoiding Contamination | Thermo Fisher Scientific - ES [https://www.thermofisher.com/us/en/home/life-science/pcr/real-time-pcr/real-time-pcr-learning-center/real-time-pcr-basics/good-laboratory-practice-avoid-contamination-qpcr-experiments.html]
- 50. 3 Best Practices for Preventing Contamination in Life ... [https://www.pion-inc.com/blog/3-best-practices-for-preventing-contamination-in-life-science-laboratories]
- 51. Sample Preparation of Drug Substances and Products in ... [https://www.chromatographyonline.com/view/sample-preparation-of-drug-substances-and-products-in-regulated-testing-a-primer]
- 52. FDA Releases Guidance on Analytical Procedures [https://www.biopharminternational.com/view/fda-releases-guidance-on-analytical-procedures]
- 53. An Enhanced Approach to Analytical Instrument and ... [https://www.spectroscopyonline.com/view/an-enhanced-approach-to-analytical-instrument-and-system-qualification]
- 54. The Fitness for Purpose of Analytical Methods (2025) [https://www.eurachem.org/index.php/3-publications/guides/144-gdmv2014]
- 55. Green chemistry approaches in the analytical validation of ... [https://www.sciencedirect.com/science/article/pii/S2772577425000126]
- 56. Analytical Method Validation: Back to Basics, Part II [https://www.chromatographyonline.com/view/analytical-method-validation-back-basics-part-ii]
- 57. The 6 Key Aspects of Analytical Method Validation [https://www.elementlabsolutions.com/uk/chromatography-blog/post/6-key-aspects-of-analytical-method-validation]
- 58. Method Validation vs Method Verification: Which is Better ... [https://www.labmanager.com/method-validation-vs-method-verification-which-is-better-for-use-in-laboratories-33982]
- 59. Understanding the Role of USP and EP Standards in ... [https://www.labmanager.com/understanding-the-role-of-usp-and-ep-standards-in-pharma-qc-ensuring-consistency-and-compliance-34061]
- 60. Points to Consider in Quality Control Method Validation ... [https://www.bioprocessintl.com/qa-qc/points-to-consider-in-quality-control-method-validation-and-transfer]
- 61. Proposed Revision of USP <1225> Published in the ... [https://www.gmp-compliance.org/gmp-news/proposed-revision-of-usp-1225-published-in-the-pharmacopeial-forum]
- 62. Documenting Standard Operating Procedures in 2025 [https://www.co-labb.co.uk/post/documenting-standard-operating-procedures]
- 63. Standard Operating Procedures in 2025: A Closer Look [https://www.visualsp.com/blog/standard-operating-procedures/]
- 64. Development and validation of the UV-spectrophotometric ... [https://pmc.ncbi.nlm.nih.gov/articles/PMC3658052/]
- 65. Pharmaceutical Standards Guide for UV-Vis ... [https://www.technologynetworks.com/analysis/how-to-guides/pharmaceutical-standards-guide-for-uv-vis-spectrophotometers-360708]