Quantitative Analysis Using the Beer-Lambert Law in UV-Vis Spectroscopy: A Complete Guide for Biomedical Research
This article provides a comprehensive guide for researchers and drug development professionals on applying the Beer-Lambert Law for quantitative analysis in UV-Vis spectroscopy.
Quantitative Analysis Using the Beer-Lambert Law in UV-Vis Spectroscopy: A Complete Guide for Biomedical Research
Abstract
This article provides a comprehensive guide for researchers and drug development professionals on applying the Beer-Lambert Law for quantitative analysis in UV-Vis spectroscopy. It covers the foundational principles of the law, including its historical context and mathematical formulation. The piece details methodological best practices for creating calibration curves and analyzing diverse samples, from pharmaceutical compounds to biological molecules. A significant focus is placed on troubleshooting common limitations and deviations, such as scattering in biological tissues and non-linearity at high concentrations, offering practical optimization strategies. Finally, the article explores advanced validation techniques and modified versions of the law for complex applications like tissue diagnostics, equipping scientists with the knowledge to obtain accurate, reliable, and reproducible quantitative data.
The Beer-Lambert Law Uncovered: From Core Principles to Historical Foundations
In the realm of quantitative analysis using UV-Vis spectroscopy, understanding how light interacts with matter is paramount. Absorbance and Transmittance are two fundamental, interrelated metrics that describe this interaction. Transmittance (T) is defined as the ratio of the intensity of light passing through a sample (I) to the initial intensity of the incident light (I₀) [1] [2]. It is often expressed as a percentage, representing the fraction of light that successfully traverses the sample without being absorbed, scattered, or reflected [3] [4]. Absorbance (A), in contrast, is a logarithmic measure of the amount of light absorbed by a sample at a particular wavelength [5] [2]. This relationship is mathematically defined as A = -log(T) = log(I₀/I) [1] [4]. This logarithmic nature means that absorbance provides a linear relationship with concentration, which is the cornerstone of quantitative spectroscopic analysis [1].
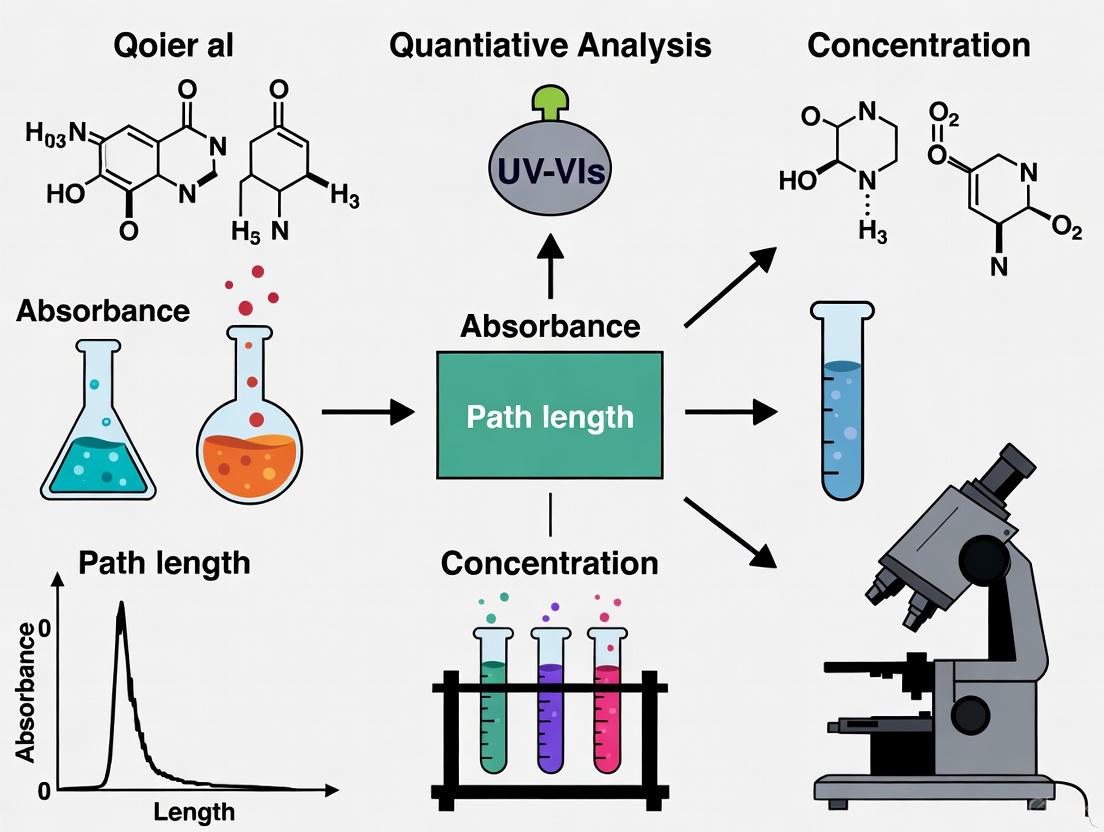
The following workflow outlines the core conceptual and experimental process for quantitative analysis based on these principles:
The Beer-Lambert Law: Foundation of Quantitative Analysis
The Beer-Lambert Law (also known as Beer's Law) forms the theoretical basis for quantifying the concentration of an analyte in solution [5] [2]. It states that the absorbance of light by a solution is directly proportional to the concentration of the absorbing species and the path length the light takes through the solution [5]. The law is expressed mathematically as:
A = ε l c
Where:
- A is the measured Absorbance (a unitless quantity) [6]
- ε is the Molar Absorptivity or molar absorption coefficient (typically in M⁻¹cm⁻¹), a substance-specific constant that measures how strongly a chemical species absorbs light at a given wavelength [5] [4]
- l is the Path Length (in cm), the distance the light travels through the sample [5]
- c is the Molar Concentration (in M) of the absorbing species [5]
The linear relationship between absorbance and concentration implied by the Beer-Lambert Law enables the creation of calibration curves. By measuring the absorbance of standard solutions of known concentration, a calibration plot of Absorbance vs. Concentration can be generated, which can then be used to determine the concentration of unknown samples [2].
Practical Limits of the Beer-Lambert Law
While foundational, the Beer-Lambert law has practical limits. Deviations from linearity are frequently encountered, especially at high analyte concentrations where molecular interactions can alter the absorption characteristics [4]. Additionally, the law is derived assuming ideal conditions and can be compromised by factors such as light scattering from particulates or microbial cells in the sample, the use of non-monochromatic light, or fluorescence from the sample itself [6] [4]. For reliable quantitative measurements, it is recommended to maintain absorbance readings within the 0.1 to 1.0 range, which corresponds to 80% to 10% transmittance [6]. Samples yielding absorbances above 1.0 (A > 1) can often be diluted to bring them into the linear range of the instrument, thereby improving accuracy [6].
Table 1: Relationship between Absorbance, Transmittance, and Light Attenuation
| Absorbance (A) | Percent Transmittance (%T) | Fraction of Light Transmitted | Fraction of Light Absorbed |
|---|---|---|---|
| 0 | 100% | 1 | 0 |
| 0.1 | ~79% | 0.79 | 0.21 |
| 0.3 | 50% | 0.5 | 0.5 |
| 1.0 | 10% | 0.1 | 0.9 |
| 2.0 | 1% | 0.01 | 0.99 |
| 3.0 | 0.1% | 0.001 | 0.999 |
Table 2: Key Parameters of the Beer-Lambert Law
| Parameter | Symbol | Definition | Typical Units | Role in Quantitative Analysis |
|---|---|---|---|---|
| Absorbance | A | Logarithmic measure of light absorbed | Unitless | The primary measured variable used for concentration determination. |
| Molar Absorptivity | ε (epsilon) | Substance-specific absorption strength | M⁻¹cm⁻¹ | A constant used to calculate concentration from absorbance; obtained from literature. |
| Path Length | l | Distance light travels through sample | cm (often 1 cm) | A fixed, known variable in the measurement (e.g., cuvette width). |
| Concentration | c | Amount of absorbing species in solution | M (mol/L) | The target unknown variable solved for in the equation. |
Experimental Protocols for Quantitative Analysis
Protocol 1: Protein Quantification via A₂₈₀ Measurement
Principle: Proteins containing tyrosine, tryptophan, and phenylalanine residues absorb ultraviolet (UV) light at a peak wavelength of 280 nm [7]. The absorbance at 280 nm (A₂₈₀) is directly proportional to the protein concentration, as described by the Beer-Lambert Law [6].
Materials & Reagents:
- Purified protein sample in a suitable buffer (e.g., phosphate-buffered saline).
- UV-transparent microcuvette or 96-well plate (e.g., Quartz or specialized UV-compatible plastic).
- UV-Vis spectrophotometer (capable of measurements at 280 nm).
- Buffer solution for blanking and sample dilution.
Procedure:
- Power on the UV-Vis spectrophotometer and allow the lamp to warm up for the time specified by the manufacturer (typically 15-30 minutes).
- Prepare the blank: Fill the cuvette with the same buffer used to dissolve or dilute the protein sample.
- Blank the instrument: Place the blank cuvette in the sample holder and perform a blank measurement at 280 nm to set the 0.000 Abs (100% T) baseline.
- Measure the sample: Pipette the protein sample into a clean cuvette, place it in the sample holder, and record the absorbance value at 280 nm.
- Ensure linear range: If the measured A₂₈₀ value is greater than 1.0, dilute the sample with buffer and remeasure. Apply the appropriate dilution factor in the final concentration calculation.
- Calculate concentration: Determine the protein concentration using the Beer-Lambert law: c = A / (ε * l). The molar absorptivity (ε) is specific to the protein and must be obtained from literature or databases.
Protocol 2: Nucleic Acid Quantification and Purity Assessment
Principle: Nucleic acids (DNA and RNA) have an absorbance maximum at 260 nm due to their constituent purine and pyrimidine bases [6] [7]. The A₂₆₀ measurement is the standard method for determining the concentration of DNA and RNA in solution. Furthermore, the ratios of absorbances at different wavelengths provide an assessment of sample purity, indicating the presence of common contaminants like protein or residual solvents [6].
Procedure:
- Instrument preparation: Initialize the UV-Vis spectrophotometer as described in Protocol 1.
- Blank with solvent: Use the same TE buffer or water in which the nucleic acid is dissolved as the blank.
- Acquire the spectrum: Measure the absorbance of the nucleic acid sample across a wavelength range, typically from 230 nm to 340 nm.
- Record key values: Note the absorbance values at 260 nm (A₂₆₀), 280 nm (A₂₈₀), 230 nm (A₂₃₀), and 320 nm (A₃₂₀).
- Calculate concentration:
- For double-stranded DNA: Concentration (ng/μL) = A₂₆₀ × 50 ng/μL × Dilution Factor
- For single-stranded DNA or RNA: Concentration (ng/μL) = A₂₆₀ × 40 ng/μL × Dilution Factor
- Assess purity using the following ratios:
- A₂₆₀/A₂₈₀: A ratio of ~1.8 is indicative of pure DNA; a ratio of ~2.0 is indicative of pure RNA. Lower ratios suggest protein contamination.
- A₂₆₀/A₂₃₀: This ratio should be greater than 2.0. A lower ratio may suggest contamination by chaotropic salts or organic compounds.
Instrumentation and Research Reagent Solutions
The accuracy of absorbance and transmittance measurements is highly dependent on the quality of the instrumentation and consumables used. Modern microplate readers offer high-throughput capabilities, allowing for the simultaneous measurement of 96, 384, or even 1536 samples, providing significant savings in time and reagents [6]. Key features to look for include automatic path length correction, which is essential when working with variable sample volumes in microplates, and a UV/Vis spectrometer that can capture full spectra rapidly [6] [7]. For the highest accuracy, especially with precious samples, instruments that use fixed pathlength microcuvettes are recommended as they eliminate a major variable in the Beer-Lambert equation [7].
Table 3: Essential Research Reagent Solutions and Materials
| Item | Function / Application in UV-Vis Spectroscopy |
|---|---|
| Quartz Cuvettes | Optically clear for UV light (down to ~220 nm); essential for protein and nucleic acid quantification at 280 nm and 260 nm. |
| UV-Transparent Microplates | Enable high-throughput absorbance measurements for applications like ELISA, microbial growth monitoring, and kinetic assays. |
| Bradford Reagent | A dye-binding assay reagent for protein quantification; absorbance shift is measured, useful for proteins lacking aromatic residues. |
| TE Buffer | A common solvent (Tris-EDTA) for nucleic acids; used for blanking and sample dilution, as it does not absorb significantly in the UV range. |
| NADH/NAD+ Cofactors | Used in enzyme activity assays; the reduction of NAD+ to NADH is monitored by an increase in absorbance at 340 nm. |
Advanced Considerations and Quality Control
Optical Density vs. Absorbance in Microbial Growth
In microbiology, the term Optical Density (OD) is frequently used, particularly in the context of OD₆₀₀ measurements to monitor microbial growth [6]. It is critical to understand that at 600 nm, the attenuation of light by a microbial culture is predominantly due to light scattering by the cells, not true absorption [6]. While the measurement is technically a turbidity reading, it is routinely performed using a spectrophotometer and treated as an "absorbance" value for practical purposes. However, this distinction is important as scattering can interfere with certain instrumental correction methods, such as water peak-based path length correction, making volume-based correction methods more appropriate for OD measurements [6].
Ensuring Data Reliability and Compliance
For robust and reliable quantitative results, adherence to good measurement practices is essential. This includes:
- Linear Range Verification: Always ensure that sample absorbances fall within the validated linear range of the instrument and method (typically A < 1.0) [6].
- Path Length Accuracy: Be aware of the exact path length of your measurement cell. Use instruments with fixed path lengths or reliable path length correction algorithms for the most accurate results [7].
- Reference Materials: For critical applications, use certified reference materials (CRMs) from organizations like the National Institute of Standards and Technology (NIST) to validate instrument accuracy and ensure compliance with regulatory guidelines (e.g., USP, Ph. Eur.) [7].
The Beer-Lambert Law (also referred to as Beer's Law) is a fundamental principle in optical spectroscopy that forms the cornerstone of quantitative analysis in ultraviolet-visible (UV-Vis) spectroscopy [5] [2]. This empirical relationship describes how light attenuates as it passes through an absorbing substance, establishing a linear relationship between the absorbance of a solution and the concentration of the absorbing species within it [8]. For researchers in drug development and analytical sciences, this law provides the theoretical foundation for quantifying analyte concentrations, monitoring reaction kinetics, and ensuring quality control in pharmaceutical formulations.
The modern formulation of the Beer-Lambert Law states that the absorbance (A) of a solution is directly proportional to the concentration (c) of the absorbing species, the path length (l) of light through the solution, and the molar absorptivity (ε) of the species at a specific wavelength [5] [9]. This relationship is mathematically expressed as A = εlc, where A is dimensionless absorbance, ε is the molar absorptivity coefficient (typically in L·mol⁻¹·cm⁻¹), l is the path length (usually in cm), and c is the concentration (in mol·L⁻¹) [2] [10]. The historical development of this law spans nearly two centuries, beginning with Pierre Bouguer's 1729 work on light attenuation in the atmosphere, followed by Johann Heinrich Lambert's mathematical formulation in 1760, and culminating with August Beer's contribution in 1852 linking absorption to solution concentration [9] [11]. This progression of scientific understanding has yielded one of the most widely applied relationships in analytical chemistry.
Deconstruction of the A = εlc Equation
Absorbance (A)
Absorbance (A) is a dimensionless quantity that represents the logarithm of the ratio of incident to transmitted light intensity [5] [2]. It is mathematically defined as A = log₁₀(I₀/I), where I₀ is the intensity of incident light, and I is the intensity of transmitted light [5] [10]. Absorbance has a logarithmic relationship with transmittance (T = I/I₀), which expresses how much light passes through a sample [2] [10]. This logarithmic relationship means that each unit increase in absorbance corresponds to a tenfold decrease in transmittance [2]. For instance, an absorbance of 1 indicates that 10% of the incident light is transmitted, while an absorbance of 2 indicates only 1% transmittance [2]. This relationship makes absorbance a more practically useful parameter than transmittance for quantitative analysis because it exhibits a linear relationship with concentration, as stipulated by the Beer-Lambert Law [5].
It is crucial to distinguish absorbance from the older term "optical density" (OD), which accounts for both absorption and light scattering losses [2] [10]. The International Union of Pure and Applied Chemistry (IUPAC) discourages using "optical density" in place of absorbance in spectroscopic contexts [2]. For accurate quantitative measurements, absorbance values should generally be maintained below 1.0 AU (Absorbance Units) to remain within the instrument's dynamic range and ensure a linear response [10]. When absorbance exceeds this value, the sample transmits insufficient light (less than 10%) for reliable detection in many instrument configurations [10].
Molar Absorptivity (ε)
Molar absorptivity (ε), also known as the molar extinction coefficient, is a fundamental molecular property that represents the probability of an electronic transition occurring when a photon interacts with a molecule [5]. This parameter is both wavelength-dependent and substance-specific, serving as a molecular fingerprint that varies with the chemical structure of the absorbing species and the solvent environment [2]. The molar absorptivity coefficient is expressed in units of L·mol⁻¹·cm⁻¹, which conveniently cancel with the concentration (mol·L⁻¹) and path length (cm) units to yield the dimensionless absorbance value [2] [10].
Molar absorptivity values provide insight into the nature of electronic transitions within molecules. Compounds with highly efficient light absorption, typically those with extensive conjugated π-electron systems, exhibit high molar absorptivity values (often exceeding 10,000 L·mol⁻¹·cm⁻¹) [5]. In quantitative drug analysis, determining the molar absorptivity of an active pharmaceutical ingredient at its absorption maximum (λmax) is a critical step in method development, as this value remains constant for a given compound under specific experimental conditions (solvent, temperature, pH) and enables accurate concentration determination across a wide range [2].
Path Length (l)
Path length (l) represents the distance that light travels through the absorbing solution, typically measured in centimeters (cm) [5]. In standard UV-Vis spectroscopy, this is determined by the width of the cuvette or sample container, with 1 cm path length cuvettes being the most common for routine analysis [5] [10]. According to the Beer-Lambert Law, absorbance is directly proportional to path length, meaning that doubling the path length will double the measured absorbance for a solution of fixed concentration [5].
This relationship becomes particularly important in specialized applications where sample volume is limited. Microvolume techniques employ path lengths as small as 1 mm to enable analysis of precious samples while maintaining detectable absorbance levels [10]. The path length dependence also underlies the operation of long path length cells for detecting very dilute analytes and the development of cuvette-free systems that utilize extremely small liquid films for specialized applications such as nucleic acid quantification [10]. For all quantitative work, the precise knowledge of path length is essential for accurate concentration determination.
Concentration (c)
Concentration (c) of the absorbing species in the solution, typically expressed in moles per liter (mol·L⁻¹), represents the key variable of interest in most quantitative applications of the Beer-Lambert Law [5] [2]. The law establishes that absorbance is directly proportional to concentration, enabling researchers to construct calibration curves from standards of known concentration and use these to determine unknown concentrations in test samples [2]. This linear relationship forms the basis for most quantitative analysis performed using UV-Vis spectroscopy in pharmaceutical and biochemical research.
The concentration dependence articulated by Beer's original work states that equivalent absorbance values will be obtained when the product of concentration and path length remains constant [9] [11]. This principle provides flexibility in experimental design, allowing researchers to optimize either parameter to maintain measurements within the ideal absorbance range (0.1-1.0 AU) [10]. When concentration becomes too high, leading to absorbance values above 1.0, the relationship may become nonlinear due to instrumental limitations or molecular interactions, requiring sample dilution to return to the linear range [10].
Table 1: Components of the Beer-Lambert Law Equation
| Component | Symbol | Definition | Standard Units | Role in Equation |
|---|---|---|---|---|
| Absorbance | A | Logarithm of the ratio of incident to transmitted light intensity | Dimensionless | Dependent variable representing light attenuation |
| Molar Absorptivity | ε | Measure of how strongly a substance absorbs light at a specific wavelength | L·mol⁻¹·cm⁻¹ | Substance-specific proportionality constant |
| Path Length | l | Distance light travels through the sample | cm (typically 1 cm) | Proportionality factor relating to sample geometry |
| Concentration | c | Amount of absorbing substance per unit volume | mol·L⁻¹ | Independent variable of primary interest |
Table 2: Relationship Between Absorbance and Transmittance
| Absorbance (A) | Transmittance (T) | % Transmittance | Light Transmitted | Light Absorbed |
|---|---|---|---|---|
| 0 | 1 | 100% | 100% | 0% |
| 0.3 | 0.5 | 50% | 50% | 50% |
| 1 | 0.1 | 10% | 10% | 90% |
| 2 | 0.01 | 1% | 1% | 99% |
| 3 | 0.001 | 0.1% | 0.1% | 99.9% |
Experimental Protocols for Quantitative Analysis
Protocol 1: Determination of Molar Absorptivity
Principle: This protocol describes the procedure for determining the molar absorptivity coefficient (ε) of a purified compound, which is a fundamental parameter required for quantitative analysis using the Beer-Lambert Law.
Materials:
- Analytical balance
- Volumetric flasks (10 mL, 25 mL, or appropriate sizes)
- UV-transparent quartz cuvettes (1 cm path length)
- UV-Vis spectrophotometer
- Purified analyte compound
- Appropriate solvent (spectroscopic grade)
Procedure:
- Prepare a stock solution of the analyte by accurately weighing 5-50 mg (record exact mass) of the purified compound and dissolving it in a known volume of solvent using a volumetric flask.
- Prepare a series of diluted standard solutions from the stock solution with concentrations typically spanning 10⁻⁵ M to 10⁻³ M, ensuring all absorbance measurements will fall within the linear range (0.1-1.0 AU).
- Zero the spectrophotometer with a blank containing only solvent.
- Scan the most concentrated standard solution across the UV-Vis range (typically 200-800 nm) to identify the wavelength of maximum absorption (λmax).
- Measure the absorbance of each standard solution at λmax.
- Plot absorbance versus concentration and perform linear regression analysis.
- Calculate the molar absorptivity (ε) from the slope of the calibration curve, since slope = εl, and with a 1 cm path length, ε equals the slope.
Validation: The correlation coefficient (R²) of the calibration curve should be ≥0.995, indicating acceptable linearity. The molar absorptivity value obtained should be consistent across concentrations, confirming adherence to the Beer-Lambert Law.
Protocol 2: Quantification of Unknown Concentrations
Principle: This protocol utilizes a previously determined molar absorptivity coefficient to quantify unknown concentrations of analytes in solution, representing the most common application of the Beer-Lambert Law in pharmaceutical analysis.
Materials:
- UV-Vis spectrophotometer
- Quartz or glass cuvettes (path length matched to calibration conditions)
- Appropriate solvent blanks
- Samples containing unknown analyte concentrations
Procedure:
- Turn on the UV-Vis spectrophotometer and allow the lamp to warm up for 15-30 minutes as recommended by the manufacturer.
- Set the instrument to the predetermined λmax for the analyte of interest.
- Zero the instrument using a blank solution containing all components except the analyte.
- Measure the absorbance of the unknown sample at λmax.
- If the absorbance reading exceeds 1.0 AU, dilute the sample appropriately and remeasure, recording the dilution factor.
- Calculate the concentration using the Beer-Lambert Law rearranged as c = A/(εl).
- For highest accuracy, include quality control standards with known concentrations to verify measurement accuracy.
Validation: Perform measurements in triplicate to assess precision. For samples requiring dilution, ensure that the calculated concentration, when multiplied by the dilution factor, yields consistent results across different dilution levels.
Protocol 3: Validation of Beer-Lambert Law Linearity
Principle: This protocol validates the linear relationship between absorbance and concentration for a given analyte-solvent system, establishing the working range for quantitative analysis.
Materials:
- Stock standard solution of known concentration
- Series of volumetric flasks for dilution
- UV-Vis spectrophotometer
- Matched cuvettes
Procedure:
- Prepare a minimum of five standard solutions spanning the expected concentration range, with the highest concentration designed to give an absorbance near 1.0 AU.
- Measure the absorbance of each standard at λmax in triplicate.
- Calculate the mean absorbance for each concentration.
- Plot mean absorbance versus concentration and perform linear regression analysis.
- Statistically evaluate the linearity through the correlation coefficient (R²), y-intercept, and residual analysis.
- Determine the dynamic range where the Beer-Lambert Law applies linearly for the system.
Validation: A valid linear response is typically indicated by R² ≥ 0.995. The y-intercept should not significantly differ from zero (passing through or near the origin). The residuals should be randomly distributed without systematic patterns.
Workflow Visualization
Beer-Lambert Law Quantitative Workflow
The Scientist's Toolkit: Essential Research Reagents and Materials
Table 3: Essential Materials for UV-Vis Spectroscopy Based on Beer-Lambert Law
| Item | Specifications | Function in Experiment |
|---|---|---|
| Spectrophotometer | UV-Vis range (190-1100 nm) with monochromator | Measures intensity of light before and after sample interaction to determine absorbance |
| Cuvettes | Quartz (UV), Glass/Special Plastic (Vis), 1 cm standard path length | Holds liquid sample in reproducible light path |
| Solvents | Spectroscopic grade, low UV absorbance (e.g., water, methanol, acetonitrile) | Dissolves analyte without contributing significantly to absorption |
| Volumetric Flasks | Class A, various sizes (1-100 mL) | Precisely prepares standard solutions of known concentration |
| Analytical Balance | 0.1 mg or better sensitivity | Accurately weighs analyte for primary standard preparation |
| Reference Standards | Purified compounds of known identity and purity | Establishes calibration curve for quantitative analysis |
Critical Considerations and Limitations
Fundamental Limitations of the Beer-Lambert Law
The Beer-Lambert Law provides an excellent approximation for many analytical applications but possesses inherent limitations that researchers must recognize [11]. The law assumes that (1) the absorbing species act independently of one another, (2) the absorption occurs in a uniform, homogeneous medium, (3) the incident light is parallel and monochromatic, (4) the solution does not scatter significant light, and (5) the absorption is independent of incident light intensity [5] [11]. Deviations from these ideal conditions can compromise quantitative accuracy.
Chemical deviations occur when the absorbing species participates in concentration-dependent equilibrium phenomena such as association, dissociation, polymerization, or complex formation [11]. These interactions alter the molar absorptivity coefficient at different concentrations, breaking the linear relationship between absorbance and concentration. Instrumental deviations arise from the use of polychromatic light, stray light, or insufficient spectral resolution, while physical deviations occur due to light scattering from particulates or refractive index changes at high concentrations [10] [11]. Awareness of these limitations enables researchers to design experiments that minimize their impact or to apply appropriate correction factors.
Electromagnetic Theory Considerations
Modern spectroscopic understanding recognizes that the Beer-Lambert Law represents a simplification of more complex electromagnetic interactions [11]. The wave nature of light introduces effects that cannot be fully explained by the simple exponential decay model, particularly in strongly absorbing media or at interfaces between materials with different refractive indices [11]. These electromagnetic effects can manifest as apparent band shifts and intensity changes that depend solely on optical conditions rather than chemical interactions [11].
For precise quantitative work, especially with highly concentrated solutions, thin films, or anisotropic materials, researchers should consider that the Beer-Lambert Law may not fully describe the observed absorbance [11]. In such cases, more sophisticated models incorporating dispersion theory and the complete electromagnetic wave equations may be necessary for accurate interpretation of spectral data [11]. Understanding these limitations is particularly important in pharmaceutical research where regulatory requirements demand rigorous method validation and understanding of analytical techniques.
Applications in Drug Development and Research
The Beer-Lambert Law finds extensive application throughout the drug development pipeline, from discovery through quality control. In early discovery, researchers employ UV-Vis spectroscopy to quantify protein and nucleic acid concentrations using established molar absorptivity values (e.g., ε₂₈₀ for proteins, ε₂₆₀ for DNA/RNA) [10]. During preformulation studies, the law enables determination of solubility profiles, pKa values via pH-dependent absorbance changes, and chemical stability assessment under various storage conditions.
In quality control and manufacturing, the Beer-Lambert Law provides the foundation for assay methods that quantify active pharmaceutical ingredients in final dosage forms. These validated methods must demonstrate linearity across specified ranges, accuracy, precision, and robustness as required by regulatory authorities. The law's principles also underpin dissolution testing, where API release from solid dosage forms is monitored by sampling and measuring concentration in dissolution media over time. The simplicity, reliability, and cost-effectiveness of UV-Vis spectroscopic methods based on the Beer-Lambert Law ensure their continued prominence in pharmaceutical analysis despite the availability of more sophisticated techniques.
Historical Development and Key Contributions
The Beer-Lambert law, a fundamental principle in optical spectroscopy, did not emerge from a single discovery but rather evolved through cumulative contributions over more than a century. Table 1 summarizes the pivotal contributions of Pierre Bouguer, Johann Heinrich Lambert, and August Beer, whose collective work established the empirical relationship known today as the Beer-Lambert law [12].
Table 1: Historical Contributions to the Beer-Lambert Law
| Scientist | Year of Contribution | Core Discovery | Context of Research |
|---|---|---|---|
| Pierre Bouguer | 1729 | Established that light intensity decreases exponentially (in a geometric progression) with increasing path length through an absorbing medium [9]. | Astronomical studies of the attenuation of starlight by the Earth's atmosphere [9] [13]. |
| Johann Heinrich Lambert | 1760 | Formalized Bouguer's observation into a mathematical law, stating that the attenuation of light is proportional to both the incident intensity and the path length [9] [14]. | Published in his work Photometria, providing a rigorous mathematical foundation for light absorption [9] [12]. |
| August Beer | 1852 | Discovered that the absorption of light in a solution is proportional to the concentration of the absorbing solute [5] [14]. | Investigation of the absorption of red light in colored aqueous solutions [11] [12]. |
The modern form of the law, which integrates the dependence on both path length and concentration, is largely attributed to Robert Luther and Andreas Nikolopulos, who presented it in its familiar form in 1913 [9] [11]. The following diagram illustrates the logical progression from the initial observation to the final unified law.
The Fundamental Principle and Its Mathematical Formulation
The Beer-Lambert Law Equation
The Beer-Lambert law provides a quantitative relationship between the absorption of light and the properties of the material through which it travels. The most common formulation states that absorbance (A) is equal to the product of the molar absorptivity (ε), the path length (l), and the concentration (c) of the absorbing species [5] [2]:
A = ε × c × l
In this equation:
- Absorbance (A) is a dimensionless quantity defined as A = log₁₀(I₀/I), where I₀ is the incident light intensity and I is the transmitted light intensity [5] [2].
- Molar Absorptivity (ε), also known as the molar extinction coefficient, is a constant specific to the absorbing substance and the wavelength of light, typically with units of L·mol⁻¹·cm⁻¹ [5] [10].
- Concentration (c) of the absorbing species, usually expressed in mol·L⁻¹ [2].
- Path Length (l) is the distance the light travels through the solution, most often measured in cm [2].
The law is derived from the observation that the differential decrease in light intensity (-dI) as it passes through an infinitesimally thin layer of a sample is proportional to the intensity (I), the concentration (c), and the thickness of the layer (dx). This leads to a differential equation that, when integrated, yields the familiar exponential decay form and its logarithmic equivalent, the absorbance equation [9] [14].
Transmittance and Absorbance
The relationship between transmittance (T) and absorbance (A) is fundamental. Transmittance is the fraction of incident light that passes through a sample: T = I/I₀. It is often expressed as a percentage (%T) [2] [12]. Absorbance is the negative logarithm of transmittance: A = -log₁₀(T) = log₁₀(I₀/I) [5] [12]. Table 2 shows how these two key parameters relate.
Table 2: Relationship between Absorbance and Transmittance
| Absorbance (A) | Transmittance (T) | Percent Transmittance (%T) |
|---|---|---|
| 0.0 | 1.00 | 100% |
| 0.3 | 0.50 | 50% |
| 1.0 | 0.10 | 10% |
| 2.0 | 0.01 | 1% |
| 3.0 | 0.001 | 0.1% |
Practical Application in UV-Vis Spectrophotometry
Standard Experimental Protocol for Quantitative Analysis
This protocol details the steps for determining the concentration of an unknown sample, such as a chalcone solution, using UV-Vis spectroscopy and the Beer-Lambert law [15].
Principle: The concentration of an analyte in solution is directly proportional to its absorbance at a specific wavelength, enabling quantification via a calibration curve [2] [10].
Research Reagent Solutions & Essential Materials
Table 3: Key Reagents and Materials for UV-Vis Spectrophotometry
| Item | Function / Specification |
|---|---|
| Spectrophotometer | Instrument with a UV-Vis light source (e.g., deuterium and tungsten/halogen lamps), a monochromator for wavelength selection (~1200 grooves/mm), and a detector (e.g., photomultiplier tube) [10]. |
| Cuvettes | Sample holders with a defined path length (typically 1.0 cm). Must be made of quartz for UV light (<350 nm) due to its transparency; glass or plastic may be used for visible light only [10]. |
| Analyte Standard | High-purity reference compound of the target analyte (e.g., trans-chalcone) for preparing calibration standards [15]. |
| Solvent | High-purity solvent in which the analyte is dissolved and which does not absorb significantly at the wavelengths of interest (e.g., carbon tetrachloride) [15]. Acts as the blank/reference. |
| Volumetric Glassware | Class A volumetric flasks and precision pipettes for accurate preparation and dilution of standard and sample solutions [15]. |
Procedure:
Selection of Analytical Wavelength
- Prepare a standard solution of the analyte and scan it over a range of UV-Vis wavelengths (e.g., 200-800 nm) [10].
- Identify the wavelength of maximum absorption (λₘₐₓ) for the analyte. For example, a chalcone derivative might have a λₘₐₓ of 390 nm [15]. All subsequent measurements are performed at this wavelength to maximize sensitivity.
Preparation of Standard Solutions
Measurement of Blank and Standards
- Fill a cuvette with the pure solvent and place it in the spectrophotometer. Measure this as the "blank" to set the 0 absorbance (100% transmittance) baseline [5] [10].
- Replace the blank with each standard solution and record the absorbance value at the analytical wavelength. Measure each standard in triplicate to assess repeatability [15].
Construction of Calibration Curve
- Plot the average absorbance (y-axis) against the corresponding known concentration (x-axis) for each standard.
- Perform linear regression analysis on the data. The resulting calibration curve should have a high coefficient of determination (e.g., R² > 0.999) and demonstrate random dispersion of residuals, confirming a linear fit [2] [15].
Analysis of Unknown Sample
- Prepare the unknown sample solution using the same solvent and procedure as the standards.
- Measure the absorbance of the unknown sample at the same analytical wavelength.
- Use the equation of the calibration curve to calculate the concentration of the analyte in the unknown sample [2].
Validation Parameters: The method should be validated for linearity, accuracy (recovery of 98-102%), precision (e.g., coefficient of variation <2%), and repeatability [15].
The workflow for this quantitative analysis is summarized in the diagram below.
Critical Limitations and Modern Considerations
While foundational, the Beer-Lambert law is an idealization with several important limitations that researchers must consider for accurate quantitative analysis [11] [13].
Fundamental Optical Effects: The law was originally derived for light propagating within a homogeneous medium (e.g., the atmosphere), ignoring interfaces. In a typical spectrophotometer, light passes through a cuvette, creating interfaces that cause reflections and internal interference due to the wave nature of light. These effects can lead to fringes and inaccurate absorbance readings, particularly for thin films or samples on reflective substrates [11] [13].
Concentration and Chemical Limitations: The assumption that the molar absorptivity (ε) is constant holds only for dilute solutions. At high concentrations, the absorber's environment changes, which can alter its absorption properties due to changes in molecular interactions and polarizability [11] [13]. Furthermore, chemical reactions such as association, dissociation, or polymerization that change the nature of the absorbing species will also lead to deviations from the law [12].
Spectral and Instrumental Limitations: The law requires the use of monochromatic light. The presence of stray light within the instrument or the use of insufficiently narrow bandwidths can result in non-linear Beer-Lambert behavior, especially at high absorbance values [10]. Instrumental factors such as detector non-linearity can also introduce errors [11].
Scattering and Complex Media: The generic Beer-Lambert law does not account for light loss due to scattering. This is a critical limitation when analyzing biological tissues or turbid suspensions. The Modified Beer-Lambert Law was developed to address this, introducing a Differential Pathlength Factor (DPF) to account for the increased pathlength caused by scattering, and a scattering loss term, G [14]. The equation becomes A = ε · c · DPF · d + G.
The Beer-Lambert Law (also known as Beer's Law) is a fundamental principle in optical spectroscopy that provides the theoretical foundation for quantitative analysis in UV-Vis spectroscopy research [5] [16]. This relationship describes how light is attenuated as it passes through an absorbing medium and forms the basis for determining concentrations of analytes in solution [2]. Formulated by August Beer in 1852, the law states that the absorptive capacity of a dissolved substance is directly proportional to its concentration in a solution [16]. When integrated with electromagnetic theory, this law provides profound insights into the fundamental interactions between light and matter at the molecular level.
The Beer-Lambert Law in its modern formulation is expressed mathematically as:
A = εlc
Where:
- A = Absorbance (a unitless quantity) [5] [17]
- ε = Molar absorptivity or molar extinction coefficient (typically in L·mol⁻¹·cm⁻¹) [18] [17]
- l = Path length of light through the solution (in centimeters) [5] [17]
- c = Concentration of the absorbing species (in mol·L⁻¹) [16] [17]
This linear relationship enables researchers to determine unknown concentrations by measuring absorbance, provided the molar absorptivity and path length are known [17]. The law finds particular utility in analytical chemistry for quantification of analytes, monitoring reactions and processes, and detecting specific organic compounds [19].
Electromagnetic Theory of Light-Matter Interaction
Historical Context and Theoretical Foundation
The development of the Beer-Lambert Law occurred concurrently with the formulation of electromagnetic theory by James Clerk Maxwell [11]. While the BBL law provides an empirical relationship for light absorption, its complete theoretical foundation requires understanding light as an electromagnetic wave interacting with matter at the molecular level [11]. The work of Pierre Bouguer and Johann Heinrich Lambert dealing with spectrophotometry of the atmosphere was well known to August Beer, who described that "the loss of the intensity of light transmitted through an infinitesimally thin layer of a homogeneous medium is proportional to this intensity and to the layer thickness" [11].
The differential equation provided by Bouguer and Lambert has the solution:
I(d) = I₀e^(-αd)
Where I₀ is the initial intensity of the light, I(d) is the intensity after traveling the distance d in the medium, and α is the Napierian absorption coefficient [11]. This equation forms the fundamental basis for understanding how light intensity decreases exponentially as it passes through an absorbing medium.
The Electromagnetic Perspective
From an electromagnetic perspective, when light encounters a molecule, the oscillating electric field of the electromagnetic wave interacts with the electrons in the molecule [11]. This interaction can promote electrons to higher energy states when the energy of the photons matches the energy difference between molecular orbitals [11]. The probability of these electronic transitions determines the molar absorptivity (ε) of the substance, which is intrinsically related to the molecular structure and the electronic configuration of the analyte [5].
It is crucial to recognize that absorption and dispersion are "two sides of the same coin" in electromagnetic theory [11]. The molar absorptivity is not an independent property but is fundamentally connected to the refractive index of the material through the Kramers-Kronig relations, which describe the causal relationship between absorption and dispersion in materials.
Table 1: Fundamental Electromagnetic Parameters in Light Absorption
| Parameter | Symbol | Relationship to Electromagnetic Theory | Significance in Quantitative Analysis |
|---|---|---|---|
| Molar Absorptivity | ε | Measures probability of electronic transition [5] | Determines sensitivity of concentration measurements |
| Absorption Coefficient | α | Napierian coefficient for intensity decay [11] | Describes intrinsic absorbing power of medium |
| Refractive Index | n | Related to ε through Kramers-Kronig relations [11] | Affects light propagation and reflection losses |
| Oscillator Strength | f | Quantitative measure of transition probability [11] | Fundamental molecular property determining ε |
Quantitative Relationships and Data Presentation
Absorbance and Transmittance Relationship
The Beer-Lambert Law establishes a logarithmic relationship between absorbance (A) and transmittance (T), where transmittance is defined as the ratio of transmitted to incident light intensity (T = I/I₀) [2]. The relationship between these fundamental parameters is expressed as:
A = -log(T) = log(1/T) = log(I₀/I) [5] [2] [17]
This logarithmic relationship means that absorbance increases linearly with concentration, while transmittance decreases exponentially. The practical implication is that each unit increase in absorbance corresponds to a tenfold decrease in transmitted light intensity [5] [2].
Table 2: Absorbance and Transmittance Correlation
| Absorbance (A) | Transmittance (T) | % Transmittance | Fraction of Light Transmitted |
|---|---|---|---|
| 0 | 1 | 100% | 100% |
| 0.3 | 0.5 | 50% | 50% |
| 1 | 0.1 | 10% | 10% |
| 2 | 0.01 | 1% | 1% |
| 3 | 0.001 | 0.1% | 0.1% |
| 4 | 0.0001 | 0.01% | 0.01% |
Molar Absorptivity and Sensitivity
The molar absorptivity (ε) is an intrinsic property of the absorbing species that indicates how strongly a substance absorbs light at a given wavelength [17]. A higher ε value signifies greater absorbance for a given concentration and path length, which directly impacts the sensitivity of quantitative measurements [17]. This parameter is specific to each substance and the wavelength of light used, with maximum sensitivity typically achieved at the wavelength of maximum absorption (λmax) [17].
The following diagram illustrates the complete electromagnetic interaction process from initial light emission to quantitative detection:
Diagram 1: Electromagnetic Interaction Pathway in UV-Vis Spectroscopy. This workflow illustrates the complete process from light emission to quantitative analysis, highlighting key electromagnetic interactions at each stage.
Experimental Protocols and Methodologies
Spectrophotometric Analysis of Heme-Containing Enzymes
Principle: This protocol details the quantitative determination of cytochrome P450 enzyme concentration using UV-Vis spectrophotometry based on the Beer-Lambert Law [18]. The heme prosthetic group in P450 enzymes exhibits characteristic absorption near 418 nm, enabling specific quantification in complex biological mixtures [18].
Materials and Reagents:
- UV/Vis Spectrophotometer (Thermo Scientific, Cat. #840-300000) [18]
- UVette Cuvettes (Eppendorf, Cat. #952010051) [18]
- Cell-Free Extracts (CFE) containing P450BM3 enzyme
- Control CFE (without Heme) [18]
- Extraction Buffer (50 mM potassium phosphate, pH 7.4) [18]
- Pipettes and appropriate tips
Table 3: Research Reagent Solutions for Spectrophotometric Analysis
| Reagent/Material | Function/Specification | Application Notes |
|---|---|---|
| Potassium Phosphate Buffer (50 mM, pH 7.4) | Maintains physiological pH for enzyme stability [18] | Prepare from 1 M stock: 95 g monobasic + 52.5 g dibasic potassium phosphate [18] |
| UVette Cuvettes (Eppendorf) | Provides standard 1 cm path length for measurements [18] | Ensure clean, scratch-free surfaces for accurate light transmission |
| Control CFE (without Heme) | Spectrophotometer blank for baseline correction [18] | Accounts for background absorption from cellular components |
| Cell-Free Extracts (CFE) | Contains P450BM3 enzyme for quantification [18] | Thaw completely and mix gently before measurement |
Procedure:
Sample Preparation:
- Thaw cell-free extracts (CFE) completely on ice or at room temperature.
- Prepare extraction buffer (50 mM potassium phosphate, pH 7.4) if not previously prepared.
Blank Preparation:
- Pipette 300 µL of Control CFE (without heme) into a UVette cuvette [18].
- This serves as the blank for spectrophotometer calibration to account for background absorption.
Sample Loading:
- Pipette 300 µL of experimental CFE into a separate, clean UVette cuvette [18].
Spectrophotometer Measurement:
- Insert the blank cuvette and calibrate the spectrophotometer to zero absorbance at the target wavelength.
- Replace with the sample cuvette and measure the absorbance at 418 nm (characteristic Soret band for heme) [18].
- Record the absorbance value for concentration calculations.
Concentration Calculation:
- Using the Beer-Lambert Law (A = εlc), calculate the enzyme concentration.
- For P450 enzymes, the molar absorptivity (ε) is typically known from literature (e.g., ε ≈ 100 mM⁻¹·cm⁻¹ for the Soret band).
- With path length (l) = 1 cm (standard for UVette cuvettes), concentration (c) = A/(ε×l).
Nanoparticle Synthesis Monitoring Protocol
Principle: This protocol utilizes UV-Vis spectroscopy to monitor the synthesis and stability of silver nanoparticles in colloidal solution [19]. The surface plasmon resonance of silver nanoparticles produces a characteristic absorption band between 350-550 nm with a peak around 445 nm, enabling real-time monitoring of nanoparticle formation and growth [19].
Materials and Reagents:
- AvaSpec-2048L UV/VIS spectrometer or equivalent [19]
- Silver salt solution (e.g., silver nitrate)
- Reducing agent solution
- Stabilizing agent (e.g., citrate)
- Standard quartz cuvettes (1 cm path length)
Procedure:
Reaction Setup:
- Prepare silver salt solution at appropriate concentration in purified water.
- Prepare fresh reducing agent solution according to synthesis requirements.
Spectral Monitoring:
- Set spectrophotometer to scan mode (300-700 nm) to capture the full plasmon resonance band [19].
- Initiate the reduction reaction by adding reducing agent to silver salt solution under controlled stirring.
- Collect spectra at regular time intervals (e.g., every 30 seconds initially).
Data Interpretation:
Endpoint Determination:
- Consider the reaction complete when the absorption peak stabilizes, indicating cessation of new nanoparticle formation [19].
- Use the spectral data to calculate average particle size based on established correlations between absorption maximum and nanoparticle dimensions.
The following workflow diagram illustrates the complete experimental process for quantitative analysis using the Beer-Lambert Law:
Diagram 2: Experimental Workflow for Quantitative Analysis. This diagram outlines the step-by-step process for determining analyte concentration using UV-Vis spectroscopy and the Beer-Lambert Law, from initial sample preparation to final quantitative result.
Advanced Applications in Research and Development
Pharmaceutical and Biochemical Applications
UV-Vis spectroscopy based on the Beer-Lambert Law finds extensive application in pharmaceutical research and drug development. The technology enables researchers to:
- Quantify protein concentrations in biological samples using specific absorbance characteristics [18]. For example, the Bradford assay relies on absorbance shift of Coomassie Brilliant Blue G-250 when bound to proteins.
- Monitor enzyme kinetics by tracking substrate depletion or product formation over time through absorbance changes at specific wavelengths.
- Determine drug purity and concentration in formulation studies through careful absorbance measurements at characteristic wavelengths.
- Study biomolecular interactions including protein-ligand binding through changes in absorption spectra.
In the specific case of cytochrome P450 enzymes, which play crucial roles in drug metabolism, spectrophotometric analysis allows researchers to quantify enzyme expression levels and catalytic activity [18]. This is particularly valuable in drug development studies where metabolic pathways and potential drug-drug interactions must be thoroughly characterized.
Nanotechnology and Materials Science
The Beer-Lambert Law provides fundamental support for nanotechnology research through:
- Real-time monitoring of nanoparticle synthesis as demonstrated in the silver nanoparticle protocol [19]. The progressive development of absorption bands indicates nucleation and growth processes.
- Size determination of colloidal particles based on the relationship between absorption maximum and particle dimensions [19]. As silver nanoparticles grow, their absorption peak shifts toward longer wavelengths (red shift), providing a non-invasive size measurement technique.
- Stability assessment of nanomaterial suspensions through monitoring changes in absorption spectra over time, which may indicate aggregation or chemical transformation.
The application of UV-Vis spectroscopy in nanoparticle research exemplifies the expanded utility of the Beer-Lambert Law beyond simple concentration determination to include morphological characterization and reaction progress monitoring [19].
Environmental and Atmospheric Chemistry
Environmental scientists employ Beer-Lambert principles to:
- Quantify pollutant concentrations in air and water samples through targeted absorbance measurements.
- Characterize secondary organic aerosols (SOAs) by analyzing their absorption and scattering properties [19]. Research has shown that the refractive index values of SOAs range from 1.38 to 1.59 depending on precursor compounds and NOx levels [19].
- Monitor environmental remediation processes by tracking the disappearance of contaminant absorption bands or appearance of degradation product signatures.
These applications demonstrate how the fundamental principles of light absorption governed by the Beer-Lambert Law continue to enable critical environmental research with implications for climate science and pollution control.
Limitations and Practical Considerations
Theoretical Limitations and Electromagnetic Considerations
While the Beer-Lambert Law provides an excellent foundation for quantitative analysis, researchers must be aware of its limitations:
High Concentration Deviations: At high concentrations (typically >0.01 M), molecular interactions can alter absorption characteristics and cause deviations from linearity [11] [17]. These interactions may affect the molar absorptivity, making it concentration-dependent rather than constant.
Electromagnetic Effects: The BBL law is not always fully compatible with electromagnetic theory, particularly in cases involving strong absorption or complex optical systems [11]. Wave optics-based effects can cause band shifts and intensity changes based solely on optical conditions rather than chemical factors [11].
Scattering Effects: The presence of particulates or turbidity in samples can scatter light, leading to inaccurate absorbance readings that do not solely represent electronic absorption [17]. This is particularly relevant in biological samples or nanoparticle suspensions.
Chemical Equilibrium Interference: Reversible reactions or equilibrium processes in solution can alter the effective concentration of the absorbing species, affecting absorbance measurements [17].
Instrumental and Methodological Considerations
To ensure accurate quantitative results, researchers should address these practical considerations:
- Spectral Bandwidth: Use monochromatic light sources to ensure accurate application of the law, as polychromatic light can cause deviations.
- Stray Light: Minimize stray light in the spectrophotometer, which can significantly affect absorbance measurements, particularly at high absorbance values [17].
- Cuvette Selection: Use appropriate cuvette materials (e.g., quartz for UV measurements, glass or plastic for visible range) and ensure consistent path length [17].
- Temperature Control: Maintain constant temperature during measurements as temperature can affect both absorption characteristics and solution volume.
By understanding these limitations and considerations, researchers can design more robust experiments and properly interpret spectroscopic data within the appropriate constraints of the Beer-Lambert Law.
The Beer-Lambert Law remains an indispensable tool in modern spectroscopic analysis, providing the fundamental connection between electromagnetic theory and practical quantitative measurements. By understanding both its theoretical foundation in light-matter interactions and its practical applications across diverse fields—from pharmaceutical development to nanotechnology—researchers can leverage this powerful relationship for accurate concentration determination and reaction monitoring. While mindful of its limitations, scientists continue to apply and extend Beer-Lambert principles to address increasingly complex analytical challenges in research and development.
The Beer-Lambert Law (also known as Beer's Law) is a fundamental principle in analytical chemistry that forms the basis for quantitative analysis using ultraviolet-visible (UV-Vis) spectroscopy [2]. This law states that the absorbance of light by a solution is directly proportional to the concentration of the absorbing species and the path length the light travels through the solution [20] [9]. For researchers and drug development professionals, proper application of this law enables accurate determination of analyte concentrations, essential for pharmaceutical analysis, quality control, and research applications [10].
The Beer-Lambert Law is mathematically expressed as:
A = εlc
Where:
- A is the measured absorbance (dimensionless) [2]
- ε is the molar absorptivity or extinction coefficient (typically in L·mol⁻¹·cm⁻¹) [21]
- l is the path length of the sample cell (typically in cm) [21]
- c is the concentration of the absorbing species (typically in mol/L) [21]
This article explores the ideal conditions required for perfect adherence to the Beer-Lambert Law, provides detailed experimental protocols for verification, and discusses common pitfalls that can lead to deviations from ideal behavior.
Core Assumptions of the Beer-Lambert Law
The Beer-Lambert Law operates under several fundamental assumptions. When these conditions are met, the relationship between absorbance and concentration remains linear, enabling accurate quantitative analysis [11].
Table 1: Fundamental Assumptions of the Beer-Lambert Law
| Assumption | Description | Practical Implication |
|---|---|---|
| Monochromatic Light | The incident light should consist of a single wavelength [20] | Use high-quality monochromators or lasers with narrow bandwidth [10] |
| Non-Interacting Absorbing Species | Absorbing molecules act independently without molecular interactions [11] | Maintain dilute concentrations to minimize solute-solute interactions |
| Homogeneous Solution | The sample must be uniform without light scattering [20] | Ensure complete dissolution and avoid colloidal or particulate matter |
| Absorption Only | Attenuation occurs solely through absorption, not scattering or other processes [20] | Use appropriate sample preparation and filtration methods |
| No Chemical Changes | The absorbing species does not undergo chemical alteration during measurement [22] | Verify chemical stability of the analyte under measurement conditions |
The linear relationship between absorbance and concentration holds true only when these core assumptions are satisfied. Deviations from these ideal conditions result in non-linearity, reducing the accuracy of quantitative measurements [20] [11].
Practical Considerations and Common Deviations
In practical laboratory settings, several factors can cause deviations from ideal Beer-Lambert behavior. Understanding these factors is crucial for obtaining accurate results in pharmaceutical and research applications.
Table 2: Common Deviations from Beer-Lambert Law and Solutions
| Deviation Type | Cause | Solution |
|---|---|---|
| Instrumental Stray Light | Light reaching the detector at wavelengths other than intended [20] | Use double-monochromator instruments; keep absorbance <2 AU [20] |
| Polychromatic Effects | Finite spectral bandwidth in monochromator systems [20] | Ensure instrument bandwidth <10% of natural peak width [20] |
| Molecular Interactions | Association/dissociation, solute-solvent interactions at high concentrations [11] | Work within concentration range where linearity is maintained [21] |
| Chemical Deviations | Equilibrium processes (acid-base, complexation) that change with concentration [20] | Control pH and ionic strength; use buffered solutions [20] |
| Scattering Effects | Particulate matter or turbidity in sample [20] | Filter samples; use high-purity solvents [23] |
| Fluorescence | Re-emission of absorbed light by fluorescent compounds [20] | Select appropriate measurement geometry and detection parameters |
| Refractive Index Changes | Significant changes in refractive index at high concentrations [11] | Work with dilute solutions where refractive index remains constant |
The limitations of the Beer-Lambert law become particularly important at high concentrations, where the assumption of independent absorbing species often breaks down [11]. Additionally, the optical configuration of spectrophotometers can introduce measurement artifacts that experienced researchers must recognize and mitigate [20] [10].
Diagram 1: Ideal conditions required for perfect Beer-Lambert law adherence.
Experimental Protocols
Protocol 1: Verification of Beer-Lambert Law Linear Range
Purpose: To establish the concentration range over which a specific analyte follows the Beer-Lambert Law under defined experimental conditions.
Materials and Equipment:
- UV-Vis spectrophotometer with validated performance [10]
- Matched quartz cuvettes (path length: 1.0 cm) [10]
- Analytical balance (accuracy ±0.0001 g)
- Volumetric flasks (Class A)
- Appropriate solvent (spectrophotometric grade)
- Reference standard of the analyte (purity >99%)
Procedure:
- Prepare a stock solution of the reference standard at a concentration near the expected upper limit of linearity.
- Prepare a series of 5-8 standard solutions by serial dilution covering the expected concentration range.
- Allow the spectrophotometer to warm up for at least 30 minutes as per manufacturer specifications.
- Zero the instrument using a cuvette filled with pure solvent [10].
- Measure the absorbance of each standard solution at the predetermined λmax [21].
- Perform each measurement in triplicate and record average values.
- Plot absorbance versus concentration and perform linear regression analysis.
- The linear range is defined where the correlation coefficient (R²) exceeds 0.995 and residuals show random distribution.
Acceptance Criteria: Linear range is established where the measured absorbance values between 0.1 and 1.0 AU demonstrate coefficient of variation <2% and R² > 0.995 [21].
Protocol 2: Determination of Molar Absorptivity
Purpose: To accurately determine the molar absorptivity coefficient (ε) for a compound under specified conditions.
Materials and Equipment:
- UV-Vis spectrophotometer with wavelength accuracy verification [20]
- Temperature-controlled sample holder
- Quartz cuvettes (path length precisely measured)
- High-purity analyte reference standard
- Degassed, spectrophotometric-grade solvent
Procedure:
- Prepare a minimum of five standard solutions with accurately known concentrations spanning the linear range.
- Measure the exact path length of the cuvette using interference methods or certified standards.
- thermostat the samples and instrument to 25.0±0.5°C.
- Record absorbance spectra of each solution from λmax ±50 nm.
- Measure absorbance at λmax for each solution against solvent blank.
- Calculate molar absorptivity using the Beer-Lambert law rearranged as ε = A/(l·c).
- Perform statistical analysis on calculated ε values to determine mean and standard deviation.
Acceptance Criteria: The reported molar absorptivity should represent the mean of at least five determinations with relative standard deviation <1.5% [21].
Diagram 2: Experimental workflow for Beer-Lambert law validation.
The Scientist's Toolkit: Essential Research Reagents and Materials
Proper selection of reagents and materials is critical for obtaining accurate, reproducible results that adhere to Beer-Lambert Law assumptions.
Table 3: Essential Materials for Beer-Lambert Compliant Experiments
| Item | Specification | Function | Critical Parameters |
|---|---|---|---|
| Cuvettes | Quartz (UV), glass/plastic (Vis) [10] | Sample container with defined path length | Path length accuracy (±0.5%), transparency in spectral region |
| Solvents | Spectrophotometric grade [23] | Dissolve analyte without interfering absorbance | UV cut-off wavelength, purity (>99.9%) |
| Reference Standards | Certified purity (>99.5%) [21] | Establish calibration curve | Purity certification, stability, compatibility |
| Buffer Systems | High purity, non-absorbing | Maintain constant pH | Absorbance <0.01 at λmax, chemical compatibility |
| Filters | 0.2-0.45 μm membrane | Remove particulate matter | Pore size, chemical compatibility, low extractables |
| Volumetric Glassware | Class A tolerance | Accurate solution preparation | Calibration certification, cleanliness |
Understanding and maintaining the ideal conditions for Beer-Lambert Law adherence is fundamental to obtaining accurate quantitative results in UV-Vis spectroscopy. By controlling factors such as monochromaticity, concentration ranges, solution homogeneity, and chemical stability, researchers can ensure linear absorbance-concentration relationships. The protocols and guidelines provided herein offer a framework for validating Beer-Lambert Law compliance in pharmaceutical and research applications, enabling reliable quantitative analysis essential for drug development and scientific advancement.
From Theory to Lab Bench: Practical Methods and Real-World Applications in Drug Development
Ultraviolet-visible (UV-Vis) spectroscopy is a fundamental analytical technique in research and industrial laboratories, used to measure the absorption of light by a sample across the ultraviolet (190–400 nm) and visible (400–800 nm) regions of the electromagnetic spectrum [10] [24]. The principle underpinning quantitative analysis in UV-Vis spectroscopy is the Beer-Lambert Law (often referred to as Beer's Law). This law states that the absorbance of light by a solution is directly proportional to the concentration of the absorbing species (analyte) and the path length of the light through the sample [10] [24].
The Beer-Lambert Law is mathematically expressed as: A = εcl Where:
- A is the measured Absorbance (no units)
- ε is the Molar Absorptivity (or attenuation coefficient), a constant for a specific substance at a particular wavelength (units: L mol⁻¹ cm⁻¹)
- c is the Concentration of the substance in solution (units: mol L⁻¹)
- l is the Path Length of the light through the sample (units: cm) [10] [24]
This linear relationship is the cornerstone of quantitative analysis, allowing researchers to determine unknown concentrations of analytes such as nucleic acids, proteins, and pharmaceutical compounds by constructing a calibration curve from standards of known concentration [10]. The following sections provide a detailed examination of the instrument components that enable these precise measurements, along with practical protocols for reliable quantitative analysis.
Core Components of a UV-Vis Spectrophotometer
A UV-Vis spectrophotometer is composed of several key subsystems that work in concert to produce accurate and reproducible absorption data. A high-level overview of the light path and these components is illustrated below.
Figure 1: Workflow of a UV-Vis spectrophotometer, illustrating the path of light from source to spectral output.
Detailed Breakdown of Key Components
Light Source
The light source must provide a steady and broadband emission of light that covers the entire UV and visible wavelength range. No single lamp is ideal across this entire spectrum, so instruments often use a combination of sources [10] [25].
Table 1: Common Light Sources in UV-Vis Spectrophotometry
| Light Source | Spectral Range | Principle & Characteristics | Typical Applications |
|---|---|---|---|
| Deuterium (D₂) Lamp [10] [24] [25] | 190 – 400 nm (UV) | A continuous arc source in a deuterium-filled vacuum; provides high-intensity UV light. | Standard for UV region measurements; essential for nucleic acid analysis (~260 nm). |
| Tungsten-Halogen Lamp [10] [24] [25] | 330 – 2500 nm (Visible to NIR) | A filament lamp with a halogen fill; provides intense, continuous visible light. | Standard for visible region measurements; used for colorimetric assays. |
| Xenon Lamp [10] [24] | ~190 – 800 nm (UV-Vis) | A high-intensity arc source; continuous spectrum across UV-Vis. | Used in high-performance instruments where source switching is undesirable. Less stable and more costly. |
For instruments with two lamps, a switchover mechanism typically engages between 300 and 350 nm, where the light output from both sources is comparable, ensuring a smooth transition [10] [24].
Wavelength Selection: Monochromator
The monochromator is a critical component responsible for isolating a narrow band of wavelengths from the broad spectrum emitted by the light source. Its key parts include an entrance slit, a dispersion element (grating or prism), and an exit slit [10] [25] [26]. The heart of the monochromator is the diffraction grating, a surface with many parallel grooves. The groove frequency, measured in grooves per millimeter, directly impacts the instrument's optical resolution [10]. Higher groove frequencies (e.g., ≥ 1200 grooves/mm) provide better resolution but a narrower usable wavelength range [10]. The grating is rotated to select specific wavelengths that are then directed through the exit slit to the sample. The spectral bandwidth (SBW), which is the full width at half maximum (FWHM) of the light intensity profile exiting the monochromator, is a key parameter [25]. A narrower SBW provides better resolution for distinguishing sharp peaks but reduces light throughput, potentially increasing signal noise. A balance must be struck based on the analytical requirements [25].
Sample Compartment and Containers
The selected monochromatic light passes through the sample, which is held in a suitable container. The choice of sample container material is paramount, as it must be transparent to the wavelengths of interest [10].
Table 2: Common Sample Holders (Cuvettes)
| Cuvette Material | Transmission Range | Characteristics & Best Uses |
|---|---|---|
| Quartz / Fused Silica [10] [24] | ~190 – 2500 nm | Transparent across the full UV-Vis range. Essential for UV measurements below ~350 nm. Reusable but expensive. |
| Glass [10] | ~340 – 2500 nm | Absorbs most UV light. Suitable for visible-only applications. More affordable than quartz. |
| Plastic [10] | ~380 – 750 nm | Absorbs most UV light. Disposable and low-cost, ideal for visible-range routine assays. |
For liquid samples, a standard path length of 1 cm is most common. Shorter path length cuvettes (e.g., 1 mm) are used for highly concentrated samples to keep absorbance within the instrument's optimal reading range (ideally below 1 AU) as dictated by the Beer-Lambert Law [10]. Modern systems also include cuvette-free options for microvolume analysis (e.g., 0.5 - 2 µL), where the sample is held as a pendant drop between two measurement pedestals [10] [27].
Detection System
The detector converts the transmitted light intensity (I) into an electrical signal, which is then processed to calculate absorbance (A = -log(I/I₀)). The two most common types of detectors in UV-Vis spectrophotometers are:
- Photomultiplier Tube (PMT): A highly sensitive detector where photons striking a photocathode eject electrons. These electrons are then amplified through a series of dynodes, resulting in a large, measurable current even from very weak light signals [10] [25]. PMTs are prized for their wide dynamic range, high signal-to-noise ratio, and excellent sensitivity, making them ideal for low-light applications [25].
- Silicon Photodiode: A semiconductor device where incident light creates electron-hole pairs, generating a photocurrent proportional to the light intensity [10] [25]. Photodiodes are robust, have a fast response time, and are less expensive than PMTs, though they are generally less sensitive [25]. Charge-Coupled Devices (CCDs), which are arrays of many small photodiodes, allow for simultaneous detection of multiple wavelengths [10].
Single Beam vs. Double Beam Configurations
UV-Vis spectrophotometers can operate in one of two primary optical configurations, each with distinct advantages for quantitative work.
Figure 2: Comparison of Single Beam and Double Beam optical configurations.
- Single Beam: A single light path passes sequentially through the sample. This design is simpler and more cost-effective [25] [26]. However, it requires measuring the blank (reference) and the sample in separate steps, making it susceptible to errors caused by source drift (fluctuations in lamp intensity over time) between measurements [25].
- Double Beam: The light beam is split into two paths: one passes through the sample and the other through a reference blank [24] [25]. The intensities of both beams are measured simultaneously (or rapidly alternated), and the instrument electronically calculates the ratio, providing a real-time absorbance value (A = log(Reference Signal / Sample Signal)). This configuration effectively compensates for fluctuations in the light source, leading to more stable baselines and higher measurement stability, which is crucial for kinetic studies and scanning spectra over time [25].
Essential Protocols for Quantitative Analysis
Adherence to validated protocols is essential for generating reliable quantitative data that conforms to the Beer-Lambert Law.
Protocol 1: Preparation of Calibration Standards
This protocol is fundamental for determining the concentration of an unknown sample.
- Stock Solution: Prepare a stock solution of the analyte with a accurately known concentration.
- Dilution Series: Perform a serial dilution of the stock solution using the appropriate solvent (the blank) to create at least 5 standard solutions of different, known concentrations. The concentrations should bracket the expected concentration of the unknown.
- Cuvette Selection: Select a quartz cuvette for UV work (e.g., nucleic acid analysis at 260 nm) or a glass/quartz cuvette for visible light assays [10] [24].
- Blank Measurement: Fill the cuvette with the pure solvent (blank) and measure its absorbance to establish the baseline (I₀). In a double-beam instrument, the blank is placed in the reference compartment.
- Standard Measurement: Measure the absorbance of each standard solution at the predetermined analytical wavelength (λ_max).
- Calibration Curve: Plot the measured absorbance (y-axis) against the known concentration (x-axis) for each standard. Perform linear regression to obtain the equation of the best-fit line (y = mx + c, where 'm' is the slope, equivalent to εl). The correlation coefficient (R²) should be >0.99 for a high-quality calibration.
- Unknown Analysis: Measure the absorbance of the unknown sample under identical conditions. Use the equation from the calibration curve to calculate its concentration.
Protocol 2: Verification of Instrument Performance (Quality Control)
Regular verification ensures the instrument is operating within specified parameters.
- Wavelength Accuracy: Use a certified reference material, such as a holmium oxide or didymium glass filter. Scan the standard and compare the observed peak wavelengths to the certified values. The deviation should be within the manufacturer's specifications (typically ±0.5 nm or less) [28].
- Photometric Accuracy (Stray Light Check): Measure a highly absorbing solution, such as a certified neutral density filter or a concentrated potassium dichromate solution. Stray light, which is light of unintended wavelengths reaching the detector, becomes significant at high absorbances and causes deviation from Beer-Lambert Law. The measured absorbance should match the certified value within the specified tolerance [25].
- Spectral Bandwidth Validation: Follow manufacturer guidelines to confirm the set spectral bandwidth (SBW) is correct. This can involve measuring a substance with sharp spectral features and verifying that the observed peak resolution matches expectations for the selected SBW [25].
The Scientist's Toolkit: Key Research Reagent Solutions
Table 3: Essential Reagents and Materials for UV-Vis Based Quantitative Analysis
| Reagent / Material | Function / Role | Key Considerations for Use |
|---|---|---|
| High-Purity Solvents (e.g., HPLC-grade water, buffers, ethanol) [10] | Serves as the dissolution medium for the blank and all samples/standards. | Must be transparent at the analytical wavelength. The blank must be matrix-matched to the sample to avoid background absorption. |
| Certified Reference Materials (CRMs) [28] | Used for instrument qualification (wavelength and photometric accuracy verification) and method validation. | Examples: Holmium oxide solution (wavelength standard), neutral density filters (photometric standard). |
| Quartz Cuvettes (1 cm path length) [10] [24] | Standard sample holder for full UV-Vis range analysis. | Must be meticulously cleaned. Use dedicated cuvettes for concentrated dyes or proteins to avoid cross-contamination and staining. |
| Standard Analytical Kits (e.g., Protein Assay, NanoDrop kits) [27] | Provide optimized, pre-formulated reagents and protocols for specific analyte types (proteins, nucleic acids). | Streamlines workflow and improves reproducibility. Follow the manufacturer's protocol precisely. |
| Buffer Salts & pH Adjusters (e.g., phosphate, Tris buffers) [10] [24] | Maintains a stable pH environment, which is critical for the stability of biological analytes and the reproducibility of absorbance readings. | Check the buffer's UV-cutoff; some buffers (e.g., Tris) absorb significantly at low UV wavelengths. |
Critical Considerations for Robust Quantitative Analysis
To ensure data integrity, researchers must be aware of several practical limitations and potential pitfalls.
- Limits of the Beer-Lambert Law: The linear relationship between absorbance and concentration holds only for monochromatic light and dilute solutions. Deviations occur at high concentrations (>0.01 M) due to electrostatic interactions between molecules [10] [29]. Chemical changes, such as association or dissociation of the analyte, can also cause non-linearity.
- Stray Light: This is a primary source of error at high absorbances, leading to negative deviations from Beer's Law where absorbance readings are lower than the true value [25]. It is crucial to ensure sample absorbance remains within the instrument's validated linear range, typically by keeping A < 1 [10].
- Spectral Bandwidth (SBW): For the Beer-Lambert Law to be strictly valid, the light should be monochromatic. In practice, a finite SBW is used. A general rule is that the instrument's SBW should be less than one-tenth of the natural full width at half maximum (FWHM) of the analyte's absorption peak [25]. Using too large a bandwidth can lead to decreased resolution and lower measured peak absorbances.
- Dynamic Range and Sample Preparation: No detector can accurately measure across an infinite range of light intensity. If a sample's absorbance is too high (e.g., >1.5-2 AU), the signal reaching the detector is too weak for a reliable measurement. The simplest solutions are to dilute the sample or use a cuvette with a shorter path length [10].
In the realm of quantitative analysis using UV-Vis spectroscopy, the Beer-Lambert law stands as a fundamental principle, establishing a linear relationship between the absorbance of a solution and the concentration of the analyte within it [2] [5]. This law is the cornerstone of spectrophotometric analysis, enabling researchers to determine unknown concentrations of substances in diverse fields, from pharmaceutical development to environmental monitoring [30] [12]. Its mathematical expression is A = εcl, where A is the measured absorbance, ε is the molar absorptivity (a compound-specific constant), c is the concentration of the analyte, and l is the path length of light through the solution [21] [5].
The practical application of this law for quantifying unknown samples relies on the construction of a calibration curve (or standard curve) [21] [30]. This curve is a graphical plot of absorbance versus the concentration of a series of standard solutions with known concentrations. A linear regression fit of this data provides an equation that is subsequently used to calculate the concentration of an unknown sample based on its measured absorbance [2] [31]. This application note provides a detailed protocol for building an accurate and reliable calibration curve, framed within the rigorous requirements of drug development and research.
Theoretical Foundation: The Beer-Lambert Law
The Beer-Lambert law describes the attenuation of light as it passes through a sample solution. When monochromatic light with an initial intensity (I₀) passes through a cuvette containing the analyte, the transmitted light intensity (I) is measured [2] [5]. The ratio I/I₀ defines the transmittance (T) of the solution, often expressed as a percentage (%T) [2] [12].
Absorbance (A), the key parameter for quantitation, is logarithmically related to transmittance [2] [5]: A = log₁₀(I₀/I) = -log₁₀(T) [5] [12]
This relationship means that absorbance increases as transmittance decreases. The following table illustrates this inverse logarithmic relationship, underscoring why absorbance is the preferred metric for quantitative work due to its direct proportionality to concentration [2] [12].
Table 1: Relationship Between Absorbance and Transmittance
| Absorbance (A) | Transmittance (T) | Percent Transmittance (%T) |
|---|---|---|
| 0 | 1 | 100% |
| 0.301 | 0.5 | 50% |
| 1 | 0.1 | 10% |
| 2 | 0.01 | 1% |
| 3 | 0.001 | 0.1% |
The Beer-Lambert law is a limiting law, meaning it is most accurate for dilute solutions (typically below 0.01 M) [30] [12]. At higher concentrations, factors such as solute-solute interactions and chemical associations can lead to deviations from linearity [30] [13]. Furthermore, the law assumes the use of monochromatic light and a non-scattering, homogeneous solution [13].
Experimental Protocol
Research Reagent Solutions and Essential Materials
The following table details the essential materials and reagents required to perform the calibration curve experiment.
Table 2: Key Research Reagent Solutions and Materials
| Item | Function/Description |
|---|---|
| High-Purity Analytical Standard | The pure form of the analyte of interest (e.g., ascorbic acid, Rhodamine B) used to prepare standard solutions [32] [30]. |
| Appropriate Solvent | A high-purity solvent (e.g., water, methanol) in which the analyte is soluble and stable, and which does not absorb significantly at the wavelengths of interest [30]. |
| Volumetric Flasks | For precise preparation and dilution of standard solutions to known volumes [30]. |
| Cuvettes | Containers with a specific path length (typically 1 cm) that hold the sample and blank solutions for measurement. They must be transparent in the spectral range of interest [2]. |
| UV-Vis Spectrophotometer | The instrument used to measure the absorbance of solutions at specific wavelengths. It should be capable of providing monochromatic light and detecting transmitted light intensity [30] [12]. |
Step-by-Step Workflow
The process of creating and using a calibration curve can be broken down into a logical sequence of steps, as illustrated in the following workflow.
Figure 1: Calibration Curve Development Workflow. Green nodes represent steps for creating the curve, red nodes for analyzing an unknown sample.
Step 1: Preparation of Standard Solutions
Begin by preparing a stock solution of the analyte with a precisely known concentration, typically several times more concentrated than the most concentrated standard you plan to use [30]. Then, perform serial dilutions to create a set of at least 5-7 standard solutions that cover a reasonable concentration range [21]. For example, a study validating a method for ascorbic acid used standards in the range of 10–18 ppm [32]. Ensure all dilutions are performed with high precision using volumetric glassware.
Step 2: Selection of Wavelength of Maximum Absorbance (λ_max)
To achieve the highest sensitivity and lowest detection limits, measurements should be taken at the wavelength where the analyte has its strongest absorption, known as λmax [21]. If this value is not known from literature, it must be determined experimentally. Using a standard solution of intermediate concentration, record the absorption spectrum (absorbance across a range of wavelengths). The peak of this spectrum is λmax [21] [30]. For instance, in a demonstration with potassium permanganate, λ_max was identified at 524 nm [30].
Step 3: Absorbance Measurement of Standards and Blank
- Turn on the UV-Vis spectrophotometer and allow it to initialize.
- Zero the instrument using a blank solution (the solvent without any analyte, e.g., pure water) contained in a cuvette identical to those used for the samples. This sets the 0 absorbance (100% transmittance) baseline, accounting for any absorption from the solvent or cuvette [21].
- Sequentially measure and record the absorbance at λ_max for each of your standard solutions. Ensure that the absorbance readings for your standards fall within the reliable range of the instrument, ideally between 0.1 and 1.0 absorbance units [31]. If readings are too high, further dilute the solutions.
Step 4: Construction of the Calibration Curve
- Plot the data: On a graph, plot the known concentrations of the standard solutions on the x-axis and their corresponding measured absorbance values on the y-axis [30].
- Perform linear regression: Using statistical software, perform a linear regression analysis on the data points to obtain the best-fit straight line. The goal is an equation in the form of y = mx + b, where 'y' is absorbance, 'm' is the slope, 'x' is concentration, and 'b' is the y-intercept [30] [31].
- Assess linearity: A valid calibration curve should be highly linear. The correlation coefficient (R²) should be very close to 1.000 (e.g., ≥ 0.995) [32] [30]. The y-intercept should ideally be close to zero; a significant offset may indicate issues with the blank or method specificity [21].
Data Analysis and Validation
Calculating Unknown Concentration and Method Validation
Once the calibration curve is established with the equation Absorbance = (Slope × Concentration) + Intercept, the concentration of an unknown sample (cunknown) can be determined by measuring its absorbance (Aunknown) and solving for x [31]: cunknown = (Aunknown - Intercept) / Slope
To ensure the analytical method is fit for purpose, key validation parameters should be established [32]:
- Linearity: Demonstrated by a high correlation coefficient (R²) of the calibration curve [32].
- Precision: The closeness of repeated measurements, expressed as the relative standard deviation (%RSD), which should be low (e.g., <1-2%) [32].
- Accuracy: The closeness of the measured value to the true value, often reported as a percentage recovery [32].
- Limit of Detection (LOD) and Quantitation (LOQ): The lowest concentration that can be detected or reliably quantified, respectively [32].
Table 3: Exemplary Validation Data from an Ascorbic Acid Assay [32]
| Validation Parameter | Result | Acceptance Criteria (Example) |
|---|---|---|
| Calibration Equation | Y = 0.020x + 0.030 | N/A |
| Correlation Coefficient (R²) | 0.995 | ≥ 0.995 |
| Precision (%RSD) | 0.13% | < 2% |
| Accuracy (% Recovery) | 103.5% | 90-110% |
| LOD | 0.43 ppm | Method Dependent |
| LOQ | 1.30 ppm | Method Dependent |
Troubleshooting and Best Practices
- Non-linear Calibration Curve: This can be caused by overly high concentrations, chemical interactions (e.g., dimerization), or instrumental limitations [30] [13]. Ensure standards are within the linear range of the Beer-Lambert law and that the solution obeys its assumptions.
- Y-intercept Significantly Non-zero: Often results from an improperly set blank or interference from impurities that also absorb at λ_max [21]. Verify the blank composition and the purity of reagents.
- Poor Replicates/High %RSD: Can be due to inconsistent pipetting, dirty cuvettes, or air bubbles in the light path. Practice meticulous solution preparation and handling techniques.
- General Best Practices:
- Always use high-purity reagents and volumetric glassware.
- Ensure cuvettes are clean and positioned consistently in the spectrophotometer.
- Use a fresh blank if the analysis is conducted over a long period.
- Verify the performance of the spectrophotometer regularly.
The molar absorptivity (ε), also known as the molar absorption coefficient or molar extinction coefficient, is a fundamental molecular property that quantifies how strongly a chemical species absorbs light at a given wavelength [33] [2]. This parameter is not merely a characteristic constant; it is indispensable for accurate quantitative analysis using UV-Vis spectroscopy based on the Beer-Lambert law. During analytical method development, particularly in pharmaceutical and biological research, accurately determining ε is crucial for calculating precise sample concentrations, validating spectroscopic methods, and ensuring reproducible results across experiments [33] [10]. While the Beer-Lambert law provides the theoretical framework (A = εbc), where A is absorbance, b is path length, and c is concentration, the accurate experimental determination of ε presents significant challenges, especially when working with novel compounds or limited sample quantities [33] [34]. This Application Note outlines established and emerging protocols for determining molar absorptivity, framed within the context of robust quantitative analytical development.
Theoretical Foundation: The Beer-Lambert Law
The Beer-Lambert law establishes a linear relationship between the absorbance of light by a solution and the concentration of the absorbing species present in that solution [2] [35]. The mathematical expression of this law is:
A = εbc
Here:
- A is the measured Absorbance (a dimensionless quantity) [2] [10].
- ε is the Molar Absorptivity (with typical units of M⁻¹cm⁻¹ or L·mol⁻¹·cm⁻¹) [35] [10].
- b is the Path Length, representing the distance the light travels through the solution (most commonly 1 cm) [2] [10].
- c is the Molar Concentration of the absorbing species (in mol/L or M) [2] [35].
The molar absorptivity (ε) is the crucial proportionality constant in this equation. Its value is specific to a particular substance at a specific wavelength and under defined conditions of solvent and temperature [10]. A higher ε value indicates a greater probability that a photon of a specific wavelength will be absorbed by the molecule, making it a direct measure of the absorption strength of an electronic transition [2].
The following workflow illustrates the logical process of applying the Beer-Lambert law, from measurement to concentration determination, highlighting the central role of molar absorptivity.
Established Protocol: Determining ε by Serial Dilution
The most direct method for determining molar absorptivity involves preparing a series of standard solutions of known concentration, measuring their absorbance, and constructing a calibration curve [2] [35].
Materials and Equipment
Table 1: Research Reagent Solutions and Essential Materials
| Item | Function / Specification |
|---|---|
| UV-Vis Spectrophotometer | Instrument for measuring light absorption by samples. Must include a light source (e.g., deuterium or xenon lamp), wavelength selector (e.g., monochromator), and detector (e.g., photomultiplier tube) [10]. |
| Quartz Cuvettes | Sample holders with a defined path length (typically 1.0 cm). Quartz is essential for UV range measurements, as glass and plastic absorb UV light [10]. |
| High-Purity Analytical Balance | For accurate weighing of solid analyte to prepare stock solutions. |
| Volumetric Flasks | For precise preparation and dilution of standard solutions. |
| Stock Solution of Analyte | A solution where the analyte is dissolved in an appropriate solvent at a known, relatively high concentration. |
| Solvent (HPLC Grade) | High-purity solvent in which the analyte is dissolved. The same solvent must be used for all standards and as the blank. |
Step-by-Step Protocol
- Solution Preparation: Accurately prepare a stock solution of the pure analyte with a known concentration. Using serial dilution, create a series of at least 5 standard solutions covering a concentration range that will yield absorbances between 0.1 and 1.0 AU to remain within the instrument's linear dynamic range [10].
- Instrument Setup: Turn on the UV-Vis spectrophotometer and allow the lamp to warm up for the time specified by the manufacturer (typically 15-30 minutes). Set the desired wavelength (often the absorption maximum, λ_max) [10].
- Blank Measurement: Fill a quartz cuvette with the pure solvent and place it in the sample holder. This will be used as the reference to zero the instrument [10].
- Sample Measurement: For each standard solution, rinse the cuvette with a small portion of the solution, then fill it. Place it in the spectrophotometer and record the absorbance value. Measure each solution in triplicate to ensure reproducibility.
- Data Analysis & Calculation: Plot the average absorbance (y-axis) against the corresponding concentration (x-axis). Perform linear regression analysis. The slope of the resulting calibration curve is equal to εb. Since the path length (b) is known (e.g., 1 cm), the molar absorptivity is calculated as ε = slope / b [2] [35].
Table 2: Example Absorbance Data for Rhodamine B at λ_max [2]
| Concentration (M) | Absorbance (at λ_max) |
|---|---|
| 1.00 x 10⁻⁶ | 0.105 |
| 2.00 x 10⁻⁶ | 0.215 |
| 4.00 x 10⁻⁶ | 0.428 |
| 6.00 x 10⁻⁶ | 0.641 |
| 8.00 x 10⁻⁶ | 0.850 |
Advanced Sample-Sparing Techniques
For newly synthesized compounds, such as modified luminescent dyes, where material is often limited, traditional serial dilution may not be feasible. Recent research has developed sample-sparing techniques to address this challenge [33] [34].
Electrospray Mass Spectrometry (ES-MS) Incorporation Method
This method determines the incorporation ratio of a dye-labeled protein to back-calculate the concentration and thus ε of the unknown dye [33] [34].
Protocol:
- Conjugate: Covalently label a protein with the uncharacterized luminescent dye.
- Analyze: Use Electrospray Mass Spectrometry to obtain a high-resolution mass spectrum of the conjugate. The mass shift from the unlabeled protein is used to determine the average number of dye molecules attached per protein molecule (the incorporation ratio).
- Measure: Measure the UV-Vis absorbance of the conjugate solution.
- Calculate: The concentration of the dye in the solution is the incorporation ratio multiplied by the protein concentration. Using this concentration and the measured absorbance in the Beer-Lambert law allows for the calculation of ε for the dye.
Covalent Linking to a Reference Dye
This approach couples the unknown dye to a reference dye with a known molar absorptivity, using the reference as an internal standard [33] [34].
Protocol:
- Synthesize: Covalently link the uncharacterized dye to a well-characterized dye (the reference) to create a conjugate.
- Measure Absorbance: Record the absorption spectrum of the conjugate.
- Calculate: Using the known ε of the reference dye at one of its absorption maxima, calculate its concentration in the conjugate solution. This concentration equals the concentration of the unknown dye in the same solution. The absorbance value of the unknown dye at its own absorption maximum can then be used to calculate its ε.
Fluorescence Correlation Spectroscopy (FCS)
FCS is a powerful technique that can determine the concentration of fluorescent particles in solution by analyzing fluorescence intensity fluctuations in a very small observation volume [33] [34].
Protocol:
- Prepare Sample: Prepare a solution of the uncharacterized luminescent dye.
- FCS Measurement: Subject the solution to FCS analysis. The technique analyzes the diffusion times of fluorescent molecules through a confocal volume to calculate the number of particles, and thus the concentration, in the solution.
- Measure Absorbance: Measure the absorbance of the same solution using UV-Vis spectrophotometry.
- Calculate: With both the concentration (from FCS) and absorbance known, the molar absorptivity (ε) can be directly calculated using the Beer-Lambert law.
The following workflow summarizes the key steps common to these three sample-sparing techniques.
Comparison of Advanced Techniques
Table 3: Comparison of Sample-Sparing Techniques for ε Determination
| Technique | Key Principle | Key Advantage | Potential Limitation |
|---|---|---|---|
| ES-MS Incorporation | Measures dye-to-protein ratio via mass shift to find dye concentration [33] [34]. | High-resolution, direct measurement. | Requires successful and stable protein conjugation. |
| Covalent Linking | Uses a reference dye with known ε as an internal standard [33] [34]. | Relies on established reference values. | Requires synthesis of a covalent conjugate between dyes. |
| Fluorescence Correlation Spectroscopy (FCS) | Analyzes fluorescence fluctuations to count particles and determine concentration [33] [34]. | Requires extremely small sample volumes. | Dependent on the brightness and photostability of the dye. |
Application in Quantitative Analysis: A Case Study in Glucose Testing
The practical utility of accurately known molar absorptivity values is exemplified in a recent application for blood glucose testing. Researchers have developed a "blind" model for estimating blood glucose using near-infrared (NIR) spectroscopy that calculates regression coefficients directly from the molar absorptivity of glucose, applying a modified Beer-Lambert law framework [36].
Experimental Workflow:
- Sample Collection & Preparation: A blood sample is obtained via a finger-prick method and immediately encapsulated in a liquid cell with a fixed path length (e.g., 10 mm) to minimize exposure to air [36].
- Spectral Acquisition: The transmittance spectrum of the blood sample is measured using a Fourier Transform Infrared (FT-IR) spectrometer over the NIR range (e.g., 4000-8000 cm⁻¹) [36].
- Data Processing: The raw transmittance (T) data is converted to absorbance (A = -log₁₀T). The significant absorbance contribution from water is then subtracted from the sample spectrum to isolate the glucose signal [36].
- Concentration Prediction: The processed absorbance at key wavelengths where glucose has characteristic absorption peaks (e.g., 4700 cm⁻¹ or 2128 nm) is used in conjunction with glucose's pre-determined molar absorptivity at those wavelengths to estimate concentration, bypassing the need for extensive multivariate calibration models [36].
This approach demonstrates that intrinsic chemical constants like ε can effectively guide predictions, simplifying calibration and reducing reliance on large statistical datasets, which is advantageous for developing clinical or portable diagnostic devices [36].
The accurate determination of the molar absorptivity coefficient (ε) is a critical step in developing robust, quantitative UV-Vis spectroscopic methods. While the traditional serial dilution method remains a reliable and widely applicable standard, the emergence of innovative sample-sparing techniques—such as ES-MS incorporation, covalent linking to a reference dye, and FCS—provides powerful alternatives for situations where sample quantity is limited, as is common with novel compounds in drug development [33] [34]. Understanding the principles, protocols, and applications of these methods empowers researchers and scientists to select the optimal strategy for their specific needs, ensuring the accuracy and reliability of their quantitative analytical results based on the foundational Beer-Lambert law.
Ultraviolet-Visible (UV-Vis) spectroscopy is a cornerstone analytical technique for quantitative analysis in research and drug development. Its principle for quantification is the Beer-Lambert Law (also known as Beer's Law), which states a linear relationship between absorbance and the concentration of an analyte in solution [5] [2]. The law is mathematically expressed as ( A = \epsilon l c ), where A is the measured absorbance, ϵ is the molar absorptivity coefficient (M⁻¹cm⁻¹), l is the optical path length of the cuvette (cm), and c is the analyte concentration (M) [5]. For this relationship to hold true, meticulous attention to sample preparation is non-negotiable. The accuracy of quantitative results depends critically on three fundamental choices: the selection of an appropriate cuvette, the use of a spectroscopically compatible solvent, and the correct execution of blank measurements to establish a reliable baseline [37] [38].
This guide details the essential protocols for these critical steps, ensuring that data generated for your research meets the highest standards of precision and reproducibility required for rigorous scientific inquiry.
Critical Component I: Cuvette Selection
The cuvette is far more than a simple sample container; it defines the optical geometry and can significantly influence signal quality, baseline stability, and measurement reproducibility [37]. An inappropriate choice can introduce artifacts, increase the limit of detection, and compromise data integrity.
Cuvette Material and Wavelength Transparency
The primary factor in cuvette selection is its material, which dictates the usable wavelength range for analysis. The most common materials are compared in the table below.
Table 1: Comparison of Common Cuvette Materials for UV-Vis Spectroscopy
| Material | Transparency Range (nm) | Best For | Chemical Resistance | Relative Cost |
|---|---|---|---|---|
| UV Quartz | 190 - 2500 [37] [39] | Deep-UV work (e.g., DNA/RNA at 260 nm), broadest applications, harsh solvents [37] [40] | Excellent against acids, bases, most solvents [37] | $$$ [39] |
| IR Quartz | 220 - 3500 [39] | Applications extending into the Near-IR region | Good | $$$$ [39] |
| Optical Glass | 320 - 2500 [37] [39] | Routine colorimetric assays in the visible range only [37] | Good, but avoid HF and strong alkali [37] | $$ [39] |
| Sapphire | 250 - 5000 [39] | Extreme durability and extended IR range; specialized applications | Excellent | $$$$$ [39] |
Selection Protocol: For quantitative work relying on the Beer-Lambert law, especially below 320 nm, UV Quartz is the unequivocal material of choice. Its high transmission (>90% at 220 nm) in the deep UV ensures maximum light throughput and accurate absorbance readings for critical assays like nucleic acid quantification and protein analysis [40]. Using a glass cuvette for such applications can introduce significant error due to its low UV transmission (10-30% at 220 nm) [40].
Optical Path Length and Sample Volume
The path length (l) in the Beer-Lambert law is a direct proportionality factor. Its selection allows for optimizing the measurable absorbance range for a given sample concentration.
Table 2: Guide to Path Length Selection Based on Sample Type
| Path Length | Sensitivity Gain (vs. 1 mm) | Ideal Applications & Sample Volume Considerations |
|---|---|---|
| 1 mm | Baseline | High-concentration analytes, turbid samples; often requires smaller volumes [37] |
| 10 mm (Standard) | ~10x | Most quantitative UV-Vis analyses; standard 3-4 mL volume [37] |
| 20 - 50 mm | 20x - 50x | Trace analytes, low-concentration environmental monitoring [37] |
| Microvolume (e.g., 10 mm path, < 50 µL volume) | ~10x | Precious or limited samples (e.g., proteins, oligonucleotides) [37] |
Selection Protocol: The path length should be chosen so that the measured absorbance of your sample at the wavelength of interest falls within the linear dynamic range of your instrument, ideally between 0.1 and 1.0 AU [2]. For highly concentrated samples, a shorter path length (1-2 mm) prevents signal saturation (A > 2), while for trace analysis, a long path length (50 mm) enhances sensitivity [37]. Always verify that the cuvette's window height is compatible with your spectrometer's beam height [37].
Diagram 1: Cuvette selection workflow for UV-Vis spectroscopy.
Critical Component II: Solvent Compatibility
The solvent must dissolve the analyte and be optically transparent in the spectral region of interest. A solvent with high background absorption will reduce the dynamic range, compromise the detection limit, and violate the Beer-Lambert law's assumption that only the analyte absorbs light.
UV-Vis Transparency of Common Solvents
Solvents are characterized by their UV cutoff, the wavelength below which the solvent itself absorbs significantly (typically with an absorbance >1.0 in a 1 cm path length) [41]. The table below lists the UV cutoffs of high-purity "Uvasol" or "HPLC-grade" solvents, which are essential to avoid interference from fluorescent or absorbing impurities.
Table 3: UV Cutoff Wavelengths of Common Spectroscopic Solvents
| Solvent | UV Cutoff (nm)* | Common Applications & Notes |
|---|---|---|
| Water (HPLC Grade) | < 190 nm | Biochemical assays, aqueous buffer solutions |
| n-Hexane / Isooctane | < 200 nm [41] | Non-polar analytes, reference solvent for polarity studies |
| Acetonitrile | < 210 nm [41] | Reverse-phase HPLC mobile phase, polar analytics |
| Methanol / Ethanol | < 210 nm [41] | General purpose, organic synthesis products |
| Cyclohexane | < 210 nm [41] | Alternative to hexane for non-polar compounds |
| Chloroform | ~ 245 nm | Extraction solvent, careful with compatibility [39] |
| Tetrahydrofuran (THF) | < 240 nm [41] | Polymer analysis, organic synthesis |
| Acetone | ~ 330 nm [41] | General purpose, but high UV cutoff limits use |
| Dimethyl Sulfoxide (DMSO) | < 270 nm [41] | Solubilizing difficult compounds, cell culture studies |
*Approximate wavelength where absorbance >1.0 for a 1 cm path length. Always consult the solvent's certificate of analysis.
Selection Protocol: The solvent's UV cutoff must be at least 20-50 nm below the lowest wavelength you intend to measure for your analyte. For example, to measure an analyte's peak at 260 nm (like DNA), a solvent with a cutoff of 210 nm or lower is required. Using acetone (cutoff ~330 nm) for this measurement would be impossible due to intense solvent absorption.
Critical Component III: Blank Measurements and Baseline Correction
The blank measurement is a critical control experiment that accounts for all sources of light attenuation except from the analyte of interest. This includes absorption from the solvent, the cuvette, and other components in the solution matrix. Proper blanking ensures that the final absorbance spectrum accurately represents the analyte alone, a fundamental requirement for applying the Beer-Lambert law.
Protocol for Blank Measurement
The modern approach to blank measurement, facilitated by computer-controlled instruments, is as follows [38]:
- Prepare the Blank Solution: The blank must contain everything in the sample solution except the target analyte. For a simple solution of an analyte in solvent, the blank is the pure solvent. For complex matrices (e.g., a drug in a buffer with excipients), the blank is the buffer with all excipients.
- Rinse the Cuvette: Thoroughly rinse the selected cuvette with the blank solution to remove any contaminants. Do not use the blank solution for this rinse.
- Measure the Baseline: Place the blank solution in the cuvette and insert it into the sample compartment. Run the instrument's "Baseline Correction" or "Set Zero" procedure. The spectrometer stores this baseline scan in memory. In modern systems, it is no longer necessary to place a solvent blank in the reference beam path, as the baseline correction is performed computationally [38].
- Measure the Sample: Replace the blank with your sample solution, using the same cuvette. Measure the sample's absorbance against the stored baseline.
When a solvent blank in the reference beam is still beneficial: If the solvent itself is highly absorbing, placing a matched cuvette filled with solvent in the reference beam can improve the signal-to-noise ratio and dynamic range for the sample measurement by optically compensating for the solvent's high absorbance [38].
Integrated Experimental Workflow for Quantitative Analysis
The following workflow integrates all components into a single, reliable protocol for quantitative analysis, from sample preparation to data acquisition.
Diagram 2: UV-Vis quantitative analysis workflow.
Protocol: Generating a Calibration Curve
This protocol is essential for determining the concentration of an unknown sample.
- Preparation: Prepare a series of standard solutions of the analyte with known, increasing concentrations, covering the expected range of your unknown. Ensure all solutions are in the same solvent matrix.
- Blank Measurement: Using the correct cuvette and a blank solution, perform a baseline correction as described in Section 4.1.
- Standard Measurement: Measure the absorbance of each standard solution at the relevant wavelength (typically λmax).
- Data Analysis: Plot the measured absorbance (A) of the standards against their known concentration (c). Perform linear regression to obtain the equation of the line ( A = \epsilon l c + intercept ). The slope of this line is ( \epsilon l ), the product of the molar absorptivity and the path length.
- Unknown Determination: Measure the absorbance of your unknown sample. Use the calibration curve equation to calculate its concentration.
The Scientist's Toolkit: Essential Research Reagent Solutions
Table 4: Key Materials for UV-Vis Sample Preparation and Analysis
| Item | Function / Purpose | Critical Specification / Note |
|---|---|---|
| UV Quartz Cuvette (10 mm path) | Standard sample holder for broad UV-Vis range | Transmission: 190-2500 nm; Fused silica; Square or rectangular [37] [40] |
| High-Purity Spectroscopic Solvents | To dissolve analyte with minimal background interference | UV Cutoff suitable for analysis; e.g., Uvasol Grade [41] |
| Matching Blank Solution | To correct for all non-analyte absorbance | Must be matrix-matched to sample (solvent + all additives except analyte) [38] |
| Calibration Standards | To establish the quantitative relationship between A and c (Beer-Lambert law) | Certified Reference Materials (CRMs) or high-purity analytes of known concentration |
| Lint-Free Wipes / Swabs | For cleaning and drying cuvette optical surfaces without scratching | Microfiber or foam tips; avoid cotton [37] |
| Nitrile Gloves | To prevent fingerprint oils on cuvette, which absorb at 270-300 nm [37] | Powder-free to avoid contamination |
| Microvolume Pipettes and Tips | For accurate and precise handling of samples and standards | Calibrated and appropriate for volumes used |
Theoretical Foundation: The Beer-Lambert Law in Quantitative Analysis
The Beer-Lambert Law forms the cornerstone of quantitative ultraviolet-visible (UV-Vis) spectroscopy, establishing a linear relationship between the absorbance of light by a solution and the concentration of the absorbing species [2]. This principle is mathematically expressed as:
A = ε · c · l
Where:
- A is the measured absorbance (a dimensionless quantity)
- ε is the molar absorption coefficient (L·mol⁻¹·cm⁻¹)
- c is the concentration of the analyte (mol·L⁻¹)
- l is the optical path length through the sample (cm) [2] [10] [42]
This relationship enables researchers to determine unknown concentrations by measuring absorbance, provided the molar absorptivity and path length are known [2]. The logarithmic nature of absorbance means that each unit increase corresponds to a tenfold decrease in transmittance; an absorbance of 1 equates to 10% transmittance, while an absorbance of 2 corresponds to 1% transmittance [2]. For accurate quantification, absorbance values should ideally be kept below 1 to remain within the instrument's linear dynamic range, often necessitating sample dilution or reduced path lengths for concentrated samples [10].
Application 1: Quantification of Drug Concentrations
The accurate determination of drug concentrations in various matrices is crucial for pharmaceutical development, therapeutic drug monitoring, and pharmacokinetic studies.
Protocol: Quantification of Levofloxacin in Saliva for Therapeutic Drug Monitoring
This protocol adapts a validated method for quantifying levofloxacin, a fluoroquinolone antibiotic, in human saliva using microvolume UV-Vis spectrophotometry [43].
1. Equipment and Reagents:
- Mobile UV-Vis spectrophotometer (e.g., NP80 NanoPhotometer) capable of microvolume measurements (0.3-2 µL)
- Levofloxacin reference standard (≥98% purity)
- Drug-free human saliva (filtered through 0.22 µm polyethersulfone membrane)
- Salivette collection devices
- Calibration standards (2.5-50.0 mg/L) prepared in filtered saliva
- Methanol (UPLC-MS grade) and ethanol (70% for cleaning)
2. Sample Preparation:
- Collect saliva samples using Salivette devices according to manufacturer instructions [43].
- Centrifuge Salivette devices and filter the collected saliva through a 0.22 µm membrane.
- Thaw calibration standards and quality control samples stored at -20°C.
- Ensure samples and standards are at room temperature before analysis.
3. Instrumental Analysis:
- Clean the sample pedestal with lint-free tissues, deionized water, and 70% ethanol.
- Deposit a 3 µL droplet of blank (drug-free filtered saliva) onto the measurement surface.
- Perform a blank measurement across the 200-900 nm range with a path length of 0.67 mm.
- Clean the pedestal and measure calibration standards and unknown samples similarly.
- For each sample, scan the UV-Vis spectrum with the smoothing function turned off.
4. Data Processing and Quantification:
- Apply the Savitsky-Golay method to calculate second-order derivative spectra [43].
- Use the amplitude of the second-order derivative spectrum between 300-400 nm for quantification.
- Construct a calibration curve from the seven calibrators using linear regression.
- Calculate unknown sample concentrations from the calibration curve.
5. Method Validation Parameters:
- Linearity: Correlation coefficient (r) should be ≥0.997 over 2.5-50.0 mg/L
- Accuracy: -5.2% to 2.4% deviation from reference values
- Precision: 2.1% to 16.1% relative standard deviation
- Specificity: Test potential interferents (e.g., rifampicin, pyrazinamide)
Table 1: Key Validation Parameters for Levofloxacin Quantification in Saliva
| Parameter | Result | Acceptance Criterion |
|---|---|---|
| Linear Range | 2.5-50.0 mg/L | - |
| Correlation Coefficient (r) | 0.997 | ≥0.995 |
| Accuracy Range | -5.2% to 2.4% | ±15% of reference value |
| Overall Precision | 2.1-16.1% RSD | ≤20% RSD |
| Lower Limit of Quantification | 2.5 mg/L | - |
This method demonstrates sufficient accuracy and precision for therapeutic drug monitoring of levofloxacin in TB-endemic settings, enabling dose individualization based on drug exposure [43]. The use of derivative spectroscopy enhances selectivity by suppressing broad absorbance bands from macromolecular matrix components while emphasizing sharp analyte peaks.
Advanced Considerations for Drug Quantification
Modern UV-Vis applications increasingly employ multicomponent analysis to resolve complex mixtures with overlapping spectra [44]. Techniques such as multilinear regression analysis, partial least squares, and derivative spectroscopy enable simultaneous quantification of multiple analytes without physical separation [44] [43]. For biological matrices, correction for light scattering artifacts caused by particulates or protein aggregates is essential. A Rayleigh-Mie correction based on curve-fitting baseline subtraction has been validated for various samples including protein aggregates and nanospheres [45].
Application 2: Analysis of Protein-Ligand Interactions
UV-Vis spectroscopy provides valuable insights into protein-ligand binding events through changes in absorbance properties of either the protein, ligand, or both.
Protocol: Determining Protein Concentration and Monitoring Ligand Binding
1. Equipment and Reagents:
- UV-Vis spectrophotometer with deuterium lamp (UV range) and tungsten lamp (visible range)
- Quartz cuvettes (transparent to UV light) with 1 cm path length
- High-purity buffer (e.g., phosphate buffer, Tris-HCl)
- Protein standard of known concentration (e.g., bovine serum albumin)
- Ligand solution in appropriate solvent
- Purified protein sample
2. Protein Concentration Determination via Direct A280 Absorbance:
- Prepare protein standard dilutions covering expected concentration range.
- Blank spectrophotometer with appropriate buffer.
- Measure absorbance of standards and unknown samples at 280 nm.
- Construct calibration curve of absorbance versus concentration.
- Calculate unknown concentrations using Beer-Lambert law [7] [42].
3. Alternative Protein Quantification Methods: For samples with potential interfering substances, alternative methods include:
- BCA Assay: Based on bicinchoninic acid reaction with Cu⁺ ions [46]
- Bradford Assay: Based on Coomassie Blue G-250 dye binding [46]
- Specialized Hemoglobin Assays: SLS-Hb or cyanmetHb methods for hemoglobin quantification [46]
4. Protein-Ligand Binding Experiments:
- Prepare fixed concentration of protein in appropriate buffer.
- Titrate increasing concentrations of ligand into protein solution.
- Incubate mixtures to reach binding equilibrium.
- Record full UV-Vis spectra (250-800 nm) after each addition.
- Measure specific absorbance changes at characteristic wavelengths.
5. Data Analysis:
- Correct for ligand absorbance in protein-ligand mixtures.
- Plot absorbance changes versus ligand concentration.
- Determine binding constants using appropriate models (e.g., Scatchard plot).
Table 2: Comparison of Protein Quantification Methods in UV-Vis Spectroscopy
| Method | Principle | Wavelength | Advantages | Limitations |
|---|---|---|---|---|
| Direct A280 | Absorbance by aromatic amino acids | 280 nm | Simple, non-destructive, preserves sample | Interference from nucleic acids, dependent on aromatic content [42] |
| BCA Assay | Reduction of Cu²⁺ in alkaline medium | 562 nm | Sensitive, compatible with detergents | Affected by reducing agents, requires incubation [46] |
| Bradford Assay | Coomassie dye binding to proteins | 595 nm | Rapid, minimal interference | Variable response with different proteins [46] |
| SLS-Hb Method | Specific hemoglobin detection in presence of SLS | 450-700 nm (specific peaks) | Hb-specific, safe, cost-effective | Primarily for hemoglobin-containing samples [46] |
The Scientist's Toolkit: Essential Research Reagents and Materials
Table 3: Essential Research Reagents and Materials for UV-Vis-Based Quantification
| Item | Function/Application | Key Considerations |
|---|---|---|
| UV-Vis Spectrophotometer | Measures light absorption by samples | Select based on required wavelength range, resolution, and sample volume capability [10] |
| Quartz Cuvettes | Sample holders for UV measurements | Essential for UV range (<350 nm); transparent down to 200 nm [10] |
| Microvolume Systems | Enables measurement of small volumes (0.3-2 µL) | Ideal for precious samples; uses surface tension instead of cuvettes [43] |
| Mobile UV/VIS Spectrophotometers | Portable therapeutic drug monitoring | Enables point-of-care analysis in resource-limited settings [43] |
| High-Purity Buffers | Sample preparation and dilution | Minimizes background absorbance and interference [42] |
| Protein Standards (BSA) | Calibration curve generation | Essential for accurate protein quantification [42] |
| Reference Materials (NIST) | Method validation and verification | Ensures accuracy and compliance with regulatory guidelines [7] |
| Filtration Units (0.22 µm) | Sample clarification | Removes particulates that cause light scattering [43] |
| Derivative Spectroscopy Software | Data processing for complex mixtures | Enhances resolution of overlapping peaks [44] [43] |
Experimental Workflows
The following diagrams illustrate the key experimental workflows for the applications described in this note.
Diagram 1: Drug Quantification Workflow in Biological Matrices
Diagram 2: Protein-Ligand Interaction Analysis Workflow
Critical Considerations and Best Practices
Ensuring Data Accuracy and Reliability
Path Length Consistency: Maintain consistent path length across measurements; standard 1 cm cuvettes are most common, but shorter path lengths (e.g., 1 mm) may be necessary for concentrated samples [10].
Absorbance Range: Maintain absorbance readings between 0.1 and 1.0 AU for optimal linearity; dilute samples with absorbance >1 to avoid detector saturation and non-linearity [10].
Interference Management: Identify and correct for potential interferents: nucleic acids (for protein A280), light scattering from particulates, and other absorbing compounds in the matrix [45] [42].
Reference Measurements: Always include appropriate blank/reference samples containing all components except the analyte of interest [10].
Advanced Methodological Approaches
For complex samples, several advanced approaches enhance quantification accuracy:
Derivative Spectroscopy: Improves resolution of overlapping peaks and reduces baseline effects, particularly useful for multicomponent analysis [44] [43].
Multivariate Calibration: Techniques like partial least squares regression enable quantification of multiple components in mixtures without physical separation [44].
Light Scattering Corrections: Rayleigh-Mie correction algorithms account for scattering artifacts from particulates or aggregates in protein solutions [45].
UV-Vis spectroscopy, grounded in the fundamental Beer-Lambert Law, remains an indispensable tool for quantitative analysis in pharmaceutical and biochemical research. The methodologies outlined in this application note provide robust frameworks for reliable quantification of drug concentrations and characterization of protein-ligand interactions, supporting critical decisions in drug development and basic research.
Within quantitative analysis using UV-Vis spectroscopy, the Beer-Lambert law serves as a foundational principle, enabling researchers to draw a direct, quantitative connection between the concentration of an analyte in solution and its absorbance of light [9] [47]. This application note details how this principle is applied in two critical areas for drug development and life science research: the assessment of nucleic acid purity and the monitoring of chemical reaction kinetics. Accurate nucleic acid quantification and purity evaluation are essential for the success of downstream applications like PCR and sequencing [48], while monitoring kinetics provides vital data for elucidating reaction mechanisms and rates [49] [50]. The following sections provide detailed protocols and data analysis methods for these applications.
Quantitative Analysis of Nucleic Acid Purity and Concentration
The quantification and purity assessment of DNA and RNA are crucial, preliminary steps in most molecular biology workflows, from routine PCR to next-generation sequencing. UV-Vis spectroscopy is the most widely used method for this purpose, leveraging the intrinsic property of nucleic acids to absorb ultraviolet light [48] [51].
Theoretical Principle
Nucleic acids absorb UV light maximally at a wavelength of 260 nm due to the resonant structure of their purine and pyrimidine bases [48] [52]. The Beer-Lambert law (A = ε * l * c) facilitates the conversion of measured absorbance into concentration [9] [47]. The extinction coefficients (ε) are well-established, differing between types of nucleic acids [53] [51]. Furthermore, contaminants commonly encountered in nucleic acid preparations absorb light at characteristic wavelengths, allowing for a rapid assessment of sample purity through absorbance ratios [54] [52].
Essential Materials and Reagents
Table 1: Key Research Reagent Solutions for Nucleic Acid Analysis via UV-Vis Spectroscopy
| Item | Function/Description |
|---|---|
| UV-Transparent Cuvette/Plate | A container, typically quartz or specialized plastic, that allows the transmission of UV light for accurate absorbance measurement [54]. |
| Blanking Buffer | A solution such as TE buffer (pH 8.0) or nuclease-free water, used to zero the spectrophotometer and establish a baseline. The use of a slightly alkaline buffer is recommended for accurate A260/A280 ratios [54]. |
| Nucleic Acid Standard | A solution of known concentration and purity (e.g., NIST Reference Materials) used for instrument calibration and validation of measurements [7] [54]. |
| DNase/RNase-Free Water | Water treated to remove nucleases, essential for preventing the degradation of RNA or DNA samples during dilution and handling [54]. |
Detailed Protocol
- Instrument Preparation: Power on the UV-Vis spectrophotometer and allow it to initialize. Set the instrument to measure absorbance at 230 nm, 260 nm, 280 nm, and 320 nm [54].
- Blank Measurement: Pipette an appropriate volume of the blanking buffer (e.g., TE buffer) into a clean UV-transparent cuvette. Place it in the sample holder and perform a blank measurement to set the baseline absorbance to zero.
- Sample Measurement: Replace the blank with a diluted aliquot of your nucleic acid sample. The dilution should be prepared such that the expected A260 reading falls between 0.1 and 1.0 to remain within the linear range of the instrument [53] [54]. Record the absorbance values at all specified wavelengths.
- Data Analysis:
- Concentration Calculation: Apply the Beer-Lambert law using the appropriate extinction coefficient.
- Purity Assessment: Calculate the absorbance ratios.
- A260/A280: A ratio between 1.8 and 2.0 indicates pure DNA, while ~2.0 is expected for pure RNA [54] [52].
- A260/A230: A ratio greater than 1.5-2.0 suggests the sample is free of contaminants like salts, phenol, or carbohydrates [51] [52].
- Background Correction: A reading at 320 nm can be used to correct for light scattering caused by particulates or dirty cuvettes [54].
The workflow below summarizes the key steps in this analytical process.
Figure 1: Workflow for nucleic acid concentration and purity analysis.
Data Interpretation and Key Parameters
Table 2: Quantitative Data for Nucleic Acid Analysis via UV-Vis Spectroscopy
| Parameter | Wavelength | Target Value (Pure Sample) | Indication of Contamination |
|---|---|---|---|
| Nucleic Acid Concentration | 260 nm | N/A | N/A |
| Purity Ratio (A260/A280) | 260 nm & 280 nm | 1.8-2.0 (DNA)~2.0 (RNA) [54] [52] | Protein/phenol (low ratio); RNA in DNA sample (high ratio) [52] |
| Purity Ratio (A260/A230) | 260 nm & 230 nm | >1.5-2.0 [51] [52] | Salt, EDTA, carbohydrates, or phenol [52] |
Monitoring Chemical Reaction Kinetics
UV-Vis spectroscopy is a powerful tool for monitoring the progress of chemical reactions in real-time. By tracking the change in absorbance of a reactant or product at a specific wavelength, researchers can determine the reaction's order, rate constant, and mechanism [49] [50].
Theoretical Principle
The Beer-Lambert law provides the critical link between spectroscopic measurement and concentration. For a reactant that absorbs light, a decrease in its concentration over time will produce a corresponding decrease in absorbance at a specific wavelength. The experiment involves first validating the Beer-Lambert relationship for the absorbing species to ensure absorbance is linearly proportional to concentration within the working range [49] [50]. Once a suitable wavelength is established, the reaction is initiated, and absorbance is measured at regular intervals to generate kinetic data.
Essential Materials and Reagents
Table 3: Key Research Reagent Solutions for Kinetic Studies
| Item | Function/Description |
|---|---|
| Spectrophotometer with Kinetics Capability | An instrument capable of rapidly collecting absorbance measurements at a fixed wavelength over time. |
| Reactant Solutions | Stock solutions of known concentration for all reactants involved in the kinetic study (e.g., crystal violet, iodide, acetone, acid) [49] [50]. |
| Temperature-Controlled Cuvette Holder | Many reactions are temperature-sensitive; a holder that maintains a constant temperature is essential for obtaining reliable kinetic data. |
| Stopping Solution (if applicable) | A chemical that rapidly quenches the reaction at specific time points for methods not involving in-situ monitoring. |
Detailed Protocol
The following protocol outlines a general approach for determining the reaction order of a reactant.
Beer-Lambert Law Validation:
- Prepare a series of standard solutions of the absorbing species (e.g., crystal violet or iodide) at known, varying concentrations [49] [50].
- Obtain the absorbance spectrum for each concentration and select an appropriate analytical wavelength (λ_max) [49].
- Plot absorbance versus concentration at λ_max to generate a calibration curve. Verify linearity and calculate the molar absorptivity (ε) [50].
Reaction Initiation and Monitoring:
- In a cuvette, mix all reaction components except for the initiator (e.g., the acid in an iodination reaction [50]).
- Place the cuvette in the temperature-controlled spectrophotometer.
- Rapidly add the initiator, mix thoroughly, and immediately start recording the absorbance at λ_max over time.
Data Analysis to Determine Reaction Order:
- Using the calibration curve, convert the collected absorbance data into concentration values over time.
- Plot the data in different forms to determine the reaction order with respect to the absorbing species:
- Zero-Order: Plot [A] vs. time (linear fit).
- First-Order: Plot ln[A] vs. time (linear fit).
- Second-Order: Plot 1/[A] vs. time (linear fit) [49].
- The plot that yields the straightest line indicates the reaction order. The rate constant (k) is derived from the slope of this line.
The logical process for determining the reaction order is illustrated below.
Figure 2: Logic flow for determining reaction order from kinetic data.
This application note demonstrates the utility of the Beer-Lambert law in UV-Vis spectroscopy for two distinct yet vital applications in research and development. The protocol for nucleic acid analysis provides a rapid and reliable method for quantifying DNA/RNA and screening for common contaminants, a non-negotiable quality control step. The kinetics protocol offers a robust framework for elucidating the temporal progression of chemical reactions, enabling the determination of key parameters like reaction order and rate constant. Together, these applications underscore the indispensable role of UV-Vis spectroscopy as a quantitative analytical tool in the modern laboratory.
Beyond the Ideal: Troubleshooting Deviations and Optimizing Your Assay
The Beer-Lambert Law (A = εbc) is a foundational principle in UV-Vis spectroscopy, enabling the quantitative analysis of solute concentrations in solution [5] [17]. This relationship establishes a direct proportionality between absorbance (A) and the concentration (c) of an absorbing species, and is indispensable for researchers and drug development professionals performing quantitative analysis. However, the law's validity rests on several fundamental assumptions, including that the absorbing species act independently at low concentrations and do not undergo concentration-dependent chemical changes [11] [17].
Chemical deviations occur when these assumptions are violated due to the very nature of the chemical species involved and their interactions. Such deviations manifest when analytical concentrations perturb chemical equilibria, induce molecular association, or promote aggregation [11] [17]. These phenomena fundamentally alter the nature of the absorbing species, their populations, or their absorptivity, leading to a non-linear relationship between measured absorbance and analytical concentration. For professionals relying on spectroscopic quantification—such as in determining API (Active Pharmaceutical Ingredient) concentration or assessing excipient interactions—recognizing, diagnosing, and mitigating these deviations is critical for generating accurate and reliable data. This application note details the origins and consequences of these key chemical deviations and provides structured experimental protocols for their identification and resolution.
Types of Chemical Deviations and Their Mechanisms
Understanding the specific mechanisms behind chemical deviations is the first step toward mitigating their impact on quantitative analysis. The following table summarizes the three primary types of chemical deviations, their underlying causes, and observable consequences.
Table 1: Types of Chemical Deviations from the Beer-Lambert Law
| Deviation Type | Fundamental Cause | Impact on Absorbance | Common Examples |
|---|---|---|---|
| Equilibrium Shifts | Change in analyte concentration disturbs a pre-existing chemical equilibrium, altering the relative concentrations of absorbing species [17]. | Non-linearity because the concentration of the specific absorbing species is not directly proportional to the total analytical concentration. | Acid-Base indicators (e.g., phenolphthalein), metal-complexation equilibria. |
| Molecular Association | Analyte molecules (identical or different) interact to form new molecular aggregates or complexes [11] [17]. | The new associate has a distinct molar absorptivity (ε) compared to the monomer, changing the overall absorption profile. | Dimerization of organic dyes (e.g., eosin, methylene blue), stacking of aromatic molecules. |
| Aggregation | At high concentrations, molecules may form larger, colloidal-sized particles that precipitate from solution [17]. | Significant light scattering in addition to absorption, leading to an apparent increase in absorbance and spectral distortion. | Hydrophobic drugs in aqueous solution, dyes at high ionic strength. |
The logical relationship between a deviation hypothesis and the subsequent investigative workflow is outlined below.
Experimental Protocols for Identifying Deviations
A systematic experimental approach is required to diagnose the specific type of chemical deviation affecting a spectroscopic measurement. The following protocols provide detailed methodologies for this purpose.
Protocol 1: Investigating Equilibrium-Based Shifts via pH-Absorbance Profiling
This protocol is designed to confirm whether a spectral deviation arises from a pH-dependent equilibrium, such as the interconversion between an acid and its conjugate base, each with distinct absorption profiles.
1.1 Materials and Reagents:
- Stock solution of the analyte.
- Series of buffered solutions covering a comprehensive pH range (e.g., pH 2-12).
- UV-transparent quartz cuvettes (path length typically 1.00 cm).
- UV-Vis spectrophotometer with temperature control.
- pH meter.
1.2 Procedure: 1. Prepare a dilution of the stock analyte solution into each buffered solution, ensuring the final concentration of the analyte is identical across all samples. 2. Allow the solutions to equilibrate at a constant temperature (e.g., 25.0 °C) for 15-30 minutes. 3. Record the full UV-Vis absorption spectrum (e.g., from 230 nm to 600 nm) for each pH-buffered analyte solution, using the corresponding buffer blank for background subtraction. 4. Precisely measure and record the pH of each solution after spectral acquisition.
1.3 Data Analysis and Interpretation: - Plot the absorbance at a characteristic wavelength (e.g., λmax of one species) versus pH to generate a titration curve. - Overlay the full spectra. The presence of isosbestic point(s)—a wavelength where all spectra intersect—strongly indicates an equilibrium between exactly two absorbing species that interconvert [5]. The absence of clear isosbestic points suggests more complex equilibria involving three or more species.
Protocol 2: Probing Molecular Association through Concentration-Dependent Spectral Analysis
This protocol identifies the formation of associates (e.g., dimers, complexes) by observing changes in the absorption spectrum as a function of total analyte concentration.
2.1 Materials and Reagents:
- High-purity stock solution of the analyte.
- Solvent (the same used for the stock solution).
- Volumetric flasks or micropipettes for serial dilution.
- UV-transparent quartz cuvettes.
2.2 Procedure: 1. From the stock solution, prepare a series of solutions via serial dilution, spanning a wide concentration range (e.g., from 10^-5 M to 10^-3 M). 2. Using a consistent path length cuvette, record the full UV-Vis absorption spectrum for each concentration under the same instrumental conditions.
2.3 Data Analysis and Interpretation: - Plot the absorbance versus concentration at a specific wavelength (e.g., λmax of the monomer). Negative deviation from linearity (curve bending towards the concentration axis) at higher concentrations suggests association. - Inspect the overlaid spectra for changes in spectral shape, the appearance of new absorption peaks, or shifts in λmax. These changes indicate the formation of a new chemical species (the associate) with a distinct molar absorptivity.
Protocol 3: Confirming Aggregation and Scattering Effects
This protocol distinguishes true absorption from apparent absorption caused by light scattering due to aggregation or particulate formation.
3.1 Materials and Reagents:
- Stock solution of the analyte, prepared at a concentration suspected to induce aggregation.
- Solvent for dilution.
- UV-Vis spectrophotometer.
- 0.2 μm or 0.45 μm syringe filter (compatible with solvent).
3.2 Procedure: 1. Record the absorption spectrum of the unfiltered, concentrated analyte solution. 2. Dilute the solution significantly (e.g., 10-fold or 100-fold) and record the spectrum again. 3. Filter a portion of the original concentrated solution through a fine syringe filter. 4. Record the absorption spectrum of the filtered solution immediately.
3.3 Data Analysis and Interpretation: - Compare the spectra from steps 1 and 2. A non-linear response to dilution (e.g., a greater-than-expected drop in absorbance at certain wavelengths after dilution) is indicative of disaggregation. - Compare the spectra from steps 1 and 3. A significant reduction in the baseline absorbance, particularly at shorter wavelengths, after filtration is a hallmark of light scattering caused by aggregates or particles that have been removed by the filter.
The Scientist's Toolkit: Essential Reagents and Materials
Successful execution of the diagnostic protocols requires specific, high-quality materials. The following table lists key reagent solutions and their critical functions in the context of investigating chemical deviations.
Table 2: Key Research Reagent Solutions for Investigating Chemical Deviations
| Reagent/Material | Function in Protocol | Key Consideration for Reliable Results |
|---|---|---|
| Buffered Solutions (pH range) | Maintains a constant ionic environment and defines the protonation state in equilibrium studies (Protocol 1). | Use buffers with low UV absorbance in the spectral region of interest. Ensure adequate buffer capacity. |
| High-Purity Analyte Stock | Serves as the consistent source for all sample preparations, especially in association studies (Protocol 2). | Purity is paramount; impurities can act as unexpected chromophores or participate in equilibria. |
| Spectroscopic-Grade Solvent | The medium for all sample solutions; ensures minimal background interference. | The solvent must not absorb significantly in the spectral range being analyzed [10]. |
| Quartz Cuvettes (1 cm path length) | Holds the sample for spectroscopic measurement. | Quartz is essential for UV-range studies; plastic and glass absorb UV light [10]. Consistent path length is critical for A vs. c plots. |
| Syringe Filters (0.2/0.45 μm) | Physically removes large aggregates and particulates from solution (Protocol 3). | The filter membrane must be chemically compatible with the solvent to avoid dissolution or leaching. |
The entire process, from initial observation to the final implementation of a solution, can be summarized in the following comprehensive workflow.
Chemical deviations from the Beer-Lambert Law are not merely experimental nuisances but are often rich sources of information about the physicochemical behavior of analytes in solution. For researchers in drug development, a thorough understanding of equilibria, association, and aggregation is critical, as these phenomena directly impact the apparent solubility, stability, and formulation of compounds. By applying the systematic diagnostic protocols and utilizing the appropriate toolkit outlined in this document, scientists can confidently identify the root cause of spectroscopic non-linearity. This enables them to either establish robust, validated quantitative methods under conditions that minimize these deviations or to employ advanced models that explicitly account for the underlying chemistry, thereby ensuring the integrity of their analytical results.
Quantitative analysis using UV-Vis spectroscopy predominantly relies on the Beer-Lambert Law, which states that absorbance (A) is directly proportional to the concentration (c) of the analyte in solution: A = εlc, where ε is the molar absorptivity and l is the path length [2] [5] [9]. This relationship forms the cornerstone for determining concentrations of proteins, nucleic acids, and other analytes in drug development and research [7]. However, the accuracy of this method is fundamentally dependent on the proper functioning and calibration of the spectrophotometer itself. Instrumental limitations—specifically stray light, bandwidth, and detector non-linearity—can introduce significant deviations from the Beer-Lambert Law, leading to erroneous quantitative results [55] [11]. This application note details the identification, impact, and mitigation of these three critical instrumental limitations to ensure data integrity in pharmaceutical and research applications.
Theoretical Background: The Foundations and Limits of the Beer-Lambert Law
The Beer-Lambert Law provides a linear relationship between absorbance and concentration, enabling the creation of calibration curves for unknown sample determination [2] [5]. The law derives from the logarithmic relationship between the incident light intensity (I₀) and the transmitted light intensity (I): A = log₁₀(I₀/I) [5] [9]. This relationship holds true for monochromatic light and optically clear, dilute solutions.
Deviations from ideal behavior can be either chemical (e.g., associations, dissociations, or interactions at high concentrations) or instrumental in nature [55] [11]. This note focuses on the latter, as instrumental deviations can occur even with ideal samples and invalidate quantitative measurements if not properly addressed. As noted in recent literature, "the Beer‐Lambert law is unquestionably the most important law in optical spectroscopy and indispensable for the qualitative and quantitative interpretation of spectroscopic data. As such, every spectroscopist should know its limits and potential pitfalls, arising from its application, by heart" [11].
Instrumental Limitations: Identification, Impact, and Quantification
Stray Light
- Definition and Causes: Stray light is defined as any detected light that reaches the detector without passing through the sample or that is outside the intended wavelength band [55]. Sources include scattering from optical components, imperfections in gratings or mirrors, and higher-order diffraction from monochromators.
- Impact on Absorbance: Stray light causes a deviation from the Beer-Lambert Law, particularly at high absorbance values. The measured absorbance (Ameas) is lower than the true absorbance (Atrue) because the stray light (Istray) constitutes a larger fraction of the total signal when the transmitted light through the sample is dim. The relationship is given by: Ameas = log₁₀ [ (I₀ + Istray) / (I + Istray) ] This effect becomes significant when the stray light exceeds 0.1% and can lead to a plateau in the calibration curve [55].
- Quantitative Detection Limits: The following table summarizes the relationship between stray light levels and their observable impacts:
Table 1: Impact of Stray Light on UV-Vis Measurements
| Stray Light Level | Observable Effect on Absorbance Reading | Impact on Quantitative Analysis |
|---|---|---|
| < 0.1% | Negligible deviation across the range. | Minimal effect on linearity. |
| ~ 0.1% - 1% | Noticeable negative deviation at A > 1.0. | Reduced upper limit of linearity. |
| > 1% | Severe flattening of peaks at A > 0.7. | Significant quantitative errors. |
Spectral Bandwidth
- Definition: The spectral bandwidth (SBW) is the width of the wavelength interval, typically measured at half the maximum intensity, that exits the monochromator [55]. It is determined by the slit width of the instrument.
- Impact on Absorbance: A SBW that is too large relative to the natural width of the sample's absorption band will result in a decrease in the measured peak absorbance. This occurs because the monochromator transmits light that is both at the absorption maximum (where ε is high) and on the shoulders of the peak (where ε is lower), leading to a weighted average that is less than the true maximum [55] [56].
- Protocol for Bandwidth Validation:
- Prepare a solution of a holmium oxide or didymium glass filter, which has sharp, well-defined absorption peaks.
- Scan the sample using progressively narrower slit widths (and thus smaller SBW).
- Observe the absorbance at a sharp peak. The point at which further reduction in SBW no longer increases the recorded absorbance is the point where the instrumental bandwidth is sufficiently small for that analyte. A common rule of thumb is to maintain an instrumental SBW of ≤ 1/10 of the natural half-width of the absorption band [55].
Detector Non-Linearity
- Definition and Causes: Detector non-linearity refers to the situation where the electrical signal output from the detector is not directly proportional to the intensity of the light falling upon it [55] [11]. This can happen at both very high light intensities (detector saturation) and very low light intensities (signal-to-noise limitations).
- Impact on Absorbance: Non-linearity causes a breakdown of the Beer-Lambert relationship across the entire concentration range, leading to inaccurate calibration curves. The measured absorbance will deviate from the true value, making quantitative analysis unreliable.
- Quantitative Linearity Standards: The following table outlines the ideal and critical absorbance ranges for quantitative work:
Table 2: Absorbance Ranges and Detector Linearity Performance
| Absorbance Range | Linearity Performance | Recommendation for Quantitative Analysis |
|---|---|---|
| 0.2 - 1.0 AU | Optimal linearity. | Ideal range for accurate quantification [55]. |
| 1.0 - 1.5 AU | Good, minor risk of deviation. | Acceptable, but monitor for non-linearity. |
| > 1.5 - 2.0 AU | High risk of non-linearity and stray light effects. | Dilute samples to fall within the optimal range [55]. |
| > 2.0 AU | Severe deviations. | Unsuitable for reliable quantification. |
Experimental Protocols for Instrument Validation
Protocol 1: Stray Light Verification and Qualification
- Objective: To quantify the level of stray light in a UV-Vis spectrophotometer at critical wavelengths.
- Materials:
- High-purity water (for 190-210 nm check).
- Potassium chloride or sodium iodide solutions (1.2% w/v) for checking at 200-220 nm [55].
- Opaque or masked cuvette (optional, for baseline).
- Matched quartz cuvettes.
- Methodology:
- Blank Measurement: Fill a quartz cuvette with high-purity water and place it in the sample beam. Collect a baseline spectrum.
- Sample Measurement: Replace the water with a 1.2% w/v KCl solution. This solution is known to completely absorb light below ~200 nm.
- Measurement: Set the spectrophotometer to a wavelength where the solution has an absorbance theoretically greater than 6 AU (e.g., 200 nm for KCl). Measure the apparent "% Transmittance" of the KCl solution.
- Calculation: The %T reading is a direct measure of the stray light at that wavelength. For example, a reading of 0.1% T indicates a stray light level of 0.1%.
- Acceptance Criterion: For quantitative work, stray light should be < 0.5% T, and ideally < 0.1% T at the wavelength of use [55].
Protocol 2: Bandwidth Suitability Assessment
- Objective: To confirm that the instrumental spectral bandwidth is appropriate for the analyte of interest.
- Materials:
- Standard solution with a narrow absorption band (e.g., holmium oxide filter, benzene vapor in hexane, or a specific rare-earth salt solution).
- Or, the actual analyte of interest at a known concentration.
- Methodology:
- Place the standard or sample in the spectrophotometer.
- Record the absorption spectrum using the instrument's default (usually largest) SBW. Note the peak absorbance value.
- Sequentially reduce the SBW (by decreasing the slit width) and re-measure the spectrum and peak absorbance each time.
- Plot the observed peak absorbance versus the spectral bandwidth.
- Interpretation: The correct SBW is the largest bandwidth at which the peak absorbance reaches a maximum and stabilizes. Using a smaller SBW than this point will not improve accuracy but will reduce the signal-to-noise ratio.
Protocol 3: Detector Linearity and Absorbance Accuracy Validation
- Objective: To verify the linear response of the detector across a defined absorbance range.
- Materials:
- Methodology (Using Filters):
- Measure the baseline with an empty beam or an air-air background.
- Place a certified filter of low absorbance (e.g., ~0.5 AU) in the light path and record the measured absorbance at the specified wavelength.
- Repeat with filters of progressively higher known absorbances (e.g., 1.0, 1.5, 2.0 AU).
- Plot the measured absorbance versus the certified absorbance value.
- Methodology (Using Serial Dilution):
- Prepare at least 5 dilutions of the standard absorber covering the absorbance range from 0.1 to 2.0 AU.
- Measure the absorbance of each solution.
- Plot measured absorbance versus concentration (or versus the theoretical absorbance calculated from the known ε and l).
- Acceptance Criterion: The correlation coefficient (R²) of the plot should be ≥ 0.999. The measured values should not deviate from the certified/theoretical values by more than 1-2% across the range of 0.1 to 1.0 AU, and not more than 2-3% up to 2.0 AU, depending on application requirements [55] [7].
Workflow for Comprehensive Instrument Qualification
The following diagram illustrates the logical sequence for a systematic approach to validating a UV-Vis instrument for quantitative analysis, integrating the protocols described above.
Diagram 1: UV-Vis Instrument Qualification Workflow
The Scientist's Toolkit: Essential Research Reagent Solutions
Table 3: Key Reagents and Materials for UV-Vis Instrument Validation
| Reagent/Material | Function/Application | Key Consideration |
|---|---|---|
| Holmium Oxide (Ho₂O₃) Filter | Wavelength accuracy verification; possesses sharp emission lines at known wavelengths (e.g., 241 nm, 287 nm, 361 nm). | Certified reference material (CRM) traceable to NIST ensures reliability [55]. |
| Potassium Chloride (KCl) | Stray light validation in the UV region (e.g., at 200 nm). A 1.2% (w/v) solution should block all light. | Requires high-purity grade and high-purity water to avoid interference [55]. |
| Neutral Density Glass Filters | Absorbance accuracy and detector linearity assessment across a wide range (e.g., 0.5, 1.0, 2.0 AU). | Must be certified with known absorbance values at specified wavelengths and traceable to a national metrology institute [55]. |
| Potassium Dichromate (K₂Cr₂O₇) | Used in solution-based linearity and absorbance accuracy checks, particularly in acidic medium (e.g., in perchloric acid). | A stable primary standard; requires careful preparation and handling due to its toxicity [55]. |
| Matched Quartz Cuvettes | Holding liquid samples for measurement. A pair with identical pathlengths and optical properties is essential. | The pathlength (typically 1 cm) must be accurate and known. Must be scrupulously clean to avoid scattering and absorption artifacts [2] [55]. |
Robust quantitative analysis in UV-Vis spectroscopy, as required in drug development and rigorous scientific research, cannot be assured by the Beer-Lambert Law alone. It is imperative to systematically address and validate instrumental performance parameters. Stray light, spectral bandwidth, and detector non-linearity represent three critical sources of error that can be proactively managed through the implementation of the detailed protocols and workflows provided in this application note. Regular instrument qualification using these methods, supported by certified reference materials, forms the foundation of reliable, reproducible, and accurate spectrophotometric data.
The Beer-Lambert Law (BLL) is the fundamental principle governing quantitative analysis in ultraviolet-visible (UV-Vis) spectroscopy, establishing a linear relationship between the absorbance of a solution and the concentration of the absorbing species [5]. This law is expressed as ( A = \epsilon l c ), where ( A ) is the measured absorbance, ( \epsilon ) is the molar absorptivity coefficient (M⁻¹cm⁻¹), ( l ) is the optical path length (cm), and ( c ) is the analyte concentration (M) [5] [2]. For accurate quantification, absorbance measurements should ideally fall within a specific linear dynamic range (typically 0.1–1.0 AU) where the Beer-Lambert Law holds true [2]. Measurements outside this range introduce significant error; low absorbance values suffer from poor signal-to-noise, while high absorbance values often lead to deviations from linearity due to instrumental and chemical factors [29] [13]. This application note details practical strategies—specifically, dilution and path length adjustment—to maintain absorbance within this optimal range, ensuring data integrity in pharmaceutical and biotechnological research.
Theoretical Foundation and Optimization Principles
Core Principles of the Beer-Lambert Law
The Beer-Lambert Law states that the absorbance (A) of a light beam traversing a sample is directly proportional to the concentration of the absorbing species and the path length of the light through the solution [5]. The law's derivation begins with the definition of absorbance from transmittance: ( A = \log{10} (I0 / I) ), where ( I_0 ) is the incident light intensity and ( I ) is the transmitted light intensity [5] [2]. The linear relationship ( A \propto cl ) is converted to an equality by introducing the molar absorptivity (( \epsilon )), a substance-specific constant that is a measure of the probability of the electronic transition at a given wavelength [5].
Adherence to the optimal absorbance range (0.1–1.0 AU) is critical. An absorbance of 1 corresponds to 10% transmittance (90% of the light absorbed), while an absorbance of 2 corresponds to 1% transmittance [2]. At high concentrations, apparent absorbances can exceed 2, but the actual light transmission is extremely low, leading to increased stray light effects and detector noise that violate the fundamental assumptions of the BLL [29] [13].
Recognizing and Correcting for Non-Linearity
Deviations from the Beer-Lambert Law occur due to several factors:
- Instrumental Limitations: Stray light, non-monochromatic light sources, and detector non-linearity at high absorbances [13] [57].
- Chemical Factors: Molecular interactions at high concentrations can alter the molar absorptivity coefficient; samples must be microhomogeneous to avoid scattering effects [13].
- Physical Effects: Light scattering in turbid samples (e.g., cell lysates) or fluorescence can lead to inaccurate absorbance readings [58] [57]. For complex matrices like living tissues, a Modified Beer-Lambert Law (MBLL) that incorporates a Differential Pathlength Factor (DPF) is used to account for increased photon pathlengths due to scattering [57].
The following workflow provides a logical framework for diagnosing and correcting absorbance values that fall outside the optimal quantitative range.
Optimization Strategies: Dilution and Path Length Adjustment
Two primary, practical methods exist for bringing sample absorbance into the optimal range: sample dilution and path length adjustment. The choice between them depends on the sample's initial concentration, available volume, and the required analytical precision.
Table 1: Comparison of Absorbance Optimization Strategies
| Strategy | Typical Use Case | Key Advantages | Key Limitations | Impact on Detection Limit |
|---|---|---|---|---|
| Sample Dilution | Samples with high concentration (A >> 1.0); requires sufficient stock volume [2]. | Simple to perform with standard lab equipment; maintains standard 1 cm pathlength for consistency [2]. | Introduces dilution error; may dilute interfering compounds below detection; not suitable for small volumes [13]. | No change to theoretical limit, but practical limit may be affected by dilution error. |
| Path Length Reduction | Limited sample volume; high-concentration samples; microvolume analysis [7]. | No alteration of sample concentration; ideal for precious or limited samples [7]. | Requires specialized cuvettes or instrumentation; pathlength must be known precisely [13] [7]. | Improves upper limit of quantification; shorter pathlength requires higher concentration for detection. |
Strategy 1: Controlled Sample Dilution
This protocol outlines a systematic approach for diluting an over-range sample (A > 1.0) to achieve an absorbance within the 0.1–1.0 range.
Protocol 3.1: Serial Dilution for Absorbance Optimization
Principle: Progressively dilute the sample with an appropriate solvent to reduce the analyte concentration, thereby lowering the measured absorbance into the linear range [2].
Materials:
- Stock sample solution
- Appropriate solvent (e.g., buffer, water)
- Volumetric flasks or microcentrifuge tubes
- Precision pipettes and tips
- Cuvette or microplate compatible with spectrophotometer
Procedure:
- Perform Initial Scan: Measure the absorbance spectrum of the undiluted sample to identify the wavelength of maximum absorbance (( \lambda_{max} )).
- Calculate Dilution Factor: At ( \lambda{max} ), use the formula ( DF = A{initial} / A{target} ) to estimate the required dilution factor, where ( A{target} ) is ideally between 0.3–0.7.
- Execute Serial Dilution:
- Prepare a series of dilutions (e.g., 1:2, 1:5, 1:10) based on the calculated factor.
- For a 1:10 dilution, mix 100 µL of sample with 900 µL of solvent.
- Measure Diluted Samples: Measure the absorbance of each dilution at ( \lambda_{max} ).
- Verify Linearity: Ensure the measured absorbance of the chosen dilution is < 1.0 and that the dilution series shows a proportional decrease in absorbance.
- Calculate Original Concentration: Use the measured absorbance of the diluted sample (( A{measured} )), the dilution factor (( DF )), and the Beer-Lambert Law to back-calculate the original concentration: ( c{original} = (A_{measured} / (\epsilon l)) \times DF ).
Troubleshooting:
- Non-Linear Dilution Series: Indicates chemical interaction or equilibrium changes; use a different buffer or solvent [13].
- Absorbance Still Too High: Increase the dilution factor and repeat.
- Absorbance Too Low After Dilution: Use a less aggressive dilution factor or concentrate the sample.
Strategy 2: Path Length Adjustment
This protocol leverages the direct proportionality between absorbance and path length. Reducing the path length is a non-destructive way to lower the measured absorbance of concentrated samples [7].
Protocol 3.2: Microvolume Analysis Using Short Path Length Cuvettes
Principle: The Beer-Lambert Law states ( A \propto l ). Using a cuvette with a short path length (e.g., 0.1 mm instead of 10 mm) reduces the absorbance by a proportional factor, avoiding sample alteration [7].
Materials:
- Spectrophotometer capable of microvolume measurements or accepting short path length cuvettes.
- Short path length cuvettes (e.g., 0.1 mm, 0.7 mm) or a microvolume platform [7].
- Sample solution (as small as 2 µL) [7].
Procedure:
- Select Path Length: Choose a short path length cuvette based on the initial absorbance. For an A > 2.0 in a 1 cm cuvette, a 0.1 cm (1 mm) path length will theoretically reduce the absorbance by a factor of 10.
- Load Sample: Carefully load a small, defined volume of the sample into the microcuvette, ensuring no air bubbles are present [7].
- Measure Absorbance: Insert the cuvette into the spectrometer and measure the absorbance at ( \lambda_{max} ).
- Convert to 1 cm Equivalent: If required for reporting, convert the measured absorbance to its 1 cm equivalent using the ratio of the path lengths: ( A{1cm} = A{measured} \times (1 cm / l_{actual}) ).
- Validate with Standard: If possible, validate the method by measuring a standard solution of known concentration with the short path length cuvette to confirm linearity.
Troubleshooting:
- Path Length Uncertainty: Use instrumentation with a fixed, known pathlength for maximum accuracy [7].
- Sample Evaporation: Ensure a sealed measurement chamber or use microfluidic circuits to prevent evaporation for volatile solvents [7].
- Insufficient Absorbance Reduction: Switch to a cuvette with an even shorter path length.
The Scientist's Toolkit: Essential Reagent Solutions
Successful implementation of quantitative UV-Vis spectroscopy requires specific materials and reagents. The following table details key research solutions and their functions.
Table 2: Essential Reagents and Materials for Quantitative UV-Vis Analysis
| Item | Function / Rationale | Application Notes |
|---|---|---|
| High-Purity Solvent | Dissolves analyte without contributing significant background absorbance. | Use solvent-grade water or spectrophometric-grade organic solvents. Always use the solvent for the blank/reference measurement [2]. |
| Standard Cuvettes (1 cm) | Standard path length container for liquid samples. | Ideal for most applications with absorbances between 0.1–1.0. Ensure they are clean and matched if used in a double-beam instrument [2]. |
| Short Path Length Cuvettes (e.g., 0.1 mm) | Reduces effective path length to lower measured absorbance of concentrated samples without dilution [7]. | Essential for analyzing high-concentration samples like monoclonal antibodies at 10–200 mg/mL [7]. |
| NIST-Traceable Standards | Validates instrument accuracy and calibration curve linearity [7]. | Standards like NISTmAb (monoclonal antibody), tryptophan, or uracil should be used for periodic performance verification [7]. |
| Precision Pipettes & Tips | Ensures accurate and precise liquid handling for sample and standard preparation. | Critical for performing accurate serial dilutions. Regular calibration is required. |
Maintaining the absorbance within the optimal 0.1–1.0 AU range is a prerequisite for reliable quantitative analysis governed by the Beer-Lambert Law. The strategies of controlled dilution and path length adjustment provide researchers with robust, practical tools to achieve this. Dilution is a universally accessible technique, while path length reduction offers a powerful, non-destructive alternative, especially for high-value samples with limited volume. By systematically applying these protocols and utilizing the appropriate tools from the scientist's toolkit, researchers in drug development and related fields can ensure the generation of high-quality, accurate spectroscopic data essential for informed decision-making.
The Beer-Lambert Law (BLL) stands as a fundamental principle in ultraviolet-visible (UV-Vis) spectroscopy, establishing a direct proportionality between the absorbance of a solution and the concentration of the absorbing species [9] [35]. Formally, for a single analyte, it is expressed as ( A = \epsilon l c ), where ( A ) is absorbance, ( \epsilon ) is the molar absorptivity, ( l ) is the path length, and ( c ) is the concentration [9]. This relationship provides the foundation for quantitative analysis across chemical, biological, and pharmaceutical research.
However, the foundational assumptions of the BLL—primarily that the medium is homogeneous and does not scatter radiation—are violated in the presence of suspended particles, colloids, or biological macromolecules [57]. In such turbid samples, light is not only absorbed but also scattered, leading to significant deviations from ideal behavior. This scattering causes an apparent increase in absorbance as light is deflected away from the detector, resulting in inflated concentration readings and compromised analytical accuracy [59] [60] [61]. For researchers in drug development working with complex biological matrices or formulation suspensions, mitigating this interference is critical for obtaining reliable quantitative data.
Theoretical Foundation: Adapting the Beer-Lambert Law for Turbidity
The Origin of Interference
In an ideal, non-scattering solution, the incident light (( I0 )) is attenuated solely via absorption by the solute, yielding a transmitted intensity (( It )) [35]. In a turbid mixture, the total attenuation is a composite effect. The suspended particles contribute to the signal through both absorption (( A{tur} )) and scattering (( I{sca} )) [61]. Consequently, the measured absorbance (( A_{mix} )) becomes a non-linear combination of the true analyte absorbance and the turbidity effect, violating the linearity of the BLL [61].
The Modified Beer-Lambert Law (MBLL)
To address scattering in biological tissues, the Modified Beer-Lambert Law (MBLL) was introduced, incorporating terms for photon path lengthening and scattering losses [62] [57]: [ OD = \log\left(\frac{I0}{I}\right) = DPF \cdot \mua \cdot d + G ] Here, ( OD ) is the optical density, ( DPF ) is the differential pathlength factor accounting for the increased distance photons travel due to scattering, ( \mu_a ) is the absorption coefficient, ( d ) is the source-detector separation, and ( G ) is a geometry-dependent factor accounting for light loss due to scattering [62] [57]. While developed for tissue diagnostics, the MBLL conceptually underpins the need to separate and correct for scattering effects in various turbid samples.
Methodologies for Turbidity Compensation: A Comparative Analysis
Researchers have developed several computational and experimental strategies to compensate for turbidity. The following table summarizes the primary methods, their principles, and their performance.
Table 1: Comparison of Primary Turbidity Compensation Methods
| Method | Fundamental Principle | Key Advantages | Reported Performance & Limitations |
|---|---|---|---|
| Exponential Model [60] | Models turbidity absorbance across the UV-Vis spectrum using an exponential decay function. | Simple, robust, suitable for embedded systems and online sensors. | RMSE for COD prediction improved from 29.9 (unprocessed) to 9.51 [60]. Outperformed simpler models. |
| DOSC-PLS [61] | Direct Orthogonal Signal Correction filters out spectral components orthogonal to the target concentration, followed by Partial Least Squares regression. | Effectively corrects blue shift and peak reduction; does not require a priori turbidity standard. | RMSE for COD prediction dropped from 12.36 to 0.23; R² improved from 0.5455 to 0.9997 [61]. |
| Scattered Light Measurement [59] | Uses scattered light at a specific wavelength (e.g., 850 nm) to quantify turbidity level and generate a compensation curve. | Applicable over the entire UV-Vis spectrum; effective for high turbidity and low analyte concentrations. | Reduced RMSE for rhodamine B predictions from 0.5935 mg/L to 0.0218 mg/L [59]. |
| Twersky's Formulation [57] | A modified BLL that explicitly adds terms for light loss due to scattering from particles (e.g., red blood cells). | Provides a physical model for scattering, suitable for biological suspensions like blood. | Improves reliability for blood oxygen saturation calculations compared to the original BLL [57]. |
Detailed Experimental Protocols
Protocol: Turbidity Compensation Using an Exponential Model
This protocol is adapted from Wang et al. for the determination of Chemical Oxygen Demand (COD) and is applicable to other analytes in turbid solutions [60].
Research Reagent Solutions & Essential Materials
Table 2: Key Research Reagents and Materials
| Item | Function/Brief Explanation |
|---|---|
| Formazine Suspensions | A standard turbidity material with excellent optical stability, used for calibration and modeling [60] [61]. |
| Quartz Cuvette (10 mm path) | Holds the sample for spectral acquisition; quartz is transparent across the UV-Vis range. |
| Micro UV-Vis Spectrometer | Measures the absorption spectrum of the sample across a broad wavelength range (e.g., 220-900 nm) [60]. |
| Xenon Lamp Light Source | Provides a broad-spectrum, collimated light beam from UV to infrared [60]. |
| Potassium Hydrogen Phthalate | Used to prepare standard COD solutions for calibration [60] [61]. |
| 0.45 μm Membrane Filters | Used to prepare particle-free (non-turbid) reference samples for validation [60]. |
Step-by-Step Procedure
- System Setup and Calibration: Configure the spectral acquisition system comprising a xenon lamp, a 10 mm quartz cuvette, and a micro-spectrometer. Set the spectrometer's integration time and averaging parameters to ensure high signal stability (e.g., 2000 ms integration, averaged 3 times). Acquire a reference spectrum using ultrapure water [60].
- Turbidity Model Calibration:
- Prepare a series of at least 15 formazine suspensions covering a relevant turbidity range (e.g., 10-200 FNU) [60].
- Measure the absorption spectrum of each formazine suspension.
- For each spectrum, perform a linear regression on the transformed data (Ln(Absorbance) vs. Ln(Wavelength)) within the linear range (typically 220-660 nm). This establishes the exponential model parameters for turbidity alone [60].
- Sample Measurement:
- Thoroughly agitate the turbid analyte sample to ensure a homogeneous suspension and immediately transfer it to the quartz cuvette.
- Measure the absorption spectrum of the sample mixture.
- Spectral Compensation:
- Using the visible region of the sample spectrum (where the analyte may not absorb), fit the exponential model to determine the specific turbidity level.
- Use this fitted model to predict the turbidity's absorbance contribution across the entire spectrum, including the UV region where the analyte absorbs.
- Subtract the predicted turbidity spectrum from the measured mixture spectrum to obtain the compensated, analyte-only absorption spectrum [60].
- Quantification:
- Use the compensated spectrum at the analyte's characteristic wavelength(s) for quantification via a pre-established BLL calibration curve or a multivariate model like PLS.
The workflow for this method is outlined below.
Protocol: Turbidity Compensation Using the DOSC-PLS Algorithm
This protocol employs chemometrics to correct spectral data and build a robust prediction model, as described by Chen et al. [61].
Step-by-Step Procedure
- Sample Preparation for Model Training:
- Prepare a large set of calibration samples (e.g., >50 mixtures) with known concentrations of the target analyte (e.g., COD) and known turbidity levels (using formazine) [61].
- Spectral Acquisition:
- Measure the full UV-Vis absorption spectrum (e.g., from 220 nm to 600 nm) for each calibration sample.
- Direct Orthogonal Signal Correction (DOSC):
- Apply the DOSC algorithm to the matrix of absorption spectra ((X)) from the calibration set.
- DOSC identifies and removes spectral components that are orthogonal (mathematically unrelated) to the vector of analyte concentrations ((y)). This step effectively strips away the variance caused by turbidity, leaving a corrected spectral matrix ((X_{corr})) that is maximally related to analyte concentration [61].
- Partial Least Squares (PLS) Model Development:
- Use the corrected spectral matrix ((X_{corr})) and the known concentration vector ((y)) to build a PLS regression model. PLS identifies latent variables that best capture the covariance between the spectral data and the concentrations.
- Optionally, select specific feature wavelengths from the full spectrum to create a discrete model [61].
- Analysis of Unknown Samples:
- For an unknown sample, measure its absorption spectrum.
- Apply the pre-calculated DOSC correction coefficients to obtain its corrected spectrum.
- Use the established PLS model to predict the analyte concentration from the corrected spectrum.
The logical relationship and workflow of the DOSC-PLS method is depicted in the following diagram.
Accurate quantitative analysis with UV-Vis spectroscopy in turbid samples is achievable through deliberate compensation strategies. While the choice between a simpler exponential model and a more advanced chemometric approach like DOSC-PLS depends on the application's required precision, sample complexity, and available computational resources, the fundamental principle remains consistent: the systematic identification and subtraction of scattering interference is essential. By integrating these protocols, researchers and drug development professionals can reliably extend the utility of the Beer-Lambert law to a wider range of complex, real-world samples, ensuring data integrity in critical analytical workflows.
In quantitative ultraviolet-visible (UV-Vis) spectroscopy, the Beer-Lambert law (A = εcl) serves as the fundamental principle for determining analyte concentration [5] [2]. This relationship assumes that absorbance (A) depends solely on the molar absorptivity (ε), path length (l), and concentration (c) of the target analyte [21]. However, this idealized framework often neglects a critical experimental variable: the refractive index effect. Changes in solvent composition and concentration alter the solution's refractive index, subsequently influencing light propagation, reflection losses, and ultimately, the accuracy of quantitative measurements [63] [13].
These effects become particularly problematic in pharmaceutical analysis and drug development, where samples often contain multiple components dissolved in complex solvent systems [63]. Minute spectral interferents with high molar absorptivity can cause significant quantitative errors, while refractive index changes from solvent gradients or high analyte concentrations introduce deviations from Beer-Lambert behavior [63] [11] [13]. This application note explores the underlying mechanisms of these effects and provides validated protocols to overcome these critical limitations in quantitative UV-Vis analysis.
Theoretical Foundation: Linking Refractive Index and Absorption
The Electromagnetic Basis of Light-Matter Interactions
The Bouguer-Beer-Lambert law, while empirically useful, represents an approximation that does not fully account for the electromagnetic nature of light [11] [13]. When light traverses a solution, its behavior is governed not only by absorption but also by the refractive index of the medium, which determines light scattering, reflection at interfaces, and internal interference effects [13].
For a sample in a cuvette with defined interfaces (unlike in Bouguer's original atmospheric studies), multiple reflections occur between the optical surfaces [13]. The resulting forward and backward traveling waves interfere with each other, causing fluctuations in measured light intensity that depend on the sample thickness, wavelength, and refractive index [13]. These interference effects demonstrate that the Beer-Lambert law provides incomplete physical understanding, particularly for samples with significant refractive index contrasts [11].
Refractometry as a Solution to Spectral Interference
A powerful approach to address spectral interference involves combining UV-Vis spectrophotometry with constrained refractometry [63]. This dual-technique methodology leverages the different dependence of each measurement on impurity effects.
While UV-Vis spectrophotometry follows the Beer-Lambert law:
A = ε_a c_a l + Σ(ε_i c_i l) (where subscripts 'a' and 'i' refer to analyte and impurity, respectively) [63]
Refractometry follows the Lorentz-Lorenz equation:
μ_solution = 1/V_solution × (μ_a v_a + μ_sol v_sol + Σμ_i v_i) (where μ relates to refractive index and v denotes volume) [63]
The critical insight is that molar absorptivities (ε) vary dramatically between compounds, meaning even trace impurities with high absorptivity can cause substantial errors in UV-Vis quantification [63]. In contrast, refractive indices for most liquids fall within a relatively narrow range (1.3-1.6), making refractometry inherently less susceptible to large errors from unknown impurities [63].
Table 1: Comparative Error Profiles of Spectrophotometry and Refractometry
| Technique | Fundamental Principle | Major Error Source | Error Dependence | ||
|---|---|---|---|---|---|
| UV-Vis Spectrophotometry | Beer-Lambert Law: A = εcl [5] [2] | Spectral interference from impurities | Error ≈ Σ(εi ci / εa ca); can be large even for minor impurities with high ε_i [63] | ||
| Constrained Refractometry | Lorentz-Lorenz Equation [63] | Refractive index mismatch | Maximum error limited to ~2% when impurity:analyte ratio < 1:100 and | nsol - na | > 0.15 [63] |
Experimental Protocols
Protocol 1: Refractive Index-Assisted UV/Vis Spectrophotometry
This protocol describes a method to overcome spectral interference in UV-Vis quantification by implementing refractive index-assisted correction [63].
Research Reagent Solutions
Table 2: Essential Materials for Refractive Index-Assisted Measurements
| Item | Specifications | Function/Purpose |
|---|---|---|
| Dual-Beam UV-Vis Spectrophotometer | Capable of 1 nm resolution or better; quartz cuvettes (1 cm path length) [63] | Primary absorbance measurement at specific analytical wavelengths |
| Refractometer | Precision of ±1×10⁻⁵ RI units; temperature control to ±0.01°C [63] | Accurate measurement of solution refractive index |
| Reference Solvents | High-purity solvents with known refractive indices (e.g., cyclohexane, water, ethanol) [63] | System calibration and establishment of baseline measurements |
| Analyte Standards | Certified reference materials of known purity | Preparation of calibration curves for quantitative analysis |
Procedure
Sample Preparation:
Constrained Refractometry Measurement:
UV-Vis Spectrophotometry:
- Zero the instrument using the solvent reference cell.
- Record absorbance spectra of all solutions at 1 nm resolution [63].
- Calculate apparent analyte concentration using Beer-Lambert law.
Discrepancy Analysis:
- Compare concentration results from both techniques.
- Significant disagreements indicate potential spectral interference.
- Use the refractometry result as a more reliable concentration estimate when interferences are detected [63].
Error Quantification:
Workflow Visualization
Protocol 2: Solvent Selection and Calibration for Refractive Index Matching
This protocol provides a systematic approach for solvent selection and calibration curve preparation that minimizes refractive index-related errors.
Procedure
Solvent Characterization:
Calibration Curve Preparation:
- Prepare 5-7 standard solutions spanning the expected concentration range.
- Use volumetric glassware for maximum accuracy; avoid graduated cylinders [23].
- For each standard, measure both absorbance and refractive index.
Dual Calibration:
- Create standard curves for both techniques: Absorbance vs. concentration and refractive index vs. concentration.
- Verify linearity with correlation coefficients of 0.995 or better [23].
Unknown Sample Analysis:
- Measure both absorbance and refractive index of unknown samples.
- Calculate concentration from both calibration curves.
- If results differ by more than 5%, investigate potential interferents using the discrepancy as a diagnostic tool [63].
Applications in Pharmaceutical Research
Case Study: Protein Quantification with Interferents
In protein concentration determination at 280 nm, common impurities like nucleic acids, detergents, or other proteins can cause significant spectral interference [63]. For example, just 1% DNA contamination produces a 26.3% error in BSA analysis [63]. Implementing the refractive index-assisted method reduces this error to approximately 2%, even with multiple unknown interfering contaminants [63].
Case Study: Benzene in Cyclohexane with N,N-Dimethylaniline Interference
Experimental results demonstrate the method's efficacy: for a benzene solution in cyclohexane contaminated with N,N-Dimethylaniline (100:1 ratio), the quantification error reduced from 53.4% with conventional UV spectrophotometry to 2% with constrained refractometry [63]. The major impurity was successfully identified with a correlation coefficient r > 0.99 [63].
Table 3: Quantitative Error Reduction in Experimental System
| Analysis Method | Contamination Level | Reported Error | Key Advantage |
|---|---|---|---|
| Conventional UV-Vis | 1% N,N-Dimethylaniline | 53.4% [63] | High sensitivity but vulnerable to interference |
| Constrained Refractometry | 1% N,N-Dimethylaniline | 2% [63] | Robust to spectral interference from unknown contaminants |
| Combined Approach | 1% N,N-Dimethylaniline | <2% with impurity identification [63] | Both accurate quantification and interferent identification |
Troubleshooting and Technical Notes
Common Limitations and Solutions
Low Analyte Concentration: Refractometry has lower sensitivity than UV-Vis spectroscopy. For analytes at very low concentrations (<0.1 mg/mL), UV-Vis may provide better precision despite potential interference [63].
Solvent Selection Constraints: The requirement for significant refractive index difference between solvent and analyte (≥0.15) may limit solvent choices for some applications. In such cases, consider standard addition methods or alternative detection techniques [63].
Multiple Interferents: When samples contain multiple interferents, the correlation-based identification approach may be less effective. In these cases, chromatographic separation prior to analysis is recommended [63].
Data Interpretation Guidelines
Agreement Between Techniques: When UV-Vis and refractometry results agree within 2%, spectral interference is minimal, and either result can be trusted [63].
Moderate Discrepancies (2-10%): Suggest minor interferents. Use the refractometry result for concentration and investigate the nature of potential interferents [63].
Large Discrepancies (>10%): Indicate significant spectral interference. The refractometry result provides the more accurate concentration, and the discrepancy magnitude can help identify potential interferent classes [63].
The refractive index effect represents a significant yet often overlooked factor in quantitative UV-Vis spectroscopy. By implementing the refractive index-assisted methodology outlined in these protocols, researchers can overcome the critical limitation of spectral interference from unknown contaminants. The combined approach of constrained refractometry and UV-Vis spectrophotometry provides both accurate quantification and valuable diagnostic capability for identifying interferents, making it particularly valuable in pharmaceutical development where sample purity varies and complex matrices are common. This dual-technique framework extends the utility of UV-Vis spectroscopy beyond its traditional limitations, enabling more reliable quantitative analysis in real-world applications where ideal Beer-Lambert conditions rarely exist.
Ensuring Accuracy: Method Validation and Advanced Modifications for Biomedical Research
In the realm of quantitative analysis using UV-Vis spectroscopy, the Beer-Lambert law serves as the fundamental principle linking a substance's concentration to its light absorption. However, reliable quantification requires rigorous method validation to ensure generated data meets predefined quality standards. This process verifies that an analytical method is suitable for its intended purpose, providing scientists with confidence in their results. For UV-Vis spectroscopic methods applied in pharmaceutical development and environmental analysis, key validation parameters include linearity, limits of detection and quantification, and precision, typically evaluated following International Conference on Harmonisation guidelines.
This application note provides detailed protocols and data assessment frameworks for these critical validation parameters, supported by experimental data from recent research. Proper validation ensures that UV-Vis methods deliver accurate, reproducible results essential for quality control, regulatory submissions, and research applications.
Theoretical Foundations
The Beer-Lambert Law in Modern Spectroscopy
The Beer-Lambert law establishes the linear relationship between a substance's concentration and its absorbance of monochromatic light, expressed mathematically as A = ε × c × l, where A is absorbance, ε is the molar absorptivity, c is the concentration, and l is the path length [64] [65]. This principle forms the theoretical basis for most quantitative UV-Vis applications, from simple single-component analysis to complex baseline manipulation techniques for mixtures.
In practice, modern UV-Vis spectrophotometers operate by directing a controlled light source through a sample contained in an appropriate cuvette and measuring the transmitted light intensity. The instrument compares this intensity to that of a blank reference, calculating absorbance according to the equation: A = log(I₀/I), where I₀ is the incident light intensity and I is the transmitted light intensity [65]. This measured absorbance serves as the analytical response from which concentration is derived, either directly via the Beer-Lambert law or through a calibration curve.
Validation Parameter Definitions
- Linearity: The ability of a method to obtain test results directly proportional to analyte concentration within a given range, demonstrated through a calibrated relationship [64] [66].
- Limit of Detection (LOD): The lowest amount of analyte that can be detected but not necessarily quantified as an exact value, typically representing a signal-to-noise ratio of 3:1 [67].
- Limit of Quantification (LOQ): The lowest amount of analyte that can be quantitatively determined with acceptable precision and accuracy, typically representing a signal-to-noise ratio of 10:1 [67].
- Precision: The degree of agreement among individual test results when the procedure is applied repeatedly to multiple samplings of a homogeneous sample, expressed as relative standard deviation (%RSD) [15] [66].
Diagram Title: Method Validation Parameter Relationships
Experimental Protocols
Linearity Assessment Protocol
Principle: Linearity demonstrates that the analytical procedure produces results directly proportional to analyte concentration within a specified range [64].
Materials:
- UV-Vis spectrophotometer (e.g., Varian Cary 100)
- Matched quartz cells (10 mm path length)
- Analytical balance (e.g., Shimadzu AUW-220D)
- Volumetric flasks (appropriate sizes)
- Micropipettes
- Reference standard and sample
Procedure:
- Prepare a stock standard solution of known concentration (e.g., 100 μg/mL) using the analyte reference standard dissolved in appropriate solvent [66].
- From the stock solution, prepare a series of at least five standard solutions spanning the expected concentration range (e.g., 5-30 μg/mL for terbinafine hydrochloride) [66].
- Select the analytical wavelength (λmax) by scanning an appropriate standard solution over the UV-Vis range (200-400 nm) [66].
- Measure absorbance of each standard solution in triplicate at the predetermined λmax, using solvent as blank.
- Plot mean absorbance values against corresponding concentrations.
- Calculate regression parameters using the least squares method: y = mx + c, where y is absorbance, m is slope, x is concentration, and c is intercept.
Data Analysis:
- Determine correlation coefficient (R²) - should be >0.999 for high precision methods [15] [66].
- Examine residual plots for random distribution around zero [15].
- Calculate slope, intercept, and standard error of estimate.
Troubleshooting:
- Non-linear response at higher concentrations may indicate Beer-Lambert law deviation - dilute samples or narrow concentration range.
- Poor correlation may indicate instrumental issues, improper wavelength selection, or chemical interactions.
LOD and LOQ Determination Protocol
Principle: LOD and LOQ represent the lowest detectable and quantifiable analyte levels, respectively, determined based on signal-to-noise ratio or statistical calculations [67].
Materials:
- UV-Vis spectrophotometer
- Low-concentration standard solutions
- Solvent blank
Procedure - Statistical Approach:
- Prepare a calibration curve with at least five concentrations near the expected detection limit.
- Calculate the standard deviation (SD) of the response from the regression line.
- Determine the slope (S) of the calibration curve.
- Apply the formulas:
Procedure - Visual Inspection:
- Analyze samples with known concentrations of analyte.
- Determine the minimum concentration at which the analyte can be reliably detected (LOD) and quantified with acceptable accuracy and precision (LOQ).
Procedure - Signal-to-Noise Ratio:
- Compare measured signals from low concentration samples with those of blank samples.
- Establish LOD at concentration yielding signal-to-noise ratio ≥3:1.
- Establish LOQ at concentration yielding signal-to-noise ratio ≥10:1 [67].
Data Analysis:
- Verify that LOD/LOQ values are within the same order of magnitude regardless of calculation method [67].
- For impurity methods, express LOD in peak height units to avoid load-dependent variability [67].
Precision Evaluation Protocol
Principle: Precision measures the degree of scatter between a series of measurements from multiple sampling of the same homogeneous sample under prescribed conditions [15] [66].
Materials:
- Homogeneous sample solution
- UV-Vis spectrophotometer
- Data recording system
Procedure - Repeatability:
- Prepare six independent sample preparations from the same homogeneous lot at 100% test concentration [66].
- Analyze all six preparations following the analytical method.
- Calculate mean, standard deviation, and %RSD of results.
Procedure - Intermediate Precision:
- Conduct analyses on different days, with different analysts, or using different instruments [64].
- Prepare samples at three concentration levels (low, medium, high) with three replicates each.
- Perform analyses over at least three days.
- Calculate overall mean, standard deviation, and %RSD.
Procedure - Data Analysis:
- Calculate %RSD = (Standard Deviation/Mean) × 100
- Compare obtained %RSD with target values derived from the Horwitz equation: %RSD = 2^(1 - 0.5logC) where C is the concentration expressed as a mass fraction [67].
- For method qualification, target intermediate precision is typically two-thirds of the %RSD derived from the Horwitz equation [67].
Acceptance Criteria:
- For assay methods: %RSD < 2% [66]
- For impurity methods: Refer to Horwitz-derived targets based on concentration [67]
Diagram Title: Precision Assessment Workflow
Data Presentation and Analysis
Validation Parameters from Research Studies
Table 1: Method Validation Parameters from Published Studies
| Analyte | Linearity Range | Correlation Coefficient (R²) | LOD | LOQ | Precision (%RSD) | Citation |
|---|---|---|---|---|---|---|
| Chalcone | 0.3-17.6 μg/mL | 0.9994 | - | - | 1.92-2.08% (repeatability) | [15] |
| Terbinafine HCl | 5-30 μg/mL | 0.999 | 1.30 μg | 0.42 μg | <2% (intra-day & inter-day) | [66] |
| Drotaverine (DRT) | 4-20 μg/mL | - | - | - | - | [64] |
| Etoricoxib (ETR) | 4.5-22.5 μg/mL | - | - | - | - | [64] |
Table 2: Target Precision Expectations Based on Horwitz Equation
| Analyte Concentration | Horwitz %RSD | Target Intermediate Precision (%RSD) |
|---|---|---|
| 100 mg/mL | 1.6% | 1.1% |
| 10 mg/mL | 2.8% | 1.9% |
| 1 mg/mL | 5.0% | 3.3% |
| 100 μg/mL | 8.0% | 5.3% |
| 10 μg/mL | 11.3% | 7.5% |
| 1 μg/mL | 16.0% | 10.7% |
Case Study: Chalcone Analysis Method Validation
A recent study developed a UV-Vis spectrophotometric method for estimating total chalcone content, demonstrating comprehensive validation [15]:
Linearity: Excellent linear response was observed with R² = 0.9994 and random dispersion of residual concentrations, indicating appropriate model fit throughout the concentration range of 0.3-17.6 μg/mL [15].
Precision: The method demonstrated strong repeatability with coefficients of variation of 1.92% and 2.08%, well within acceptable limits for spectrophotometric methods [15].
Accuracy: Recovery studies showed results between 98-102%, confirming method accuracy [15].
Specificity: The method proved specific for trans-chalcone even in the presence of potentially interfering flavonoids including flavanol (+)-catechin, flavone luteolin, and flavonol quercetin [15].
The Scientist's Toolkit
Table 3: Essential Research Reagents and Materials
| Item | Function | Application Example |
|---|---|---|
| Spectroscopic Grade Methanol | Solvent for sample preparation | Dissolving drotaverine and etoricoxib for analysis [64] |
| Quartz Cuvettes (10 mm) | Sample holder for UV-Vis measurement | Compatible with full UV-Vis range, used in multiple studies [64] |
| Antimony Pentachloride | Derivatization agent | Used in chalcone analysis to enable detection at 390 nm [15] |
| Carbon Tetrachloride | Non-polar solvent | Sample dilution medium for chalcone analysis [15] |
| HPLC-Grade Water | Aqueous solvent medium | Used in terbinafine HCl analysis and as dilution medium [66] |
| Reference Standards | Quantitative calibration | High-purity compounds for calibration curves [64] |
Robust validation of UV-Vis spectroscopic methods ensures reliability and accuracy in quantitative analysis. The protocols outlined for assessing linearity, LOD, LOQ, and precision provide researchers with standardized approaches to demonstrate method suitability. Current research continues to validate UV-Vis methods for diverse applications, from pharmaceutical analysis to environmental monitoring, with consistently strong performance characteristics including correlation coefficients >0.999, precision %RSD values <2%, and excellent accuracy with recoveries of 98-102%. By adhering to these validation protocols and acceptance criteria, researchers can generate high-quality, defensible data suitable for regulatory submissions, quality control, and research publications.
The Beer-Lambert law (BLL) is a cornerstone of optical spectroscopy, establishing a linear relationship between the absorbance of light, the path length it travels through a medium, and the concentration of the absorbing species [68] [9]. Formally expressed as A = εcl, where A is absorbance, ε is the molar absorptivity, c is the concentration, and l is the path length, this law is indispensable for quantitative analysis in UV-Vis spectroscopy research [21]. Its elegant simplicity has enabled widespread application across chemical and pharmaceutical analysis [68].
However, this very simplicity relies on assumptions that are routinely violated in biological environments. When applied to living tissues—complex, heterogeneous, and scattering media collectively termed biological matrices—the standard BLL frequently fails, leading to significant errors in concentration estimation [69] [70]. The core challenge is that the law originally assumed ideal conditions: a non-scattering, homogeneous medium through which monochromatic, collimated light travels in a straight line [11] [69]. Biological tissues fundamentally defy these conditions. They are highly scattering, chemically complex, and structurally heterogeneous, giving rise to various optical phenomena that the standard law cannot account for [69] [71]. This application note examines the root causes of these failures and outlines validated methodological corrections to enable accurate quantitative analysis in tissue-based research and drug development.
Key Limitations of the Beer-Lambert Law in Biological Matrices
The primary limitations of the standard BLL in tissue diagnostics stem from the fundamental optical properties of biological samples. The table below summarizes the core assumptions of the law and how biological matrices violate them.
Table 1: Core Assumptions of the Standard Beer-Lambert Law vs. the Reality in Biological Tissues
| Assumption of Standard BLL | Reality in Biological Tissues | Consequence for Quantification |
|---|---|---|
| No light scattering [69] | Tissues are highly scattering media due to cellular membranes, organelles, and other structures [69] [62]. | Increased light loss, leading to overestimation of absorber concentration [69]. |
| Homogeneous medium [69] | Tissues are chemically and structurally heterogeneous (e.g., containing blood vessels, extracellular matrix, different cell types) [71]. | The optical pathlength becomes uncertain and variable [9] [69]. |
| Monochromatic light | Even with monochromators, practical light sources have a finite bandwidth; scattering further broadens the effective bandwidth in tissue. | The linear relationship between absorbance and concentration breaks down [70]. |
| Straight-line, collimated beam path [69] | Scattering causes photons to travel in a random walk, creating a "banana-shaped" path between source and detector [69]. | The effective pathlength (l) is longer and dependent on the scattering and absorption properties [69]. |
| Absorbers act independently | At high concentrations common in tissues (e.g., hemoglobin in blood), molecular interactions can alter absorption properties [68]. | Non-linear deviations from the predicted absorbance occur [68] [70]. |
A critical concept for understanding BLL failure in tissues is the differential pathlength factor (DPF). In a non-scattering medium, the pathlength l is simply the physical distance between the light source and detector. In tissue, however, scattering causes the light to travel a much longer, tortuous path. The DPF is the factor by which the actual average photon pathlength exceeds the physical separation [69]. For biological tissues, DPF values typically range from 3 to 6, meaning light travels 3 to 6 times farther than the physical geometry would suggest [69]. Failure to account for this effect is a primary source of quantitative error.
Modified Formulations for Tissue Diagnostics
To address these limitations, several modified versions of the Beer-Lambert law have been developed. These formulations incorporate additional terms to account for scattering and other tissue-specific effects.
Table 2: Modified Beer-Lambert Formulations for Tissue Spectroscopy
| Model/Modification | Key Formula | Application Context | Advantages & Limitations |
|---|---|---|---|
| Standard BLL | ( A = \epsilon \cdot c \cdot l ) [21] | Ideal, non-scattering solutions (e.g., cuvette-based protein analysis) [7]. | Simple and widely understood. Fails in scattering media like tissues. |
| Modified Beer-Lambert Law (MBLL) | ( OD = - \log\left(\frac{I}{I0}\right) = DPF \cdot \mua \cdot d + G ) [69] | Diffuse optical spectroscopy (e.g., NIRS) of tissues [62] [69]. | Accounts for scattering-induced pathlength (via DPF) and signal loss (via G). G is often unknown, preventing absolute concentration measurement [69]. |
| Twersky's Model for Blood | ( OD = \epsilon c d - \log(10^{-sH(1-H)d} + \frac{q}{\alpha q}(1-10^{-sH(1-H)d})) ) [69] | Quantifying absorption in whole blood, accounting for scattering from red blood cells. | Specifically models scattering from particulate matter (e.g., RBCs). More complex and requires knowledge of additional parameters like hematocrit (H) [69]. |
| Electromagnetic Extension | ( A = \frac{4\pi \nu}{\ln 10} (\beta c + \gamma c^2 + \delta c^3) d ) [68] | High-concentration solutions where molecular interactions alter polarizability. | Addresses fundamental deviations at high concentrations by incorporating higher-order concentration terms from electromagnetic theory [68]. |
These modified models demonstrate that successful quantification in tissues requires moving beyond the simple linear model to account for the dominant effects of scattering and heterogeneity.
Essential Reagents and Materials for Tissue Spectroscopy
The following toolkit is essential for researchers conducting quantitative optical studies in biological tissues.
Table 3: Research Reagent Solutions for Tissue Spectroscopy
| Item/Category | Function & Importance | Examples & Notes |
|---|---|---|
| Chromophore Standards | To create calibration curves for extracting concentrations from unknown tissue spectra [21]. | Purified hemoglobin (oxy/deoxy), bilirubin, cytochrome-c-oxidase, lipids, water [69] [71]. |
| Phosphate Buffered Saline (PBS) | A chemically inert solvent for preparing standard solutions and dilutions; provides a stable ionic and pH environment [68] [70]. | Used in studies quantifying lactate in PBS, serum, and blood to isolate scattering effects [70]. |
| Solid Tissue Phantoms | To calibrate instruments and validate models in systems with known optical properties (µₐ, µₛ) [69]. | Materials with embedded scattering particles (e.g., titanium dioxide, intralipid) and absorbing dyes (e.g., India ink) [69]. |
| Holmium Oxide Glass Filter | To verify the wavelength accuracy of the spectrophotometer, a critical step for reliable chromophore identification [68]. | Has distinct, known absorption peaks (e.g., 361, 445, 460 nm) [68]. |
| Quartz Cuvettes | To hold liquid samples for transmission measurements. Glass and plastic cuvettes are unsuitable for UV light [10]. | Required for UV range studies as quartz is transparent down to ~200 nm [10]. |
Experimental Protocol: Quantifying Chromophores in Tissue Using MBLL
This protocol details the steps for employing the Modified Beer-Lambert Law to quantify changes in chromophore concentration, such as hemoglobin oxygenation, in a tissue model.
Principle: Measure changes in optical attenuation relative to a baseline to calculate changes in chromophore concentration using a differential MBLL formulation [69] [71].
Materials and Equipment
- A UV-Vis or NIR spectrophotometer capable of measurements in reflectance geometry [10] [71].
- A fiber-optic probe (for contact measurements) or a camera system (for hyperspectral imaging, HSI).
- A solid tissue phantom or an in vivo/in vitro tissue sample.
- Data analysis software (e.g., Python with Spyder IDE, MATLAB) [68].
Step-by-Step Procedure
Instrument Calibration:
- Perform a wavelength accuracy test using a holmium oxide glass filter. Confirm that measured absorption peaks are within a specified tolerance (e.g., ±0.01) of known values [68].
- Record a dark spectrum (with the light source off) and a reference spectrum (I₀(λ)) from a reflectance standard (e.g., Spectralon) to correct for the system's spectral response [10].
Baseline Data Acquisition:
- Position the probe or focus the HSI camera on the tissue sample.
- Acquire and record the initial reflected light intensity spectrum, I₁(λ). This is your baseline, representing the initial physiological state [71].
Sample Data Acquisition:
- Induce a physiological change in the tissue (e.g., arterial occlusion, respiratory challenge, or drug application).
- Acquire and record the new reflected light intensity spectrum, I₂(λ), after the change has occurred [71].
Data Processing and Calculation:
- Calculate Differential Attenuation: For each wavelength, compute the change in optical density (OD) using the formula derived from the MBLL [71]:
ΔA(λ) = log₁₀( I₁(λ) / I₂(λ) )This differential form helps cancel out unknown, constant attenuation factors [71]. - Spectral Unmixing: Input
ΔA(λ)into a processing algorithm to solve for the changes in chromophore concentrations{Δc_i}. The governing equation is:ΔA(λ) ≈ DPF(λ) · d · Σ [ ε_i(λ) · Δc_i ]This can be solved using linear algebra (e.g., least squares optimization or non-negative matrix factorization) if the molar absorptivitiesε_i(λ)and the DPF are known [71].
- Calculate Differential Attenuation: For each wavelength, compute the change in optical density (OD) using the formula derived from the MBLL [71]:
Advanced Data Analysis and Machine Learning Approaches
Non-linear machine learning models are increasingly employed to handle the complex relationships in tissue spectra where linear models like MBLL may be insufficient [70] [71].
- Model Training: A neural network can be trained on a large synthetic dataset generated using the MBLL itself. The input is the differential attenuation spectrum
ΔA(λ), and the output is the corresponding set of concentration changes{Δc_i}[71]. - Real-Time Inference: Once trained, the model can infer chromophore concentrations from new spectral data in milliseconds, enabling real-time monitoring during surgical or diagnostic procedures [71].
- Validation: Studies comparing linear (PLS) and non-linear models (Support Vector Regression with RBF kernel, Artificial Neural Networks) on spectral data from scattering media like serum and whole blood have shown that non-linear models can provide superior performance, justifying their increased complexity [70].
The standard Beer-Lambert law, while powerful for ideal solutions, is an insufficient model for quantitative analysis in biological tissues due to pervasive light scattering and chemical heterogeneity. Researchers must employ modified formulations, such as the MBLL, which explicitly account for the increased and wavelength-dependent photon pathlength through the DPF. For the most complex real-time applications, such as intra-operative brain tissue monitoring, machine learning methods informed by these physical models offer a promising path toward both speed and accuracy. By understanding its limitations and adopting these advanced methodologies, scientists and drug development professionals can reliably extract quantitative biochemical information from living tissues.
Theoretical Foundation
Limitations of the Classical Beer-Lambert Law
The classical Beer-Lambert Law describes light attenuation in nonscattering absorbing media, stating that absorbance is linearly proportional to the concentration of the absorbing species, the path length, and the material's absorptivity [9] [5]. Formally, it is expressed as:
Classical Beer-Lambert Law: ( A = \log{10} \left( \frac{I0}{I} \right) = \epsilon \cdot c \cdot l )
Where:
- ( A ) = Absorbance (unitless)
- ( I_0 ) = Incident light intensity
- ( I ) = Transmitted light intensity
- ( \epsilon ) = Molar absorptivity or extinction coefficient (L·mol⁻¹·cm⁻¹)
- ( c ) = Concentration of the absorber (mol/L)
- ( l ) = Optical path length (cm)
However, this classical model assumes a non-scattering, homogeneous medium, which makes it inadequate for turbid biological samples, tissues, and colloidal suspensions where scattering significantly affects light propagation [11] [13] [62]. In scattering media, photons travel longer paths than the physical sample thickness, and a substantial portion of light is lost to scattering rather than absorption, leading to inaccurate concentration measurements if the classical law is applied directly [62].
The Modified Beer-Lambert Law (MBLL) Formulation
The Modified Beer-Lambert Law (MBLL) extends the classical model by incorporating terms that account for the effects of light scattering, making it suitable for quantitative analysis in turbid media [62]. The fundamental MBLL equation is expressed as:
Modified Beer-Lambert Law (MBLL): ( A\lambda = \epsilon{\text{HHb}\lambda} \cdot C{\text{HHb}} + \epsilon{\text{HbO}2\lambda} \cdot C{\text{HbO}2} \ \cdot d \cdot \text{DPF} + G )
Where the new parameters are:
- ( d ) = Physical distance between light source and detector (cm)
- DPF = Differential Pathlength Factor (unitless): Accounts for the increased distance light travels due to scattering.
- ( G ) = Scattering-dependent attenuation loss (unitless): Accounts for light loss that does not reach the detector due to scattering.
The DPF is a dimensionless scaling factor that represents the multiplicative increase in the actual optical pathlength (( l )) compared to the physical separation (( d )) between the light source and detector: ( l = d \cdot \text{DPF} ) [62]. Its value is always greater than 1 in scattering media and depends on the tissue type and wavelength.
Table 1: Key Differences Between Classical and Modified Beer-Lambert Law
| Parameter | Classical Beer-Lambert Law | Modified Beer-Lambert Law |
|---|---|---|
| Application Medium | Non-scattering, homogeneous solutions | Scattering, turbid media (tissues, colloids) |
| Path Length | Fixed, known geometric path ( l ) | Longer, unknown effective path ( d \cdot \text{DPF} ) |
| Scattering Consideration | Neglected or minimal | Explicitly accounted for by factor ( G ) |
| Primary Output | Absolute concentration | Relative concentration changes |
| Complexity | Simple linear relationship | Requires additional parameters (DPF, G) |
Experimental Protocols
Protocol 1: Determining the Differential Pathlength Factor (DPF)
Principle
The DPF is a critical parameter in MBLL that quantifies how much scattering increases the actual optical pathlength beyond the physical source-detector separation. This protocol describes how to determine DPF experimentally using time-resolved or frequency-domain photon migration techniques.
Materials and Equipment
- Spectrophotometer with integrating sphere attachment
- Time-resolved spectroscopy system OR frequency-domain photon migration equipment
- Cuvettes or sample holders for turbid media
- Standard turbid phantoms with known optical properties
- Software for data analysis (e.g., MATLAB, Python with SciPy)
Procedure
- Prepare calibration phantoms with known reduced scattering coefficients (( \mus' )) and absorption coefficients (( \mua )) using Intralipid or similar scattering agents.
- Set up the time-resolved or frequency-domain measurement system with appropriate source-detector separation (( d )), typically 2-4 cm for biological tissues.
- Measure the mean time of flight of photons (( \langle t \rangle )) for each phantom using the time-resolved system.
- Calculate the DPF using the relationship: ( \text{DPF} = \frac{v \cdot \langle t \rangle}{d} ), where ( v ) is the speed of light in the medium.
- Establish a correlation curve between DPF and reduced scattering coefficient for your specific media type.
- For unknown samples, measure ( \langle t \rangle ) and use the calibration curve to determine the appropriate DPF value.
Data Analysis
The DPF is wavelength-dependent and increases with reduced scattering coefficient. Typical DPF values for human tissues range from 3 to 6 for near-infrared light with source-detector separations of 2-4 cm.
Protocol 2: Correcting for Scattering in UV-Vis Spectra
Principle
This protocol provides a methodology to identify and subtract scattering contributions from absorption spectra, which is essential for accurate application of MBLL in analytical spectroscopy of colloidal systems, nanoparticle suspensions, and turbid biological samples.
Materials and Equipment
- UV-Vis spectrophotometer with appropriate cuvettes
- Centrifuge and filtration equipment (0.22 μm filters)
- Sample buffer or solvent matching the sample medium
- Software with scatter correction capabilities (e.g., DeNovix DS-11 series or equivalent)
Procedure
Instrument Preparation:
- Clean measurement surfaces thoroughly according to manufacturer instructions.
- Launch the UV-Vis application and disable any automatic baseline correction.
- Perform a blank measurement using the sample buffer or solvent (e.g., 1 μL dH₂O for microvolume instruments) [72].
Sample Measurement:
- Pipette the sample onto the measurement surface (e.g., 1 μL for microvolume systems).
- Collect the absorption spectrum across the relevant wavelength range (e.g., 220-750 nm).
Scatter Identification:
- Examine the spectrum for characteristic scatter signatures: gradually increasing apparent absorption at shorter wavelengths following approximately ( \lambda^{-4} ) dependence (Rayleigh scatter) [73].
- Identify spectral regions where the sample does not absorb but shows apparent absorption due to scatter.
Scatter Correction:
- Select multiple reference points in non-absorbing regions of the spectrum, particularly at longer wavelengths where scatter effects are minimal.
- Apply scatter fitting functions:
- "Scatter" function: ( A(\lambda) = A0 + c \cdot \lambda^{-4} ) (physically meaningful for Rayleigh scatter)
- "Alternate" function: ( A(\lambda) = A0 + c \cdot \lambda^{-n} ) (fits exponent n for unknown scatter type)
- "Linear" function: ( A(\lambda) = A_0 + m \cdot \lambda ) (empirical, for narrow fitting ranges)
- Subtract the fitted scatter baseline from the entire absorption spectrum.
- Verify that the corrected spectrum shows zero absorption in known non-absorbing regions.
Data Analysis
After scatter correction, analyze the true absorption features for quantitative analysis using MBLL. Report both uncorrected and corrected spectra with details of the scatter fitting method used.
Applications and Data Analysis
Near-Infrared Spectroscopy (NIRS) for Tissue Oximetry
MBLL finds extensive application in NIRS for non-invasive monitoring of tissue oxygenation, particularly for measuring hemoglobin concentration changes in brain, muscle, and other tissues [62].
MBLL Formulation for Tissue Oximetry: ( A\lambda = (\epsilon{\text{HHb}\lambda} \cdot C{\text{HHb}} + \epsilon{\text{HbO}2\lambda} \cdot C{\text{HbO}2}) \cdot d \cdot \text{DPF} + G )
For dual-wavelength measurements used in pulse oximetry, the ratio of ratios (R) is calculated as: ( R = \frac{(\Delta I / I){\lambda1}}{(\Delta I / I){\lambda2}} = \frac{AC{\lambda1} / DC{\lambda1}}{AC{\lambda2} / DC{\lambda2}} )
This ratio relates to oxygen saturation (SaO₂) through: ( \text{SaO}2 = \frac{\epsilon{\text{HHb}}(\lambda1) - R \cdot \epsilon{\text{HHb}}(\lambda2)}{R \cdot (\epsilon{\text{HbO}2}(\lambda2) - \epsilon{\text{HHb}}(\lambda2)) - (\epsilon{\text{HbO}2}(\lambda1) - \epsilon{\text{HHb}}(\lambda_1))} )
Table 2: Extinction Coefficients for Hemoglobin Species at Common NIRS Wavelengths
| Wavelength (nm) | ε(HbO₂) (cm⁻¹·M⁻¹) | ε(HHb) (cm⁻¹·M⁻¹) | Typical DPF in Tissue |
|---|---|---|---|
| 730 | ~760 | ~1010 | 4.5-5.5 |
| 810 | ~870 | ~870 | 4.5-5.5 |
| 850 | ~950 | ~720 | 4.0-5.0 |
Analysis of Nanoparticle Suspensions and Colloidal Systems
MBLL enables quantitative analysis of metal nanoparticles in smart microgels and hybrid systems by correcting for scattering contributions, allowing accurate determination of nanoparticle concentration and surface plasmon resonance properties [74].
Key Applications:
- Monitoring growth of metal nanoparticles within polymer networks
- Investigating swelling/deswelling kinetics of hybrid microgels
- Studying catalytic activity of nanoparticle systems
- Analyzing adsorption processes in colloidal systems
The Scientist's Toolkit
Table 3: Essential Research Reagent Solutions for MBLL Applications
| Reagent/Material | Function in MBLL Experiments | Typical Concentrations/Forms |
|---|---|---|
| Intralipid | Scattering phantom standard for DPF calibration | 1-20% suspensions in aqueous medium |
| India Ink | Absorption standard for calibration | Diluted solutions in buffer |
| Polystyrene Nanospheres | Monodisperse scatterers for system validation | 0.1-1 μm diameters in aqueous suspension |
| Hemoglobin Standards | Reference absorbers for oximetry calibration | Lyophilized or solution forms |
| NIST Traceable Neutral Density Filters | Instrument performance verification | Various optical densities |
| Solid Tissue Phantoms | Validation of in vivo measurements | Polymer-based with calibrated optical properties |
Workflow and Conceptual Diagrams
MBLL Development Workflow
Scatter Correction Methodology
Quantitative analysis using ultraviolet-visible (UV-Vis) spectroscopy traditionally relies on the Beer-Lambert Law (BLL), which establishes a linear relationship between analyte concentration and absorbed light [10]. This principle states that absorbance (A) is equal to the product of the molar absorptivity (ε), path length (L), and concentration (c) of the absorbing species: A = ε·L·c [57]. The BLL operates under specific ideal conditions: the use of monochromatic light, a non-scattering medium, and the absence of molecular interactions or chemical equilibria that might alter absorption characteristics [57]. While this model provides excellent accuracy in simple, homogeneous solutions commonly analyzed in pharmaceutical quality control and educational settings [10] [75], its application becomes significantly limited when dealing with complex, turbid biological samples such as living tissues, bacterial suspensions, or colloidal systems [57].
The fundamental challenge in applying the classical BLL to biological systems arises from the fact that these media scatter light in addition to absorbing it [57]. In bacterial culturing, for instance, measurements of optical density (OD) at 600 nm actually quantify light scattering rather than true absorption [75]. Similarly, in tissue diagnostics, the presence of multiple scattering centers—such as cell membranes, organelles, and connective tissue fibers—deviates photon paths from the straight line assumed by the BLL, leading to inaccurate concentration estimations for clinically important chromophores like hemoglobin and bilirubin [57]. To address these limitations, researchers have developed three principal advanced methodologies: the Modified Beer-Lambert Law (MBLL), Diffusion Theory, and Monte Carlo Simulations, each offering distinct approaches to overcome the constraints of traditional absorption spectroscopy in complex media.
Methodological Principles and Modifications
Modified Beer-Lambert Law (MBLL)
The Modified Beer-Lambert Law represents an empirical extension of the classical BLL specifically designed to accommodate light scattering in biological tissues. This approach introduces a semi-empirical correction factor known as the Differential Pathlength Factor (DPF) to account for the increased distance that photons travel due to scattering [57]. The MBLL formula is expressed as:
OD = -log(I/I₀) = DPF · μₐ · dᵢₒ + G
In this equation, OD represents optical density, μₐ is the absorption coefficient, dᵢₒ is the physical distance between the light source and detector, and G is a geometry-dependent factor [57]. The DPF, which typically ranges from 3 to 6 for biological tissues, effectively quantifies the multiplying effect of scattering on the actual photon pathlength [57]. For instance, a DPF value of 5 indicates that photons travel, on average, five times the physical source-detector separation. This modification has proven particularly valuable in near-infrared spectroscopy (NIRS) for monitoring tissue oxygenation and hemodynamics, where it enables reasonable estimation of chromophore concentrations despite the complex tissue architecture [57].
The primary advantage of MBLL lies in its computational simplicity and ease of implementation, requiring minimal processing power compared to more complex models [57]. However, this approach has significant limitations, including its dependence on empirical calibration and its inability to provide absolute quantification without incorporating assumptions about tissue structure [57]. Additionally, the MBLL does not explicitly separate the effects of absorption and scattering, potentially leading to inaccuracies when these optical properties change independently, as occurs in tissues with varying blood content or cellularity [57].
Diffusion Theory
Diffusion Theory approaches light propagation in turbid media by treating photons as particles undergoing random walk processes, effectively modeling light transport as a diffusion phenomenon [76]. This method is mathematically founded on the diffusion approximation to the radiative transfer equation, which provides analytical solutions for photon flux in various geometries [76]. The theory operates under the fundamental assumption that light scattering significantly dominates over absorption (μₛ' >> μₐ), and it primarily considers photons that have undergone multiple scattering events, effectively randomizing their direction [76].
The implementation of Diffusion Theory typically incorporates specific boundary conditions to accurately model photon behavior at tissue interfaces. Research comparing extrapolated-boundary conditions (EBC) against zero-boundary conditions (ZBC) has demonstrated that EBC provides superior accuracy, particularly for estimating reduced scattering coefficients [76]. The ability to derive analytical solutions grants Diffusion Theory a significant computational efficiency advantage over stochastic methods, making it particularly suitable for inverse problem-solving in tissue optics, where optical parameters are derived from measured reflectance or transmittance data [76].
Despite its mathematical elegance, Diffusion Theory fails to accurately model light transport in regions close to the source or in low-scattering media, where the dominance of ballistic photons and short-pathlength scattering events violates its core assumptions [76] [77]. This limitation restricts its application in certain clinical and laboratory scenarios, particularly those involving superficial tissue measurements or samples with weak scattering properties.
Monte Carlo Simulations
Monte Carlo (MC) Simulations represent a stochastic approach to modeling light-tissue interactions by computationally tracking the trajectories of individual photons as they travel through a medium [78]. This method employs random sampling techniques to simulate the probabilistic nature of light absorption and scattering events, providing a flexible framework for modeling complex tissue architectures with heterogeneous optical properties [78] [77]. Unlike analytical methods, MC simulations can incorporate detailed three-dimensional anatomical information, arbitrary source-detector geometries, and wavelength-dependent optical properties without requiring simplifying mathematical assumptions [78].
The fundamental strength of MC simulations lies in their ability to provide benchmark-quality solutions against which simpler models can be validated [78] [77]. For example, in dental research, MC methods have been employed to simulate light interaction with multi-compartment tooth models, revealing that transmittance mode measurements offer superior sensitivity for detecting pulp signals compared to reflectance mode configurations [78]. Similarly, in tissue spectroscopy, MC simulations have been instrumental in quantifying the accuracy of Diffusion Theory under various scattering regimes [76].
The primary limitation of conventional MC simulations is their substantial computational demand, particularly when modeling thick tissues or requiring high statistical precision [78] [77]. To address this challenge, researchers have developed accelerated implementations using graphics processing units (GPUs) and hybrid approaches that combine MC simulations near the source with Diffusion Theory further away [78] [77]. These innovations have improved simulation speeds by factors of 7 or more while maintaining accuracy within 2 standard deviations of pure MC simulations [77].
Table 1: Comparative Analysis of Quantitative Methodologies for UV-Vis Spectroscopy in Turbid Media
| Feature | Modified Beer-Lambert Law (MBLL) | Diffusion Theory | Monte Carlo Simulations |
|---|---|---|---|
| Theoretical Basis | Empirical extension of BLL with pathlength correction [57] | Diffusion approximation of radiative transfer equation [76] | Stochastic simulation of photon transport [78] |
| Scattering Handling | Incorporated via Differential Pathlength Factor (DPF) [57] | Assumes dominant scattering (μₛ' >> μₐ) [76] | Explicitly models each scattering event [78] |
| Computational Demand | Low (algebraic calculations) [57] | Moderate (solving differential equations) [76] | High (tracking millions of photons) [78] |
| Accuracy | Limited to specific calibration conditions [57] | Reduced near sources and boundaries [76] | High (considered gold standard) [78] |
| Tissue Complexity | Homogeneous assumptions [57] | Layered models possible [76] | Arbitrary 3D geometries [78] |
| Typical Applications | NIRS, oximetry [57] | Tomography, photon density mapping [76] | Model validation, device optimization [78] |
Experimental Protocols and Applications
Protocol 1: Quantifying Hemoglobin Oxygen Saturation Using MBLL
Principle: This protocol utilizes the Modified Beer-Lambert Law to determine blood oxygen saturation (SO₂) in biological tissues by measuring optical attenuation at multiple wavelengths and applying scattering corrections [57].
Materials and Reagents:
- Near-infrared spectrophotometer with multiple wavelength capability (e.g., 690, 805, 830 nm)
- Optical fibers for source delivery and detection
- Phantom calibration standards with known optical properties
- Coupling gel for optical contact
- Data acquisition software with MBLL implementation
Procedure:
- Set up the NIRS instrument with source-detector separations of 2-4 cm, appropriate for probing tissue depths.
- Calibrate the system using phantom standards with known absorption and scattering properties.
- Apply optical coupling gel to ensure optimal light transmission between optical fibers and tissue surface.
- Acquire intensity measurements at a minimum of two wavelengths (typically isosbestic and oxygen-sensitive wavelengths).
- Calculate optical density (OD) for each wavelength: OD = -log(I/I₀)
- Apply the MBLL equation: OD = DPF · μₐ · dᵢ₀ + G
- Determine absorption coefficients (μₐ) at each wavelength using the DPF values appropriate for the tissue type.
- Calculate oxygen saturation using the differential absorption of oxyhemoglobin and deoxyhemoglobin:
SO₂ = [εHb(λ₂) · μₐ(λ₁) - εHb(λ₁) · μₐ(λ₂)] / [εHbO₂(λ₁) · εHb(λ₂) - εHbO₂(λ₂) · εHb(λ₁)]
where ε represents extinction coefficients for deoxyhemoglobin (Hb) and oxyhemoglobin (HbO₂) [57].
Applications: This MBLL-based protocol is extensively used in clinical monitoring of cerebral oxygenation, muscle oxygenation during exercise physiology studies, and neonatal cerebral oximetry [57].
Protocol 2: Determining Optical Properties Using Diffusion Theory
Principle: This protocol employs time-resolved reflectance measurements with diffusion theory to determine absorption and scattering coefficients of turbid media [76].
Materials and Reagents:
- Pulsed laser source (e.g., Ti:Sapphire laser)
- Time-correlated single photon counting (TCSPC) system
- Photomultiplier tube or fast avalanche photodiode detector
- Optical fibers and beam steering optics
- Tissue phantoms with known optical properties for validation
Procedure:
- Configure the time-resolved spectroscopy system with pulsed laser source and time-gated detector.
- Measure temporal point spread function (TPSF) of light reflectance from the sample surface at multiple source-detector separations.
- Fit the measured TPSF to the solution of the diffusion equation for a semi-infinite medium:
R(ρ,t) = (4πDc)⁻³/² · z₀ · t⁻⁵/² · exp(-μₐct) · exp(-ρ²+z₀²)/(4Dct)
where D = [3(μₐ+μₛ')]⁻¹ is the diffusion coefficient, z₀ = (μₛ')⁻¹, and ρ is the source-detector separation [76].
- Use nonlinear optimization algorithms to extract μₐ and μₛ' that provide the best fit to measured data.
- Validate the extracted parameters using phantom standards with known optical properties.
- For continuous wave measurements, employ spatial reflectance measurements at multiple distances and fit to the steady-state solution of the diffusion equation.
Applications: This approach is valuable for characterizing optical properties of biological tissues, monitoring therapeutic responses in photodynamic therapy, and quality control of tissue-mimicking phantoms [76].
Protocol 3: Modeling Light Transport in Teeth Using Monte Carlo Simulations
Principle: This protocol uses GPU-accelerated Monte Carlo simulations to model light transport in complex dental structures for caries detection and structural analysis [78].
Materials and Reagents:
- High-performance computing workstation with GPU capability
- Monte Carlo simulation software (e.g., MCX - Monte Carlo eXtreme)
- 3D tooth model with segmented compartments (enamel, dentin, pulp)
- Optical properties database for dental tissues at target wavelengths
Procedure:
- Obtain or create a detailed 3D mesh model of the tooth structure with compartment segmentation.
- Assign wavelength-specific optical properties (μₐ, μₛ, g, n) to each tissue type based on literature values or preliminary measurements.
- Configure simulation parameters in MCX:
- Number of photons: 10⁸-10⁹ for sufficient statistics
- Time gate: 1 ns with 0.1 ns steps
- Source type: pencil beam, broad beam, or structured illumination
- Detection mode: reflectance or transmittance
- Execute the simulation on GPU hardware for accelerated computation.
- Validate simulation results against analytical solutions for simple geometries or experimental measurements.
- Analyze photon pathlength distributions, spatial sensitivity profiles, and detection probability maps.
- Correlate simulated light propagation with clinical observations or diagnostic thresholds.
Applications: This MC simulation protocol aids in optimizing dental diagnostic devices, planning phototherapeutic procedures, and understanding the fundamental light-tissue interactions in complex dental structures [78].
Table 2: Research Reagent Solutions for Advanced UV-Vis Spectroscopy Applications
| Reagent/Standard | Composition/Type | Function in Research |
|---|---|---|
| Tissue Phantoms | Lipid emulsions, titanium dioxide, ink dyes [57] | Calibrating instruments and validating models by mimicking tissue optical properties |
| Extinction Coefficient Standards | Hemoglobin solutions, bilirubin, cytochrome c [57] | Providing reference absorption values for quantitative concentration calculations |
| Scattering Suspensions | Polystyrene microspheres, silica nanoparticles [57] | Isolating and studying scattering effects in turbid media |
| Enzyme Assay Kits | Pre-formulated reagent mixtures [75] | Enabling specific biochemical quantification in complex matrices like food and beverages |
| Optical Coupling Media | Gels, oils with matched refractive indices [78] | Minimizing surface reflections at tissue-instrument interfaces |
| Cuvette Materials | Quartz, specialty plastics [10] | Ensuring appropriate transmission characteristics across UV-Vis spectrum |
Visualization of Methodologies
The following diagrams illustrate the fundamental concepts, workflows, and decision processes for selecting and implementing the three methodologies discussed in this application note.
Monte Carlo Simulation Workflow
Methodology Selection Guide
The comparative analysis of MBLL, Diffusion Theory, and Monte Carlo Simulations reveals a clear trade-off between computational efficiency and modeling accuracy in quantitative UV-Vis spectroscopy of turbid media. MBLL offers practical solutions for real-time monitoring applications where relative changes are sufficient, while Diffusion Theory provides more rigorous analytical solutions for media where scattering dominates. Monte Carlo simulations represent the gold standard for accuracy and flexibility, albeit at significant computational cost. The emerging trend of hybrid approaches, which combine the strengths of multiple methodologies, along with GPU acceleration, promises to further enhance our capability for quantitative spectroscopy in complex biological systems. These advanced methodologies collectively extend the utility of UV-Vis spectroscopy beyond simple solutions to encompass intricate biological matrices, enabling more accurate drug development, clinical diagnostics, and materials characterization.
The Beer-Lambert Law (BLL) serves as a foundational principle in optical spectroscopy, establishing a linear relationship between the absorbance of light and the properties of the material through which it passes [79]. In its basic form, it states that absorbance (A) is equal to the product of the molar absorptivity (ε), the concentration of the absorber (c), and the optical path length (d): A = ε·c·d [57] [79]. While this law is powerful for analyzing clear solutions in cuvettes, its application to complex, scattering biological tissues like human skin and blood requires significant modification.
The Modified Beer-Lambert Law (MBLL) was developed to address the unique challenges of tissue spectroscopy, primarily the profound effects of light scattering [57]. This case study details the application of MBLL for the non-invasive measurement of blood oxygen saturation (SpO₂), a critical physiological parameter in clinical monitoring, drug development, and biomedical research [80] [81]. We will focus on the principles, a detailed experimental protocol for a cuff occlusion paradigm, data analysis using a novel algorithm, and the essential toolkit for researchers.
Theoretical Foundation of MBLL
In biological tissues, light is not only absorbed but also scattered, meaning the actual path length traveled by photons is longer and more complex than the physical separation between the light source and detector [57]. The MBLL accounts for this by introducing a Differential Pathlength Factor (DPF) and a geometry-dependent factor (G), resulting in the formulation for Optical Density (OD):
OD = -log(I/I₀) = DPF · μₐ · d + G [57]
Where:
I₀andIare the incident and detected light intensities, respectively.μₐis the absorption coefficient of the tissue.dis the physical source-detector separation.
The DPF is not a constant; it depends on the tissue's absorption (μₐ) and reduced scattering (μ'ₛ) coefficients [57] [82]. For a homogeneous semi-infinite medium, it can be approximated as DPF ≈ (1/2) * [3 * μ'ₛ / μₐ]^{1/2} [82]. This modification transforms the BLL from a simple linear model into a powerful tool for quantifying changes in tissue chromophores, primarily oxy-hemoglobin (HbO₂) and deoxy-hemoglobin (Hb).
Application to Pulse Oximetry and Oxygen Saturation
Pulse oximetry leverages the MBLL by measuring the pulsatile component of the arterial blood volume. The key insight is that the difference in light absorption between systolic (high blood volume) and diastolic (low blood volume) phases isolates the absorption due to arterial blood alone [83] [84]. Oxygen saturation (SpO₂) is defined as the percentage of hemoglobin that is oxygenated:
SpO₂ = [HbO₂] / ([HbO₂] + [Hb]) * 100% [84]
To calculate this, measurements are taken at two wavelengths—typically 660 nm (red) and 940 nm (infrared)—where the extinction coefficients of HbO₂ and Hb differ significantly [80] [83]. The pulsatile changes in absorbance at these two wavelengths are used to compute a Ratio-of-Ratios (R), which is then correlated to SpO₂ via a calibration curve [84].
Diagram 1: The logical workflow for non-invasive SpO₂ measurement using MBLL, showing the transformation of emitted light into a clinical saturation value.
Experimental Protocol: Forearm Cuff Occlusion
This protocol is designed to induce and measure dynamic changes in tissue oxygenation, providing a robust validation for MBLL algorithms. The procedure is adapted from established physiological paradigms [85] [86].
Materials and Setup
- Continuous-Wave NIRS System: A system equipped with laser diodes or LEDs at a minimum of two wavelengths (e.g., 760 nm and 850 nm). The source and detector should be housed in a flexible probe.
- Data Acquisition System: A unit capable of recording light intensity signals at a sampling rate ≥ 10 Hz.
- Blood Pressure Cuff: A standard automatic or manual cuff sized for the upper arm.
- Probe Fixation Materials: Medical-grade adhesive tape or a custom-made holder to secure the optical probe.
Step-by-Step Procedure
Subject Preparation & Probe Placement:
- Recruit a healthy adult subject and obtain informed consent according to institutional ethical guidelines.
- Place the subject in a comfortable seated or supine position. Abduct the arm and rest it on a supportive surface.
- Clean the skin on the flexor side of the forearm with alcohol wipes and allow it to dry.
- Fix the optical probe firmly to the skin, ensuring good contact without pressure points. The source-detector separation should be between 2.5 cm and 4.0 cm [86] [82].
- Place the blood pressure cuff snugly around the upper arm.
Baseline Data Collection:
- Initiate data recording from the NIRS system.
- Collect at least 3 minutes of stable, resting baseline data.
Occlusion Phase:
- Rapidly inflate the cuff to a pressure of at least 50 mmHg above the subject's systolic pressure to fully occlude arterial inflow.
- Maintain occlusion for a period of 2-3 minutes, or until a clear and sustained drop in tissue oxygen saturation is observed. Monitor the subject for any discomfort.
Reperfusion Phase:
- Rapidly and fully deflate the cuff.
- Continue data recording for at least 3-5 minutes to capture the hyperemic response and the return to baseline.
Data Storage:
- Save the recorded light intensity data for all wavelengths with appropriate timestamps.
Data Analysis and the PV-MBLL Algorithm
Conventional MBLL is excellent for tracking changes in hemoglobin concentration. However, extracting absolute values of tissue oxygen saturation (StO₂) has traditionally required multiple source-detector separations. The Phantom-Validation MBLL (PV-MBLL) algorithm is a novel approach that enables absolute StO₂ measurement using only a single source-detector pair [85] [86].
PV-MBLL Algorithm Workflow
The core of the PV-MBLL algorithm involves a two-step calibration with a tissue-simulating phantom to accurately determine the differential pathlength factor (DPF), which is critical for converting light attenuation into absorption coefficients [86].
Diagram 2: The step-by-step workflow of the PV-MBLL algorithm for extracting absolute tissue oxygenation.
- Phantom Calibration: The optical probe is placed on a tissue-simulating phantom with precisely known absorption (
μₐ) and reduced scattering (μ'ₛ) coefficients. Light intensity (I_phantom) is measured. - DPF Calculation: The DPF is calculated by fitting the measured data to the MBLL model. This step links the measured intensity to a known absorption coefficient, effectively calibrating the pathlength for the specific probe and tissue type.
- In Vivo Measurement: The probe is moved to the subject, and light intensity (
I_in_vivo) is recorded during the cuff occlusion experiment. - Absorption Coefficient Recovery: Using the DPF obtained from the phantom calibration, the in vivo absorption coefficient (
μₐ_in_vivo) is calculated at each time point and for each wavelength. - Hemoglobin Concentration Calculation: The system of equations based on the absorption at different wavelengths is solved [86]:
μₐ(λ₁) = (ε_HbO₂(λ₁)·[HbO₂] + ε_Hb(λ₁)·[Hb])μₐ(λ₂) = (ε_HbO₂(λ₂)·[HbO₂] + ε_Hb(λ₂)·[Hb]) - Oxygen Saturation Computation: Absolute tissue oxygen saturation is finally computed as
StO₂ = [HbO₂] / ([HbO₂] + [Hb]) * 100%.
Key Quantitative Data
Table 1: Performance comparison of the PV-MBLL algorithm versus a conventional spatial-resolved algorithm in liquid phantom experiments.
| Algorithm | Absorption Coefficient (μₐ) Range | Maximum Reconstruction Error | Key Advantage |
|---|---|---|---|
| PV-MBLL | 0.02 - 0.20 cm⁻¹ | 5.35% | High accuracy with single S-D pair [86] |
| Spatial-Resolved | 0.02 - 0.20 cm⁻¹ | 37.57% | Requires multiple S-D pairs [86] |
Table 2: Extinction coefficients of hemoglobin species at standard pulse oximetry wavelengths.
| Hemoglobin Species | Extinction Coefficient at 660 nm (red) | Extinction Coefficient at 940 nm (infrared) |
|---|---|---|
| Oxy-hemoglobin (HbO₂) | Low | High [80] [83] |
| Deoxy-hemoglobin (Hb) | High | Low [80] [83] |
The Scientist's Toolkit: Research Reagent Solutions
This section details the essential materials and computational tools required to implement the MBLL for oxygen saturation measurements in a research or development setting.
Table 3: Essential research reagents and materials for MBLL-based oxygenation studies.
| Item Name | Specification / Example | Function in the Experiment |
|---|---|---|
| Continuous-Wave NIRS System | e.g., systems from Hamamatsu (NIRO) or Somanetics (INVOS) [86] | Provides controlled light sources at specific wavelengths and detects transmitted/reflected light. |
| Optical Probe | Custom-built or commercial; single or multiple source-detector pairs. | Delivers light to tissue and collects the attenuated signal. Material should block ambient light. |
| Tissue-Simulating Phantom | Liquid (e.g., intralipid, ink) or solid (e.g., silicone with scatterers/absorbers) with known μₐ and μ'ₛ [86]. | Critical for system calibration and determining the DPF in the PV-MBLL algorithm. |
| Hemoglobin Extinction Coefficients | Published values from Prahl or Zijlstra et al. | Reference data used to convert measured absorption coefficients into concentrations of HbO₂ and Hb [86] [84]. |
| Data Processing Software | MATLAB, Python (with NumPy/SciPy), or custom C++ code. | Implements the MBLL/PV-MBLL algorithms, filters signals, and calculates saturation values. |
The Modified Beer-Lambert Law bridges the gap between fundamental spectroscopic theory and practical, non-invasive physiological monitoring. As demonstrated in this case study, advanced implementations like the PV-MBLL algorithm overcome traditional limitations, enabling accurate measurement of absolute tissue oxygenation with simpler hardware [86]. This is of paramount importance for researchers and drug development professionals who require quantitative data from specific tissue beds. Understanding the principles, protocols, and tools outlined here provides a solid foundation for developing new diagnostic technologies, validating physiological responses in clinical trials, and advancing quantitative spectroscopy research. Future directions include integrating multi-wavelength systems to correct for confounding factors like skin melanin [81] [83] and leveraging machine learning to further improve accuracy in challenging conditions.
Conclusion
The Beer-Lambert Law remains a cornerstone of quantitative UV-Vis spectroscopy, providing a straightforward and powerful tool for concentration determination. However, its successful application, particularly in complex biomedical research and drug development, requires a deep understanding of its foundational principles, a meticulous methodological approach, and a critical awareness of its limitations. By systematically troubleshooting deviations, optimizing assay conditions, and employing validated methods—including advanced modifications like the MBLL for scattering biological tissues—researchers can ensure data accuracy and reliability. Future directions point toward the increasing integration of computational models and machine learning to augment the law's capabilities, promising even more robust quantitative analysis for next-generation diagnostics and therapeutic development.
References
- 1. 13.1: Transmittance and Absorbance [https://chem.libretexts.org/Bookshelves/Analytical_Chemistry/Instrumental_Analysis_(LibreTexts)/13%3A_Introduction_to_Ultraviolet_Visible_Absorption_Spectrometry/13.01%3A_Transmittance_and_Absorbance]
- 2. Beer-Lambert Law | Transmittance & Absorbance [https://www.edinst.com/resource/the-beer-lambert-law/]
- 3. Difference Between Absorbance and Transmittance [https://gamma-sci.com/2019/11/18/difference-between-absorbance-and-transmittance/?srsltid=AfmBOopTsokrAxZmp6lcCmVA7TiHJveWPF7LYRjlBkHMqlVnR4Tqu03b]
- 4. Absorbance and Transmittance [https://www.sarspec.com/spectroscopy-techniques/absorbance-and-transmittance]
- 5. The Beer-Lambert Law [https://chem.libretexts.org/Bookshelves/Physical_and_Theoretical_Chemistry_Textbook_Maps/Supplemental_Modules_(Physical_and_Theoretical_Chemistry)/Spectroscopy/Electronic_Spectroscopy/Electronic_Spectroscopy_Basics/The_Beer-Lambert_Law]
- 6. Optical density and absorbance measurements [https://www.bmglabtech.com/en/blog/optical-density-for-absorbance-assays/]
- 7. UV/Vis Spectroscopy for DNA & Protein Analysis [https://www.unchainedlabs.com/uv-vis-spectroscopy/]
- 8. Experimental validation of lambert-beer's law: Principles ... [https://deepscienceresearch.com/dsr/catalog/book/107/chapter/408]
- 9. Beer–Lambert law [https://en.wikipedia.org/wiki/Beer%E2%80%93Lambert_law]
- 10. UV-Vis Spectroscopy: Principle, Strengths and Limitations ... [https://www.technologynetworks.com/analysis/articles/uv-vis-spectroscopy-principle-strengths-and-limitations-and-applications-349865]
- 11. The Bouguer‐Beer‐Lambert Law: Shining Light on the ... [https://pmc.ncbi.nlm.nih.gov/articles/PMC7540309/]
- 12. Beer-Lambert Law Spectrophotometer [https://www.hinotek.com/an-in-depth-analysis-of-the-beer-lambert-law-spectrophotometer/]
- 13. Understanding the Limits of the Bouguer-Beer-Lambert Law [https://www.spectroscopyonline.com/view/understanding-the-limits-of-the-bouguer-beer-lambert-law]
- 14. Lambert Law - an overview [https://www.sciencedirect.com/topics/engineering/lambert-law]
- 15. Development and validation of a UV–Vis ... [https://www.sciencedirect.com/science/article/pii/S2215016124005703]
- 16. Beer's law | Definition, Equation, & Facts [https://www.britannica.com/science/Beers-law]
- 17. Beer-Lambert Law | Intermolecular Forces and Properties [https://www.sparkl.me/learn/collegeboard-ap/chemistry/beer-lambert-law/revision-notes/652]
- 18. 3: Activity 1-3 - Beer's Law Spectrophotometric Analysis [https://bio.libretexts.org/Courses/Irvine_Valley_College/Lab_manual_%3A_Protein_Biomanufacturing_and_Biochemistry_(Biot274_@IVC)/03%3A_Activity_1-3_-_Beers_Law_Spectrophotometric_Analysis]
- 19. Chemistry Applications of UV/VIS Spectroscopy [https://www.azom.com/article.aspx?ArticleID=15629]
- 20. –visible Ultraviolet - Wikipedia spectroscopy [https://en.wikipedia.org/wiki/Ultraviolet%E2%80%93visible_spectroscopy]
- 21. 1.2: Beer's Law [https://chem.libretexts.org/Bookshelves/Analytical_Chemistry/Molecular_and_Atomic_Spectroscopy_(Wenzel)/1%3A_General_Background_on_Molecular_Spectroscopy/1.2%3A_Beers_Law]
- 22. UV–VIS absorption spectroscopy: Lambert-Beer reloaded [https://www.sciencedirect.com/science/article/abs/pii/S1386142516305558]
- 23. 4.4: UV-Visible Spectroscopy [https://chem.libretexts.org/Bookshelves/Analytical_Chemistry/Physical_Methods_in_Chemistry_and_Nano_Science_(Barron)/04%3A_Chemical_Speciation/4.04%3A_UV-Visible_Spectroscopy]
- 24. UV-Vis Spectroscopy: Principle, Parts, Uses, Limitations [https://microbenotes.com/uv-vis-spectroscopy/]
- 25. Instrumentation of a UV-Visible Spectrophotometer - JASCO Inc [https://jascoinc.com/learning-center/theory/spectroscopy/uv-vis-spectroscopy/instrumentation/]
- 26. How does a spectrophotometer function? [https://www.ssi.shimadzu.com/service-support/faq/uv-vis/instrument-design/1/index.html]
- 27. What is a UV-Vis Spectrophotometer? [https://www.denovix.com/what-is-a-uv-vis-spectrophotometer/]
- 28. Appendix VII - UV/Visible Instruments - NDACC [https://ndacc.larc.nasa.gov/about/protocols/appendix-vii-uv-vis]
- 29. UV–VIS absorption spectroscopy: Lambert-Beer reloaded [https://www.sciencedirect.com/science/article/pii/S1386142516305558]
- 30. The Beer-Lambert Law and Spectrophotometric Analysis [https://stevesopenlab.org/the-beer-lambert-law-and-spectrophotometric-analysis/]
- 31. Finding concentration of unknown solution using Beer ... [https://vlab.amrita.edu/?sub=3&brch=206&sim=577&cnt=1]
- 32. Validation of the UV-Vis Spectrophotometric Method for ... [https://oahsj.org/index.php/oahsj/article/view/101]
- 33. Three sample-sparing techniques to estimate the molar ... [https://www.sciencedirect.com/science/article/pii/S2405580825000585]
- 34. Three sample-sparing techniques to estimate the molar ... [https://pubmed.ncbi.nlm.nih.gov/40124993/]
- 35. Quantitative Spectrophotometry and Beer's Law (Experiment) [https://chem.libretexts.org/Courses/University_of_California_Davis/Chem_4A_Lab%3A_General_Chemistry_for_Majors_I/Chem_4A%3A_Laboratory_Manual/10_7%3A_Quantitative_Spectrophotometry_and_Beer's_Law_(Experiment)]
- 36. Molar Absorptivity Model Powers Near-Infrared Glucose ... [https://www.spectroscopyonline.com/view/molar-absorptivity-model-powers-near-infrared-glucose-testing]
- 37. Choosing the Right Cuvettes for UV-VIS Experiments – White Bear Photonics [https://whitebearphotonics.com/blogs/measurement-techniques/uv-vis-cuvette-guide]
- 38. Principles of UV/vis spectroscopy (6) Baseline and blank [https://www.jasco-global.com/principle/principles-of-uv-vis-spectroscopy-6-baseline-and-blank/]
- 39. How to Select Cuvettes for UV VIS Measurements & Cuvette Material Guide — FireflySci Cuvette Shop [https://www.fireflysci.com/news/2015/7/6/how-to-select-cuvettes-for-uv-vis-measurements-cuvette-material-guide]
- 40. How to Choose the Right Quartz Cuvette for Your Application? [https://toquartz.com/how-to-choose-right-quartz-cuvette-application/]
- 41. UV-Visible Solvents [https://www.sigmaaldrich.com/US/en/products/analytical-chemistry/analytical-chromatography/solvents/uv-visible-solvents?srsltid=AfmBOoq8K9PZQiUbK-nP7ODrBfsL1O-joxm5-7BqXqfbRlpnUdBV_Q_I]
- 42. UV-VIS Spectrometry for Protein Concentration Analysis [https://www.mabion.eu/science-hub/articles/uv-vis-spectrometry-for-protein-concentration-analysis/]
- 43. A mobile microvolume UV/visible light spectrophotometer for ... [https://pmc.ncbi.nlm.nih.gov/articles/PMC7816168/]
- 44. From mono- to multicomponent methods in UV-VIS ... [https://www.sciencedirect.com/science/article/pii/S0165993622002552]
- 45. Correcting Ultraviolet-Visible Spectra for Baseline Artifacts [https://www.sciencedirect.com/science/article/pii/S0022354923003350]
- 46. Comparative Evaluation of UV-Vis Spectroscopy-Based ... [https://pmc.ncbi.nlm.nih.gov/articles/PMC11430504/]
- 47. Beer-Lambert Law | AP Chem Guide [https://apchem.org/docs/unit-3/beer-lambert-law/]
- 48. Choosing the Right Method for Nucleic Acid Quantitation [https://www.promega.com/resources/pubhub/choosing-the-right-method-for-nucleic-acid-quantitation/]
- 49. 5.2: Beer's Law and Integrated Rate Law Lab [https://chem.libretexts.org/Courses/University_of_Arkansas_Little_Rock/000%3AChem_1403L_General_Chemistry_Lab/05%3A_kinetics_-_Integrated_Rate_Laws/5.2%3A_Beer's_Law_and_Integrated_Rate_Law_Lab]
- 50. Chemical Kinetics - Beer-Lambert's Law Validation [https://www.tau.ac.il/~phchlab/exp-kinetics-procedure.html]
- 51. How Measurement of Concentration and Purity of Nucleic ... [https://bitesizebio.com/13532/how-measurement-of-concentration-and-purity-of-nucleic-acids-works/]
- 52. DNA extract characterization process for microbial detection ... [https://pmc.ncbi.nlm.nih.gov/articles/PMC3599793/]
- 53. UV absorbance DNA quantitation [https://www.bmglabtech.com/en/application-notes/uv-absorbance-dna-quantitation/]
- 54. Quantitating RNA | Thermo Fisher Scientific - US [https://www.thermofisher.com/us/en/home/references/ambion-tech-support/rna-isolation/tech-notes/quantitating-rna.html]
- 55. UV-VIS Spectroscopy Not Working? Common Limitations ... [https://www.pgeneral.com/service-maintenance-and-repair/uv-vis-spectroscopy-not-working-common-limitations-and-how-to-overcome-them/]
- 56. UV-Visible Spectroscopy [https://www2.chemistry.msu.edu/faculty/reusch/virttxtjml/spectrpy/uv-vis/uvspec.htm]
- 57. Beer–Lambert law for optical tissue diagnostics [https://pmc.ncbi.nlm.nih.gov/articles/PMC8553265/]
- 58. A quantitative prediction strategy for UV-vis spectroscopy ... [https://pubs.rsc.org/en/content/articlelanding/2025/ay/d5ay01268f]
- 59. A novel turbidity compensation method for water ... [https://www.sciencedirect.com/science/article/pii/S0263224124013320]
- 60. A straightforward approach utilizing an exponential model ... [https://www.frontiersin.org/journals/microbiology/articles/10.3389/fmicb.2023.1224207/full]
- 61. Rapid Correction of Turbidity Interference on Chemical ... [https://www.mdpi.com/2227-9040/12/12/247]
- 62. Beer-Lambert Law - an overview [https://www.sciencedirect.com/topics/engineering/beer-lambert-law]
- 63. Refractive index-assisted UV/Vis spectrophotometry to ... [https://www.sciencedirect.com/science/article/abs/pii/S0003267020312691]
- 64. Development and validation of UV-Visible ... [https://pmc.ncbi.nlm.nih.gov/articles/PMC3658078/]
- 65. UV Vis Spectrophotometer Resources [https://www.thermofisher.com/us/en/home/industrial/spectroscopy-elemental-isotope-analysis/molecular-spectroscopy/uv-vis-spectrophotometry/resources.html]
- 66. Development and validation of the UV-spectrophotometric ... [https://pmc.ncbi.nlm.nih.gov/articles/PMC3658052/]
- 67. Managing the Analytical Life-Cycle for Biotechnology ... [https://www.bioprocessintl.com/bioanalytical-methods/managing-the-analytical-life-cycle-for-biotechnology-products]
- 68. beyond the Bouguer–Beer–Lambert law | Discover Chemistry [https://link.springer.com/article/10.1007/s44371-025-00214-y]
- 69. Beer–Lambert law for optical tissue diagnostics [https://www.spiedigitallibrary.org/journals/journal-of-biomedical-optics/volume-26/issue-10/100901/BeerLambert-law-for-optical-tissue-diagnostics--current-state-of/10.1117/1.JBO.26.10.100901.full]
- 70. An empirical investigation of deviations from the Beer– ... [https://www.nature.com/articles/s41598-021-92850-4]
- 71. Learnable real-time inference of molecular composition ... [https://pmc.ncbi.nlm.nih.gov/articles/PMC11421663/]
- 72. Baseline Correction | Technical Note 119 [https://www.denovix.com/tn-119-baseline-correction/]
- 73. Scatter in UV-Vis absorption spectra [https://www.fluortools.com/software/ae-uv-vis-ir-spectral-software/ae-documentation-pages/aes-spectral-tools/scatter-in-uv-vis-absorption-spectra]
- 74. UV-Vis spectroscopy in the characterization and ... [https://pmc.ncbi.nlm.nih.gov/articles/PMC11606387/]
- 75. UV-Vis Spectrophotometer Applications [https://www.thermofisher.com/us/en/home/industrial/spectroscopy-elemental-isotope-analysis/molecular-spectroscopy/uv-vis-spectrophotometry/applications.html]
- 76. Accuracy of the diffusion approximation for total time ... [https://www.sciencedirect.com/science/article/abs/pii/S0030402604702648]
- 77. Hybrid model of Monte Carlo simulation and diffusion theory ... [https://pubmed.ncbi.nlm.nih.gov/8350159/]
- 78. Monte Carlo Simulation of Diffuse Optical Spectroscopy for ... [https://pmc.ncbi.nlm.nih.gov/articles/PMC10255649/]
- 79. Beer-Lambert's Law: Principles and Applications in Daily Life [https://www.findlight.net/blog/beer-lamberts-law-explained-applications/]
- 80. Pulse Oximetry - StatPearls - NCBI Bookshelf - NIH [https://www.ncbi.nlm.nih.gov/books/NBK470348/]
- 81. EMERGING TECHNOLOGY FOR NON-INVASIVELY ... [https://www.sciencedirect.com/science/article/pii/S0012369225053930]
- 82. Noninvasive Portable Hemoglobin Concentration ... [https://www.mdpi.com/2227-9032/9/6/647]
- 83. Pulse oximetry [https://en.wikipedia.org/wiki/Pulse_oximetry]
- 84. Critical analysis of the relationship between arterial ... [https://pmc.ncbi.nlm.nih.gov/articles/PMC12238718/]
- 85. PV-MBLL algorithm for extraction of absolute tissue ... [https://pubmed.ncbi.nlm.nih.gov/32305645/]
- 86. PV-MBLL algorithm for extraction of absolute tissue ... [https://www.sciencedirect.com/science/article/abs/pii/S0169260720301280]