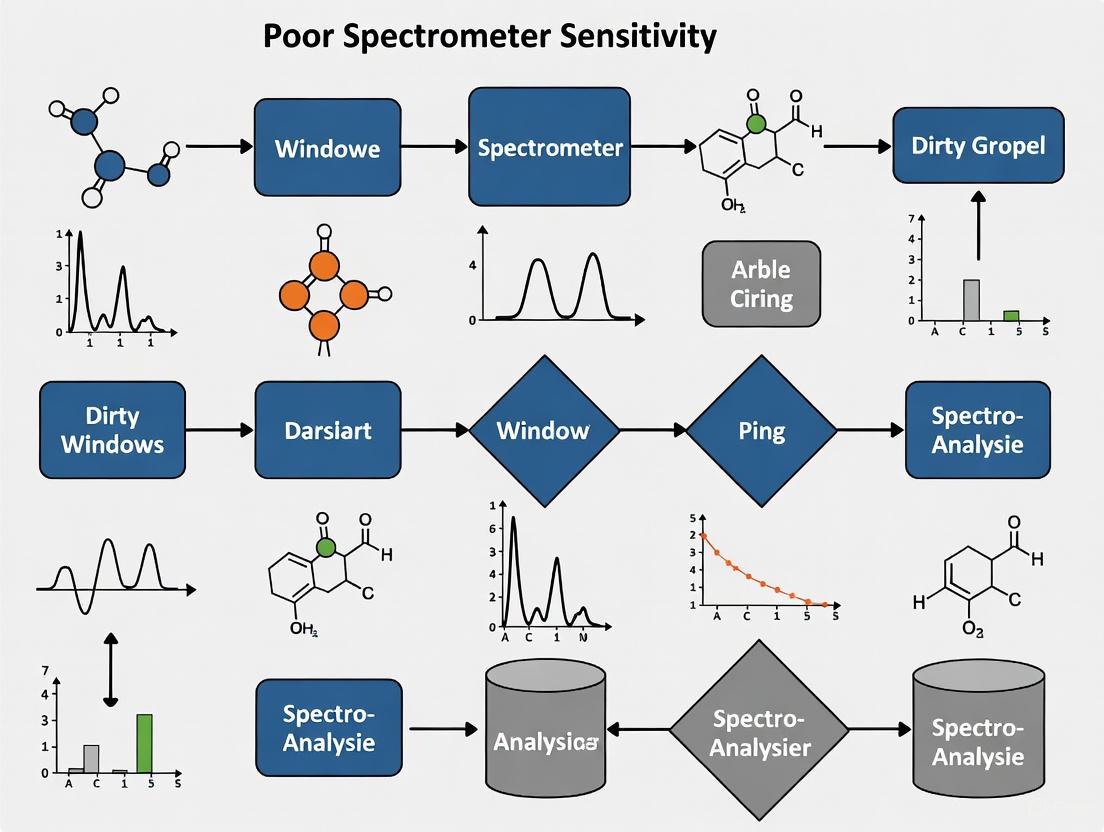
Restoring Spectrometer Sensitivity: A Complete Guide to Diagnosing and Cleaning Dirty Optical Windows
This article provides a comprehensive guide for researchers and drug development professionals on addressing the prevalent issue of poor spectrometer sensitivity caused by contaminated optical windows.
Restoring Spectrometer Sensitivity: A Complete Guide to Diagnosing and Cleaning Dirty Optical Windows
Abstract
This article provides a comprehensive guide for researchers and drug development professionals on addressing the prevalent issue of poor spectrometer sensitivity caused by contaminated optical windows. It covers the fundamental science of how dirty windows degrade data quality, outlines step-by-step cleaning and validation protocols aligned with pharmaceutical QA/QC standards, presents a systematic troubleshooting workflow to distinguish window-related issues from other instrumental problems, and discusses advanced preventative maintenance strategies and comparative analysis with other sensitivity loss factors to ensure robust, reliable spectroscopic data in biomedical and clinical research settings.
Understanding How Dirty Windows Compromise Spectrometer Sensitivity and Data Integrity
The Critical Role of Optical Windows in Light Transmission and Signal Fidelity
For researchers in drug development and analytical sciences, maintaining optimal spectrometer sensitivity is paramount. A frequent, yet often overlooked, source of signal degradation is contaminated optical windows. These components are critical for protecting the internal optics of your spectrometer. When dirty, they can scatter and absorb light, leading to diminished signal strength, unstable baselines, and inaccurate quantitative results. This guide provides targeted troubleshooting and procedures to identify, rectify, and prevent issues related to optical windows, thereby safeguarding the fidelity of your spectroscopic data.
Troubleshooting Guide: Poor Spectrometer Sensitivity
Use the table below to diagnose and resolve common issues stemming from compromised optical windows.
| Problem | Possible Causes | Recommended Solutions |
|---|---|---|
| Unstable or Drifting Readings | - Contamination (fingerprints, dust) on the window causing light scatter [1].- Environmental factors (vibrations, temperature changes) affecting the instrument [1]. | - Clean the optical window using the detailed protocol below [1] [2] [3].- Ensure the spectrometer is on a stable, level surface away from drafts [1]. |
| Cannot Set to 100% Transmittance (Fails to Blank) | - A dirty optical window is blocking or scattering the light path [1].- The light source is nearing the end of its life [1]. | - Perform a thorough cleaning of the optical window [3].- Check the lamp usage hours in the instrument's software; replace if necessary [1]. |
| Negative Absorbance Readings | - The blank was measured with a dirtier optical surface than the sample cuvette [1]. | - Ensure all optical surfaces, including the spectrometer window and cuvettes, are cleaned uniformly before blanking [1]. |
| Generally Low Sensitivity/Weak Signal | - Significant contamination on the optical window, reducing light throughput [1] [2].- Using the wrong type of optical window material for your wavelength range (e.g., glass for UV measurements) [1]. | - Clean the optical window [2] [3].- Confirm the window material (e.g., Quartz for UV, CaF₂ for IR) is appropriate for your application [1] [2]. |
| Inconsistent Readings Between Replicates | - Gradual accumulation of residue on the window during a series of measurements. | - Clean the optical window and establish a regular cleaning schedule. Handle windows only by their edges to prevent future contamination [3]. |
Frequently Asked Questions (FAQs)
Q1: How can I tell if my spectrometer's sensitivity issue is caused by a dirty window and not something else?
Start with a process of elimination. First, run a blank measurement with nothing in the sample compartment. If the baseline is noisy, the 100%T line is unstable, or you cannot zero the instrument, the issue is likely with the source, detector, or internal optics. If the baseline is stable, insert a clean cuvette filled with your blank solvent. If problems arise now, the issue is with the cuvette. If the system passes both these tests but shows low signal with a known standard, a dirty internal optical window is a probable cause and should be cleaned.
Q2: What is the safest way to clean a calcium fluoride (CaF₂) optical window?
Calcium fluoride is a common material for IR and UV windows but is relatively soft and can be easily scratched. A recommended cleaning method is [2]:
- Preliminary Treatment: Gently wipe the surface with a dust-free cotton swab or optical cleaning paper soaked in reagent-grade acetone.
- Enhanced Cleaning: For stubborn contaminants, repeat the acetone wipe with a fresh swab.
- Rinse: Use a new swab lightly moistened with deionized water to remove water-soluble residues.
- Drying: Finally, wipe the surface with a swab dipped in acetone to accelerate drying and prevent water spots.
Q3: Are there any cleaning methods I should absolutely avoid?
Yes. Avoid these common mistakes to prevent permanent damage [3]:
- Do not use acetone on plastic optics or housings, as it will dissolve and damage them.
- Do not blow on an optic to remove dust, as saliva can contaminate the surface.
- Do not use ultrasonic cleaners on delicate components like diffraction gratings.
- Never apply excessive pressure while cleaning, as this can grind particles into the soft surface and cause scratches.
Q4: My spectrometer (e.g., Thunder Optics SMA) isn't calibrating properly. Could a dirty window be the cause?
Yes. The calibration process relies on measuring known light intensities. A contaminated optical window will attenuate the light signal, leading to an incorrect calibration curve and flawed intensity data in all subsequent experiments [4]. Always ensure optical windows are clean before performing any wavelength or intensity calibration.
Experimental Protocols
Detailed Methodology: Cleaning Optical Windows and Lenses
This protocol is adapted from industry best practices for handling precision optics [3].
Objective: To safely remove contaminants (dust, oils, residues) from optical windows without scratching or damaging the surface.
Materials Required (The Scientist's Toolkit):
| Item | Function |
|---|---|
| Reagent-Grade Isopropyl Alcohol | Dissolves organic oils and residues; evaporates quickly without leaving streaks. |
| Reagent-Grade Acetone | Strong solvent for removing stubborn contaminants. Not for use on plastics. [3] |
| De-Ionized Water | Removes water-soluble contaminants; used as a final rinse after solvents. |
| Compressed Air/Dust Blower | Removes loose, abrasive dust particles before physical wiping. |
| Lint-Free Lens Tissue or Optical Wipes | Soft, non-abrasive tissue for wiping optical surfaces. |
| Cotton-Tipped Swabs | Allows for precise application of solvents and gentle wiping. |
| Powder-Free Nitrile or Latex Gloves | Prevents fingerprints and skin oils from contaminating the optic during handling. |
Step-by-Step Procedure:
- Preparation: Work on a clean, dry bench. Wear gloves and ensure all cleaning materials are within reach.
- Initial Dust Removal: Use a blast of compressed air or a dust blower to remove any loose particulate matter from the optical surface. This step is crucial to avoid grinding dust into the surface during wiping [3].
- Solvent Application: Moisten a folded piece of lens tissue or a cotton swab with a small amount of reagent-grade alcohol (or acetone, if appropriate for the material).
- Wiping Technique:
- For a lens or window held in hand, gently draw the moistened tissue across the surface in a straight line. Use a clean area of the tissue for each pass. Do not use a circular "polishing" motion, as this can redistribute contaminants [3].
- For an optic that cannot be moved, use a cotton swab. Drag the swab slowly across the surface with light pressure, turning the swab to present a clean surface as it collects contamination.
- Final Rinse (If Needed): If acetone was used, a follow-up wipe with deionized water is recommended to remove residues, followed by a final swipe with alcohol or acetone to aid in streak-free drying [2].
- Inspection: Hold the optic under a bright light and inspect it at a glancing angle. If streaks or spots remain, repeat the cleaning process with fresh materials.
Workflow Visualization
The following diagram illustrates the logical decision-making process for troubleshooting sensitivity issues related to optical windows.
Contaminants such as solvent residues, fingerprints, and particulates are significant yet often overlooked sources of interference in sensitive analytical techniques. Within the context of research on troubleshooting poor spectrometer sensitivity due to dirty windows, identifying and mitigating these contaminants is a critical first step. Their presence can lead to suppressed ionization, elevated baseline noise, signal interference, and irreproducible results, ultimately compromising data quality [5]. This guide provides targeted troubleshooting strategies to help researchers identify, prevent, and resolve these common contamination issues.
Troubleshooting FAQs
Q: Why do I have a high background and noisy baseline in my LC-MS analysis? A: A high background is frequently caused by contaminants introduced from the mobile phase, sample, or handling. Common sources include plasticizers leaching from sample containers, impurities in solvent additives (like formic acid), microbial growth in solvent reservoirs, and compounds transferred from skin contact (such as lipids and amino acids from fingerprints) [5]. These contaminants can ionize efficiently, elevating the baseline and making it challenging to detect low-abundance analytes.
Q: My spectrometer sensitivity has suddenly dropped. What should I check first? A: Follow a systematic approach to isolate the problem:
- Check the Solvents and Additives: Prepare a fresh mobile phase using LC-MS grade solvents and additives from a reliable, dedicated source. Contaminated or low-quality formic acid is a known cause of severe signal suppression [5].
- Inspect the Instrument: For GC-MS systems, a loss of sensitivity can sometimes be traced to a worn-out filament. Switching to a second filament, if available, can restore performance [6].
- Examine Sample Preparation: Ensure you are wearing nitrile gloves to prevent contamination from fingerprints and skin [5]. Review your sample clean-up protocols to remove matrix interferences that can suppress ionization [7].
Q: I see strange peaks in my chromatogram. How can I identify if they are contaminants? A: Unexpected peaks are often exogenous contaminants. To identify them:
- Consult Contaminant Databases: Use publicly available resources that tabulate common contaminants with their mass-to-charge (m/z) values and likely sources (e.g., Triton detergents, PEG, plasticizers) [5].
- Analyze a Blank: Run a procedural blank—a sample that has undergone the same preparation process but without the analyte. Peaks present in the blank are almost certainly contaminants introduced during the workflow [5].
- Perform Sample Clean-up: Using solid-phase extraction (SPE) or desalting spin columns can remove many interfering compounds, clarifying your chromatogram [8].
Q: What is the most common source of particulate contamination, and how does it affect my system? A: Particulates can originate from dust in laboratory air, contaminated solvents, or particles from sample matrices. They can clog frits and column inlets, leading to increased backpressure and peak broadening [9]. In the context of dirty windows in optical systems, particulates can scatter light and reduce sensitivity.
Experimental Protocols for Contaminant Identification
Protocol 1: Systematic Blank Analysis to Pinpoint Contamination Source
This protocol is designed to trace the origin of contaminants within your analytical workflow.
- Preparation:
- Use only LC-MS or HPLC grade solvents.
- Wear nitrile gloves throughout the procedure to avoid fingerprint contamination [5].
- Experimental Sequence: Perform the following analyses in sequence, carefully noting any new peaks that appear:
- Blank Injection: Inject a vial of your starting mobile phase.
- Processed Blank: Inject a blank that has been processed through your entire sample preparation procedure (including any solid-phase extraction, filtration, or evaporation steps).
- System Blank: Run the LC-MS system without any injection to assess background from the instrument itself.
- Data Interpretation: Compare the chromatograms from each step. Peaks that appear in the processed blank but not the solvent blank indicate contaminants introduced during sample preparation. Peaks present in the system blank may point to a contaminated LC flow path or mobile phase.
Protocol 2: Fingerprinting Exogenous Particulates
This methodology, adapted from environmental nanoparticle research, provides a framework for characterizing unknown particulates [10].
- Sample Collection and Purification:
- Collect samples from the system of interest (e.g., a swab from a "dirty window" or a filter from a solvent line).
- Purify the sample through enzymatic hydrolysis or chemical digestion to remove adsorbed biological material.
- Multi-Fingerprinting Analysis:
- Elemental Fingerprinting: Use techniques like Energy Dispersive X-ray Spectroscopy (EDXS) to identify the elemental composition of particulates. The presence of non-biological elements like Al, Ti, or Pt can point to abiogenic, industrial, or environmental sources [10].
- Structural Fingerprinting: Employ High-Angle Annular Dark-Field Scanning Transmission Electron Microscopy (HAADF-STEM) to obtain morphological and crystallographic information about the particles at a high resolution [10].
- Source Identification: Correlate the chemical multi-fingerprints with potential sources (e.g., combustion-derived particles, catalyst residues, or construction dust) to identify the origin of the contamination [10].
Contaminant Reference Tables
| Contaminant Category | Specific Examples | Common Sources | Impact on Analysis |
|---|---|---|---|
| Solvent Residues | Plasticizers (e.g., PEG), Additive impurities | Plastic solvent bottles, Low-purity mobile phase additives, Detergents from washed glassware [5] | Signal suppression/enhancement, High chemical background [5] |
| Human Residues | Lipids, Amino acids, Keratins, Salts | Handling samples/vials with bare hands, Skin contact with instrument parts [5] | Interfering peaks, Altered ionization efficiency [5] |
| Particulates | Dust, Microbes, Column frit debris | Laboratory air, Microbial growth in aqueous lines, Sample matrix [5] [9] | Clogged lines/frits, Increased backpressure, Noisy baseline [9] |
| Sample-Derived | Lipids, Proteins, Carryover | Incomplete sample clean-up, Insufficient needle wash [5] [9] | Matrix effects, Peak broadening, Contamination of subsequent runs |
Table 2: Essential Research Reagent Solutions for Contamination Control
| Reagent / Material | Function | Application Note |
|---|---|---|
| LC-MS Grade Solvents | High-purity mobile phases with minimal background | Use dedicated bottles for each solvent; do not filter unless absolutely necessary to avoid introducing contaminants [5]. |
| Nitrile Gloves | Prevent introduction of biomolecules and salts from skin | Wear at all times when handling solvents, samples, vials, and instrument components [5]. |
| HeLa Protein Digest Standard | System suitability standard for LC-MS | Use to verify that sample preparation and instrument performance are not compromised by contamination [8]. |
| Peptide Desalting Spin Columns | Clean-up of peptide/protein samples | Removes salts, detergents, and other small molecule contaminants; can also remove excess labeling reagents [8]. |
| Detergent Removal Resin | Extraction of detergents from protein samples | Critical for removing ion-suppressing detergents that are incompatible with MS analysis [8]. |
| Pierce Calibration Solutions | Instrument calibration | Ensures mass accuracy is maintained, helping to correctly identify contaminants [8]. |
Contaminant Investigation Workflow
The following diagram outlines a logical workflow for investigating and resolving contamination issues.
Contaminant Investigation Workflow
Advanced Contaminant Fingerprinting Strategy
For persistent or complex contamination, a formal fingerprinting strategy can be employed. The diagram below details a comprehensive analytical approach based on high-resolution mass spectrometry.
Chemical Fingerprinting Workflow
FAQs: Understanding the Impact of a Dirty Window
What symptoms indicate my spectrometer's window might be dirty? The primary symptoms of dirty optical windows on a spectrometer include signal drift, where readings consistently shift over time; poor precision, evidenced by significant variation between repeated tests on the same sample; and an elevated or noisy baseline [11] [12]. You may also find that the instrument requires more frequent recalibration [11].
How does a dirty window lead to these symptoms? Optical windows, such as those located in front of the fiber optic cable or in the direct light pipe, must be clean to allow light to pass through unobstructed [11]. Contamination on the window—such as dust, fingerprints, or residues—blocks or scatters the incoming light. This reduces the light intensity reaching the detector, leading to inaccurate measurements of light intensity and causing the symptoms of drift, poor precision, and baseline elevation [11] [13].
Which elements or measurements are most affected by this issue? While all measurements can be compromised, the low-wavelength elements are often the most sensitive to any optical path problem. These include critical elements like Carbon (C), Phosphorus (P), and Sulfur (S) [11]. Inaccurate results for these elements are a common warning sign of an issue with the optical path, which can be caused by a dirty window or a malfunctioning vacuum pump [11].
Troubleshooting Guide and Protocols
Symptom Identification Table
Use this table to quickly identify if your issues are consistent with a dirty optical window.
| Observed Symptom | Potential Cause | Key Characteristics |
|---|---|---|
| Signal Drift [13] | Gradual accumulation of dirt on the window. | Measurements consistently shift in one direction (e.g., decreasing intensity) over time or between calibrations. |
| Poor Precision [11] | Contamination causing inconsistent light scattering. | High variation (e.g., Relative Standard Deviation >5) between repeated analyses of the same homogeneous sample. |
| Elevated/Noisy Baseline [12] | Dirt or stains on the window creating optical interference. | The baseline signal when no sample is being analyzed is higher than normal, chaotic, or has increased micro-peaks. |
Experimental Protocol: Cleaning Spectrophotometer Windows
This detailed methodology is adapted from standard instrument cleaning procedures [14].
Essential Materials:
- Lint-free, soft cloth (e.g., microfiber)
- Canned, dust-free compressed air (do not use a shop compressor, as it can contain moisture and oil) [14]
- Denatured or isopropyl alcohol (for stubborn contamination only) [14] [15]
- Powder-free gloves [15]
Step-by-Step Procedure:
- Power Down: Turn off the spectrometer and, if applicable, unplug it. This is a critical safety step.
- Locate Windows: Identify the optical windows that require cleaning. These are typically found in the sample compartment and on the white calibration disk [11] [14].
- Initial Dust Removal: Wearing powder-free gloves, use the canned air to blow loose dust off the optical surfaces. Hold the can upright and use short bursts of air. Do not shake the can or turn it upside down during use [14].
- Inspect for Residues: Visually inspect the windows under good lighting. Look for smudges, fingerprints, or other residues.
- Clean the Surface:
- For the white calibration tile, gently wipe with a clean, lint-free cloth in circular motions. Ensure it is free of fingerprints and particles [14].
- For other optical windows, if smudges persist after dusting, apply a small amount of denatured or isopropyl alcohol to the cloth—never directly onto the instrument—and gently wipe the surface [14] [15].
- Critical: Do not use abrasive cleaners, razor blades, or coarse cloths, as these can permanently scratch the optical surfaces [15] [16].
- Final Check and Re-calibrate: Allow any residual alcohol to evaporate completely. Power the instrument back on and perform a full calibration before resuming analysis [13].
The Scientist's Toolkit: Essential Maintenance Materials
Keep these items on hand for routine optical maintenance.
| Item | Function | Key Consideration |
|---|---|---|
| Lint-free Microfiber Cloth | Safely wipes away fingerprints and smudges from optical surfaces without leaving residue [14] [16]. | Avoid using lens tissues or cloths that may have been used with abrasives [15]. |
| Canned Compressed Air | Removes loose, dry dust and particulates from the aperture and hard-to-reach areas without physical contact [14]. | Must be dust-free and moisture-free. Do not use air from a standard compressor [14]. |
| Denatured / Isopropyl Alcohol | Solvent for removing stubborn, oily contaminants like fingerprints when plain wiping is insufficient [14] [15]. | Always apply to the cleaning cloth first, not directly onto the instrument. |
| Powder-free Gloves | Prevents transferring oils and fingerprints from skin onto optical surfaces and calibration standards during handling [15]. | Essential for handling any optical component or calibration standard. |
Troubleshooting Logic Workflow
This diagram outlines the logical process for diagnosing and resolving issues related to a dirty spectrometer window.
The Direct Link Between Window Cleanliness and Accurate Quantitative Analysis
Troubleshooting Guide: Symptoms of Dirty Spectrometer Windows
Dirty or contaminated optical windows are a common, yet often overlooked, source of error in spectroscopic quantitative analysis. Contaminants such as dust, fingerprints, and residue can significantly degrade data quality. The following table outlines common symptoms, their impact on data, and the underlying causes related to window cleanliness.
| Observed Symptom | Impact on Quantitative Analysis | Link to Window Contamination |
|---|---|---|
| Calibration Drift [11] | Frequent need for recalibration; loss of historical data comparability. | A dirty window attenuates light, causing a gradual shift in the instrument's baseline response over time. |
| Poor Analysis Readings [11] | Inaccurate concentration values for analytes. | Contamination scatters and absorbs light, leading to incorrect intensity measurements used for quantification. |
| Low Light Intensity/Inaccurate Readings [11] | High variability between replicate measurements of the same sample. | Inconsistent light transmission due to uneven contaminant layers causes poor measurement reproducibility. |
| Increased Signal Noise/Unstable Readings [1] | Reduced confidence in detecting low-concentration analytes. | Particulates on the window can scatter light, contributing to a noisy signal and raising the effective detection limit. |
| Negative Absorbance Readings [1] | Theoretically impossible results, indicating a fundamental measurement error. | Can occur if the blank measurement was performed with a contaminated optical path, making the sample appear "cleaner" than the blank. |
Frequently Asked Questions (FAQs)
Q1: Which specific windows in a spectrometer are most critical for maintaining cleanliness? Two windows are paramount for accurate analysis. The first is the window located in front of the fiber optic cable, and the second is the window in the direct light pipe [11]. Contamination on either of these surfaces will directly interfere with the light path used for measurement.
Q2: How do contaminants on the window lead to inaccurate quantitative results? Quantitative analysis relies on measuring the precise intensity of light interacting with a sample. Contaminants on optical windows absorb and scatter this light, reducing the total light throughput [11]. This reduction in light intensity is misinterpreted by the instrument's software, leading to incorrect calculations of element or compound concentration. For elements measured in lower wavelengths, like Carbon and Phosphorus, this effect is particularly pronounced [11].
Q3: What is the recommended method for cleaning spectrometer windows? The universal and safest first step is to use dust-free compressed air or a blower bulb to remove loose particulate matter [17] [18] [19]. Never touch or wipe the window with anything without first blowing off dust, as this can grind particles into the surface and cause scratches [19]. For more persistent contaminants, consult the manufacturer's manual; some may recommend gentle cleaning with appropriate solvents, but this is not universally advised for all windows [17].
Q4: Can I use a lens tissue or a standard microfiber cloth to clean the windows? No, this is generally not recommended. Standard microfiber cloths and lens tissues can smudge or even scratch delicate optical glass [18]. The only user-level cleaning method advised is with compressed air. Any physical wiping should only be performed by trained personnel using specified materials, such as pure cotton wipes (e.g., Webril Wipes) and optical-grade solvents, if the manufacturer's procedure allows it [19].
Q5: How often should I inspect the spectrometer's windows for cleanliness? Inspect the windows visually before starting any critical quantitative work. The frequency of formal cleaning depends on the operating environment. A device in a clean, climate-controlled lab may require less frequent attention, while one in a factory with airborne contaminants may need daily checks [20] [21].
Experimental Protocol: Inspection and Cleaning of Optical Windows
This protocol provides a detailed methodology for the safe inspection and cleaning of spectrometer optical windows to restore and maintain analytical sensitivity.
Materials and Equipment
| Item | Function |
|---|---|
| Powder-free Gloves | Prevents transfer of skin oils to optical surfaces during handling [18] [19]. |
| Dust-Free Compressed Air / Blower Bulb | Primary tool for removing loose, dry particulates without physical contact [17] [18]. |
| Handheld Magnifier or Microscope | For detailed visual inspection of the window surface for fine contaminants and damage [19]. |
| Bright Light Source | Helps reveal contaminants and streaks by increasing the intensity of specular reflections [19]. |
Step-by-Step Procedure
- Safety and Preparation: Turn off the spectrometer and disconnect the power supply [17]. Ensure you are working in a clean, well-lit, and stable environment.
- Initial Visual Inspection: While wearing powder-free gloves, visually inspect the window. Hold the window at an angle to your line of sight to see reflections from contaminants [19].
- Dry Gas Cleaning:
- Post-Cleaning Inspection: Re-inspect the window using the bright light source and magnifier. If contaminants remain, do not proceed to wiping. Contact qualified technical support, as further cleaning may require specialized tools and solvents to avoid permanent damage [17] [19].
Diagnostic Workflow for Sensitivity Loss
The following diagram outlines a logical troubleshooting pathway to systematically determine if dirty windows are the root cause of poor spectrometer sensitivity.
Troubleshooting Guides
Guide 1: Diagnosing and Resolving Sensitivity Loss in Gas Chromatography (GC)
Loss of sensitivity in GC analyses is a common challenge that can significantly impact the accuracy of concentration assays. The troubleshooting approach depends heavily on the specific symptoms observed in your chromatogram. The table below categorizes common symptoms, their likely causes, and recommended corrective actions [22].
| Symptom Category | Potential Causes | Corrective Actions |
|---|---|---|
| All peaks are smaller; retention times unchanged [22] | Incorrect instrument settings, autosampler issues, depleted detector gases, or a dirty MS ion source [22] [6]. | Verify inlet split ratio, detector temperature, and autosampler syringe function [22]. For MS, check tune report for increased repeller or EM voltage indicating a dirty source [22] [6]. Check fuel gas ratios for flame-based detectors [22]. |
| All peaks are smaller and broadened [22] | Loss of chromatographic efficiency [22]. | Confirm correct column dimensions and carrier gas flow in method [22]. Trim the inlet end of the column by 0.5–1 meter [22]. Check column installation depth into inlet/detector [22]. |
| Reduced sensitivity for late-eluting peaks [22] [23] | Sample discrimination against high-boiling-point compounds, often due to injection technique or liner geometry [22]. | Ensure fast syringe plunger speed for liquid injection [22]. Verify correct liner is installed, ideally with deactivated glass wool packing [22]. Check for leaks, over-tightened ferrules, or incorrect column positioning in the inlet [23]. |
| Specific peaks are smaller [22] | Chemical degradation or adsorption of specific analytes [22]. | Investigate analyte stability in the sample matrix and solvent [22]. Check for active sites in the flow path (liner, column) that may adsorb certain functional groups [22]. |
Guide 2: Troubleshooting Low Recovery in Dissolution Testing
Low drug recovery in dissolution testing can lead to inaccurate assessments of product performance and quality. The following workflow and table help diagnose the root cause, which often involves drug adsorption or instability [24].
Figure 1: Diagnostic workflow for troubleshooting low recovery in dissolution testing, based on [24].
| Observation | Indicated Problem Area | Specific Checks & Solutions |
|---|---|---|
| Low recovery with autosampler, but acceptable with manual sampling. | The autosampler flow path, typically peristaltic pump tubing or residual film from inadequate cleaning [24]. | Switch to alternative tubing chemistry (e.g., Marprene). Perform several cleaning cycles with a water-alcohol mixture to remove residual excipients [24]. |
| Low recovery with both autosampler and manual sampling. | Filter adsorption or binding to the stainless-steel components of the dissolution apparatus itself [24]. | Validate filter adsorption using a defined procedure. If confirmed, switch to a different filter type. If binding to stainless steel is suspected, use alternative materials like PEEK cannulas or Diamond-Like Carbon (DLC) coated paddle shafts [24]. |
| Failed dissolution specification for gelatin capsules during stability studies. | Gelatin cross-linking, which makes the capsule shell insoluble [25]. | Add the appropriate enzyme (e.g., pepsin in acidic media, pancreatin in neutral media) to the dissolution medium to digest the cross-linked gelatin. A pre-treatment step without surfactant may be needed to protect enzyme activity [25]. |
Frequently Asked Questions (FAQs)
Q1: My GC-MS sensitivity has dropped significantly, and the autotune shows a higher than normal repeller voltage and electron multiplier (EM) voltage. What is the most likely cause? [6]
A1: A simultaneous increase in both the repeller and EM voltages in the tune report is a strong indicator of a dirty ion source. Contamination on the source components reduces their ability to efficiently focus and transmit ions, forcing the instrument to compensate by increasing these voltages. The first course of action should be a thorough cleaning and reconditioning of the ion source [6].
Q2: When should enzymes be used in the dissolution testing of gelatin capsules, and is this required for routine batch release? [25]
A2: Enzymes should only be added to the dissolution medium when there is evidence of gelatin cross-linking, which can occur during stability studies under high temperature and humidity. Enzymes are not required for routine batch release testing unless cross-linking is suspected or observed. The enzyme is selected based on the pH of the dissolution medium, and its activity must be verified according to the procedure in USP general chapter <711> [25].
Q3: What is the recommended sampling method for manual dissolution sampling, and why? [25]
A3: The recommended method is to use a syringe with an L-shaped cannula. This setup allows for easy and consistent sampling from the official sampling zone within the vessel without having to stop the agitation. After withdrawal, the sample should be filtered immediately to separate any undissolved particles and stop the dissolution process [25].
Q4: If a dissolution test fails the first stage (L1) of acceptance criteria, should a laboratory investigation be triggered immediately? [25]
A4: No. The three stages (L1, L2, L3) outlined in the USP <711> acceptance table are considered part of a single test. A formal laboratory investigation for an Out-of-Specification (OOS) result is typically initiated only if the batch fails the final stage (L3). However, a manufacturer's internal quality policy may dictate more specific rules [25].
Q5: For a chewable tablet, are both disintegration and dissolution tests required? [25]
A5: Yes. According to FDA guidance, both disintegration and dissolution tests are required for chewable tablets. This is also noted in USP general chapter <1711> "Oral Dosage Forms - Performance Tests" [25].
The Scientist's Toolkit: Key Reagents & Materials
| Item | Function / Purpose |
|---|---|
| Deactivated Glass Wool | Liner packing in GC inlets; promotes complete vaporization of the sample and traps non-volatile residues [22]. |
| PEEK Cannulas & DLC Coatings | Inert alternatives to stainless steel for dissolution apparatus components (paddles, shafts, cannulas) to prevent drug adsorption [24]. |
| Enzymes (Pepsin, Pancreatin) | Added to dissolution media to digest cross-linked gelatin in capsule shells, ensuring the capsule contents are released [25]. |
| Marrene Tubing | A specific type of tubing for peristaltic pumps in automated dissolution samplers, chosen for its low binding properties for certain drugs [24]. |
| Performance Verification Standards | USP-calibrated tablets (e.g., prednisone) used in the "chemical calibration" of dissolution apparatus to ensure system suitability [26]. |
Proven Cleaning Protocols and Best Practices for Pharmaceutical QA/QC
Step-by-Step Guide to Safe Window Inspection and Removal
Within spectrometer systems, optical windows serve as critical interfaces, protecting sensitive internal optics from the external environment while allowing light transmission for accurate measurements. Contamination or damage to these windows is a prevalent cause of signal degradation, leading to poor sensitivity, analytical drift, and unreliable data [11] [27]. This guide provides a systematic, question-and-answer format for the safe inspection, cleaning, and handling of spectrometer windows to maintain optimal instrument performance in research and drug development.
FAQs on Spectrometer Window Contamination
1. What are the common symptoms of a dirty or contaminated spectrometer window?
The symptoms often include a gradual drift in instrument calibration, necessitating more frequent recalibrations [11]. Analytically, you may observe consistently low or unstable readings for certain elements, particularly those measured at lower wavelengths [11]. A general loss of signal intensity and poor reproducibility of results on the same sample are also key indicators [11].
2. How can I visually inspect my spectrometer's windows for contamination?
Begin by turning off the spectrometer and disconnecting the power to ensure safety [17] [28]. Use a bright, oblique light source to illuminate the window surfaces. Look for signs of dust, fingerprints, oily films, or any discoloration [11]. For more advanced analysis, techniques like Laser-Induced Breakdown Spectroscopy (LIBS) can be used to detect and quantify trace surface contaminants that are not visible to the naked eye [27].
3. What is the safest method to clean optical windows?
The universal rule for optical windows is to avoid physical contact. Never wipe a window, as this can scratch the soft optical material [17] [28]. For dust, use a gentle stream of clean, dry, oil-free air or nitrogen to blow the particles away [17] [28]. If a more thorough cleaning is necessary, it must be performed with extreme caution using specialized protocols for the specific window material (see Experimental Protocols below). Manufacturer guidelines consistently warn against allowing any liquid to come into contact with optical components within the sample compartment [17] [28].
4. My spectrometer has poor sensitivity after cleaning. What could have gone wrong?
The most likely cause is damage to the window during cleaning. Scratching from abrasive cloths or chemical etching from inappropriate solvents can permanently degrade optical performance [29]. Another possibility is the introduction of a new contaminant, such as residue from a cleaning solvent or oils from skin contact if the window was handled directly [11] [29]. Always use forceps or lint-free gloves when handling optical components [30].
5. When should a window be removed or replaced instead of cleaned?
Consider replacement if visual inspection reveals any scratches, pits, or cracks on the window surface [29]. If sensitivity does not improve after a safe cleaning procedure, the window may have sustained permanent damage or the issue may lie elsewhere in the optical path [31]. Replacement is also necessary if the window is fractured, as this will completely compromise the instrument's vacuum and optical integrity [31].
Experimental Protocols
Protocol 1: Routine Inspection and Dry Cleaning of Optical Windows
This non-invasive method is the first and most frequent step in window maintenance.
- Objective: To safely remove loose particulate contamination without risking damage to the window.
- Materials Needed: Lint-free nylon gloves [30], a source of clean, dry, oil-free compressed air or nitrogen [17] [28].
- Procedure:
- Power down the spectrometer and disconnect it from the main power supply [17] [28].
- Don lint-free gloves to prevent transferring skin oils to the instrument [30].
- Open the sample compartment to access the optical windows.
- Visually inspect the windows using an oblique light source.
- Using the stream of compressed air or nitrogen, gently blow across the window surface to dislodge dust. Do not allow the air nozzle to touch the window.
- Close the compartment and reconnect the power.
Protocol 2: Acid Washing of Calcium Fluoride (CaF₂) Windows
This aggressive cleaning method should be used sparingly and only for severe organic contamination on CaF₂ windows, as it can cause pitting [29].
- Objective: To remove tenacious organic contaminants from CaF₂ windows via oxidation.
- Materials Needed:
- Procedure:
- Prepare the acid wash: In a fume hood, dissolve a few small crystals (≈5) of KMnO₄ into a small beaker containing no more than 20 mL of sulfuric acid. The solution should turn green, not dark green. CAUTION: This is a strong oxidizer and can cause fire or explosion. [29]
- Clean the window: Using forceps, gently immerse one CaF₂ window into the permanganic acid for no more than 10-15 seconds [29].
- Rinse: Remove the window and immediately place it into a tube halfway filled with water. Repeat for the second window. Then, transfer both windows to a second tube with clean water for a more thorough rinse [29].
- Neutralize waste: Carefully pour the contents of the first rinse tube and the spent acid into a large beaker of water. Slowly add soda ash to neutralize the solution before disposal [29].
- Final rinse and dry: Rinse the windows thoroughly with deionized water and dry completely using a stream of pressurized air [29].
Data Presentation
Table 1: Common Contaminants and Their Impact on Optical Properties
| Contaminant Type | Source | Primary Impact on Signal |
|---|---|---|
| Fingerprints, Skin Oils [11] [17] | Improper handling | Scattering, reduced transmission, introduces hydrocarbons for analysis [11] |
| Polishing Residues [27] | Manufacturing process | Can alter the effective index of refraction, causing measurement drift [27] |
| Dust & Particulates [32] | Environment | Light scattering, increased haze, potential for localized heating [32] |
| Rubidium Silicate Layer [32] | Chemical reaction in vapor cells | Strong absorption, significant loss of transparency, wavefront distortion [32] |
| Molecular Film (Outgassing) [33] | Non-metallic materials (seals, O-rings) | Increased haze, reduced transmission over time [33] |
Workflow Visualization
The following diagram illustrates the logical decision-making process for inspecting and addressing window-related issues in a spectrometer.
The Scientist's Toolkit
Table 2: Essential Materials for Window Inspection and Cleaning
| Item | Function | Application Notes |
|---|---|---|
| Lint-Free Gloves [30] | Prevents transfer of skin oils and particulate matter to optical surfaces during handling. | Nylon or nitrile gloves are suitable. Avoid powdered gloves. |
| Compressed Air / Nitrogen [17] [28] | Removes loose, particulate contamination without physical contact with the window. | Must be clean, dry, and oil-free. Use a gentle stream. |
| Forceps [29] | Allows for safe handling of small or fragile windows during cleaning procedures. | Use tips coated with a soft, non-scratching material. |
| Sulfuric Acid & KMnO₄ [29] | Forms a potent oxidizing solution (permanganic acid) for removing organic contaminants from CaF₂. | Highly hazardous. Use only in a fume hood with full PPE for brief immersion. |
| Micro Mesh Abrasive Sheets [30] | Provides a fine, graded abrasive for hand-polishing metal source components (not the optical windows themselves). | Used for restoring a mirror finish on stainless steel parts in mass spectrometer sources. |
| Solvents (e.g., High-Purity Methanol) | Can be used for cleaning certain non-optical metal parts and for final rinsing in some protocols. | Never use on optical windows unless specified by the manufacturer, as solvents can damage coatings. |
Within the context of research on troubleshooting poor spectrometer sensitivity, maintaining pristine optical components is a critical factor for data integrity. Dirty windows on spectrometers are a common source of analytical drift, increased recalibration frequency, and poor sensitivity, ultimately compromising experimental results [11]. This guide provides targeted troubleshooting and protocols for selecting cleaning solvents to effectively restore and preserve optical performance.
Troubleshooting Guides & FAQs
How does a dirty optical window affect my spectrometer's sensitivity?
A dirty window directly compromises sensitivity by reducing light throughput and causing scattering, which leads to signal loss and increased noise [11]. The instrument's analysis will begin to drift, requiring more frequent recalibration and resulting in poor or inconsistent analytical readings [11]. For elements measured at lower wavelengths, such as Carbon, Phosphorus, and Sulfur, this can manifest as consistently low readings [11].
What are the symptoms of a contaminated sample, and how can I prevent it during preparation?
Contamination presents as inconsistent or unstable results and can originate from improper sample handling [11]. To prevent it:
- Regrind Samples: Use a new grinding pad to remove plating, carbonization, or protective coatings before analysis [11].
- Avoid Re-contamination: Do not quench samples in water or oil, and avoid touching the sample with your fingers, as skin introduces oils and grease [11].
- Ensure Homogeneity: Inadequate sample preparation causes heterogeneity, which is a primary source of spectroscopic analytical errors [34].
What is the proper methodology for cleaning spectrometer windows?
The following protocol outlines the essential steps for safe and effective cleaning. Always prioritize manufacturer instructions, as specific coatings or materials may require specialized care.
How can I verify that my cleaning procedure was successful?
Post-cleaning verification is crucial. A successful cleaning is confirmed by:
- Visual Inspection: The window should be free of any visible streaks, film, or residue when examined under a bright light [1].
- Instrument Performance: The spectrometer should demonstrate a stable baseline and a return to expected sensitivity levels during a system performance check [1]. Advanced verification can involve techniques like Raman spectroscopy to confirm the absence of contaminant residues, as demonstrated in laser cleaning studies [32].
Experimental Protocols
Detailed Methodology: Verification of Cleaning Efficacy via UV Spectrometry
This protocol is adapted from in-line cleaning validation studies in biopharmaceutical manufacturing and can be applied to verify the cleanliness of rinse solvents or surfaces in a lab context [35].
- Objective: To quantify the removal of residual contaminants or cleaning agents from a surface by analyzing the rinse solvent using UV spectroscopy.
Materials and Equipment:
- UV spectrophotometer
- High-purity quartz cuvettes (e.g., 10 mm pathlength) [35]
- Lint-free wipes
- High-purity solvents (see table below)
- Type 1 (Ultrapure) water
Procedure:
- Establish a Blank Baseline: Using a meticulously cleaned cuvette, record the UV spectrum (e.g., from 190–400 nm) of your clean rinse solvent (e.g., Type 1 water) as a blank [35].
- Generate a Calibration Curve: Prepare a series of standard solutions of the target contaminant (e.g., a specific cleaning agent or a model soil like Bovine Serum Albumin) in the rinse solvent. Measure the absorbance of each standard at a predetermined wavelength (e.g., 220 nm for many cleaners) and plot concentration versus absorbance to create a calibration curve [35].
- Sample the Rinse Solvent: After the cleaning procedure, collect the final rinse solvent used on the component.
- Analyze the Sample: Measure the absorbance of the collected rinse solvent at the same wavelength used for calibration.
- Quantify Residue: Calculate the concentration of the residual contaminant in the rinse sample using the calibration curve. A concentration below a pre-defined acceptance limit (e.g., based on the instrument's Limit of Detection (LOD)) confirms effective cleaning [35].
Data Interpretation: The method's sensitivity can be enhanced by using a cuvette with a longer pathlength, as absorbance is proportional to pathlength per the Beer-Lambert law [35]. This approach provides quantitative, rather than just visual, confirmation of cleaning success.
The Scientist's Toolkit
Research Reagent Solutions for Spectroscopic Cleaning
The following table details key materials essential for effective and safe cleaning of spectroscopic components.
| Item | Function & Rationale |
|---|---|
| High-Purity Solvents | To dissolve and remove specific contaminants without leaving residues. Isopropyl alcohol is effective for oils; acetone for organics. Always use spectroscopic or HPLC grade to prevent introducing new contaminants that can deposit on optics [36] [35]. |
| Lint-Free Wipes | To apply solvent and mechanically remove contamination without shedding fibers that can scatter light or scratch surfaces [37]. |
| Spectrophotometric Grade Solvents | For critical applications where ultra-high optical clarity is required. These are specially purified to have ultra-low absorbance and background interference, ensuring they do not contribute to spectral noise [36]. |
| Compressed Dust-Off Gas | To remove loose particulate matter from surfaces before wet cleaning, preventing abrasive scratches [1]. |
| Quartz Cuvettes | Required for UV range verification methods (<340 nm). Standard glass or plastic cuvettes absorb UV light and will yield incorrect results [1]. |
Key Compatibility and Purity Considerations
The core principle of selecting a cleaning solvent is compatibility. The solvent must effectively dissolve the contaminant without damaging the optical substrate (e.g., quartz, glass, specialized coatings). Simultaneously, the purity of the solvent is non-negotiable. Low-grade solvents contain volatile impurities that can evaporate and form a thin film on the optical surface, directly causing the sensitivity issues you are trying to resolve [36] [1]. Always consult your spectrometer's manufacturer guidelines for approved cleaning agents and methods to avoid damaging sensitive components.
Within spectrometer-based research, maintaining optimal instrument sensitivity is paramount. A frequent, yet often overlooked, cause of declining sensitivity is contaminated optical surfaces. Dirty windows scatter and absorb light, leading to signal loss, analytical drift, and poor reproducibility [11]. This guide details proper cleaning techniques to preserve optical integrity, ensure measurement accuracy, and maintain the performance of your spectroscopic systems.
FAQs: Optical Contamination and Spectrometer Sensitivity
Q1: How does a dirty optical window specifically affect my spectrometer's sensitivity?
Contamination on optical windows, such as dust, oils, or residues, directly interferes with light transmission. This leads to:
- Signal Loss: Dirt blocks or scatters light, reducing the intensity that reaches the detector [11].
- Increased Noise: Inconsistent contamination can cause signal drift and elevated baseline noise [11].
- Inaccurate Calibration: The instrument may require more frequent recalibration, and analyses can show poor precision and unstable results [11].
Q2: What are the two critical windows on a spectrometer that require regular cleaning?
According to troubleshooting guides for optical emission spectrometers (OES), the two windows that need regular attention are [11]:
- The window located in front of the fiber optic cable.
- The window located in the direct light pipe.
Q3: Are all optical wipes created equal?
No, wipes are designed for different purposes and cleanliness levels. The table below summarizes key types:
Table 1: Types of Optical Cleaning Wipes and Their Applications
| Type | Key Features | Common Applications |
|---|---|---|
| Lens Tissue [38] [39] | Extremely soft, premium grade, low-lint, and free from contaminants and adhesives. Meets specific government specifications (e.g., A-A-50177B). | Manual cleaning of high-grade optics; wrapping optics for storage. |
| Optical Cleaning Pads [38] | Pure cotton, non-woven, low-lint, and highly absorbent. Larger size allows for a single, continuous wipe. | Cleaning larger or curved optical surfaces like lenses. |
| Precision Lens Cleaning Wipes [38] | Low-lint, durable materials like polypropylene. Some versions are pre-saturated with a 70% IPA/30% deionized water solution [39]. | Quick, convenient cleaning of optics in labs and production environments. |
| Microfiber Cloths [39] | Durable, reusable, and employ advanced microfiber technology for effective debris and moisture removal. | General cleaning of uncoated optics; suitable for delicate surfaces. |
Essential Cleaning Protocols
General Step-by-Step Guide for Cleaning Optical Windows
Diagram: Logical workflow for properly cleaning spectrometer optics.
- Inspect: Visually examine the optic under good lighting. Use a magnifier if necessary to identify contamination type (dust, fingerprints, etc.) [1].
- Dry Removal: Use a can of compressed gas or a duster to remove loose, dry particulate matter. This prevents scratching during the wet-cleaning step [38].
- Apply Solvent: Moisten a fresh, lint-free wipe or cotton-tipped applicator with an appropriate solvent (e.g., high-purity isopropyl alcohol, methanol, or lens-cleaning fluid). Do not pour solvent directly onto the optic [38].
- Wipe Gently: While holding the optic securely, gently wipe the surface using a circular motion, working from the center outward. Use minimal pressure [1].
- Dry: Use a fresh, dry, lint-free wipe or swab to gently remove any remaining solvent, preventing residue formation [1].
- Final Inspection: Re-inspect the optic to ensure it is clean and free of streaks, fibers, and residue.
Specialized Cleaning Methods
- Polymer Cleaning: For delicate optics or stubborn nanoparticles, a special polymer solution (e.g., First Contact) can be applied. It forms a film that encapsulates contaminants, which is then peeled off, lifting the debris away without mechanical contact [38].
- Ultrasonic Cleaning: This method uses high-frequency sound waves in a liquid bath to remove contaminants. The choice of cleaning liquid is critical and depends on the contaminant and the optic's material compatibility [40]. Common liquids include:
- Water-based solutions with detergents for general cleaning.
- Solvent-based solutions (e.g., isopropyl alcohol) for oils and greases [40].
- Deionized water is often recommended as a final rinse to prevent water spots.
The Scientist's Toolkit: Essential Cleaning Materials
Table 2: Key Research Reagent Solutions for Optical Cleaning
| Item | Function | Key Considerations |
|---|---|---|
| Lint-Free Wipes [38] [39] | To physically remove contamination without introducing new particles (lint). | Select grade (commercial, industrial) based on optical sensitivity. |
| Cotton-Tipped Applicators [38] | To clean confined areas or small optical surfaces where wipes are impractical. | Ensure the cotton is securely attached to the stick. |
| High-Purity Solvents (Isopropyl Alcohol, Methanol) [38] [40] | To dissolve organic contaminants like oils and fingerprints. | Use spectroscopic grade to avoid residue. Test compatibility with optical coatings. |
| Compressed Gas Duster [38] | To remove dry, loose abrasive particles before wet cleaning. | Hold the can upright to avoid ejecting liquid propellant. |
| Polymer Cleaning Kit [38] | To safely clean fragile optics or remove nanoparticles without scratching. | Follow manufacturer instructions for application, drying, and peeling. |
Safety and Handling of Optical Components
Many materials used in spectrometer windows (e.g., in FTIR) are toxic and require careful handling [41].
- Hazardous Materials: Be aware of common but hazardous optical materials:
- KRS-5: Contains thallium. Do not polish as the powder is highly toxic if inhaled [41].
- Zinc Selenide (ZnSe): Reacts with acids to produce toxic hydrogen selenide gas. Use only with samples in a pH range of 6.5 to 9.5 [41].
- Barium Fluoride (BaF2): Reacts with acid to produce harmful hydrogen fluoride gas [41].
- Procedures: Always consult Material Safety Data Sheets (MSDS) for handling, storage, and disposal information. Store poisonous or deleterious substances in locked cabinets with proper labeling [41].
Establishing a Preventive Maintenance Schedule for Continuous Performance
Troubleshooting Guides
Guide 1: Troubleshooting Poor Spectrometer Sensitivity Due to Dirty Windows
Q: How do dirty windows affect my spectrometer's sensitivity and results?
A: Dirty windows on a spectrometer directly lead to a loss of light intensity reaching the detector. This manifests as instrumental drift, necessitating more frequent recalibration and resulting in poor analysis readings and unreliable data [11]. In the context of your research on sensitivity, this is a primary physical cause of signal degradation.
Q: Which windows are critical to clean, and what are the symptoms of contamination?
A: Two primary windows require regular attention [11]:
- The window in front of the fiber optic cable.
- The window in the direct light pipe. Symptoms include consistent downward drift in calibration curves, lower-than-expected signal intensity (affecting sensitivity), and increased noise in measurements [11].
Q: What is the step-by-step protocol for cleaning spectrometer windows?
A: While specific procedures can vary by instrument, the general methodology is as follows.
- Step 1: Power off the spectrometer and allow it to cool if it has been in recent use.
- Step 2: Gently remove the window or access cover according to the manufacturer's instructions. Handle components with gloves to avoid transferring oils.
- Step 3: Clean the optical surfaces using lint-free wipes or swabs specified for optics [42].
- Step 4: Use a suitable solvent (e.g., methanol, isopropyl alcohol) as recommended by the manufacturer. Apply the solvent to the wipe, not directly onto the window, to prevent seepage into other components.
- Step 5: Wipe the optical surface gently in a circular motion. Do not apply excessive pressure.
- Step 6: Inspect the window under a light for any remaining smudges or particles. Repeat cleaning if necessary.
- Step 7: Re-install the window carefully, ensuring proper alignment and sealing.
Guide 2: General Spectrophotometer Troubleshooting for Sensitivity Issues
Q: My readings are unstable or drifting. What should I check first?
A: Instability can have several common causes. Follow this troubleshooting guide [1]:
| Problem | Possible Cause | Recommended Solution |
|---|---|---|
| Unstable/Drifting Readings | Instrument lamp not stabilized. [1] | Allow a 15-30 minute warm-up time before use. [1] |
| Sample is too concentrated. [1] | Dilute sample to an absorbance within the ideal 0.1–1.0 AU range. [1] | |
| Air bubbles in the sample. [1] | Gently tap the cuvette to dislodge bubbles. [1] | |
| Environmental vibrations or drafts. [1] | Move the instrument to a stable, vibration-free location. [1] | |
| Cannot Set 100% Transmittance | Light source (lamp) is failing. [1] [43] | Check lamp usage hours; replace if near or beyond its rated life. [42] [1] |
| Dirty or misaligned internal optics. [1] | Clean external windows; for internal optics, contact qualified service personnel. [11] [1] | |
| Negative Absorbance Readings | The blank was "dirtier" than the sample. [1] | Always use the same cuvette for blank and sample measurements. [1] |
| The cuvette was dirty during blanking. [1] | Re-clean the cuvette and perform a new blank measurement. [1] |
Q: My instrument fails to zero. Is this a hardware failure?
A: Not necessarily. First, check these points [1]:
- Sample Compartment Lid: Ensure the lid is fully closed, as external light leakage will prevent zeroing.
- Humidity: High humidity can affect internal components. Ensure the instrument is in a controlled environment and that any built-in desiccant is still active.
- Reset: Perform a power cycle by turning the instrument off and on again.
Frequently Asked Questions (FAQs)
Q: How often should I replace the light source (lamp) on my UV-Vis spectrophotometer?
A: Lamps have a finite lifespan. Deuterium (D2) and Tungsten-Halogen (WI) lamps typically require replacement after approximately 2,000 hours of use, even if they are still illuminating, as their output degrades [42]. For some process analyzers, a 6-month replacement schedule for tungsten-halogen lamps is recommended to prevent unexpected failure and ensure peak performance [44]. Consistently low light intensity or failure to set 100% transmittance are key indicators of a failing lamp [1].
Q: What is the single most important practice for ensuring consistent, sensitive measurements?
A: Proper cuvette handling and blanking. Always [1]:
- Handle cuvettes by the frosted or ribbed sides only.
- Wipe clear optical surfaces with a lint-free cloth before each measurement.
- Use the exact same cuvette for both your blank and sample measurements.
- Ensure your blank solution is the same solvent or buffer as your sample.
Q: We use an FTIR. Are there special safety concerns with window materials?
A: Yes. Certain common FTIR window materials require specific safety precautions due to their toxicity [41]. Key examples are listed in the table below.
| Material | Key Safety Hazards | Handling & Disposal Precautions |
|---|---|---|
| KRS-5 (Thallium Bromide/Iodide) | Toxic; inhaling polishing powder can cause intoxication. [41] | Users must not attempt to polish. Subject to MSDS requirements. [41] |
| Zinc Selenide (ZnSe) | Poisonous substance; reacts with acids to produce toxic hydrogen selenide. [41] | Use only with samples in pH range 6.5-9.5. Requires controlled storage and disposal as a poisonous substance. [41] |
| Barium Fluoride (BaF2) | Deleterious substance; produces harmful hydrogen fluoride gas if heated or in contact with acid. [41] | Avoid contact with acids. Requires controlled storage and disposal as a deleterious substance. [41] |
Always consult the Material Safety Data Sheet (MSDS) for specific handling, storage, and disposal instructions [41].
Preventive Maintenance Schedule and Materials
A proactive maintenance schedule is crucial for preventing sensitivity issues and unplanned downtime. The following table provides a general guideline. Always refer to your specific instrument's manual for the manufacturer's recommended procedures.
Preventive Maintenance Schedule
| Component | Maintenance Task | Frequency | Key Performance Indicator / Rationale |
|---|---|---|---|
| Light Source | Inspect output; Replace lamp [42] [44] | Every 2,000 hours or 6 months (varies by instrument) [42] [44] | Unstable baseline; failure to set 100%T; noisy spectra [1] |
| Optical Windows | Clean with lint-free wipes and appropriate solvent [11] [42] | Weekly or as needed (visual inspection) | Signal drift; need for frequent recalibration [11] |
| Cuvettes | Inspect for scratches/contamination; Clean [42] [1] | Before every use | Scratches scatter light; residue causes contamination [42] |
| Environmental Check | Ensure stable, vibration-free, dust-free environment [42] [1] | Daily (placement) | Drifting readings; unstable signal [1] |
| Full Calibration | Perform multi-point calibration with standards | Monthly or Quarterly (based on use and requirements) | Ensures quantitative accuracy and compliance [11] |
| Professional Service | Full optical inspection and alignment by qualified technician [42] | Annually | Maintains instrument specification and data integrity [42] [45] |
The Scientist's Toolkit: Essential Research Reagent Solutions
| Item | Function & Importance in Maintenance |
|---|---|
| Certified Quartz Cuvettes | Essential for UV range measurements (below ~340 nm). Must be free of scratches and cracks to avoid light scattering and erroneous absorbance values [42] [1]. |
| Lint-Free Wipes / Swabs | Used for cleaning optical windows and cuvettes without leaving fibers that can scatter light or cause contamination [42]. |
| Optical Cleaning Solvent | High-purity solvents (e.g., methanol, isopropanol) for dissolving contaminants on optical surfaces without leaving residues [41]. |
| Deuterium (D2) & Tungsten-Halogen Lamps | Standard light sources for UV-Vis spectrophotometers. Their timely replacement is critical for baseline stability and signal intensity [42]. |
| Certified Calibration Standards | Stable, traceable materials (e.g., holmium oxide for wavelength calibration, neutral density filters for photometric accuracy) used to verify instrument performance [43]. |
| Source Mirror | A consumable optical component in the lamp compartment that ensures optimal reflection and light intensity; may require cleaning or replacement during PM [42]. |
Workflow and Procedures
Experimental Protocol: Verifying Sensitivity and Quantitation Limits
This protocol, adapted from pharmaceutical cleaning validation, provides a detailed methodology to verify that your spectrometer can quantitate down to the required sensitivity level, which is critical after performing maintenance or when establishing a new method [46].
Objective: To determine the quantitation limit of an analyte on your spectrometer, ensuring it can detect residues at the required sensitivity.
Materials:
- Standard sample of the analyte (e.g., acetylsalicylic acid, isopropylantipyrine).
- Appropriate solvent (e.g., methanol, purified water).
- Volumetric flasks and pipettes.
- Certified quartz cuvettes [1].
Procedure:
- Preparation of Standard Solutions: Prepare a series of standard solutions of the analyte at known concentrations (e.g., 8, 20, 40, 80, 160, 400 mg/L for acetylsalicylic acid) [46].
- Absorbance Scan: Measure the absorption spectrum of the most concentrated standard to identify the wavelength of greatest absorption (λ_max).
- Create Calibration Curve: At the λ_max, measure the absorbance of each standard solution in the series. Plot a graph of absorbance versus concentration and determine the slope (S) of the calibration curve.
- Measure Blank Noise: Repeat the measurement of a blank solution (pure solvent) at least 10 times at the λ_max. Calculate the standard deviation (σ) of these blank absorbance values.
- Calculate Quantitation Limit: The quantitation limit (QL) is calculated as follows [46]:
- QL = 10 × σ / S
- This gives the concentration that corresponds to an absorbance signal ten times the noise level of the blank.
Troubleshooting Workflow Diagram
The following diagram illustrates a logical workflow for diagnosing the root cause of poor spectrometer sensitivity, starting with the most common and easily addressable issues.
FAQs: Spectrometer Cleaning and Compliance
Q1: How does a dirty spectrometer window affect my data and compliance? Dirty windows on a spectrometer lead to instrument analysis drift and poor analysis readings, necessitating more frequent recalibration [11]. From a compliance perspective, this drift violates the core GLP and GMP principles of data integrity and reliability. Inconsistent results due to poor maintenance can make your data inadmissible for regulatory submissions (GLP) or call into question the quality of a manufactured batch (GMP) [47] [48].
Q2: What is the documented evidence that cleaning is needed? The need for cleaning is evidenced by specific performance issues in your data. Monitor for consistent analytical drift or a sudden increase in the need to recalibrate the instrument [11]. In a GMP environment, this would be tracked against established instrument performance qualifications. Visually, a dirty white calibration disk that is no longer shiny and has fingerprints or particles is clear, objective evidence that must be addressed [14].
Q3: What are the critical cleaning steps for the external optical windows? The cleaning procedure must be documented in a Standard Operating Procedure (SOP). Key steps include:
- White Cal Disk: Use a clean, lint-free, soft cloth. Wipe gently in circular motions, avoiding scratches. For excessive dirt, denatured alcohol may be used [14].
- Aperture/Sample Area: Use canned air (not from a compressor, to avoid oil/moisture contamination). Attach the tube extension, insert it horizontally into the aperture, and use short bursts of air 2-3 times [14].
- General Cuvette Handling: Always handle cuvettes on the frosted or ribbed sides. Wipe the clear optical surfaces with a clean, lint-free cloth before each measurement to prevent fingerprints and smudges [1].
Q4: How do I document cleaning for a GLP/GMP audit? Cleaning and maintenance must be fully documented to ensure the process is reproducible, controlled, and validated [47]. Your documentation should include:
- An SOP for the cleaning procedure.
- A logbook recording each cleaning event, including the date, technician name, and the reason for cleaning (e.g., routine schedule, performance drift).
- Records linking instrument performance checks before and after cleaning to demonstrate effectiveness.
Troubleshooting Guide: Poor Sensitivity Due to Dirty Optics
| Problem | Possible Causes | Recommended Solutions & Compliance Actions |
|---|---|---|
| General Analysis Drift & Poor Results | Dirty optical windows (in front of fiber optic or in direct light pipe) [11]. | Action: Clean the windows per SOP [11].Compliance: Document the performance issue and the corrective action in the instrument log. |
| Inconsistent Readings Between Replicates | Cuvette contamination (fingerprints, residues) or inconsistent orientation [1]. | Action: Clean cuvette with lint-free cloth; always use the same orientation [1].Compliance: Use an SOP for sample preparation and cuvette handling. |
| Failed Blank/Calibration | Contaminated or misaligned optics, or a cuvette holder that is not properly seated [1]. | Action: Clean external optics; reseat the cuvette holder. If problem persists, it may require professional servicing [1].Compliance: Document the failure and all troubleshooting steps. Servicing must be performed by a qualified provider. |
Experimental Protocol: Cleaning Spectrometer External Windows
Objective: To restore and maintain spectrometer sensitivity by removing contamination from external optical surfaces without damaging the components, in compliance with GLP/GMP documentation requirements.
Materials (Research Reagent Solutions)
| Item | Function / Explanation |
|---|---|
| Lint-free, soft cloth | For physically removing particles and smudges without scratching delicate optical surfaces or leaving fibers behind [14]. |
| Canned Air | Used to blow dust and loose particles from the instrument's aperture. Critical: Do not use compressor air, which can contain oil or moisture and cause further contamination [14]. |
| Denatured Alcohol (optional) | A solvent for removing stubborn, greasy contamination. Use sparingly and only if recommended by the instrument manufacturer [14]. |
| Powder-free gloves | Worn to prevent transferring oils and particulates from hands to the optical surfaces or calibration standards during cleaning [49]. |
Methodology
- Initiation & Documentation: Note the date, time, instrument ID, and reason for cleaning (e.g., "routine maintenance" or "corrective action for observed drift") in the equipment logbook.
- Power Down: Turn off the spectrometer, if applicable, to ensure safety.
- White Calibration Disk Cleaning:
- Visually inspect the disk for fingerprints, dust, or other contamination [14].
- Using a clean, lint-free cloth, gently wipe the surface in a circular motion.
- Apply minimal pressure to avoid scratches.
- If necessary, slightly moisten a corner of the cloth with denatured alcohol and repeat, then dry with a clean portion of the cloth [14].
- Aperture Cleaning:
- Attach the plastic tube extension to the nozzle of the canned air can. Do not shake the can or turn it upside down [14].
- Gently insert the tube about one inch horizontally into the center of the instrument's aperture.
- Deliver 2-3 short bursts (approximately 2 seconds each) of air by pressing the button on the can [14].
- Carefully remove the tube.
- Cuvette Area Inspection: If accessible, visually inspect the sample compartment and cuvette holder for debris. Use canned air to gently remove any loose particles.
- Verification & Completion:
- Power the instrument on and allow it to warm up as per the manufacturer's instructions (typically 15-30 minutes) [1].
- Perform a calibration and/or analyze a known standard.
- Document the completion of the cleaning and the result of the verification test in the logbook. If performance is restored, the action is closed.
Workflow Diagram: Compliance-Driven Cleaning Protocol
Systematic Troubleshooting to Isolate and Resolve Sensitivity Loss
Troubleshooting Guide: Diagnosing Poor Spectrometer Sensitivity
What are the key symptoms of a dirty optical window in a spectrometer?
The primary symptoms of dirty optical windows are a gradual drift in instrument analysis and consistently poor analysis readings [11]. You may find that the spectrometer requires more frequent recalibration to maintain accuracy [11]. These symptoms occur because contamination on the windows attenuates or scatters the light entering the optical system, reducing signal intensity.
How can I conclusively verify that the optical windows are dirty?
Confirm the issue by visually inspecting and cleaning the two critical windows that require regular maintenance [11]:
- Window 1: Located in front of the fiber optic cable.
- Window 2: Located in the direct light pipe [11].
A clean, lint-free cloth is suitable for cleaning these windows. If sensitivity improves after cleaning, a dirty window was the root cause.
What is the step-by-step diagnostic process?
Follow this logical flowchart to diagnose the cause of poor spectrometer sensitivity. The process helps distinguish a simple dirty window from more complex instrument faults.
What is the detailed experimental protocol for cleaning and verification?
Objective: To restore spectrometer sensitivity by properly cleaning the optical windows and verifying system performance.
Materials Needed:
- Lint-free cleaning cloths
- Appropriate solvent (e.g., high-purity isopropyl alcohol)
- Recalibration standard samples
- Flat, homogeneous test sample
Methodology:
- System Shutdown: Power down the spectrometer if safe to do so according to the manufacturer's instructions.
- Window Access: Locate and gain safe access to the two optical windows: the window in front of the fiber optic and the window in the direct light pipe [11].
- Cleaning: Gently wipe the optical windows using a lint-free cloth lightly moistened with solvent. Avoid abrasive materials or excessive pressure [1].
- System Restart: Power the instrument on and allow the lamp to warm up for at least 15-30 minutes to stabilize [1].
- Performance Verification:
- Prepare a clean, flat recalibration sample by grinding or machining it to ensure a flat surface [11].
- Perform a recalibration following the software's specific sequence.
- Analyze the first recalibration standard five times in succession using the same burn spot.
- Calculate the Relative Standard Deviation (RSD). The RSD for any recalibration standard should not exceed 5. If it does, delete the results and repeat the process [11].
The Scientist's Toolkit: Essential Research Reagent Solutions
| Reagent/Material | Function in Troubleshooting |
|---|---|
| Lint-Free Cleaning Cloths | Removes particulate contamination from optical surfaces without leaving residues. |
| High-Purity Solvents | Dissolves and removes organic films or grease from optical windows. |
| Recalibration Standards | Validates instrument performance and analytical accuracy after maintenance. |
| New Grinding Pads | Prevents cross-contamination during sample preparation by removing coatings [11]. |
What if cleaning the windows doesn't solve the problem?
If sensitivity remains poor after cleaning, the issue likely lies elsewhere. This diagnostic flowchart helps rule out other common problems. Consult the following table to understand other potential faults and their unique symptoms.
| Potential Fault | Key Differentiating Symptoms |
|---|---|
| Vacuum Pump Failure [11] | Constant low readings for Carbon (C), Phosphorus (P), Sulfur (S); pump is noisy, hot, smoking, or leaking oil. |
| Lens Misalignment [11] | Consistently low light intensity for all analyses; light does not focus correctly on the sample point. |
| Contaminated Argon or Sample [11] | Unstable or inconsistent results; a white or milky appearance to the burn. |
| Unstable Instrument | Drifting readings even after cleaning; can be caused by insufficient warm-up time (less than 30 minutes) or environmental vibrations [1]. |
In the context of research on poor spectrometer sensitivity, accurately diagnosing the root cause is the first critical step toward resolution. Three of the most common culprits are dirty optical windows, an aging light source, and a degrading detector. While they all manifest as a loss of sensitivity, their specific symptoms, affected spectral regions, and troubleshooting methods differ significantly. This guide provides a clear, actionable framework to differentiate between these issues and restore your instrument to optimal performance.
FAQ: Can these problems occur simultaneously?
Yes. Especially in older instruments or those under intense use, it is possible for multiple issues to be present at once. For instance, a spectrometer with an aging lamp may also have contaminated windows, compounding the loss of signal. The recommended approach is to address the simplest and most common issues first—such as cleaning windows and replacing the lamp—before moving on to more complex detector diagnostics.
Dirty Windows or Lenses
Core Concept and Symptoms
Optical windows protect the sensitive internal components of the spectrometer, such as the fiber optic cable or the light pipe. When these windows become contaminated with dust, oil, or residue, they physically block or scatter light, leading to a systematic loss of signal [11].
Key Characteristics:
- Primary Symptom: A gradual, consistent drift in calibration and a general decline in analysis quality across multiple wavelengths [11].
- Effect on Signal: The contamination acts as a neutral density filter, attenuating the light signal. This often necessitates more frequent recalibration of the instrument [11].
- Visual Inspection: In some cases, contamination may be visible upon careful examination of the window surfaces.
Diagnostic and Resolution Workflow
The following chart outlines the process for diagnosing and resolving issues related to dirty optics, lamp aging, and detector failure.
Experimental Verification: A simple test involves running a baseline or background scan with a clean, empty sample compartment. A stable but noisier-than-usual baseline across all wavelengths can indicate dirty optics. Comparing the current baseline to one saved when the instrument was known to be performing well can highlight increased noise and reduced overall signal [1].
Resolution: Regularly clean the windows according to the manufacturer's instructions using lint-free wipes and approved solvents [11] [50]. Establishing a scheduled maintenance program for cleaning can prevent this issue.
Lamp Aging
Core Concept and Symptoms
The light source (e.g., deuterium UV lamp, halogen visible lamp) is a consumable component. Over time, the lamp's output intensity decreases, particularly at the ends of its spectral range (often the UV for deuterium lamps), and becomes noisier [51] [52].
Key Characteristics:
- Primary Symptom: An increase in baseline noise and a failure to achieve 100% transmittance (or 0 absorbance) during the blanking procedure [1].
- Spectral Signature: The signal loss is often asymmetric. A classic sign is an abnormally weak or noisy signal in the UV region while the visible region remains relatively normal [52].
- Physical Evidence: In advanced cases, visual inspection of a cool deuterium lamp may reveal a dark patch or "solarization" on its quartz envelope, which filters out UV light [52].
Diagnostic and Resolution Workflow
Experimental Verification: Examine the instrument's background scan. For a UV-Vis instrument, look for a significant drop in the intensity of the deuterium lamp's output in the UV region (e.g., below ~400 nm) compared to historical scans [52]. The instrument's software may also log the number of hours the lamp has been in use.
Resolution: The definitive solution is to replace the aging lamp. To extend lamp life, turn off the lamp when the instrument is not in use, especially if you are only working in one spectral region (e.g., turn off the deuterium lamp if only doing visible analyses) [52].
Detector Issues
Core Concept and Symptoms
The detector converts light into an electrical signal. Degradation can occur over time due to wear, leading to a loss of responsiveness (decreased signal-to-noise ratio) [53] [54].
Key Characteristics:
- Primary Symptom: A gradual, uniform decrease in sensitivity for all samples over a period of months, often accompanied by an increased need to boost detector voltage to maintain signal levels [54].
- Effect on Signal: The signal-to-noise ratio drops, making it harder to distinguish low-concentration analytes from background noise [53].
- Diagnostic Test: Detector issues are often diagnosed by ruling out other causes and through specific performance tests, such as a detector optimization procedure [54].
Diagnostic and Resolution Workflow
Experimental Verification: For certain detectors, like the CEM (Channel Electron Multiplier) in mass spectrometers, a defined optimization procedure exists. This involves infusing a standard tuning solution and incrementally increasing the detector voltage while monitoring the signal intensity until an optimal percentage increase (e.g., 20-40%) is achieved [54].
Resolution: Depending on the instrument, resolution may involve optimizing detector parameters as per the manufacturer's protocol [54]. In cases of severe degradation, the detector itself may need to be replaced by a qualified service engineer.
The table below synthesizes the key quantitative and qualitative data for differentiating these three common issues.
| Symptom / Characteristic | Dirty Windows/Lenses | Lamp Aging | Detector Degradation |
|---|---|---|---|
| Primary Symptom | Calibration drift, poor analysis [11] | High baseline noise, fails to blank [1] | Gradual, uniform sensitivity loss [54] |
| Onset | Gradual | Gradual | Very gradual (months) [54] |
| Spectral Effect | General signal attenuation | Often wavelength-specific (e.g., weak UV) [52] | Uniform signal loss |
| Baseline | Stable but may be offset | Noisy & unstable [1] | Noisy, low signal-to-noise ratio [53] |
| Diagnostic Test | Visual inspection, baseline scan | Check lamp hours, background scan [52] | Detector optimization procedure [54] |
| Common Fix | Clean windows/lenses [11] | Replace lamp [52] | Optimize or replace detector [54] |
The Scientist's Toolkit: Essential Research Reagent Solutions
The following reagents and materials are essential for the diagnostic and maintenance procedures described in this guide.
| Reagent / Material | Function | Application Context |
|---|---|---|
| PTFE (Teflon) White Reference Tile | A stable, highly reflective material used for checking instrument repeatability and performance [53]. | Verifying spectrometer repeatability and detecting wavelength drift. |
| Holmium Oxide (Ho₂O₃) Filter | A wavelength calibration standard with sharp, known absorption peaks [51]. | Annual calibration to verify and adjust wavelength accuracy of the monochromator. |
| PPG Tuning Solution | A standard solution of polypropylene glycol used for detector optimization in mass spectrometers [54]. | Optimizing the CEM detector voltage in Triple Quad or QTRAP systems to restore sensitivity. |
| NIST-Traceable Absorbance Standards | Certified glass or solution filters with known absorbance values at specific wavelengths [51]. | Calibrating the photometric accuracy (absorbance scale) of UV-Vis spectrophotometers. |
| Lint-Free Wipes & Spectroscopic-Grade Solvents | Materials for safely cleaning optical surfaces without scratching or leaving residue [1] [50]. | Routine maintenance of cuvettes and external optical windows to prevent signal loss. |
FAQs: Troubleshooting Spectrometer Sensitivity
Q1: Why is performance verification necessary after cleaning spectrometer windows? Performance verification is crucial because improper cleaning can leave residues, cause micro-scratches, or misalign optical components. These issues can negatively impact sensitivity, lead to analytical drift, and produce unreliable data. Verification with Standard Reference Materials (SRMs) confirms that the cleaning process has restored the instrument to its optimal performance state and that subsequent experimental results are valid [11] [29].
Q2: What are the common signs that my spectrometer's windows need cleaning? Common symptoms indicating dirty optical windows include:
- Increased Calibration Drift: The instrument requires more frequent recalibration [11].
- Poor Analysis Readings: Results are inconsistent or do not match expected values for known samples [11].
- Reduced Signal Intensity: Overall signal is lower, which is particularly noticeable for low-abundance analytes [11].
- Inconsistent Replicates: Repeated measurements of the same sample show high variability [1].
Q3: Which specific elements or measurements are most affected by dirty windows or suboptimal sensitivity? The impact can be widespread, but elements measured at lower wavelengths, such as Carbon (C), Phosphorus (P), and Sulfur (S), are particularly vulnerable to issues like a poor vacuum or contaminated optics. A malfunction in the system can cause these low-wavelength signals to lose intensity or disappear entirely, leading to incorrect quantitative results [11].
Q4: How do Standard Reference Materials help in troubleshooting sensitivity issues? SRMs provide a known, reproducible signal that serves as a benchmark. By comparing the instrument's response to an SRM before and after a procedure like cleaning, you can:
- Quantify Improvement: Objectively measure the change in signal intensity or signal-to-noise ratio.
- Identify Residual Issues: Detect if cleaning introduced new problems, such as scattering from scratches.
- Ensure Quantification Accuracy: Verify that the instrument's calibration remains accurate for concentration measurements [55].
Experimental Protocol: Post-Cleaning Verification
This protocol outlines the steps to verify the performance of a spectrometer after cleaning its optical windows using Standard Reference Materials.
1. Objective: To confirm that the cleaning process has successfully restored spectrometer sensitivity and analytical accuracy without introducing adverse effects.
2. Materials and Equipment:
- Spectrometer with recently cleaned windows
- Appropriate Standard Reference Materials (SRMs)
- Required solvents for sample preparation (HPLC-grade recommended)
- Clean cuvettes or sample holders (e.g., quartz for UV measurements [1])
3. Pre-Cleaning Baseline Measurement (if possible):
- If instrument performance was monitored prior to cleaning, record the signal intensity and peak shape for a specific SRM under standard operating conditions. This provides a benchmark for comparison.
4. Post-Cleaning Verification Procedure:
- Step 1: Instrument Preparation. Allow the spectrometer lamp to warm up for at least 15-30 minutes to ensure stable output [1].
- Step 2: SRM Preparation. Prepare the Standard Reference Material according to the supplier's specifications. For mass spectrometry applications, use high-purity standards like MaxSpec compounds, which are supplied with verified concentrations and detailed certificates of analysis [55].
- Step 3: System Suitability Check. Analyze the SRM and assess key parameters against pre-established acceptance criteria. The table below summarizes critical metrics to evaluate.
Table 1: Key Performance Metrics for Verification with SRMs
| Metric | Description | Acceptance Criteria (Example) |
|---|---|---|
| Signal Intensity | The absolute response for the SRM's primary ion or absorbance. | > 80% of signal from a fresh standard or pre-cleaning baseline. |
| Signal-to-Noise (S/N) Ratio | Measure of detection sensitivity and system cleanliness. | Minimum 10:1 for low-abundance analytes; higher for critical detection limits. |
| Mass Accuracy / Spectral Purity | Agreement between measured and theoretical mass/absorbance. | Mass error < 5 ppm; Absorbance peak within ±2 nm of expected value. |
| Peak Shape / Resolution | Symmetry and width of the spectral peak. | No excessive tailing or broadening; maintains specified resolution. |
- Step 4: Quantitative Accuracy Check. If the SRM is used for quantification, perform a calibration curve or a single-point check to ensure the instrument reports the correct concentration.
- Step 5: Data Interpretation. Compare the post-cleaning results with the acceptance criteria. Successful verification indicates the cleaning was effective. Failure suggests residual contamination, window damage, or other issues requiring further investigation.
Workflow Diagram: Performance Verification Logic
The following diagram illustrates the logical decision-making process for verifying spectrometer performance after cleaning.
The Scientist's Toolkit: Research Reagent Solutions
The following table details essential materials for performing reliable post-cleaning verification, particularly in mass spectrometry.
Table 2: Key Research Reagents for Performance Verification
| Item | Function / Explanation | Example Product / Note |
|---|---|---|
| Certified Reference Materials | High-purity compounds with certified concentrations used to calibrate the instrument and verify quantitative accuracy post-cleaning. | Cayman Chemical MaxSpec standards [55]. |
| Internal Standards (IS) | Isotopically labeled versions of analytes added to samples to correct for sample preparation losses and instrument variability. | Deuterated or 13C-labeled compounds [55]. |
| System Suitability Kits | Pre-configured mixtures of compounds designed to test overall instrument performance, including sensitivity, resolution, and mass accuracy. | Cayman's MaxSpec LC-MS Mixtures (e.g., for SPM D-series) [55]. |
| High-Purity Solvents | Essential for sample preparation of SRMs to prevent introducing contaminants that could deposit on freshly cleaned optics or cause background noise. | HPLC or LC-MS grade solvents [55]. |
| Lint-Free Wipes | Used for handling optics and cuvettes without introducing fibers or scratches that can scatter light and affect sensitivity. | Essential for maintaining cleanliness [1]. |
| Quartz Cuvettes | Required for UV range measurements as they do not absorb UV light, unlike plastic or glass, ensuring accurate blanking and sample measurement [1]. | Optically matched pairs for high precision [1]. |
Optimizing Signal-to-Noise Ratio Through Proper Optical Alignment After Cleaning
FAQs: Addressing Common Alignment and Sensitivity Issues
Q1: After cleaning the spectrometer windows, my analysis results are unstable and drift over time. What could be wrong? This is a classic symptom of improperly cleaned optical windows. If the windows in front of the fiber optic or in the direct light pipe are not thoroughly cleaned, it can cause instrument analysis to drift, leading to a frequent need for recalibration and very poor analysis readings [11]. Ensure these windows are cleaned correctly as part of your regular maintenance schedule.
Q2: I've cleaned the instrument, but now the signal intensity seems weak, leading to a poor signal-to-noise ratio (SNR). Is this related? Yes, this could be due to a misaligned lens. After cleaning, it is crucial to ensure that the lens is properly aligned to focus on the source of the light. If the lens is not aligned correctly, the light you intend to collect will not return to the instrument efficiently [11]. The collected light will not be intense enough for accurate results, directly lowering your signal and degrading the SNR.
Q3: How do I know if my signal-to-noise ratio is sufficient, and what are the consequences of a low SNR? A high SNR indicates a cleaner, clearer signal, which is essential for accurate optical measurements. A low SNR means that unwanted background noise obscures the information contained in your signal, which can lead to significant errors and an inability to detect weak signals or trace elements in a sample [56]. In spectroscopic assays, this could manifest as an inability to distinguish between the true signal and the baseline noise.
Q4: What are the most critical factors that affect SNR after I perform maintenance like cleaning? Several factors directly influence SNR following maintenance [56]:
- Optical Alignment and Coupling: Proper alignment ensures maximum transmission of the signal, reducing losses that can decrease the SNR.
- Source Intensity: A stable, well-aligned light source provides a stronger signal.
- Detector Sensitivity: Ensuring the optical path to the detector is unobstructed and clean is vital.
- Environmental Noise: After opening the instrument for cleaning, ensure all components are securely reassembled to shield the system from external vibrations or noise.
Troubleshooting Guide: Post-Cleaning SNR Optimization
This guide helps diagnose and resolve common issues that arise after cleaning optical components.
Troubleshooting Flow
Step-by-Step Diagnostic Procedures
Procedure 1: Checking and Cleaning Optical Windows
- Objective: To eliminate signal drift caused by contaminated windows.
- Materials: Lint-free cloth, appropriate optical cleaning solvent (e.g., high-purity isopropanol).
- Protocol:
- Identify the two critical windows: the one located in front of the fiber optic and the one in the direct light pipe [11].
- Gently wipe the windows with a lint-free cloth moistened with the cleaning solvent. Avoid abrasive materials.
- Inspect the windows for any remaining streaks or residue.
- After cleaning, perform a baseline measurement to check for stability.
Procedure 2: Verifying and Realigning the Lens
- Objective: To maximize light collection efficiency and signal intensity.
- Materials: Alignment tool (if specified by manufacturer), standard reference sample.
- Protocol:
- Operators should be trained to recognize when a lens is misaligned, typically indicated by a consistently low signal [11].
- Use a standard reference sample with a known strong signal.
- While monitoring the signal intensity from the standard, make fine adjustments to the lens alignment according to the manufacturer's guidelines.
- The alignment is correct when the signal intensity is maximized and stable. This process is typically an easy task to perform as part of regular maintenance [11].
Procedure 3: Validating Sample Preparation and Argon Purity
- Objective: To rule out sample-based or environmental contamination that degrades SNR.
- Materials: New grinding pads, uncontaminated standard sample.
- Protocol:
- Regrind Samples: Collect your samples and use a new grinding pad to regrind them. This removes plating, carbonization, or protective coatings that could interfere with analysis [11].
- Avoid Re-contamination: Ensure samples are not quenched in water or oil. Do not touch the sample with bare fingers, as skin oil adds grease contamination [11].
- Check Argon: Contaminated argon can cause a burn to appear white or milky and lead to inconsistent or unstable results [11].
Quantitative Data and Best Practices for SNR
Factors Affecting SNR and Mitigation Strategies
| Factor | Impact on SNR | Mitigation Strategy After Cleaning |
|---|---|---|
| Optical Alignment [11] [56] | Critical. Misalignment drastically reduces signal intensity. | Realign lenses and optical components per manufacturer protocol; verify with a standard. |
| Window Cleanliness [11] | High. Dirty windows cause signal drift and poor baseline stability. | Thoroughly clean the two optical windows with lint-free materials and appropriate solvents. |
| Light Source Power [56] | Direct. Higher power boosts signal. | Ensure source is stable after reassembly; use full power if sample permits [57]. |
| Detector Sensitivity [56] | Direct. Sensitive detectors capture more signal photons. | Confirm no contamination on detector path; allow instrument to warm up for stability [1]. |
| Exposure Time [57] | High. Longer exposure reduces read noise. | For weak signals, use longer exposure times rather than many short exposures. |
Optimized Experimental Protocol for Post-Cleaning Verification
- Title: Protocol for Restoring Optimal SNR Following Optical Component Cleaning.
- Objective: To verify and restore spectrometer performance, specifically the Signal-to-Noise Ratio, after routine cleaning of optical windows and lenses.
- Materials:
- Lint-free wipes
- Spectral grade isopropanol
- Certified standard reference material (e.g., acetaminophen tablet for Raman [57])
- High-purity blank solvent (for UV-Vis)
- Step-by-Step Methodology:
- System Warm-Up: Turn on the spectrometer and allow its lamps to warm up for at least 15-30 minutes to stabilize the light source and electronics [1].
- Initial Cleaning: Clean the two optical windows (fiber optic front and direct light pipe) using a lint-free wipe moistened with isopropanol [11].
- Baseline Check: For spectrophotometers, perform a blank measurement with the correct solvent in a clean cuvette. The baseline should be flat and stable. Unstable readings may indicate residual contamination or insufficient warm-up time [1].
- Lens Alignment Check: Introduce a stable standard reference material. Observe the signal intensity. If the intensity is lower than expected, proceed with fine lens alignment to maximize the collected light [11].
- SNR Measurement: Acquire a spectrum of the standard reference material. Calculate the SNR. A common method is to take the peak height of a major band (signal) and divide it by the standard deviation of the noise in a quiet, signal-free region of the spectrum [57].
- Comparison to Baseline: Compare the calculated SNR to the historical performance data for the same instrument and standard. This verifies that sensitivity has been fully restored.
- Documentation: Record the post-cleaning SNR value and alignment settings for future reference and quality control.
The Scientist's Toolkit: Essential Research Reagents & Materials
| Item | Function in Post-Cleaning Optimization |
|---|---|
| Lint-Free Wipes | To clean optical windows and lenses without introducing scratches or fibers that scatter light. |
| High-Purity Solvents (e.g., Isopropanol) | To dissolve and remove organic contaminants from optical surfaces without leaving residue. |
| Standard Reference Material (e.g., Acetaminophen, Holmium Oxide) | To provide a known, stable signal for verifying signal intensity, wavelength accuracy, and calculating SNR after alignment [57]. |
| Cuvettes (Quartz & Glass) | Precision containers for liquid samples. Quartz is essential for UV range measurements. Must be clean and handled carefully to avoid fingerprints [1]. |
| Alignment Tools | Manufacturer-specific jigs or tools to ensure lenses and optical components are returned to their optimal position after cleaning. |
Addressing Common Post-Cleaning Pitfalls and Contamination Recurrence
Troubleshooting Guides
Guide 1: Troubleshooting Poor Spectrometer Sensitivity After Cleaning
Problem: Analysis results are unstable, drifting, or consistently low for specific elements after a cleaning procedure.
Q1: Why are my readings for Carbon (C), Phosphorus (P), and Sulfur (S) consistently low after cleaning? This is a classic symptom of a compromised vacuum pump. The vacuum pump purges the optic chamber to allow low-wavelength light (such as that from C, P, S, and N) to pass through. A malfunctioning pump allows atmosphere into the chamber, causing a loss of intensity for these specific elements [11].
- Troubleshooting Steps:
- Monitor Performance: Consistently track the readings for low-wavelength elements; values below normal indicate a potential pump issue [11].
- Physical Inspection: Check the pump for warning signs like smoke, being hot to the touch, unusual gurgling or loud noises, or oil leaks. An oil leak requires immediate replacement [11].
Q2: My spectrometer was just cleaned, but analysis is still unstable and requires frequent recalibration. What's wrong? This often indicates that the optical windows were not properly cleaned or were contaminated during the process. Dirty windows on the fiber optic or direct light pipe cause instrumental drift and poor analysis readings [11].
- Troubleshooting Steps:
- Inspect and Clean Windows: Check the two critical windows (in front of the fiber optic and in the direct light pipe) for residue or dirt.
- Follow Proper Cleaning Protocol: Clean the windows with appropriate materials and techniques, or schedule professional maintenance to ensure it is done correctly [11].
Q3: After cleaning the sample chamber, I get highly inconsistent results on the same sample. What could be the cause? This can be caused by several factors related to sample preparation and handling post-cleaning.
- Troubleshooting Steps:
- Regrind Samples: Use a new grinding pad to remove any plating, carbonization, or protective coatings that may have been introduced after cleaning [11].
- Avoid Recontamination: Do not quench samples in water or oil after preparation. Avoid touching samples with bare fingers, as skin oils can contaminate them [11].
- Check for Air Bubbles: Ensure your liquid sample is well-mixed and free of air bubbles by gently tapping the cuvette, as bubbles scatter light and cause erratic readings [1].
Guide 2: Troubleshooting Contamination Recurrence
Problem: Contaminants reappear quickly after cleaning, leading to high background signals and unreliable data.
Q4: My blanks show high background signals. I've cleaned the system, but the problem returns. Where are these contaminants coming from? Contaminants can be reintroduced from numerous sources in your workflow. Common sources include [5]:
- Solvents and Additives: Impurities in solvents, additives from plastic containers, or microbial growth in solvent reservoirs.
- Sample Handling: Keratins, lipids, and amino acids from skin and hair transferred by handling components without gloves.
- Instrumentation: Compounds leaching from instrument seals or tubing, and carryover from previous samples.
- Best Practices to Prevent Recurrence:
- Wear Gloves: Always wear nitrile gloves when handling instrument components, solvent bottles, and preparing samples [5].
- Use Dedicated LC-MS Grade Materials: Use dedicated solvent bottles and LC-MS grade solvents and additives to minimize impurities [5].
- Minimize Filtering: Avoid filtering mobile-phase solvents unless absolutely necessary, as this can introduce contaminants from the filtration apparatus [5].
Q5: How can I verify that my cleaning procedure was effective and no residues remain? Effective cleaning validation can be performed using a reference standard.
- Experimental Protocol: Using a Reference Standard for Verification [58]
- Obtain Standard: Use the reference standard (e.g., a stainless steel 2205 disk) that was shipped with your instrument.
- Clean the Standard: Clean the reference sample with isopropyl alcohol to remove any oils or residues from storage or handling [58].
- Perform Multiple Assays: Take at least ten assays of the clean standard, moving the analyzer to different areas to get a representative reading.
- Check Results: If the instrument correctly identifies the reference material and the average elemental results fall within the expected min/max range, the device is working properly and the cleaning was likely effective [58].
Frequently Asked Questions (FAQs)
Q: The vacuum pump on my OES spectrometer is leaking oil. What should I do? A: An oil leak requires immediate replacement. Do not ignore this issue, as it can lead to further complications and adverse effects on your test results [11].
Q: My sample readings are unstable and my burns look white or milky. What does this mean? A: A white or milky burn is a key symptom of contaminated argon gas. This contamination leads to inconsistent and unstable results because the machine analyzes both the material and the introduced contamination [11].
Q: I keep getting negative absorbance readings. What is the most common cause of this? A: Negative absorbance typically occurs when the blank solution absorbs more light than your sample. This can happen if you use different cuvettes for the blank and sample, or if the cuvette used for the blank measurement was dirtier or had different optical properties than the one used for the sample [1].
Q: How can I reduce particulate contamination when opening glass ampoules? A: Research shows that using a vacuum machine during opening can reduce insoluble glass particulate contamination by nearly 90% compared to opening by hand. This method efficiently minimizes the risk of introducing sharp glass particles into your samples [59].
The table below summarizes key quantitative information for troubleshooting and validation procedures.
Table 1: Troubleshooting Metrics and Specifications
| Issue / Parameter | Metric / Specification | Source |
|---|---|---|
| Vacuum Pump Argon Flow | Increase from 43 psi to 60 psi to improve probe contact | [11] |
| Recalibration Standard RSD | Relative Standard Deviation (RSD) should not exceed 5 | [11] |
| Handheld XRF Sample Thickness | Requires at least 3/4 inch thickness for soil in plastic bags | [58] |
| Soil Moisture Content (XRF) | >20% moisture adversely affects readings | [58] |
| Glass Particulate Reduction | Vacuum machine reduces particles by up to 87.8-89.3% | [59] |
| NIR-CI Detection Limit (Lab) | Achieved 1.0 mg/cm² for residue detection | [60] |
Experimental Protocols
Protocol 1: Spectrometer Recalibration after Cleaning
This protocol provides a detailed method for recalibrating your spectrometer following cleaning to ensure analytical accuracy [11].
- Sample Preparation: Prepare the recalibration sample by grinding or machining it to be as flat as possible.
- Software Navigation: Open the recalibration program in the spectrometer software (e.g., IE FE100 or Al000).
- Follow Sequence: Adhere precisely to the sequence of steps prompted by the software. Do not deviate from the sample requirements.
- Replicate Analysis: Analyze the first sample in the recalibration process five times consecutively, using the same burn spot.
- Calculate RSD: The Relative Standard Deviation (RSD) for any recalibration standard should not exceed 5. If it does, delete the analysis results and restart from step 1.
Protocol 2: Validation of Cleaning via Reference Standard
This method verifies that your spectrometer is functioning correctly after cleaning and maintenance [58].
- Inspection: Turn off the analyzer and inspect the instrument's front window for damage (tears, punctures) or smudges. Replace if necessary.
- Standard Preparation: Clean your provided reference standard (e.g., 2205 stainless steel) with isopropyl alcohol to remove all surface contaminants.
- Assay: Take a minimum of ten assays of the clean reference standard. Move the analyzer's aperture to different areas on the sample to ensure a representative test.
- Verification: The instrument should correctly identify the standard (e.g., "2205"). The average elemental results from the ten assays must fall within the accepted minimum and maximum range for that standard.
Workflow and Relationship Diagrams
Spectrometer Troubleshooting Logic
Post-Cleaning Validation Workflow
The Scientist's Toolkit: Essential Research Reagents & Materials
Table 2: Key Materials for Troubleshooting and Maintenance
| Item | Function / Purpose |
|---|---|
| Isopropyl Alcohol | For cleaning reference standards and sample surfaces without leaving residue [58]. |
| Reference Standard (e.g., 2205 Steel) | A calibrated sample for verifying instrument performance and calibration after cleaning [58]. |
| Nitrile Gloves | Prevents introduction of keratins, lipids, and other contaminants from skin during handling [5]. |
| Lint-Free Wipes | For cleaning optical windows and cuvettes without introducing fibers or scratches [1]. |
| Quartz Cuvettes | Essential for measurements in the ultraviolet (UV) range below ~340 nm [1]. |
| LC-MS Grade Solvents/Additives | High-purity solvents and additives that minimize background contamination [5]. |
| Diamond Sandpaper/Abrasive Disks | For cleaning alloy samples by removing corrosion, ensuring the analyzed surface is representative [58]. |
Performance Validation and Comparative Analysis of Sensitivity Issues
Troubleshooting Guides
Guide 1: Diagnosing Symptoms of Poor Spectrometer Sensitivity
This guide helps you identify and resolve common issues, particularly those related to dirty optical windows, that lead to a loss of spectrometer sensitivity.
Table: Common Symptoms and Causes of Poor Sensitivity
| Symptom | Possible Cause | Recommended Troubleshooting Action |
|---|---|---|
| Frequent need for recalibration [11] | Drift caused by dirty optical windows | Clean the optical windows as per the protocol below [11]. |
| Low or inconsistent readings for Carbon, Phosphorus, Sulfur [11] | Vacuum pump failure; atmosphere in optic chamber | Check vacuum pump for noise, heat, or leaks; contact service [11]. |
| Inconsistent readings or poor analysis on same sample [11] | Dirty optical windows or contaminated argon | Clean optical windows [11]. Ensure samples are not re-contaminated after grinding [11]. |
| Inconsistent readings or drift [61] | Aging lamp or dirty optics | Check and replace lamp if needed. Inspect and clean sample compartment optics [61]. |
| Low light intensity or signal error [61] | Debris in light path, dirty optics, or misaligned cuvette | Inspect cuvette for residue and proper alignment. Check for debris and clean optics [61]. |
| Instrument fails to blank [1] | Dirty internal optics or misaligned cuvette holder | Ensure cuvette holder is seated properly. Instrument may require professional servicing for internal optics [1]. |
Guide 2: Validating Spectrometer Window Cleaning: An Experimental Protocol
This protocol provides a detailed methodology to validate the efficacy of cleaning the optical windows on your spectrometer.
Objective: To quantitatively confirm the restoration of spectrometer sensitivity and analytical performance following the cleaning of optical windows.
Principle: Cleaning the windows located in front of the fiber optic and in the direct light pipe removes residue that causes light scatter and absorption. This is validated by demonstrating a return to stable, precise, and accurate readings on a standard reference material [11].
Materials and Reagents:
- Lint-free, clean cloths (e.g., specialized optical lens tissue)
- High-purity solvent (e.g., HPLC-grade methanol or isopropanol)
- Commercially available recalibration standard sample (appropriate for your spectrometer type)
- A stable, homogeneous control sample of known composition
Procedure:
- Pre-Cleaning Baseline Measurement:
- Ensure the spectrometer has warmed up for at least 15-30 minutes to stabilize [1].
- Using the unclean instrument, analyze the recalibration standard sample five times in succession using the same burn spot or cuvette position [11].
- Record the results for each analysis, calculating the Relative Standard Deviation (RSD). An RSD exceeding 5 indicates instability often caused by dirty components [11].
Cleaning Execution:
- Gently wipe the optical windows with a cloth lightly moistened with the high-purity solvent. Avoid excessive pressure [11].
- Allow the solvent to fully evaporate before closing the instrument.
Post-Cleaning Performance Validation:
- Repeat Step 1 exactly, analyzing the same standard sample five times.
- Calculate the RSD for the new set of results. A successful cleaning is indicated by an RSD of 5 or below [11].
- Analyze the stable control sample and confirm that the results align with its known certified values within an acceptable margin of error.
Interpretation of Results: Compare the pre- and post-cleaning data. Successful validation is confirmed by:
- A significant reduction in the RSD of the standard sample analysis (≤5%).
- Accurate results for the control sample.
- The elimination of drift and inconsistent readings noted before cleaning.
Frequently Asked Questions (FAQs)
What are the direct performance metrics that indicate my spectrometer's windows need cleaning?
The most direct performance metrics indicating dirty windows are analytical drift requiring more frequent recalibration and very poor analysis readings [11]. If your results for the same sample show significant, unpredictable variation between tests, dirty optics are a primary suspect. A high Relative Standard Deviation (RSD >5) during repeated analysis of a standard is a key quantitative metric [11].
How often should I clean the optical windows on my spectrometer?
There is no fixed schedule; the frequency should be determined by usage and monitoring of performance metrics. Incorporate window inspection and cleaning as a part of your instrument's regular maintenance [11]. If you operate the spectrometer frequently or analyze samples that may produce residue, you should check and potentially clean the windows more often. The need for cleaning is best indicated by the performance degradation symptoms listed in the troubleshooting guide.
Beyond dirty windows, what other factors can cause a sudden drop in sensitivity?
A sudden sensitivity drop can be caused by several other issues. Check these components:
- Light Source: An aging or failing lamp (deuterium or tungsten) can cause low light intensity and failed blanking [61] [1].
- Vacuum Pump: For OES spectrometers, a malfunctioning pump introduces atmosphere, causing low-intensity or disappearing low wavelengths critical for elements like Carbon and Phosphorus [11].
- Sample Preparation: Contaminated samples, fingerprints on cuvettes, or air bubbles in the solution can cause inaccurate and inconsistent readings [11] [1].
- Contaminated Argon: In spectrometers using argon, contamination can result in unstable and inconsistent results. A burn that appears white or milky can be a visual indicator [11].
Can in-line spectrometry be used to validate cleaning processes itself?
Yes, spectroscopic methods are increasingly used for cleaning validation, especially in pharmaceutical manufacturing. In-line UV spectrometry is a key example, allowing for real-time, continuous monitoring of the cleaning process by detecting residual cleaning agents or product residues in rinse water, supporting Pharma 4.0 goals [35]. Near Infra-Red Chemical Imaging (NIR-CI) is another emerging technology developed specifically for rapid, non-invasive verification of equipment cleanliness [60].
The Scientist's Toolkit: Essential Reagents & Materials
Table: Key Materials for Spectrometer Maintenance and Cleaning Validation
| Item | Function |
|---|---|
| Recalibration Standard Sample | A material of known, certified composition used to verify the accuracy and precision of the spectrometer before and after maintenance procedures like cleaning [11]. |
| Lint-Free Cleaning Cloths | Specialized cloths designed to clean optical surfaces without scratching or leaving fibers behind, ensuring no additional scatter or residue is introduced. |
| High-Purity Solvents | Solvents like HPLC-grade methanol or isopropanol are used to dissolve and remove organic residues from optical windows without leaving impurities. |
| Stable Control Sample | A homogeneous, in-house sample with well-characterized composition, used to routinely check instrument stability and performance over time. |
| Cuvettes (Quartz/Glass) | Precision optical containers for liquid samples. Quartz is required for UV range measurements. They must be kept clean and scratch-free [1]. |
Experimental Workflow for Cleaning Validation
The diagram below outlines the logical workflow for validating the cleaning efficacy of your spectrometer's optical windows.
FAQ: How do dirty windows compare to other common issues that affect spectrometer sensitivity?
Dirty windows on a spectrometer are a prevalent issue, but it is one of several factors that can severely impact analytical sensitivity and accuracy. The table below provides a comparative overview of dirty windows against other common sensitivity killers, highlighting their distinct symptoms and effects on data.
Table: Comparative Analysis of Common Spectrometer Sensitivity Issues
| Issue Category | Specific Problem | Primary Effect on Signal/Sensitivity | Key Symptoms & Indicators |
|---|---|---|---|
| Optical Path | Dirty Windows [11] | Gradual analysis drift; poor analysis readings [11] | Increased need for frequent recalibration; low or drifting intensity [11] |
| Vacuum System | Vacuum Pump Failure [11] | Loss of intensity for low-wavelength elements [11] | Low readings for C, P, S; pump is hot, loud, or leaking oil [11] |
| Gas Purity | Contaminated Argon [11] | Inconsistent or unstable results [11] | A white, milky appearance of the burn [11] |
| Sample Introduction | Incorrect Probe Contact [11] | Incorrect results or no results [11] | Louder sound during analysis; bright light escaping from pistol face [11] |
| LC-MS Interface | Suboptimal Ion Source Parameters [7] | Reduced ionization efficiency; lower signal-to-noise (S/N) [7] | General low response for target analytes; requires method-specific optimization [7] |
| Chromatography | Decreased Column Efficiency [62] | Broader peaks; reduced peak height (concentration at detector) [62] | Peaks become wider over time while retention times may be stable [62] |
FAQ: What is the detailed experimental protocol for diagnosing and resolving dirty window issues?
A dirty optical window is a critical failure point that directly compromises data quality by obstructing light transmission. The following protocol provides a systematic method for confirming this issue and restoring instrument performance.
Experimental Protocol: Diagnosis and Correction of Dirty Spectrometer Windows
Objective: To identify and eliminate sensitivity loss caused by contaminated optical windows.
Background: Spectrometers have windows that protect sensitive internal optics, such as the one in front of the fiber optic cable and in the direct light pipe [11]. Contamination on these windows blocks or scatters light, leading to instrument drift and poor analysis readings [11]. This protocol outlines the steps for cleaning these components.
Materials and Reagents:
- Lint-free laboratory wipes (e.g., Kimwipes)
- HPLC-grade or spectroscopic-grade methanol
- HPLC-grade or spectroscopic-grade acetone
- Deionized water
- Compressed dust-free air or nitrogen gas
- Appropriate personal protective equipment (PPE): gloves, safety glasses
Procedure:
- Initial Symptom Identification:
- Monitor the spectrometer for a persistent increase in calibration drift or a general downward trend in signal intensity across multiple analyses [11].
- Rule out other common issues, such as recent argon tank changes or unusual pump noises, to isolate the problem to the optical path.
Safe Shutdown and Access:
- Follow the manufacturer's recommended procedure to safely shut down the spectrometer.
- Gain access to the optical chamber. Crucially, consult your instrument's manual before touching any internal components to avoid misalignment or damage.
Visual Inspection:
- Under a bright light, carefully inspect the relevant windows for dust, haze, fingerprints, or other visible contaminants.
Cleaning Process:
- Dry Cleaning: First, use a stream of compressed, dust-free air or nitrogen to blow loose particles off the window surface.
- Solvent Cleaning: Moisten a lint-free wipe with a small amount of methanol. Gently wipe the window surface in a circular motion, applying minimal pressure. Do not pour solvent directly onto the window.
- Rinse (if needed): For stubborn residues, repeat the wiping process with a wipe moistened with deionized water.
- Final Dry: Use a dry, lint-free wipe to dry the surface, or allow it to air dry completely.
Reassembly and Verification:
- Once completely dry, reassemble the instrument and restart the system.
- Perform a validation test using a standard reference material.
- Compare the signal intensity and stability to data collected prior to cleaning. Successful cleaning should result in restored signal strength and reduced calibration drift [11].
Troubleshooting Tips:
- If haze or contamination persists, repeating the solvent cleaning step with acetone may be effective, but ensure the window material is compatible.
- Avoid using abrasive materials or excessive force, which can scratch optical coatings.
- If problems continue after cleaning, the issue may lie elsewhere, such as lens misalignment [11] or a failing vacuum pump [11].
Diagnostic Workflow for Sensitivity Loss
The following diagram illustrates the logical decision process for troubleshooting poor spectrometer sensitivity, positioning "dirty windows" within a broader diagnostic framework.
The Scientist's Toolkit: Essential Research Reagent Solutions
The following table lists key materials and reagents essential for the maintenance and troubleshooting activities discussed in this guide.
Table: Essential Research Reagent Solutions for Spectrometer Maintenance
| Item | Function/Application | Key Consideration |
|---|---|---|
| Lint-Free Wipes | Cleaning optical windows and surfaces without leaving fibers. | Essential to prevent new contamination. |
| Spectroscopic-Grade Solvents (Methanol, Acetone) | Dissolving organic contaminants on optical components. | High purity prevents residue formation. |
| Compressed Duster Gas | Removing particulate matter from optical surfaces and instrument interiors. | Must be oil- and residue-free. |
| Calibration Standard Reference Materials | Verifying instrument performance and sensitivity after maintenance. | Must be traceable and certified. |
| High-Purity Argon Gas | Used as a purge and spark atmosphere in optical emission spectrometry (OES). | Contamination causes unstable and inconsistent results [11]. |
| Vacuum Pump Oil | Maintaining the proper vacuum level in the optic chamber. | Leaks or degraded oil adversely affect critical low-wavelength elements [11]. |
Leveraging Spectral Preprocessing to Correct for Residual Baseline Effects
Troubleshooting Guide: Addressing Baseline Drift in Spectral Analysis
This guide helps researchers diagnose and correct common baseline effects that compromise spectral data quality, particularly in studies involving contaminated or "dirty" optical windows [32] [63].
FAQ: Baseline Correction Fundamentals
1. What is spectral baseline correction and why is it critical for sensitivity? Baseline correction is a preprocessing technique that removes background signal not related to the sample properties you want to analyze [64]. This background can be caused by factors like detector noise, light scattering, or fluorescence [65] [64]. It is critical because these distortions can significantly degrade measurement accuracy and impair machine learning-based spectral analysis by introducing artifacts and biasing feature extraction [65] [66]. In the context of dirty windows, fatty acid films or other surface contaminants can create a persistent background that masks genuine sample signatures [63].
2. My spectrometer sensitivity has dropped. Could a dirty optical window be the cause? Yes, contamination on optical windows is a well-known problem that negatively affects performance by decreasing transmitted laser intensity, modifying laser pulse wavefronts, and creating localized absorption that facilitates laser-induced damage [32]. For example, in rubidium vapor cells, an opaque layer on the inner window can develop, leading to a loss of transparency [32]. Similarly, common "grimy windows" can harbour pollutants protected under stable films of fatty acids [63].
3. When should I use Asymmetric Least Squares (ALS) over other baseline correction methods? ALS is particularly suited for correcting broad baseline disturbances, such as fluorescence in Raman spectra, especially when these disturbances are wider than the characteristic spectral peaks of interest [64] [67]. The method works by fitting a smooth function to the baseline, applying a much higher penalty to positive deviations (the peaks) than to negative deviations, which allows the fit to adapt to the baseline [64]. It is a good general-purpose algorithm, but its parameters need tuning for optimal results.
4. How does particle size or sample presentation affect my baseline? Sample heterogeneity, particle size, and surface roughness are common sources of spectral distortion in techniques like FT-IR ATR spectroscopy [68]. These factors can cause multiplicative scaling effects and baseline shifts, which can be corrected using techniques like Standard Normal Variate (SNV) or Multiplicative Scatter Correction (MSC) [68] [67].
Troubleshooting Common Baseline Issues
Problem: Broad, Fluorescence-Dominated Baseline in Raman Spectra
- Description: A sloping or curved background overwhelms weaker Raman peaks.
- Solution: Apply Asymmetric Least Squares (ALS) baseline correction.
- Protocol:
- Implement the
prep.alsbasecorr()function or equivalent [67]. - Set the main parameters:
- Iteratively adjust parameters: increase
plambdato make the baseline stiffer (less flexible) or decrease it to make it more flexible. Adjustpto control the balance between fitting the baseline and preserving peak shape.
- Implement the
Problem: Complex, Wavy Baseline with Multiple Underlying Peaks
- Description: The baseline has a complex shape that simpler polynomials cannot fit without distorting peaks.
- Solution: Use a B-Spline fitting approach.
- Protocol:
- The method relies on defining local polynomial functions via "knots" (T) and a recursive basis [66].
- Optimize the control points of the B-Spline using a least-squares algorithm [66].
- Tune the number of knots and the spline degree (k); poor tuning can significantly reduce accuracy. This method offers excellent local control and can boost sensitivity for trace gas analysis [66].
Problem: Simple Offset or Linear Drift Across the Spectrum
- Description: The entire spectrum is shifted vertically (offset) or has a constant slope (tilt).
- Solution: Apply Standard Normal Variate (SNV) normalization.
- Protocol:
- For each individual spectrum, calculate its mean (average) and standard deviation.
- Subtract the mean from every spectral value (centering).
- Divide the result by the standard deviation (scaling) [67]. This procedure removes both additive (offset) and multiplicative (slope) effects from the spectrum.
Quantitative Comparison of Baseline Correction Methods
The table below summarizes standard techniques to help select the appropriate method.
Table 1: Common Spectral Baseline Correction Methods
| Method | Core Mechanism | Key Parameters | Advantages | Best For |
|---|---|---|---|---|
| Asymmetric Least Squares (ALS) [64] [67] | Fits a smooth baseline with asymmetric penalties on deviations. | p (asymmetry, 0.001-0.1), plambda (smoothness, 10²-10⁹) |
No peak detection needed; handles broad baselines well. | Fluorescence in Raman; smooth, complex baselines. |
| Standard Normal Variate (SNV) [67] | Centers & scales each spectrum by its own mean and standard deviation. | None. | Simple, fast, removes additive and multiplicative effects. | Simple offset/tilt; scatter correction in NIR. |
| Multiplicative Scatter Correction (MSC) [67] | Linear fit of spectrum to a reference (e.g., mean spectrum). | Choice of reference spectrum. | Effective for particle size effects. | Solid samples with varying particle sizes. |
| Morphological Operations [66] | Uses erosion/dilation with a structural element to estimate baseline. | Width of the structural element. | Maintains geometric integrity of spectral peaks. | Pharmaceutical PCA workflows; complex peak shapes. |
| Piecewise Polynomial Fitting [66] | Fits polynomials to manually or automatically selected spectral segments. | Polynomial degree, number of segments. | Adaptive and fast, no physical assumptions. | Complex, irregular baselines (e.g., soil analysis). |
Experimental Protocol: Baseline Correction for a Contaminated Window Study
This protocol is adapted from laser cleaning and analysis studies [32].
Objective: To acquire a clean Raman spectrum from a sample behind a contaminated optical surface and correct the resulting baseline to recover true spectral features.
Materials and Reagents:
- Portable Raman Spectrometer: Preferably with 785 nm excitation to reduce fluorescence [69].
- Contaminated Sample Cell: The sample of interest, such as a rubidium vapor cell with an inner opaque layer of rubidium silicate or a window with a grimy fatty acid film [32] [63].
- Laser Cleaning System (Optional): For in-situ cleaning, e.g., a Q-switched Nd:YAG laser [32].
- Computer with Spectral Processing Software: Capable of running ALS, SNV, and other preprocessing algorithms [64].
Procedure:
- Initial Spectral Acquisition: Collect a Raman spectrum from the sample through the contaminated window. Note the strong baseline drift and potentially suppressed peak intensities.
- Laser Cleaning (If Applicable):
- Focus the cleaning laser (e.g., Nd:YAG at 1064 nm) inside the cell, just in front of the contaminated surface, to avoid damaging the window material [32].
- Use a single pulse at a low energy (e.g., 50 mJ) and gradually increase if needed. A successful cleaning pulse will locally restore transparency [32].
- Post-Cleaning Spectral Acquisition: Acquire a new Raman spectrum from the cleaned spot using the Raman spectrometer.
- Baseline Correction with ALS:
- Transfer the spectrum to your processing software.
- Apply an ALS algorithm. Use the provided Python code snippet as a starting point [64].
- Iteratively tune the
lam(λ, smoothness) andp(asymmetry) parameters. Start withlam=1e6andp=0.01, adjusting until the baseline is smoothly subtracted without distorting the peaks.
- Validation: Compare the corrected spectrum against a reference spectrum from a clean sample or a standard library to confirm the accurate recovery of spectral peaks.
Workflow Diagram for Troubleshooting Poor Sensitivity
The diagram below outlines a logical workflow for diagnosing and resolving sensitivity issues related to baseline effects.
Research Reagent and Material Solutions
Table 2: Essential Materials for Spectral Analysis and Contamination Studies
| Item | Function in Experiment |
|---|---|
| Portable Raman Spectrometer (785 nm) | Allows for flexible, on-site analysis. Excitation at 785 nm offers a good compromise between reducing fluorescence and maintaining detector sensitivity [69]. |
| Q-switched Nd:YAG Laser | Used for laser cleaning of contaminated optical surfaces without damaging the underlying substrate [32]. |
| Rubidium Vapor Cell | A example sample system where inner window contamination (e.g., rubidium silicate) leads to loss of transparency and sensitivity [32]. |
| Standard Reference Materials | Certified samples used to validate spectrometer performance and the correctness of the preprocessing pipeline after correction [69]. |
| Spectral Processing Software | Software (e.g., Python with SciPy, PyWT) implementing algorithms like ALS, SNV, and wavelet transforms for baseline correction [64] [67]. |
Benchmarking Against Instrument Specifications and Regulatory Standards
FAQs and Troubleshooting Guides
FAQ: Core Principles and Regulations
Q1: What does "fit for intended use" mean for an analytical instrument? According to updated USP guidance, an instrument is considered "fit for intended use" when it is metrologically capable of operating over the ranges specified in your analytical procedures, its calibration is traceable to national or international standards, and its critical parameters remain in a state of statistical control within established acceptance limits throughout its lifecycle [70].
Q2: What is the most fundamental rule for effective troubleshooting? The most critical rule is to change only one thing at a time. Making multiple changes simultaneously, such as flushing a flow cell and changing mobile phase pre-mixing, makes it impossible to determine which action actually resolved the problem. This prevents learning and can lead to unnecessary part replacements in the future [71].
Q3: How are instruments classified under the updated USP <1058>? The draft update for Analytical Instrument and System Qualification (AISQ) classifies apparatus and instruments into three groups, which determine the extent of qualification activities. The general framework is a three-phase lifecycle: Specification and Selection, Installation and Qualification, and Ongoing Performance Verification [70].
FAQ: Troubleshooting Poor Sensitivity
Q4: My spectrometer's sensitivity has degraded. What are the first components I should check? Start with the sample introduction system and optical components, as these are most frequently associated with sensitivity loss. For ICP-MS, also check the interface cones. A systematic approach is crucial [72].
Q5: How can a "dirty window" or similar contamination cause poor sensitivity? Contamination on optical components, such as lenses, windows, or flow cells, can scatter or absorb the analytical signal before it reaches the detector. In mass spectrometers, deposits on the orifice of interface cones can block ions, leading to a significant drop in signal intensity and degraded detection limits [72].
Q6: What are the best practices for cleaning to restore sensitivity? Always follow manufacturer guidelines. For ICP-MS interface cones, regular inspection and careful cleaning to remove visible deposits are essential. The frequency depends on your sample workload and matrix. Avoid damaging sensitive components; for instance, do not insert tools into nebulizer orifices or use hydrofluoric acid (HF) to clean glass components [72].
Troubleshooting Guide: Poor Spectrometer Sensitivity
The following table outlines common problem areas and systematic checks for diagnosing poor sensitivity.
Troubleshooting Poor Sensitivity
| Problem Area | Specific Component to Check | Symptoms & Diagnostic Checks | Corrective Actions |
|---|---|---|---|
| Sample Introduction | Nebulizer | - High/fluctuating backpressure.- "Spitting" mist in spray chamber.- Poor precision (%RSD) [72]. | - Clear blockage with manufacturer-recommended tools/solvents.- Replace if damaged [72]. |
| Spray Chamber | - Poor precision, carryover.- Visible contamination inside [72]. | - Clean with appropriate solution.- Ensure proper drain line function [72]. | |
| Pump & Tubing | - Fluctuating uptake rate, drift [72]. | - Replace worn peristaltic pump tubing.- Inspect and replace pump rollers if worn [72]. | |
| Optics & Interface | ICP-MS Interface Cones | - Increased background, memory effects, loss of sensitivity, distorted peaks [72]. | - Inspect and clean orifice of sampler and skimmer cones regularly.- Replace if orifice is blocked or worn [72]. |
| Flow Cell (UV/Vis, FLD) | - Wavy or elevated baseline [71]. | - Flush with isopropanol to remove air bubbles or contaminants [71]. | |
| Calibration & Method | Calibration Model | - Results for validation samples are inconsistent with model expectations (outliers) [73]. | - Ensure sample is applicable to the model's multivariate space.- Re-calibrate using relevant standards [73]. |
| Mobile Phase/Solvents (LC-MS) | - High background noise, adduct formation in MS [71]. | - Use MS-grade solvents in plastic containers to avoid metal ion leaching from glass.- Flush system with 0.1% formic acid [71]. |
Experimental Protocols for Diagnostics
This protocol helps isolate issues within the sample introduction system that can cause sensitivity loss and poor precision [72].
1. Principle To methodically check each component of the sample introduction system (pump, nebulizer, spray chamber, torch) by visual inspection, performance monitoring, and component substitution.
2. Materials
- ICP spectrometer
- Appropriate calibration standard
- Replacement nebulizer and pump tubing (known to be good)
- Manufacturer-recommended cleaning tools and solvents
3. Procedure 1. Peristaltic Pump Check: Introduce an air bubble into the pump tubing and observe its flow toward the nebulizer. A jerky or non-smooth flow indicates worn tubing, rollers, or a faulty pump. Replace worn tubing first. If the problem persists, inspect and replace rollers or the pump [72]. 2. Nebulizer Check: Observe the mist inside the spray chamber. "Spitting" or pulsations indicate a faulty nebulizer. Monitor the nebulizer backpressure; a high reading suggests a blockage. Replace the nebulizer with a known-good one to see if performance improves. If blocked, carefully clear the blockage using tools and solvents specified by the manufacturer [72]. 3. Spray Chamber Check: Inspect for visible dirt or slow drainage. Clean the spray chamber with an appropriate solution and ensure the drain line is not blocked. Replace with a clean, proven spray chamber to confirm it is not the cause of poor precision [72]. 4. Torch/Injector Check: Visually inspect the torch injector for deposits. Clean any deposits found. Check for torch or injector misalignment according to the instrument manual [72].
Protocol 2: System Suitability and Model Applicability Check for Multivariate Spectroscopic Analyzers
This protocol is for verifying that a multivariate model (e.g., for NIR, Raman) is still applicable to your sample and that the analyzer is performing as expected, which is critical for maintaining data quality [73].
1. Principle To validate that a sample's spectrum is not an outlier relative to the calibration model and that the predicted results agree with the primary test method within statistically defined limits.
2. Materials
- Validated multivariate analyzer (NIR, Raman)
- Set of validation samples (not used in model development)
- Results for the same samples from the Primary Test Method (PTM)
3. Procedure 1. Outlier Detection: Measure the spectrum of your validation sample. The software will use mathematical criteria (e.g., leverage, spectral residuals) to determine if the sample spectrum falls within the multivariate space covered by the calibration model. If it is an outlier, the result is invalid, and the model may not be applicable [73]. 2. Local Validation (for a limited number of samples): * For each non-outlier sample, calculate the absolute difference |δ| between the analyzer's predicted value (PPTMR) and the PTM result. * Calculate the Prediction Interval Half-Width (PIHW) based on the model's standard error of calibration (SEC) and the sample's leverage. * The result for a single sample is considered validated if |δ| ≤ PIHW. For a set of samples, an inverse binomial calculation is used to determine if a sufficient number of results meet this criterion for the system to pass validation [73].
Workflow Visualization
Troubleshooting Logic for Sensitivity Loss
Analytical Instrument Qualification Lifecycle
The Scientist's Toolkit: Essential Research Reagent Solutions
Key Materials for Maintenance and Troubleshooting
| Item | Function/Application | Key Consideration |
|---|---|---|
| MS-Grade Solvents | Prevents alkali metal ion adduction in oligonucleotide and sensitive MS analysis, reducing background noise [71]. | Use plastic containers to avoid ion leaching from glass [71]. |
| Inline-Particle Filter | Protects nebulizers from blockages caused by particulates in samples, improving uptime [72]. | Select based on sample matrix; essential for high TDS or particulate-heavy samples [72]. |
| Certified Reference Standards | Used for calibrating instruments (balances, pH meters, spectrophotometers) and validating multivariate analyzer performance [73] [74]. | Must be traceable to national or international standards to ensure metrological capability [70]. |
| 0.1% Formic Acid Solution | Flushing agent for LC-MS systems to remove alkali metal ions from the flow path, improving spectral quality [71]. | Prepare with high-purity water and MS-grade formic acid. |
| Appropriate Cleaning Solvents | For maintaining spray chambers and cleaning interface cones and optical components without causing damage [72]. | Critical: Avoid HF for glass/quartz; avoid hydrogen peroxide for treated PFA/PTFE surfaces [72]. |
| Calibrated Weights & Buffer Solutions | For routine performance verification (OPV) of fundamental lab equipment like balances and pH meters [74]. | Part of the Ongoing Performance Verification (OPV) phase in the instrument lifecycle [70]. |
This case study examines a critical yet often overlooked factor in HPLC-UV analysis: the maintenance of optical windows. Within the context of broader thesis research on troubleshooting poor spectrometer sensitivity, we demonstrate how a rigorous, scheduled cleaning protocol for the detector flow cell window directly restored method reliability, accuracy, and precision in the quantification of L-Dopa from Vicia faba L. (broad beans) [75]. The findings provide a definitive troubleshooting guide for scientists encountering unexplained sensitivity loss.
The Problem: Unexplained Sensitivity Drift and Quantification Errors
Researchers developing an HPLC-UV method for L-Dopa analysis began observing a gradual but significant decline in analyte peak areas during a long-term stability study [75]. The issue manifested as:
- Progressive decrease in peak response for the L-Dopa standard, suggesting a loss of detector sensitivity.
- Increased calibration curve variability, compromising the method's accuracy and precision.
- Inconsistent recovery rates when analyzing spiked broad bean samples.
Initial troubleshooting focused on the chromatographic conditions, sample stability, and mobile phase composition, with no success in restoring the original sensitivity [75] [76]. This led to the hypothesis that the problem originated in the UV detector itself, specifically the optical window of the flow cell.
Background: Why Optical Window Clarity is Non-Negotiable
The UV detector measures the amount of light absorbed by a sample as it passes through a flow cell. The optical window of this cell must be perfectly clean and transparent to ensure accurate light transmission.
- The Consequence of Contamination: Over time, samples and mobile phases can leave minute deposits, films, or scratches on the window [77] [78]. These contaminants scatter and absorb light, leading to a false reduction in the measured signal—a phenomenon known as sensitivity drift.
- Impact on Data: This drift directly causes underestimation of analyte concentration, increased baseline noise, and a degraded signal-to-noise ratio, ultimately invalidating analytical results [77].
Experimental Protocol: Systematic Cleaning and Validation
A controlled experiment was designed to isolate and resolve the sensitivity issue.
1. Diagnosis and Cleaning Procedure Following the instrument's Standard Operating Procedure (SOP), the detector flow cell was cleaned [79].
- Materials:
- Method:
- The system was shut down and the flow cell carefully disassembled according to the manufacturer's instructions.
- The optical window was gently wiped with a cloth moistened with methanol, followed by a rinse with water [79].
- The window was thoroughly dried using a stream of compressed nitrogen to prevent streaking [80].
- The flow cell was reassembled, and the system was purged and equilibrated.
2. Performance Validation To quantitatively assess the impact of cleaning, the established HPLC-UV method for L-Dopa was run before and after the maintenance [75].
- Chromatographic Conditions:
- Validation Metrics: System suitability tests were performed, including analysis of a calibration series and precision injections of a mid-level standard.
Results and Discussion: Data-Driven Evidence of Restoration
The quantitative data below confirms the decisive role of window maintenance.
Table 1: HPLC-UV Performance Metrics Before and After Flow Cell Cleaning
| Performance Metric | Before Cleaning | After Cleaning | Target Value |
|---|---|---|---|
| L-Dopa Peak Area (50 mg/L std) | 124,550 ± 15,220 | 253,150 ± 3,480 | N/A |
| Signal-to-Noise Ratio (50 mg/L std) | 125 | 450 | >200 |
| Calibration Curve R² | 0.9873 | 0.9996 | >0.995 |
| %RSD (Repeatability, n=6) | 12.2% | 1.4% | ≤2.0% |
| LOD (µg/L) | 15.2 | 5.1 | N/A |
The results demonstrate a dramatic improvement. The peak area for the L-Dopa standard more than doubled, and the precision (%RSD) was restored to well within the acceptable limits for analytical methods [75]. The enhanced signal-to-noise ratio and lower LOD confirm that the core issue was a dirty optical window attenuating the UV signal.
The following workflow diagrams the logical troubleshooting process and the experimental design used to validate the cleaning efficacy.
Troubleshooting Pathway for Sensitivity Loss
Cleaning Validation Experiment Workflow
The Scientist's Toolkit: Essential Reagents and Materials
Table 2: Key Research Reagent Solutions for HPLC-UV Method Maintenance
| Item | Function / Application |
|---|---|
| HPLC-Grade Methanol | Cleaning solvent for optical windows and system purging [79]. |
| Lint-Free Wipes | For cleaning optical surfaces without introducing scratches or fibers [79] [78]. |
| 0.1 M Hydrochloric Acid (HCl) | Optimal extraction and storage solvent for acid-labile analytes like L-Dopa to prevent degradation [75]. |
| 0.2% (v/v) Formic Acid | Acidic mobile phase component that improves peak shape and retention for polar compounds in reversed-phase HPLC [75]. |
| Compressed Nitrogen Gas | For drying cleaned optical components and preventing water spots or streaks [80]. |
| Potassium Dichromate Solution | A standard reference material for verifying UV-Vis spectrophotometer calibration [77]. |
FAQs: Troubleshooting HPLC-UV Sensitivity
Q1: My HPLC-UV method for L-Dopa has become less sensitive over several months. I've checked the column and mobile phase. What should I do next? A: This is a classic symptom of a contaminated optical window in the UV detector flow cell. As residues build up, they scatter and absorb light, reducing the signal reaching the photodiode. The first step is to perform a systematic cleaning of the flow cell according to your instrument's SOP, using lint-free wipes and HPLC-grade solvents like methanol [77] [79]. This simple maintenance task often restores lost sensitivity.
Q2: How often should I clean the UV detector's flow cell? A: There is no universal schedule, as it depends on sample cleanliness and usage. For methods analyzing complex plant extracts (like Vicia faba), a monthly inspection and cleaning may be necessary. A good practice is to monitor baseline noise and standard peak area; a gradual increase in noise or decrease in response is a clear indicator that cleaning is required [77]. In very dirty environments, weekly cleaning might be recommended, as seen in guidelines for other optical systems like ICP-OES [80] [78].
Q3: After cleaning the flow cell, how do I validate that performance has been restored? A: You must re-run system suitability tests using a freshly prepared standard solution [75]. Compare key performance metrics against your method's validation criteria or pre-cleaning data. Critical parameters to check include:
- Peak Area and Height of a standard: Should show a significant increase.
- Signal-to-Noise Ratio: Should be substantially higher.
- %RSD of replicate injections: Should meet precision requirements (e.g., ≤2.0%).
- Baseline Absorbance and Noise: Should be low and stable.
Q4: Can using the wrong cleaner damage the optical window? A: Yes. Optical windows, especially those made of specialized materials like sapphire, can be etched or permanently damaged by harsh or inappropriate chemicals [78]. Always consult the manufacturer's manual for recommended cleaning agents. Generally, HPLC-grade methanol, water, or isopropyl alcohol are safe choices. Avoid abrasive cloths and always use compressed gas or lint-free wipes for drying [79] [80].
This case study provides conclusive evidence that rigorous and scheduled maintenance of the HPLC-UV detector's optical window is not a minor housekeeping task but a fundamental requirement for method reliability. For researchers troubleshooting spectrometer sensitivity, a dirty window must be a primary diagnostic consideration. A proactive cleaning protocol, as validated here, ensures the generation of accurate, precise, and reproducible data, which is the cornerstone of robust scientific research and drug development.
Conclusion
Maintaining pristine spectrometer optical windows is not merely a maintenance task but a critical factor in ensuring data integrity, regulatory compliance, and scientific validity in pharmaceutical and biomedical research. A proactive, systematic approach encompassing regular cleaning, thorough troubleshooting, and rigorous performance validation can effectively prevent sensitivity degradation. Future directions should emphasize the integration of these practices with emerging Process Analytical Technology (PAT) frameworks and advanced spectral preprocessing techniques, fostering a culture of quality-by-design that enhances the reliability of spectroscopic data in drug development and clinical research.
References
- 1. : 15 Common... | HINOTEK Spectrophotometer Troubleshooting [https://www.hinotek.com/spectrophotometer-troubleshooting/]
- 2. How do I clean calcium fluoride (CaF₂) optical window? [https://mokoptics.com/how-do-i-clean-calcium-fluoride-caf%E2%82%82-optical-window/]
- 3. Cleaning Optics [https://www.edmundoptics.com/knowledge-center/application-notes/optics/cleaning-optics/?srsltid=AfmBOoriN_jQC1VNZlZ0jyIHtF0ELYpgHPbWaJ4DoD3E_eG0_sMKCJu3]
- 4. FAQ - Thunder Optics [https://thunderoptics.fr/faq/]
- 5. Contaminants Everywhere! Tips and Tricks for Reducing ... [https://www.chromatographyonline.com/view/contaminants-everywhere-tips-and-tricks-reducing-background-signals-when-using-lc-ms]
- 6. Loss of sensitivity on 5975 Bad Repeller? [http://www.chromforum.org/viewtopic.php?t=21166]
- 7. LC–MS Sensitivity: Practical Strategies to Boost Your ... [https://www.chromatographyonline.com/view/lc-ms-sensitivity-practical-strategies-boost-your-signal-and-lower-your-noise]
- 8. Mass Spectrometry Sample Clean-Up Support ... [https://www.thermofisher.com/us/en/home/technical-resources/technical-reference-library/mass-spectrometry-support-center/mass-spectrometry-reagents-support/ms-sample-clean-up-support/ms-sample-clean-up-support-troubleshooting.html]
- 9. HPLC Troubleshooting Guide [https://www.thermofisher.com/us/en/home/industrial/chromatography/chromatography-learning-center/high-performance-liquid-chromatography-hplc-support/hplc-troubleshooting.html]
- 10. Chemical multi-fingerprinting of exogenous ultrafine ... [https://pmc.ncbi.nlm.nih.gov/articles/PMC7244483/]
- 11. Troubleshooting Common Spectrometer Issues | Verichek [https://verichek.net/troubleshooting-common-spectrometer-issues.html]
- 12. Uncovering Overlooked Factors Behind Abnormal Baselines [https://www.welch-us.com/blogs/knowleage-base/investigating-case-6-uncovering-overlooked-factors-behind-a-poor-baseline]
- 13. Dealing with Color Drift? It Could Be Your Spectrophotometer | X-Rite Blog [https://www.xrite.com/blog/spectrophotometer-color-drift]
- 14. Cleaning procedure for spectrophotometers [https://www.xrite.com/service-support/cleaning_procedure_for_spectrophotometers]
- 15. How to Handle & Care for Spectrophotometer Calibration ... [https://www.fireflysci.com/news/2015/6/8/how-to-handle-care-for-spectrophotometer-calibration-standards?srsltid=AfmBOopJuGphgQ8ldFbt5aFeA-imp9lppzDoh-g2FdrSAju_Ld34GIbr]
- 16. 6 Steps to Clean Windows for a Streak-Free Finish [https://www.pella.com/ideas/windows/how-to-clean-windows/]
- 17. Clean the Spectrometer and Touchscreen [https://knowledge1.thermofisher.com/Molecular_Spectroscopy/Molecular_Spectroscopy_Media_and_Document_Repository/Nicolet_Summit_and_Nicolet_Summit_PRO_User_Guide/Clean_the_Spectrometer_and_Touchscreen]
- 18. How to Handle & Care for Spectrophotometer Calibration ... [https://www.fireflysci.com/news/2015/6/8/how-to-handle-care-for-spectrophotometer-calibration-standards?srsltid=AfmBOorF55nZupD1H039Uu67oQV2riToinezM2Y6gWqhXMX-YAQKHx5g]
- 19. Optics Handling and Care Tutorial [https://www.thorlabs.com/newgrouppage9.cfm?objectgroup_id=9025]
- 20. Spectrophotometer Best Practices [https://www.hunterlab.com/blog/spectrophotometer-best-practices/]
- 21. Caring for your Spectrophotometer [https://www.xrite.com/blog/caring-for-your-spectrophotometer]
- 22. Reduced Peak Size (Loss of Sensitivity) [https://www.chromatographyonline.com/view/lcgc-blog-troubleshooting-gas-chromatography-part-ii-reduced-peak-size-loss-sensitivity]
- 23. Low sensitivity for higher MW components in GC - Forum [https://community.agilent.com/technical/gc/f/forum/1009/low-sensitivity-for-higher-mw-components-in-gc]
- 24. Drug loss in dissolution: causes and solutions [https://www.linkedin.com/posts/kenboda_drug-loss-in-dissolution-where-did-it-go-activity-7325143509756256259-0MZ5]
- 25. Questions and Answers May 2025 [https://dissolutiontech.com/issues/202505/202505qa.php]
- 26. Getting the Truth out of Dissolution Testing [https://www.pharmtech.com/view/getting-truth-out-dissolution-testing]
- 27. Quantification of surface contamination on optical glass via ... [https://www.sciencedirect.com/science/article/pii/S0169433220327410]
- 28. Cleaning your instrument - Thermo Fisher Knowledge Base [https://knowledge1.thermofisher.com/Molecular_Spectroscopy/Fourier_Transform_FT_Infrared_IR_and_Near_Infrared_NIR/Nicolet_Spectrometers/Nicolet_Apex_FTIR_Spectrometer/269-3615_01_Rev_A_Nicolet_Apex_FTIR_Spectrometer_User_Guide/Cleaning_your_instrument]
- 29. FTIR Spectroscopy: Every Window Needs a Good Acid Wash [https://bitesizebio.com/30534/ftir-spectroscopy-window-acid-wash/]
- 30. MS Tip: Mass Spectrometer Source Cleaning Procedures [https://www.sisweb.com/referenc/tips/msclean.htm]
- 31. Product Support and Troubleshooting Guide [https://alphaspectra.com/product-support-and-troubleshooting-guide/]
- 32. Laser cleaning and Raman analysis of the contamination on ... [https://pmc.ncbi.nlm.nih.gov/articles/PMC9477823/]
- 33. Evaluation of contamination impact on optical properties ... [https://www.spiedigitallibrary.org/conference-proceedings-of-spie/13628/1362804/Evaluation-of-contamination-impact-on-optical-properties-of-windows-assembly/10.1117/12.3064346.full?webSyncID=8c08e1c6-4c97-026d-873b-139ac6584444&sessionGUID=37c22323-c473-7981-396b-5dcbd186378c]
- 34. Spectroscopic Sample Preparation: Techniques for ... [https://www.metkon.com/spectroscopic-sample-preparation/]
- 35. In-line UV Spectrometry Monitoring in Cleaning Validation [https://www.pharmtech.com/view/in-line-uv-spectrometry-monitoring-in-cleaning-validation]
- 36. High Purity Solvents Market Growth and Forecast, 2025-2035 [https://www.futuremarketinsights.com/reports/high-purity-solvents-market]
- 37. Troubleshooting Common Spectrometer Issues [https://nelabsystems.com/troubleshooting-common-spectrometer-issues/]
- 38. Optic Cleaning Supplies [https://www.thorlabs.com/newgrouppage9.cfm?objectgroup_id=330]
- 39. Lens Tissue and Cloth - Optical Cleaning [https://www.edmundoptics.com/c/lens-tissue-cloth/678/?srsltid=AfmBOordwj8hlw0zO2Q3ItffDtsyCLeyw0t0mE7wElp8R95bPc3Ckr9w]
- 40. What Liquid to Use in Ultrasonic Cleaners [https://www.drawellanalytical.com/what-liquid-to-use-in-ultrasonic-cleaners-key-considerations-and-common-types/]
- 41. Safety of Windows and Prisms Used in FTIR [https://www.shimadzu.com/an/service-support/technical-support/ftir/tips_and_tricks/safety.html]
- 42. Maintenance of UV-VIS Spectrophotometer & PM Kit [https://nexusanalyticals.com/maintenance-of-uv-vis-spectrophotometer-pm-kit/]
- 43. Spectrophotometer Selection and Troubleshooting [https://sperdirect.com/blogs/news/spectrophotometer-selection-and-troubleshooting-a-practical-guide?srsltid=AfmBOoqLXJJdhpypExASVeylSO7V4PBpiUyeFCG6NjWVJor8Jp6KcUcW]
- 44. Periodic Maintenance Schedule [https://www.process-insights.com/products-3/nir-uv-vis-process-and-lab-analyzers/troubleshooting-guides-nir-uv-vis/periodic-maintenance/]
- 45. Preventative Maintenance Contracts [https://www.spectro.com/support/why-spectro/maintenance-contracts]
- 46. Supporting Pharmaceutical Cleaning Validation With TOC ... [https://www.americanlaboratory.com/914-Application-Notes/515-Supporting-Pharmaceutical-Cleaning-Validation-With-TOC-and-UV-VIS-Spectrophotometric-Analysis/]
- 47. GMP and GLP washers: What are the differences? [https://cleanroomtechnology.com/gmp-and-glp-washers-what-are-the-differences--158824]
- 48. GMP vs. GLP: Key Differences and How They Impact Your ... [https://www.cfpie.com/gmp-vs-glp-key-differences-and-how-they-impact-your-organization]
- 49. How To Calibrate a Spectrophotometer - Part 1 [https://www.fireflysci.com/news/2015/11/10/how-to-calibrate-a-spectrophotometer-part-1?srsltid=AfmBOorR3-eUA63qY8c51VqPM_zIu4k85jjYdZB3k6u3_wM5CCwDTnaV]
- 50. How do you maintain a UV spectrophotometer? [https://www.yixist.com/applictionsofyx/how-do-you-maintain-a-uv-spectrophotometer-/]
- 51. Spectrophotometer Calibration & Maintenance [https://techsafety.com/blog/spectrophotometer-calibration-and-maintenance]
- 52. abnormally low UV incident light - Forum [https://community.agilent.com/technical/molecular-spec/f/forum/956/abnormally-low-uv-incident-light]
- 53. How Aging Affects Portable NIR Spectrophotometers [https://felixinstruments.com/blog/how-aging-affects-portable-nir-spectrophotometer/]
- 54. Lost sensitivity on your Triple Quad or QTRAP You may ... [https://sciex.com/support/knowledge-base-articles/lost-sensitivity-on-your-triple-quad-or-qtrap-you-may-need-to-optimize-your-cem-detector-parameter-1481142998734_en_us]
- 55. Reference Materials for Mass Spectrometry - Raise your ... [https://resources.biomol.com/biomol-blog/reference-materials-for-mass-spectrometry-raise-your-standards-with-cayman-chemical]
- 56. Understanding signal-to-noise ratio (SNR) in optical ... [https://eureka.patsnap.com/article/understanding-signal-to-noise-ratio-snr-in-optical-measurements]
- 57. Understanding Raman Spectrometer Parameters [https://www.spectroscopyonline.com/view/understanding-raman-spectrometer-parameters]
- 58. Is My Handheld XRF Analyzer Working Correctly? [https://www.bruker.com/en/products-and-solutions/elemental-analyzers/handheld-xrf-spectrometers/is-my-handheld-xrf-analyzer-working.html]
- 59. A strategy for reducing particulate contamination on ... [https://pubmed.ncbi.nlm.nih.gov/21702739/]
- 60. Effective and reliable optical system for cleaning validation in ... [https://cordis.europa.eu/project/id/285836/reporting]
- 61. Spectrophotometer Selection and Troubleshooting [https://sperdirect.com/blogs/news/spectrophotometer-selection-and-troubleshooting-a-practical-guide?srsltid=AfmBOopIyDxl3DNAjOC2sIHX0gCNu_jypvff8JRK4ymxH1h4v1BtpBdv]
- 62. Essentials of LC Troubleshooting, Part V: What Happened ... [https://www.chromatographyonline.com/view/essentials-of-lc-troubleshooting-part-v-what-happened-to-my-sensitivity-]
- 63. ISIS Grimy windows could be harbouring toxic pollutants [https://www.isis.stfc.ac.uk/Pages/SH22_GrimyWindows.aspx]
- 64. Two methods for baseline correction of spectral data [https://nirpyresearch.com/two-methods-baseline-correction-spectral-data/]
- 65. A review on spectral data preprocessing techniques for ... [https://www.sciencedirect.com/science/article/pii/S258900422501020X]
- 66. A review on spectral data preprocessing techniques for ... [https://pmc.ncbi.nlm.nih.gov/articles/PMC12221524/]
- 67. Correction of spectral baseline | Getting started with ... [https://mda.tools/docs/preprocessing--baseline.html]
- 68. Mini-Tutorial: Cleaning Up the Spectrum Using ... [https://www.spectroscopyonline.com/view/mini-tutorial-cleaning-up-the-spectrum-using-preprocessing-strategies-for-ft-ir-atr-analysis]
- 69. Pharmaceutical analysis with portable spectrometers [https://www.europeanpharmaceuticalreview.com/article/168732/pharmaceutical-analysis-with-portable-spectrometers/]
- 70. An Enhanced Approach to Analytical Instrument and ... [https://www.spectroscopyonline.com/view/an-enhanced-approach-to-analytical-instrument-and-system-qualification]
- 71. Troubleshooting Everywhere! An Assortment of Topics from ... [https://www.chromatographyonline.com/view/troubleshooting-everywhere-an-assortment-of-topics-from-pittcon-2025]
- 72. Troubleshooting ICP Spectrometer Performance [https://www.labcompare.com/346794-Troubleshooting-ICP-Spectrometer-Performance/]
- 73. D6122 Standard Practice for Validation of the Performance ... [https://store.astm.org/d6122-25.html]
- 74. Instrument calibration procedure for pharmaceutical industry [https://www.gmpsop.com/instrument-calibration-procedure/]
- 75. Development and Validation of a Reversed-Phase HPLC ... [https://pmc.ncbi.nlm.nih.gov/articles/PMC9654252/]
- 76. HPLC Method Development Steps [https://www.thermofisher.com/us/en/home/industrial/chromatography/chromatography-learning-center/liquid-chromatography-information/hplc-method-development-steps.html]
- 77. Top 10 Mistakes to Avoid in UV-Vis Spectrophotometry [https://labindia-analytical.com/Blog_detail/view/Top-10-Mistakes-to-Avoid-in-UV-Vis-Spectrophotometry?srsltid=AfmBOooinet_iM_juQv5uzlaZtyHJPf8bkwiAkJTZj-4UGZqbwmZ2K1J]
- 78. Cleaning the Optical Window and Reflectors [https://docs.msasafety.com/fl500/en-us/FL500%20UV_IR%20FL500-H2%20Flame%20Detector/Cleaning_the_Optical_Win.htm]
- 79. SOP for Cleaning of U.V. /Visible Spectrophotometer [https://www.pharmaguideline.com/2011/07/sop-for-cleaning-procedure-for-uv.html]
- 80. Cleaning the Agilent ICP-OES Snout - Articles [https://community.agilent.com/knowledge/icp-oes-portal/kmp/icp-oes-articles/kp329.cleaning-the-agilent-icp-oes-snout]